Case Library Usage Guide
Projects are the core unit of work in PickWiz. There are two methods to create a new project, namely, create a new Scene project, or load a project from Case Library. Case Library contains specific solutions provided by PickWiz for common typical application Scenes, which includes the basic configuration data of the Scene, allowing for faster configuration debugging. The steps to create a project from the case library are as follows:

1. Load the project from the case library
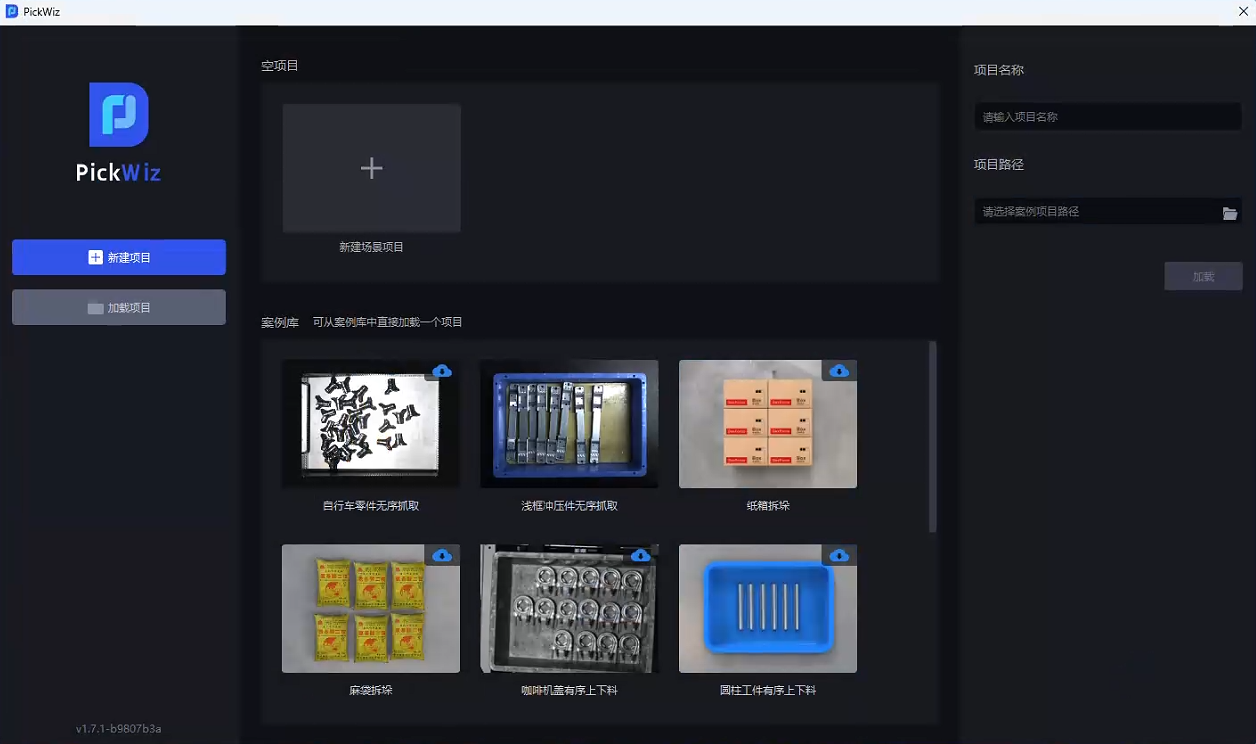
After you open PickWiz for the first time, you will automatically enter the welcome page, and you can select the desired Scene project in the case library, as shown in the figure below. If there are no cases that meet Scene requirements in the case library, please click "New Scene Project" above and refer to the [Project Operation Guide] (项目操作指南.md) to create a new Scene project.
If you have entered the main interface of the software, click the Menu in the upper left corner and select New Project.
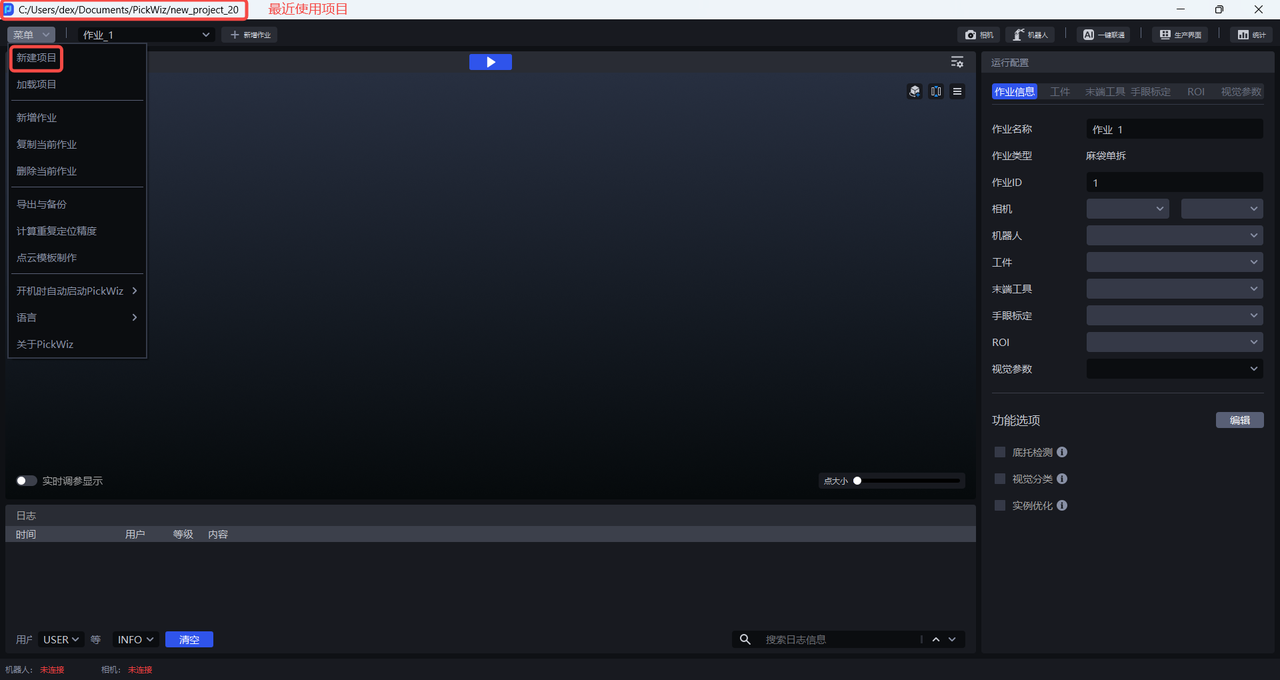
The software will open the new project interface, and you can select the desired Scene project from the case library. If there are no cases that meet Scene requirements in the case library, please click "New Scene Project" above and refer to the [Project Operation Guide] (项目操作指南.md) to create a new Scene project.
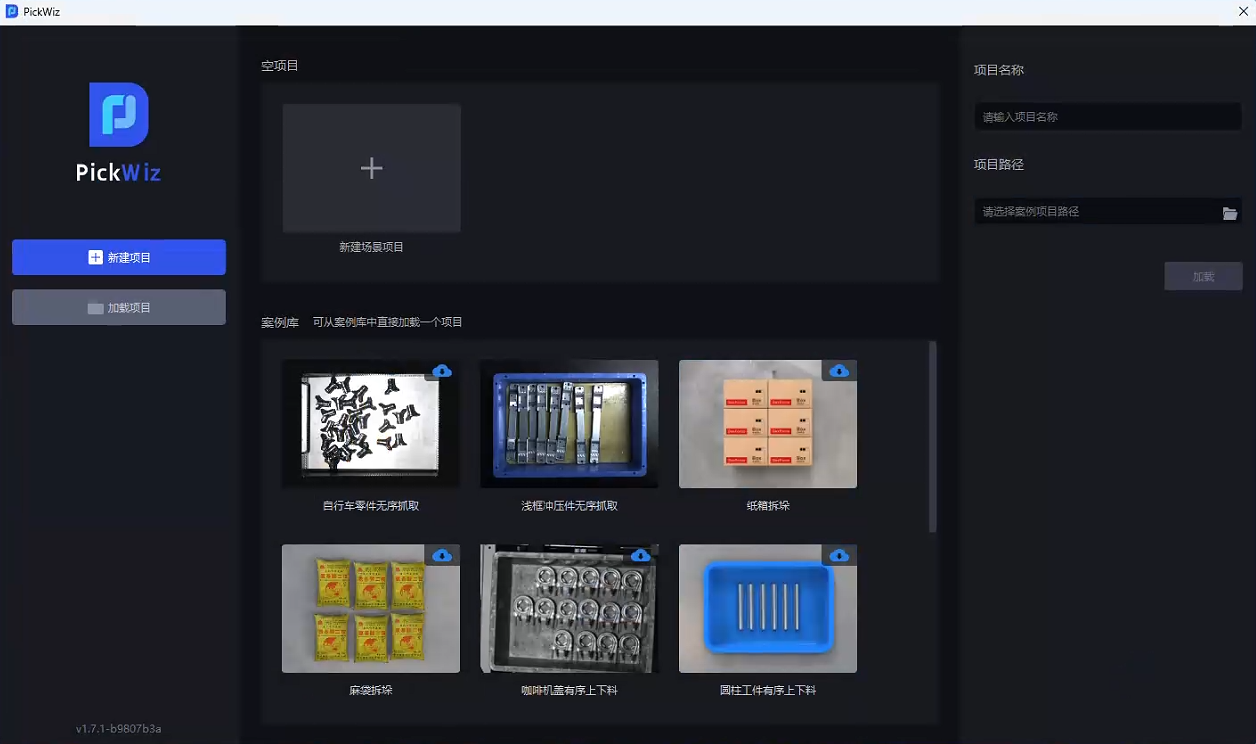
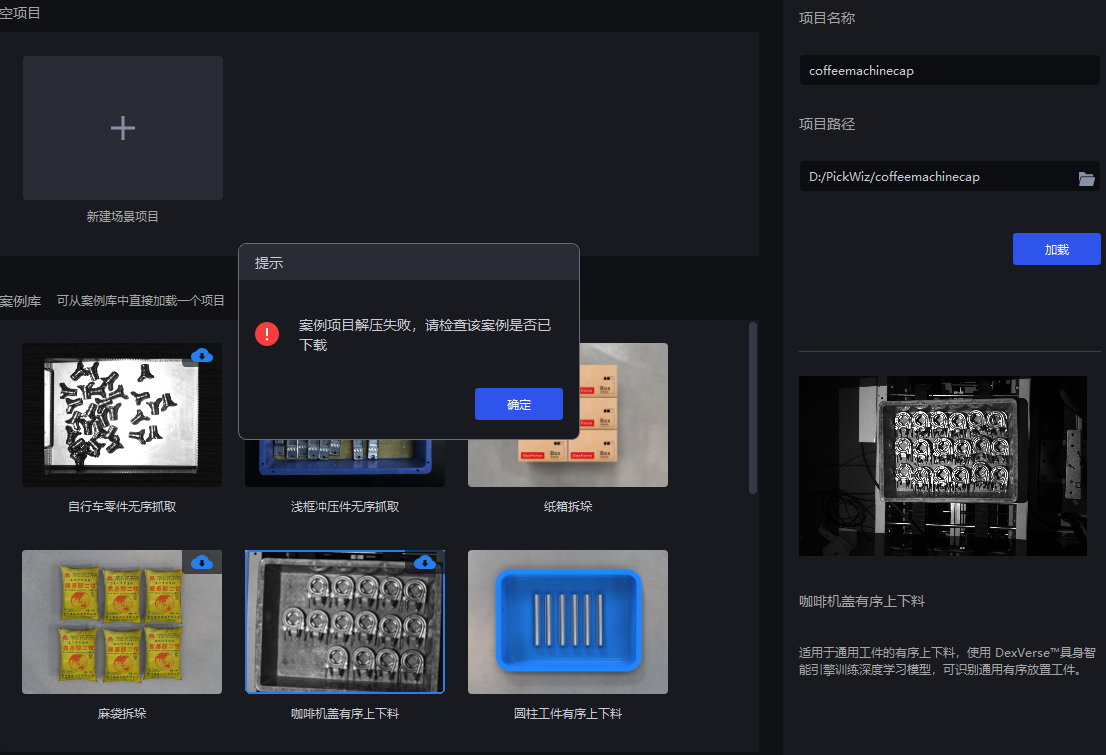
After selecting the case library required by the Scene in the case library, if you use the case for the first time, you need to download it. After the download is completed, a prompt pop-up window will automatically appear, click OK.
Notice
If you are using the selected case for the first time, you need to connect to the Internet and click the blue icon in the upper right corner of the case to download.
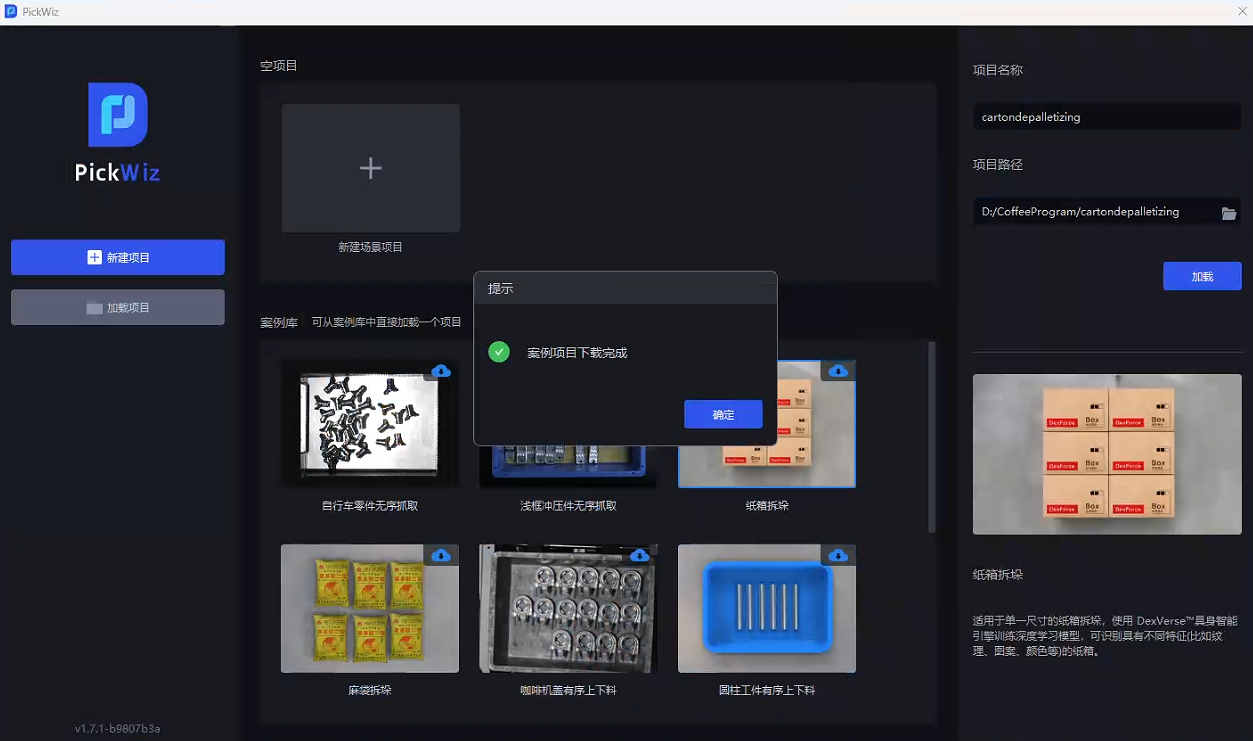
Fill in the project name on the right and select the project storage path, and finally click Load to create the solution to the project storage path.
Notice
The project name only supports English uppercase and lowercase letters and special characters.
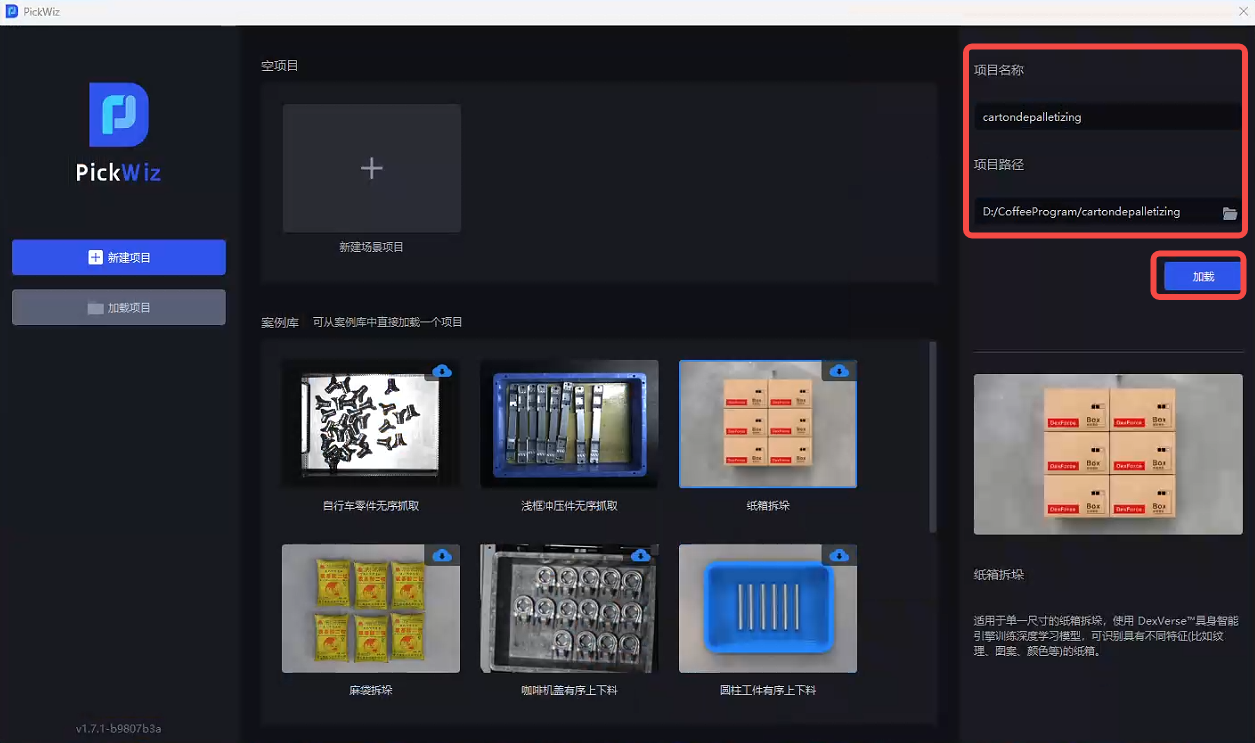
2. Project configuration
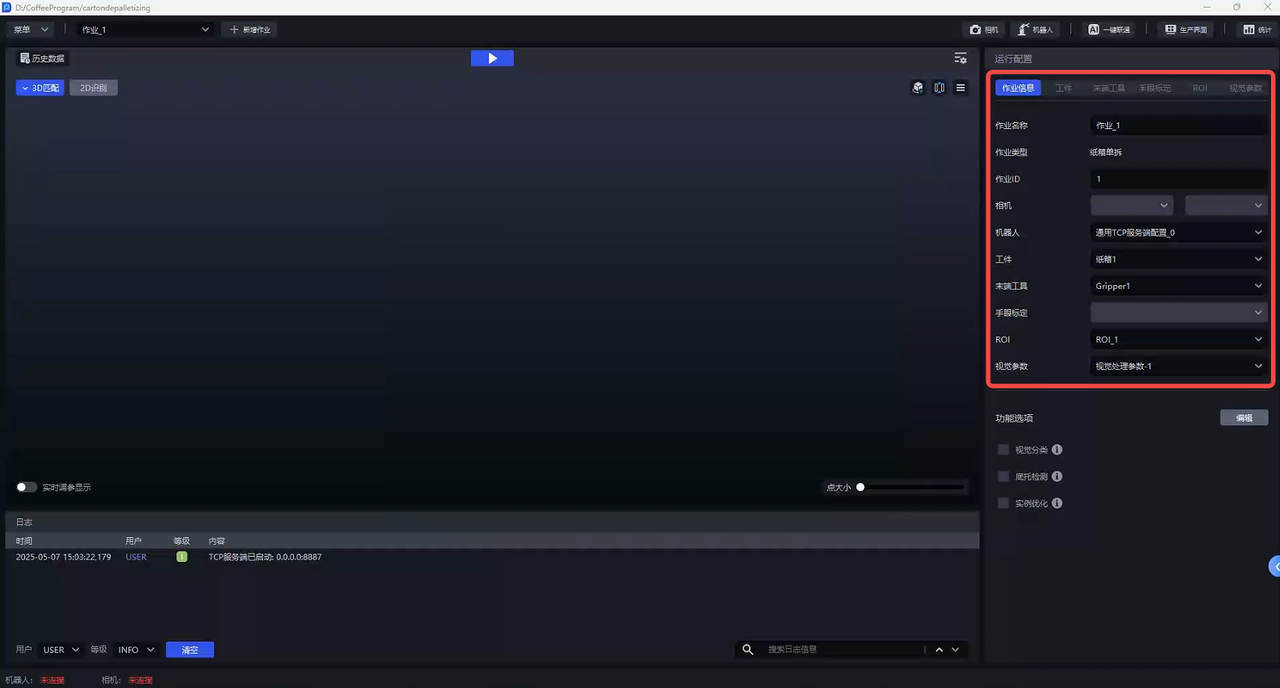
After creating a new project from the case library, the project contains basic configuration data of Task and TaskScene. Based on this data, visual-related Parameter configuration and debugging can be performed. During actual capture, other configurations need to be added, such as Camera, Robot, Eye-hand calibration, etc.
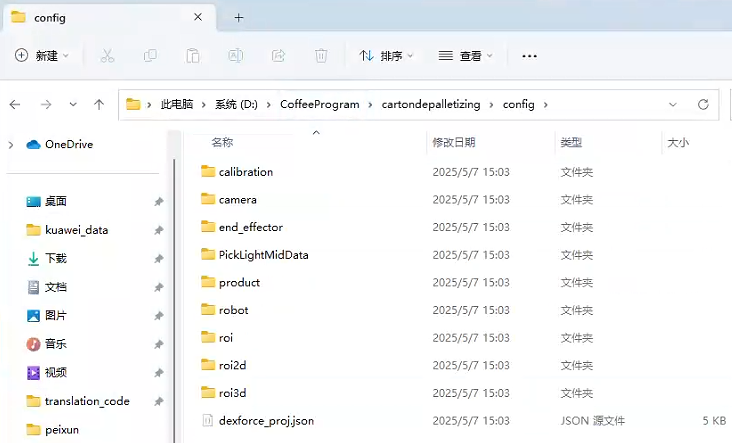
Open the corresponding project configuration folder config according to the project storage path set when creating the project (Click here to view) to view the configuration data of the case library project, as shown in the figure below.
Notice
It is not recommended to modify the project configuration folder, otherwise it may cause PickWiz Exception error reported and cannot be used normally.
| serial number | Folder name | configuration name | Description |
|---|---|---|---|
| 1 | calibration | Eye-hand calibration | stores the Eye-hand calibration (new version) configuration | when the current Task is running
| 2 | camera | Camera | stores the Camera and CameraParameter | when the current Task is running
| 3 | end_effector | End-effector | stores the End-effector configuration | when the current Task is running
| 4 | PickLightMidData | Visual configuration | stores the configuration corresponding to the visualization window |
| 5 | product | Target | stores the Target configuration of the current Task |
| 6 | robot | Robot | stores the Robot | when the current Task is running
| 7 | roi | ROI | stores the ROI configuration when the current Task is running |
| 8 | roi2d | ROI 2D | stores the ROI 2D configuration of the current Task runtime |
| 9 | roi3d | ROI 3D | stores the ROI 3D configuration | when the current Task is running.
| 10 | scene_object | Scene Object | stores various objects in the actual Scene of the current Task, including material frames, bottom brackets, etc. |
| 11 | strategy | Visual Parameter | stores the visual Parameter configuration | when the current Task is running
| 12 | dexforce_proj.json | Root Profile | The root configuration file of theproject. The configurations corresponding to all tasks of the project are specified in this file |
Project configuration data can be compared with Task information.
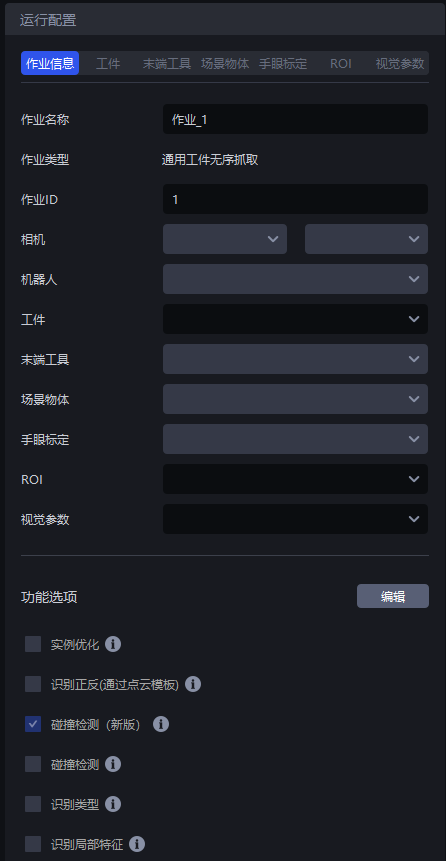
| Tag | Description |
|---|---|
| Task name | The name of the current Task, which can be modified |
| Task type | The type of the current Task, namely TaskScene, corresponds to the TaskScene selected when creates a new project or creates a new Task |
| TaskID | identifies the current Task. Robot can switch Task | through this ID.
| Camera | Camera & CameraParameter when the current Task is running, connect Camera & set CameraParameter reference Camera Connection and Parameter Adjustment Guide |
| Robot | Robot when the current Task is running, reference for establishing communication with Robot Robot Configuration and Communication Operation Guide |
| Target | The Target configuration of the current Task is added to the Target interface and then configured to the Task information |
| End-effector | End-effector configuration when the current Task is running, configure it to Task information | after adding it to the End-effector interface
| Scene Object | Various objects in the actual Scene of the current Task, including material frames, bottom brackets, etc., are added in the Scene Object interface |
| Eye-hand calibration | Eye-hand calibration configuration when the current Task is running, configure it to Task information | after adding it on the Eye-hand calibration interface
| ROI | ROI configuration when the current Task is running, in ROI After the interface is added, it is configured to Task information |
| Visual Parameter | Visual Parameter configuration when the current Task is running, configure | on the visual Parameter interface
| Function options | Click "Edit", select "Collision Detection", "Type Identification", "Local Identification", "Pallet Detection" and other working condition attributes, select the working condition attributes related to the project, PickWiz According to the selected working condition attributes, the functional configuration of the adapted working condition will be matched, that is, the configuration related to the selected working condition will be added to related configurations such as Target and visual parameters. |