Point Cloud Template Creation Guide
PickWiz's Point Cloud template production function includes four parts: grid file processing, Point Cloud template production, key point production, and Point Cloud alignment to the grid. The operation method is as follows.
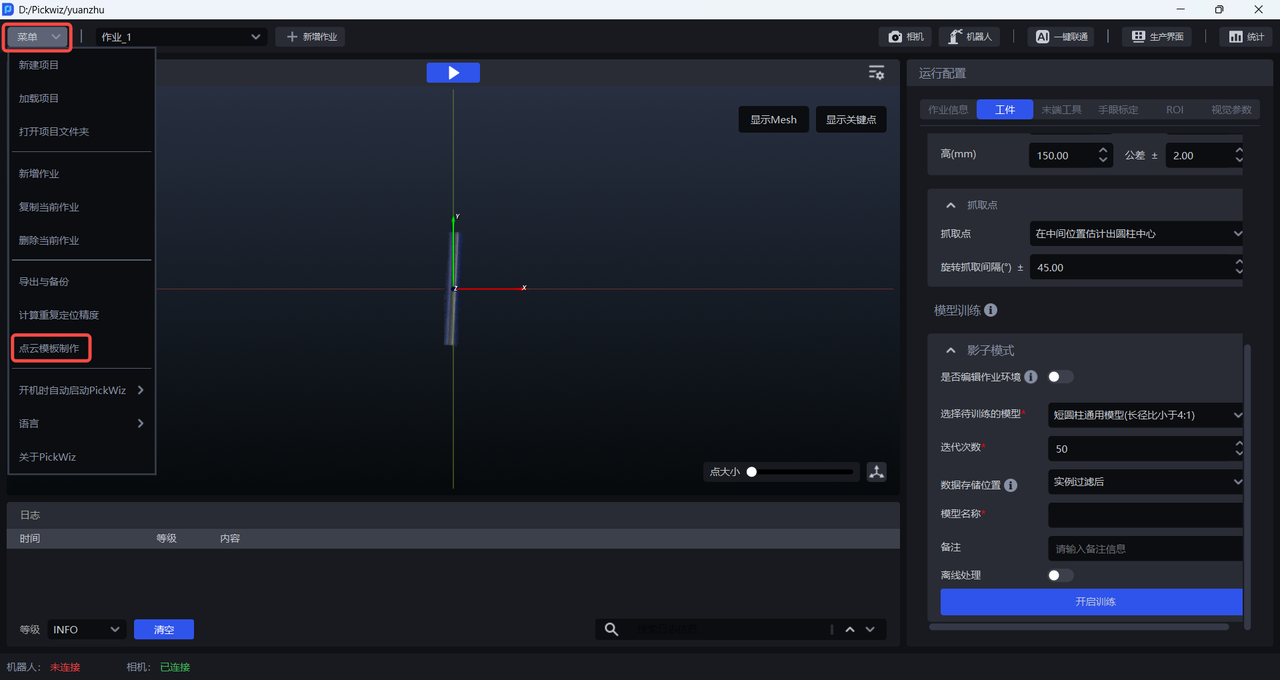
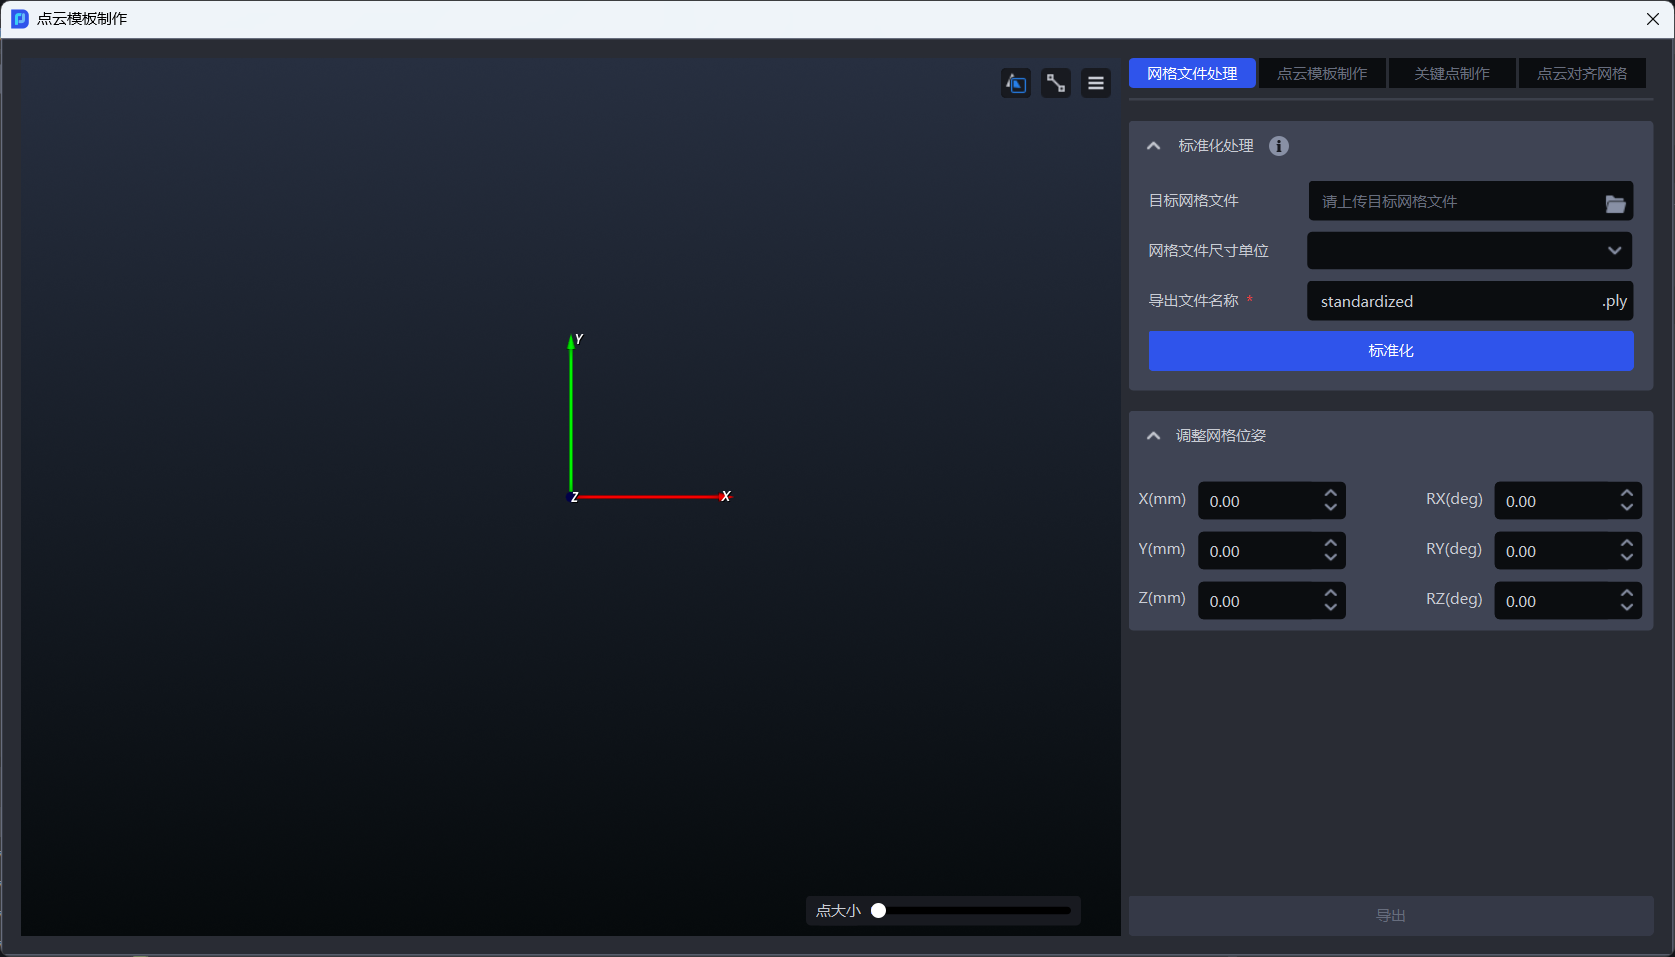
Click Menu>Point Cloud Template Making on the main interface to open the Point Cloud Template Making window, as shown in the figure below.
1. Grid file processing
Grid files refer to files that store three-dimensional model data, usually Target's CAD models, used for one-click training of Visual Models.
To upload a grid file, select Grid file size unit, meter (m) or millimeter (mm). If you are not sure about the unit of the grid file, you can leave it unselected. The system will automatically judge and convert it based on the uploaded grid file. After selecting, you can click Standardize. Currently, only grid files in ply format are supported.
Tips
Standardized Grid File will implement the following four functions:
Automatically align grid files to coordinate centers
Mesh patch simplification
Adjust the Target to solve the problem of misalignment between the Target and the coordinate system
Uniformly adjust grid file sizes to meters (m)
Warning
Each time you click Standardize Grid File, it will be standardized again based on the last processed file.
The same grid file, usually only needs to be normalized once
After the standardization is completed, the grid pose can be customized and the adjustment results can be observed in the left window.
After the adjustment is completed, click Export to select
Target of the current Task, select the corresponding Target, and clickSync to Targetto automatically upload the standardized grid file to the Target.If you need to create a Point Cloud template or align the Point Cloud to the grid, you should export the standardized grid file to your local computer.
2. Point Cloud template production
Point Cloud template refers to Point Cloud data that can accurately describe the shape, structure and key characteristics of the Target under ideal conditions. After being configured in the Target in advance, it is 3D matched with the Target Point Cloud collected in real time by the Camera to find the best transformation relationship between the two and obtain the optimized Target posture.
Point Cloud templates can describe the entire Target or only a part of the Target. In order for the Point Cloud template to play a better role in the matching process, the Point Cloud template should have the following characteristics:
features
The Point Cloud in the Point Cloud template is evenly distributed and the number is reasonable to avoid affecting the matching speed.
Point Cloud templates should include Target's typical characteristics so that Target can be accurately identified during the matching process.
Point Cloud templates should avoid interference factors such as irrelevant Point Clouds to ensure the stability and accuracy of matching.
2.1 Point Cloud template creation method
| Point Cloud template creation method | Description | applies to Scene |
|---|---|---|
| grid generation template | downsamples the imported standardized grid file and generates Point Cloud template | with one clickUnder real working conditions, the TargetPoint Cloud collected by the Camera and the TargetPoint Cloud template generated through the standardized grid have good consistency |
| Camera image collection generation template | collects two images through Camera (one with Target and one without Target), calculates the difference between the two images to obtain Target's Point Cloud template | Camera has poor consistency between the TargetPoint Cloud collected by the Camera and the TargetPoint Cloud template generated through the standardized grid |
| collects Point Cloud | in the 3D areaIn the Point Cloud image containing Target collected by Camera, use a 3D bounding box to select the Target Point Cloud, and click Generate Template to obtain the Point Cloud template file | / |
| historical data generation template | Select the folder containing Target's ScenePoint Cloud image (.ply), original color image (.png), Depth image (.tiff) and CameraIntrinsic Parameterjson file (.json) in the historical data folder, use a 3D bounding box to select the TargetPoint Cloud, and click Generate Template to obtain the Point Cloud template file | Item type is "Loading and unloading of neatly arranged plane type target objects (image matching)" and "Plane type Target positioned assembly (image matching only) |
2.1.1 grid generation template
Function description
Downsample the imported standardized grid file and generate a Point Cloud template with one click. There are two generation methods:
Generate template:
Based on standardized grid files, overall downsampling generates Point Cloud templates;
Applicable to most Scenes.
Generate template (current view only)
Based on the standardized grid file, only the grid file in the current perspective is used to generate the Point Cloud template;
It is suitable for scenes in ordered scenes where the Target is placed in a single posture. It is necessary to ensure that the perspective of the grid file in the window is consistent with the Target in the camera perspective of the real working condition.
Applicable to Scene
Under real working conditions, the TargetPoint Cloud collected by the Camera and the TargetPoint Cloud template generated through the standardized grid have good consistency.
2.1.2 Camera picture generation template
Function description
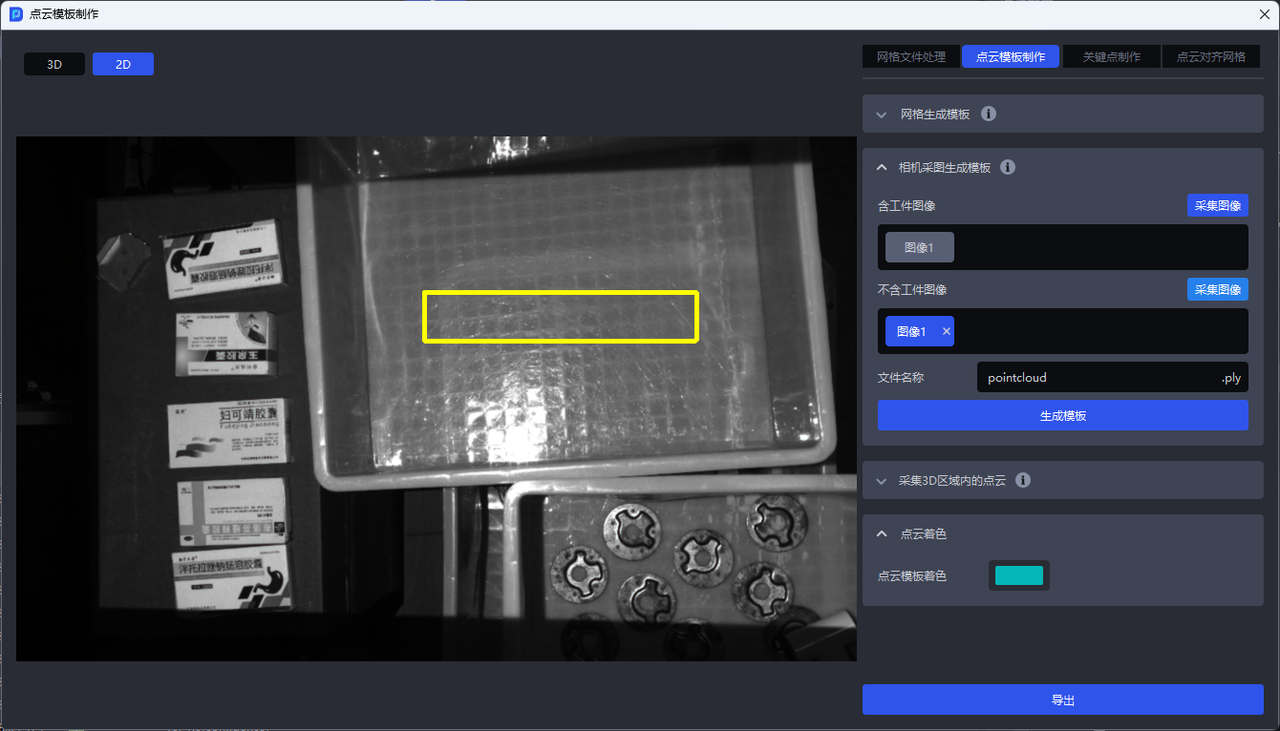
Collect two images through the Camera (one with Target and one without Target), and calculate the difference between the two images to obtain Target's Point Cloud template. It is necessary to ensure that the Camera's image acquisition perspective and any objects other than Target do not change during the two acquisitions.
Applicable to Scene
The consistency between the TargetPoint Cloud collected by the Camera and the TargetPoint Cloud template generated through the standardized grid is poor.
⚠️Known Issues
When making a flatter TargetPoint Cloud template by collecting images with the Camera, there is a problem that the Point Cloud cannot be collected or there are too few Point Clouds. The solution is to raise the flat Target and then capture the image.
- Click
Camera image generation template
Before using Camera to collect images to generate templates, you must connect Camera and configure Camera into Task information. For details, please refer to [Camera Connection and Parameter Adjustment Guide] (相机连接与调参指南.md)
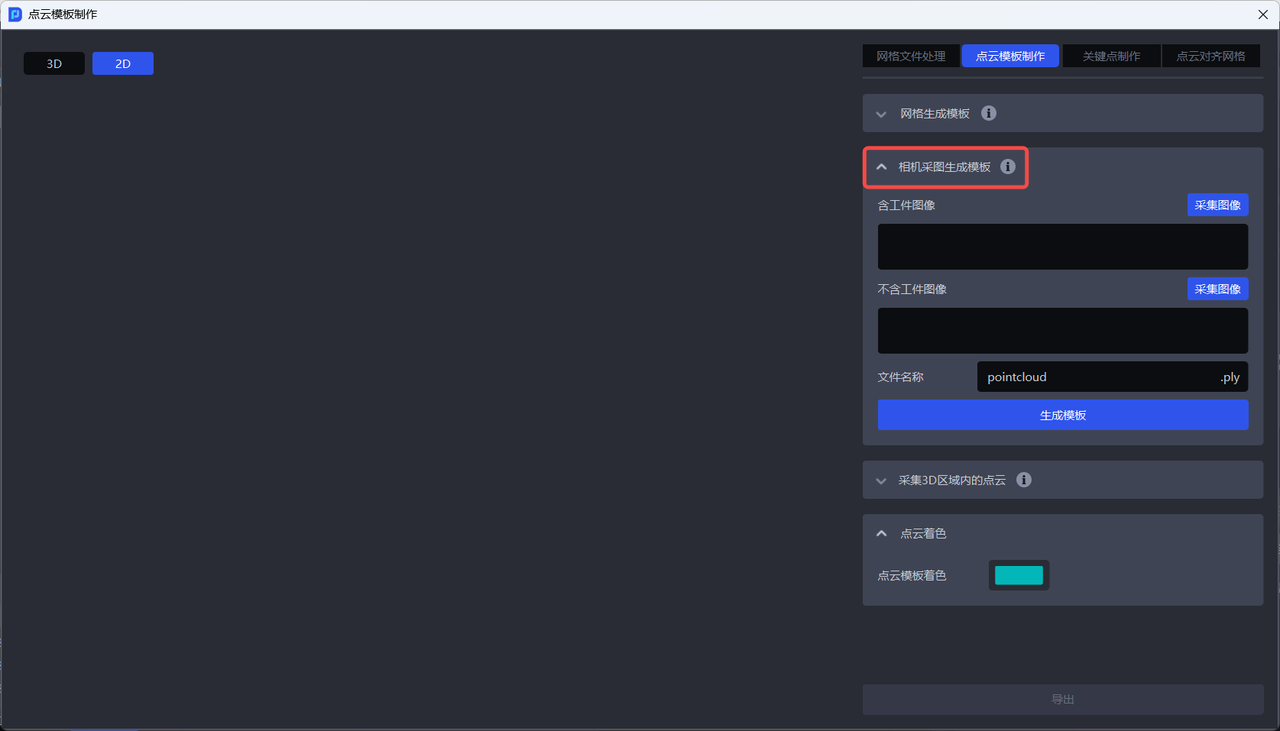
- Click
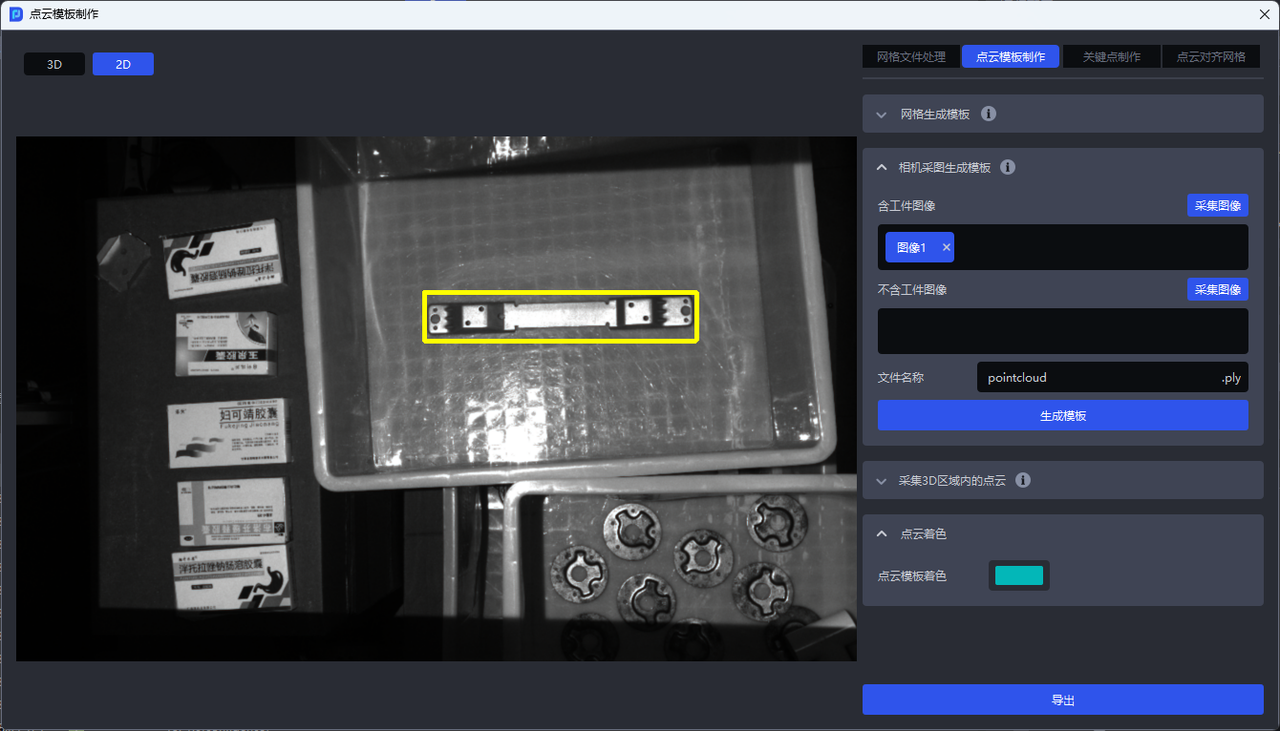
Collect Imagein theImage Containing Targetcolumn to capture an image containing Target, as shown in the figure below
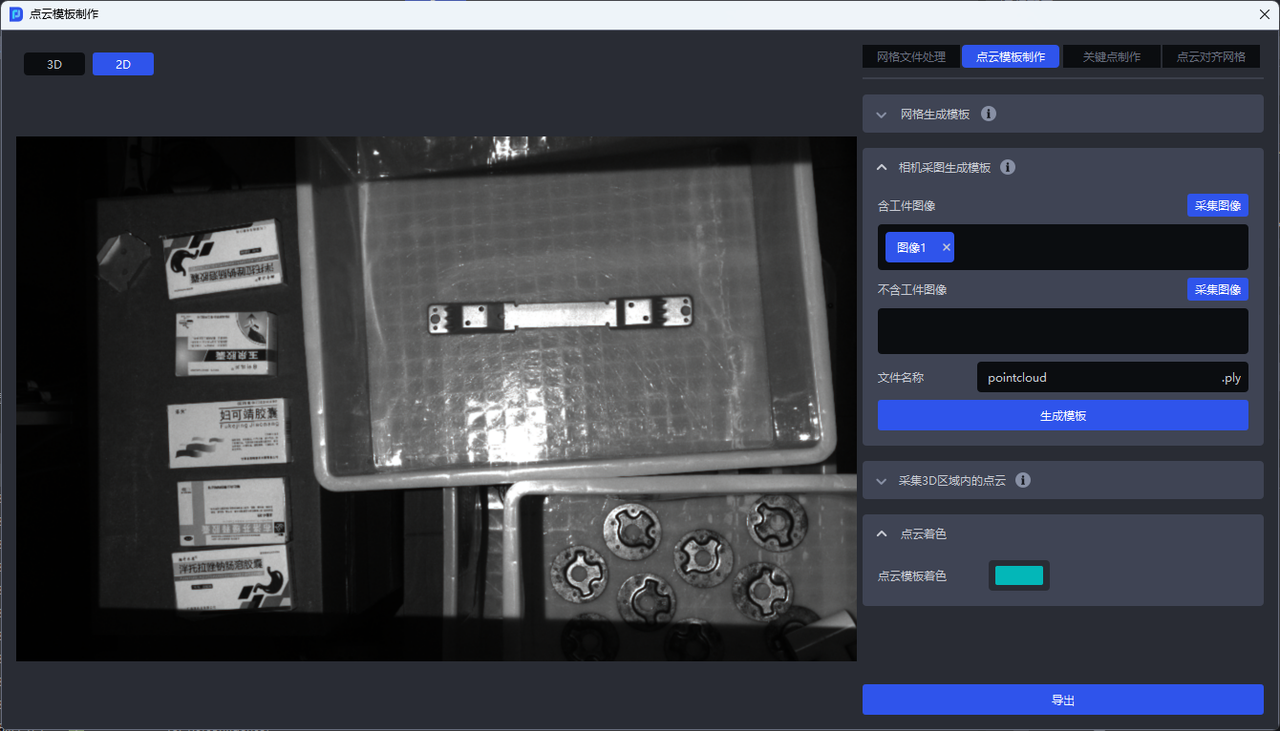
- Draw the 2D box of Target on the collected image containing Target, as shown in the figure below.
- Click
Collect imagein theImage without Targetcolumn to capture a background image without Target, as shown in the figure below
- Click
Generate Templateto generate Target's Point Cloud template. The Point Cloud template is automatically aligned to the origin of the coordinates.
2.1.3 Collects Point Cloud in 3D area
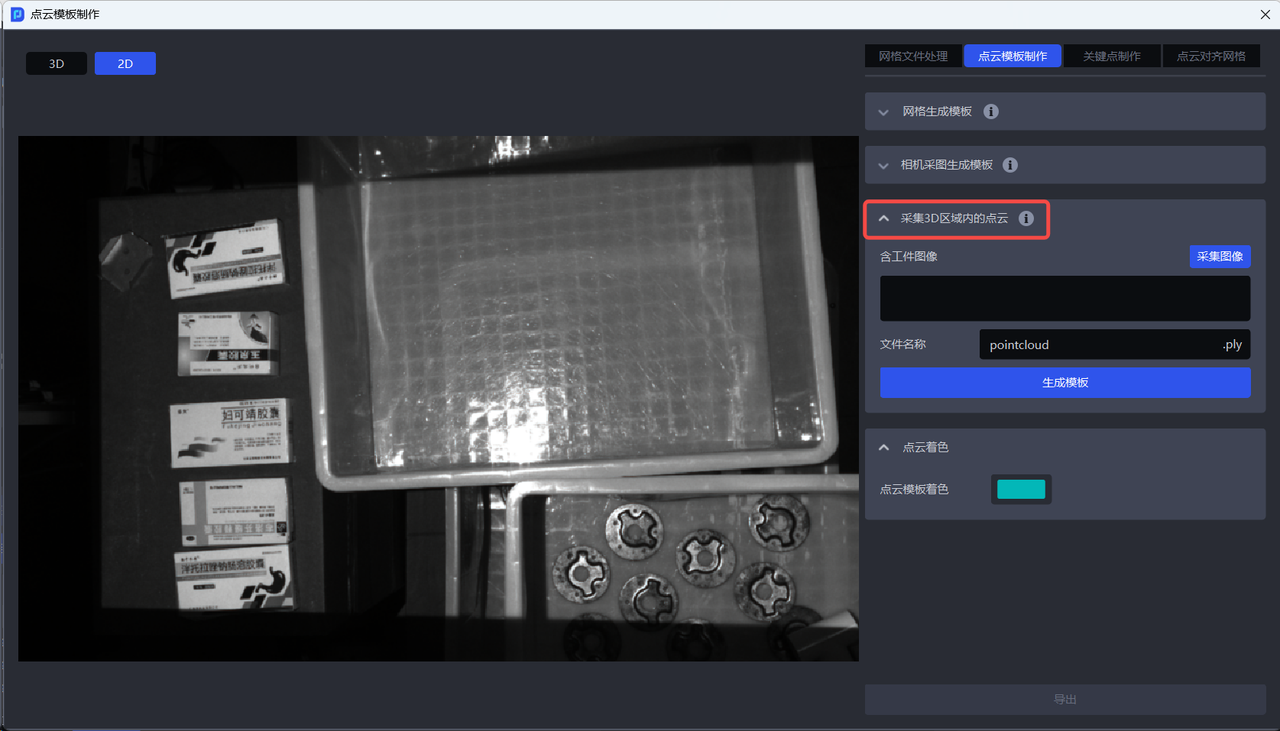
In the Point Cloud image containing Target collected by Camera, use a 3D bounding box to select the Target Point Cloud, and click Generate Template to obtain the Point Cloud template file, as shown in the figure below.
- Click
Collect Point Cloud in 3D area
Before collecting the Point Cloud in the 3D area, you must connect to the Camera and configure the Camera to the Task information. For details, please refer to [Camera Connection and Parameter Adjustment Guide] (相机连接与调参指南.md)
- Click
Collect Imagein theImage Containing Targetcolumn to capture an image containing Target, as shown in the figure below
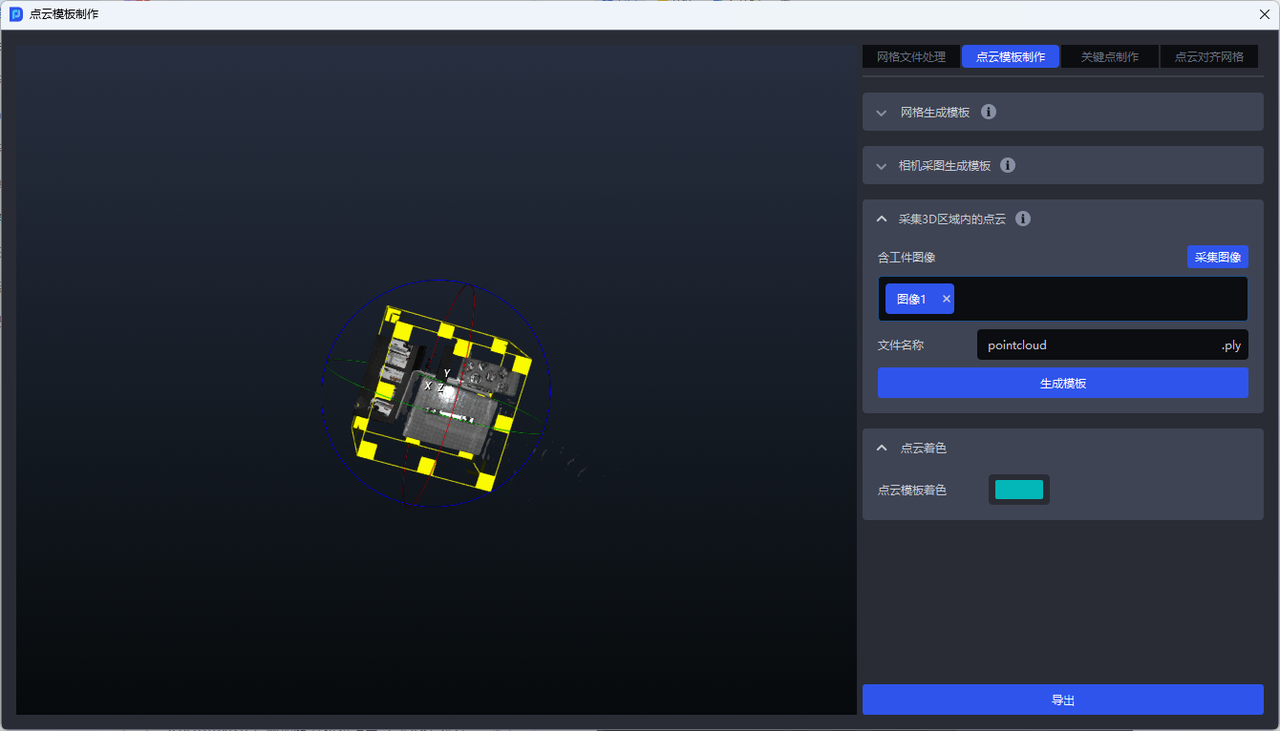
- Frame Target on the captured image
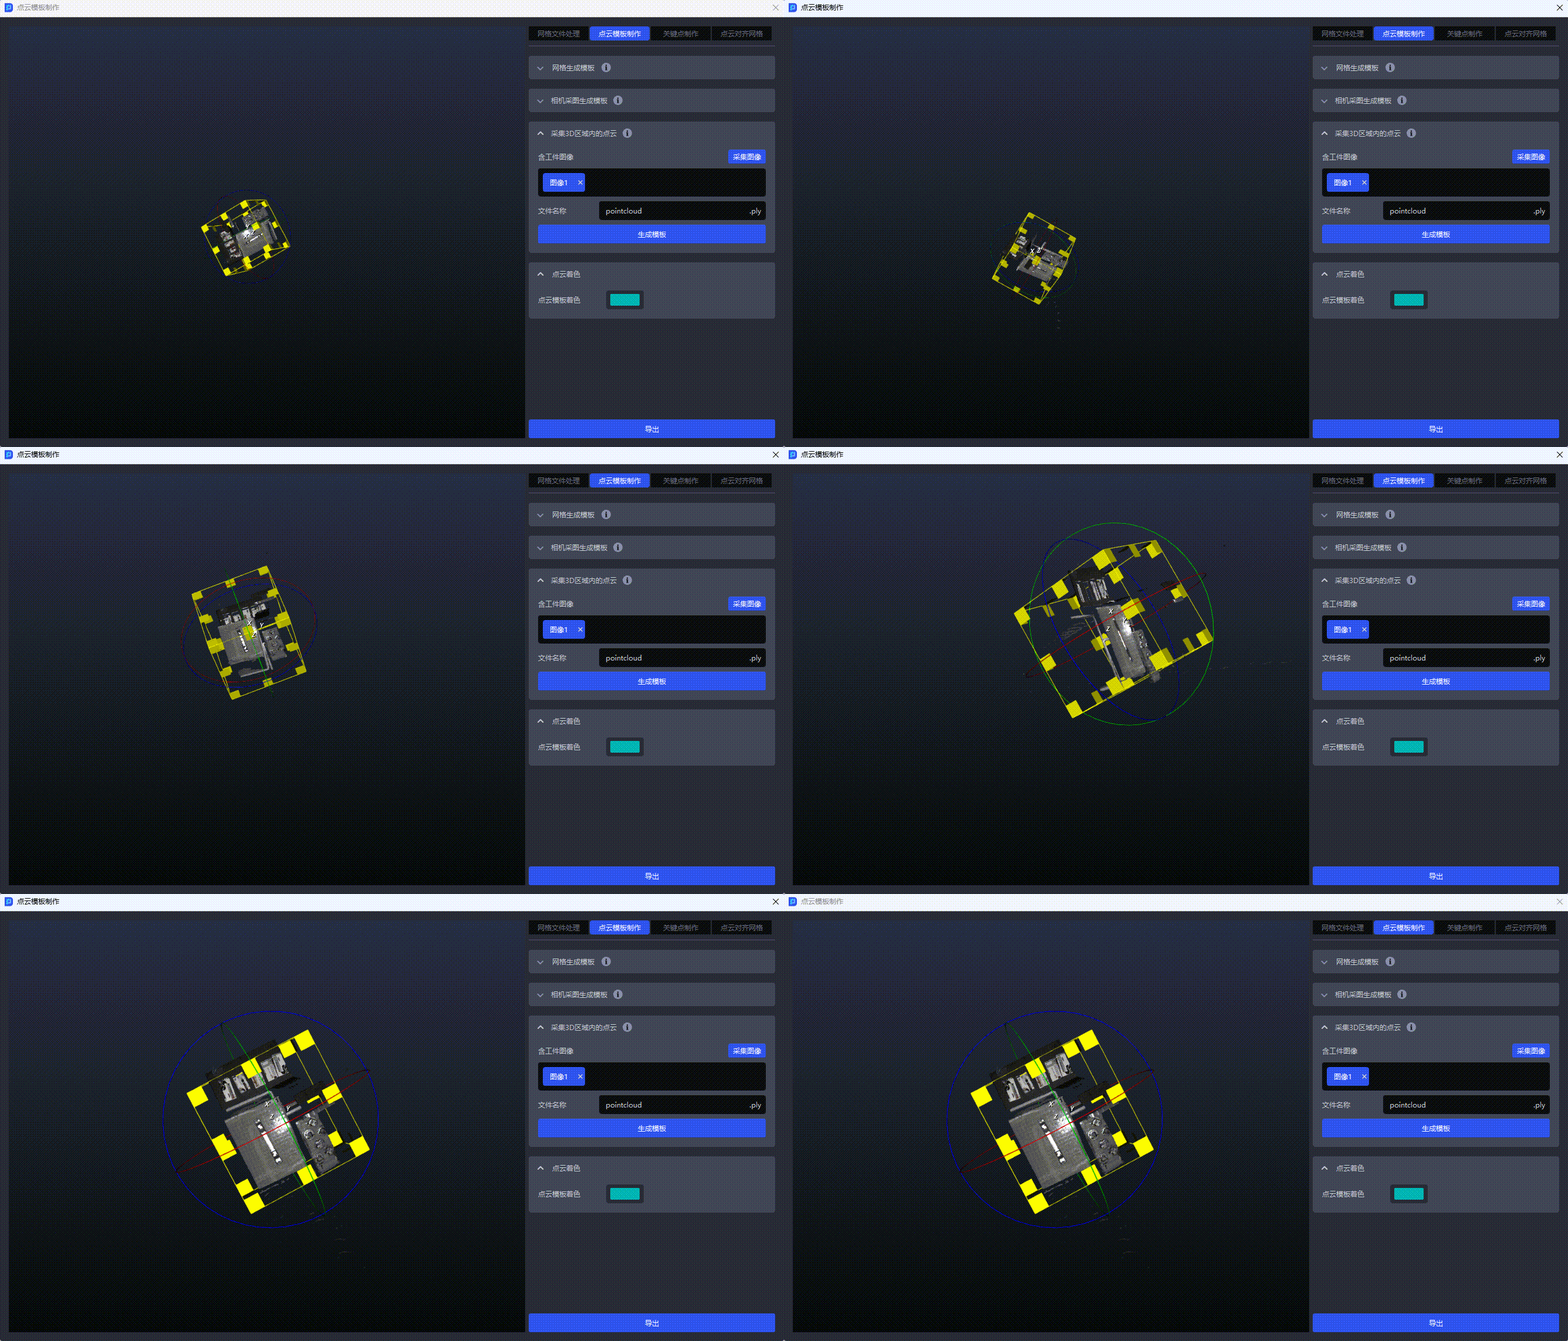
The left mouse button can change the perspective, zoom in or out, as shown in the figure below.
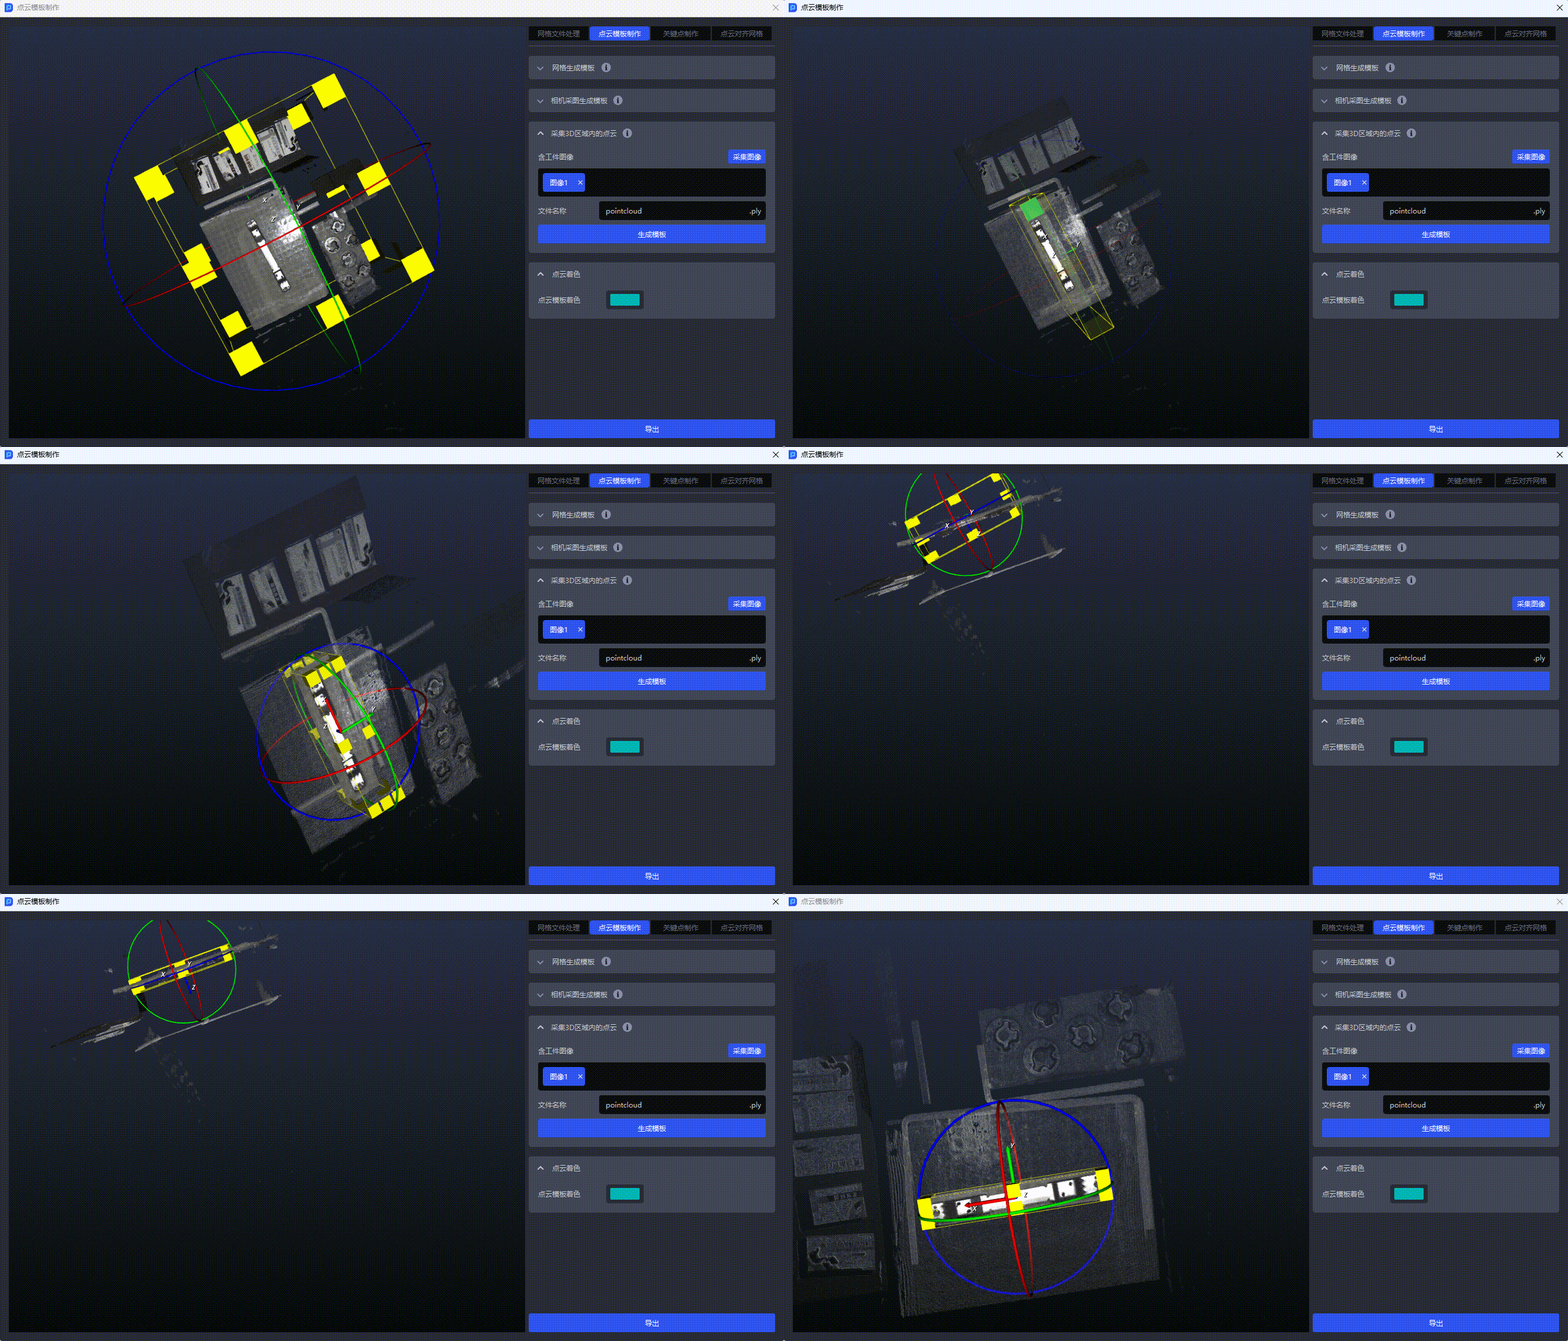
The right mouse button can adjust the size and angle of the 3D box, as shown in the figure below.
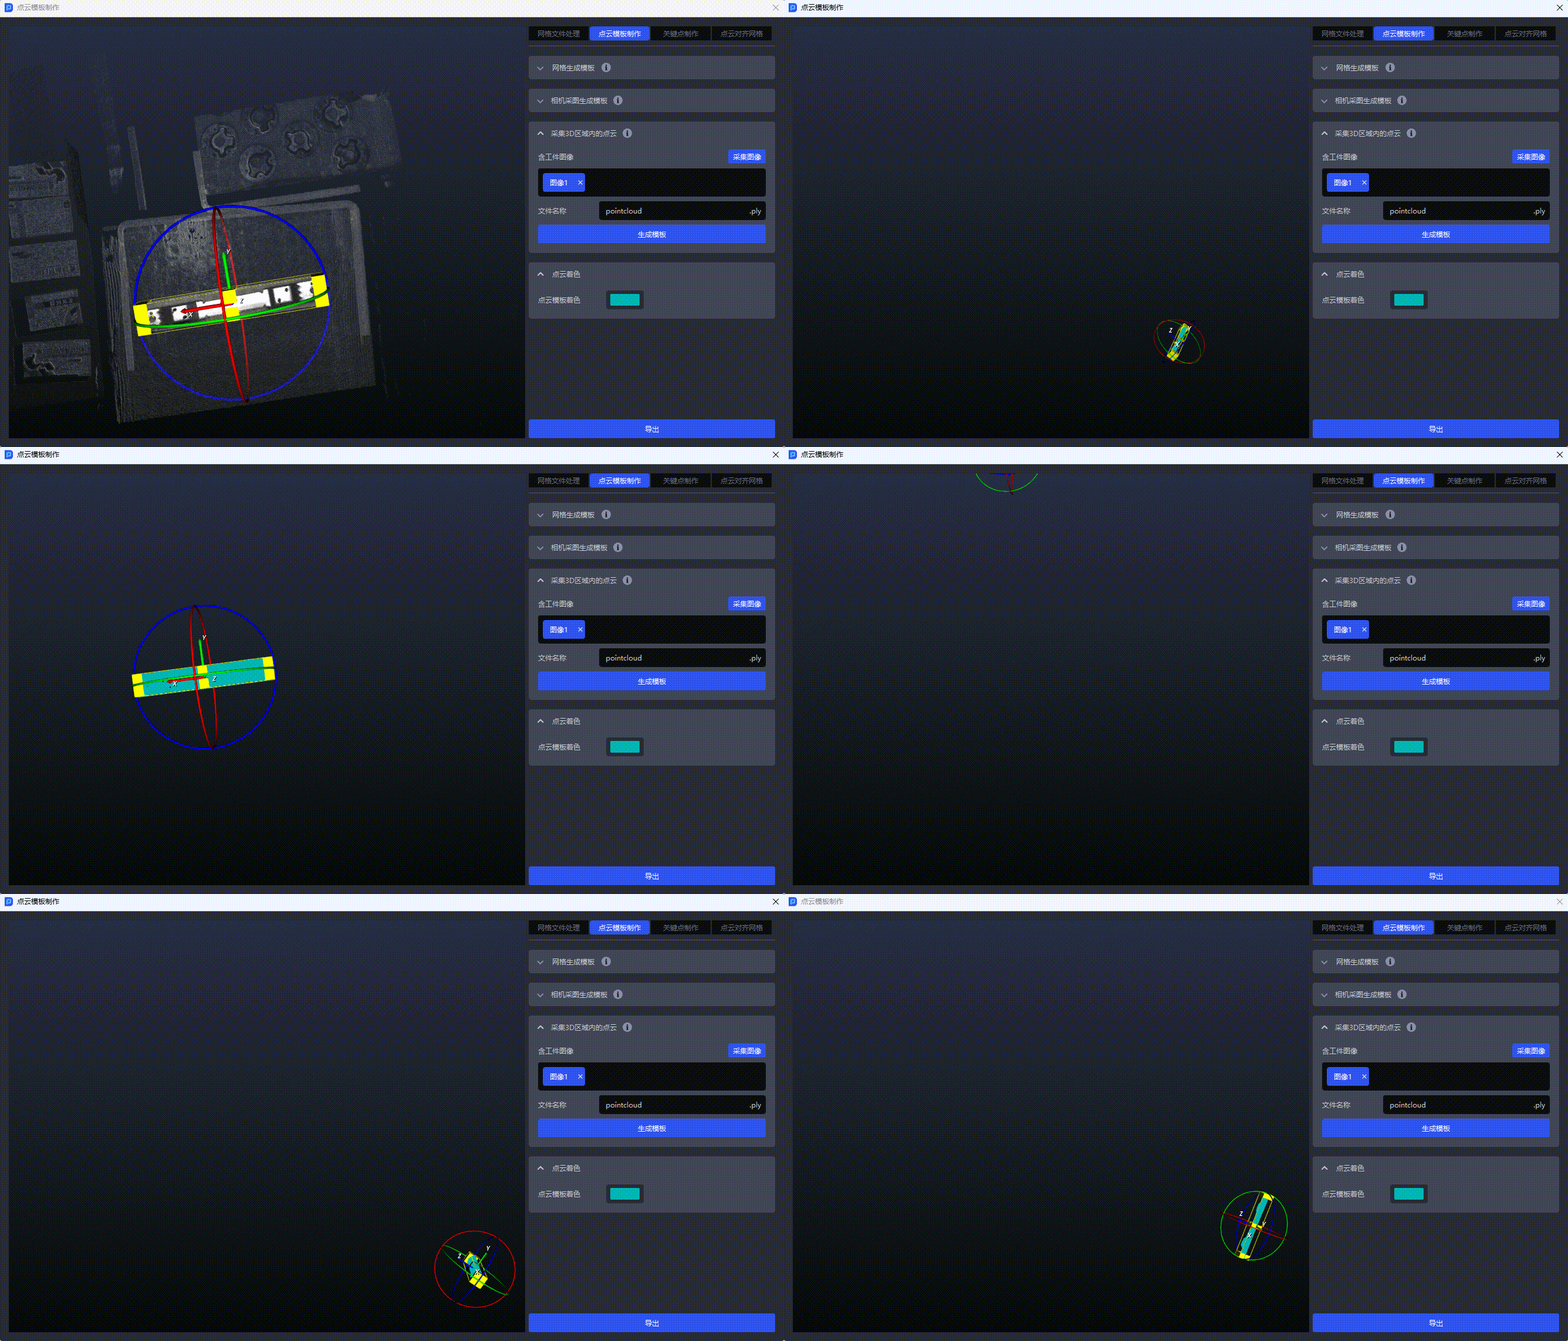
- After framing the TargetPoint Cloud, click
Generate Templateto generate Target's Point Cloud template. The Point Cloud template will automatically align to the origin of the coordinates.
2.1.4 historical data generation template
When the project type is "Loading and unloading of neatly arranged plane type target objects (image matching)" and "Plane type Target positioned assembly (image matching only)", you need to create a Point Cloud template in the "Menu" - "Point Cloud Template Production" function, "Historical Data Generation Template".
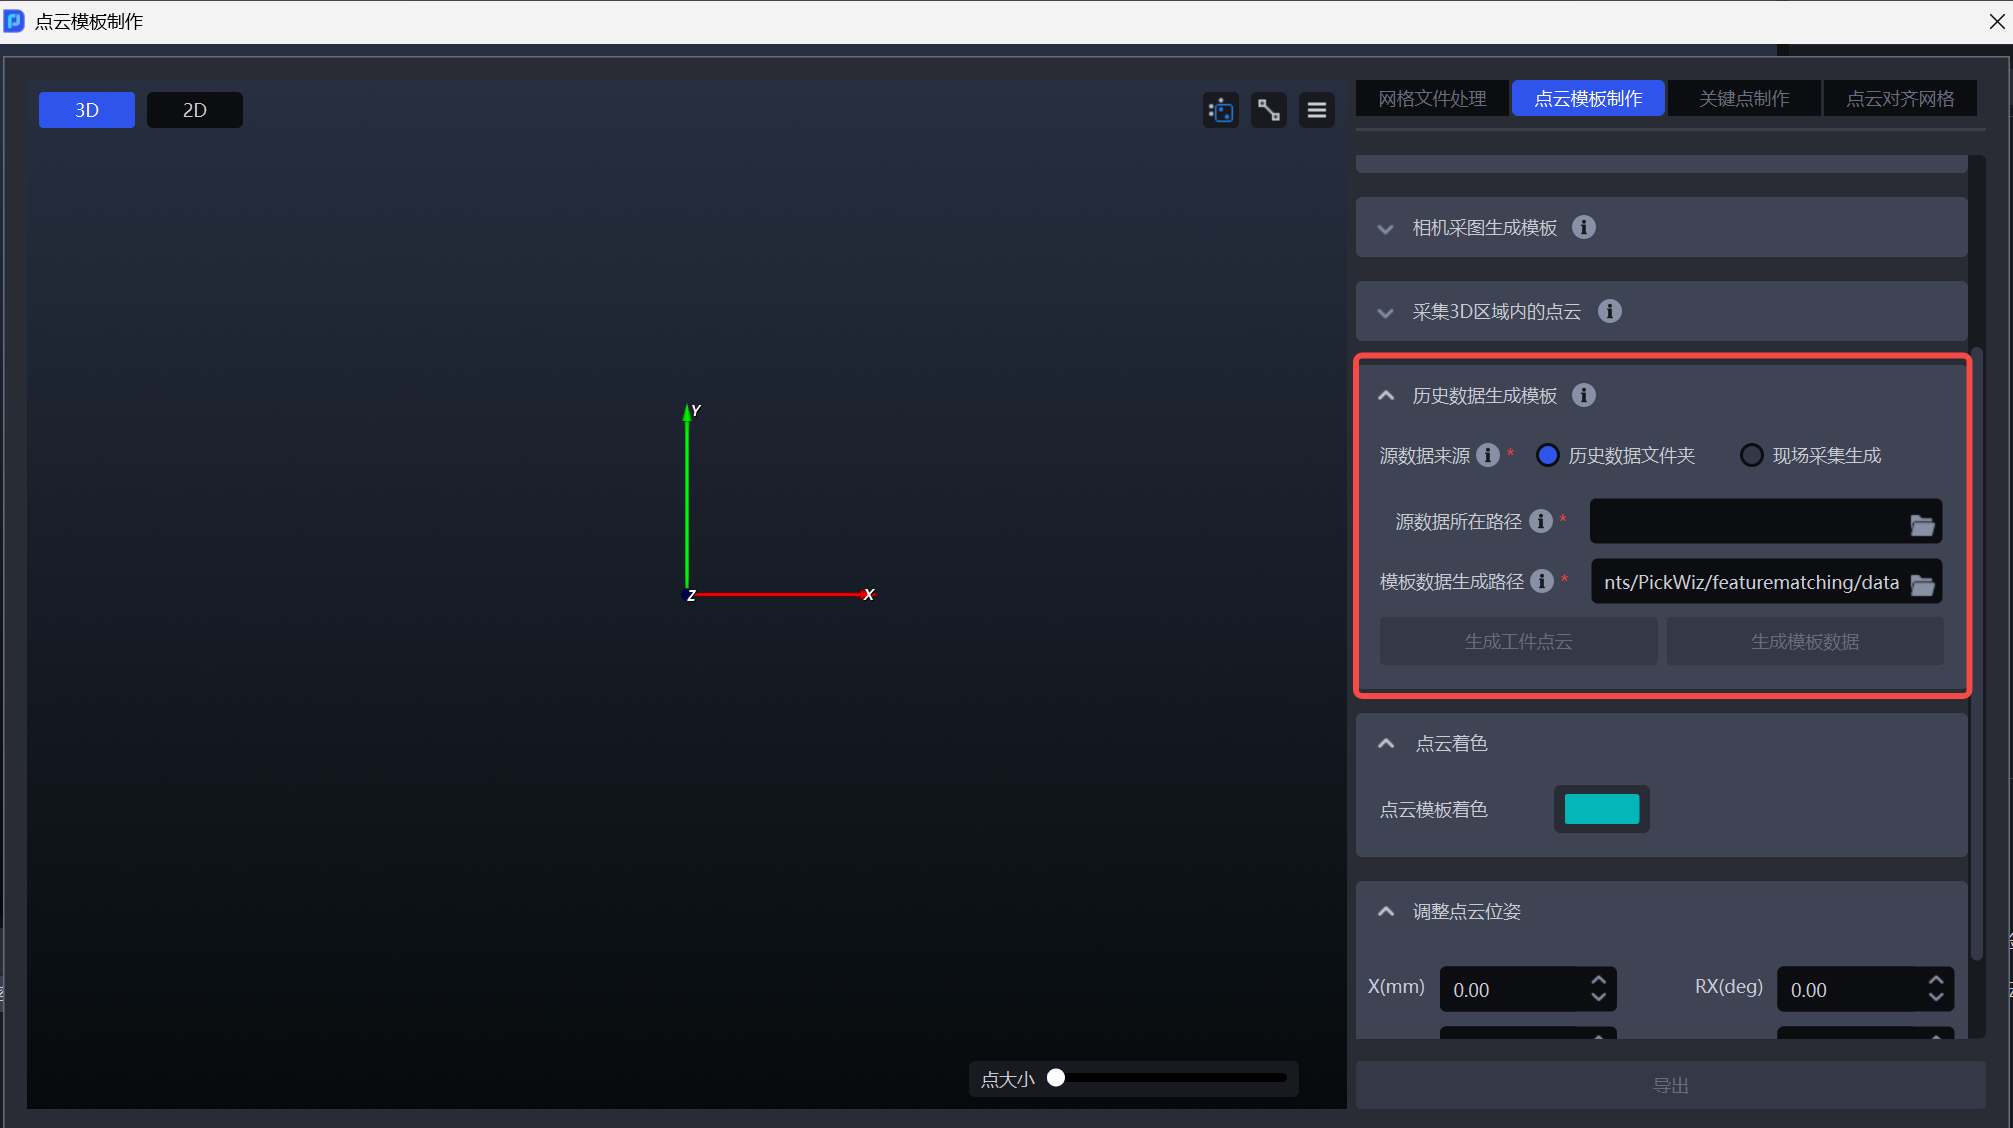
- Source data source: Historical data folder
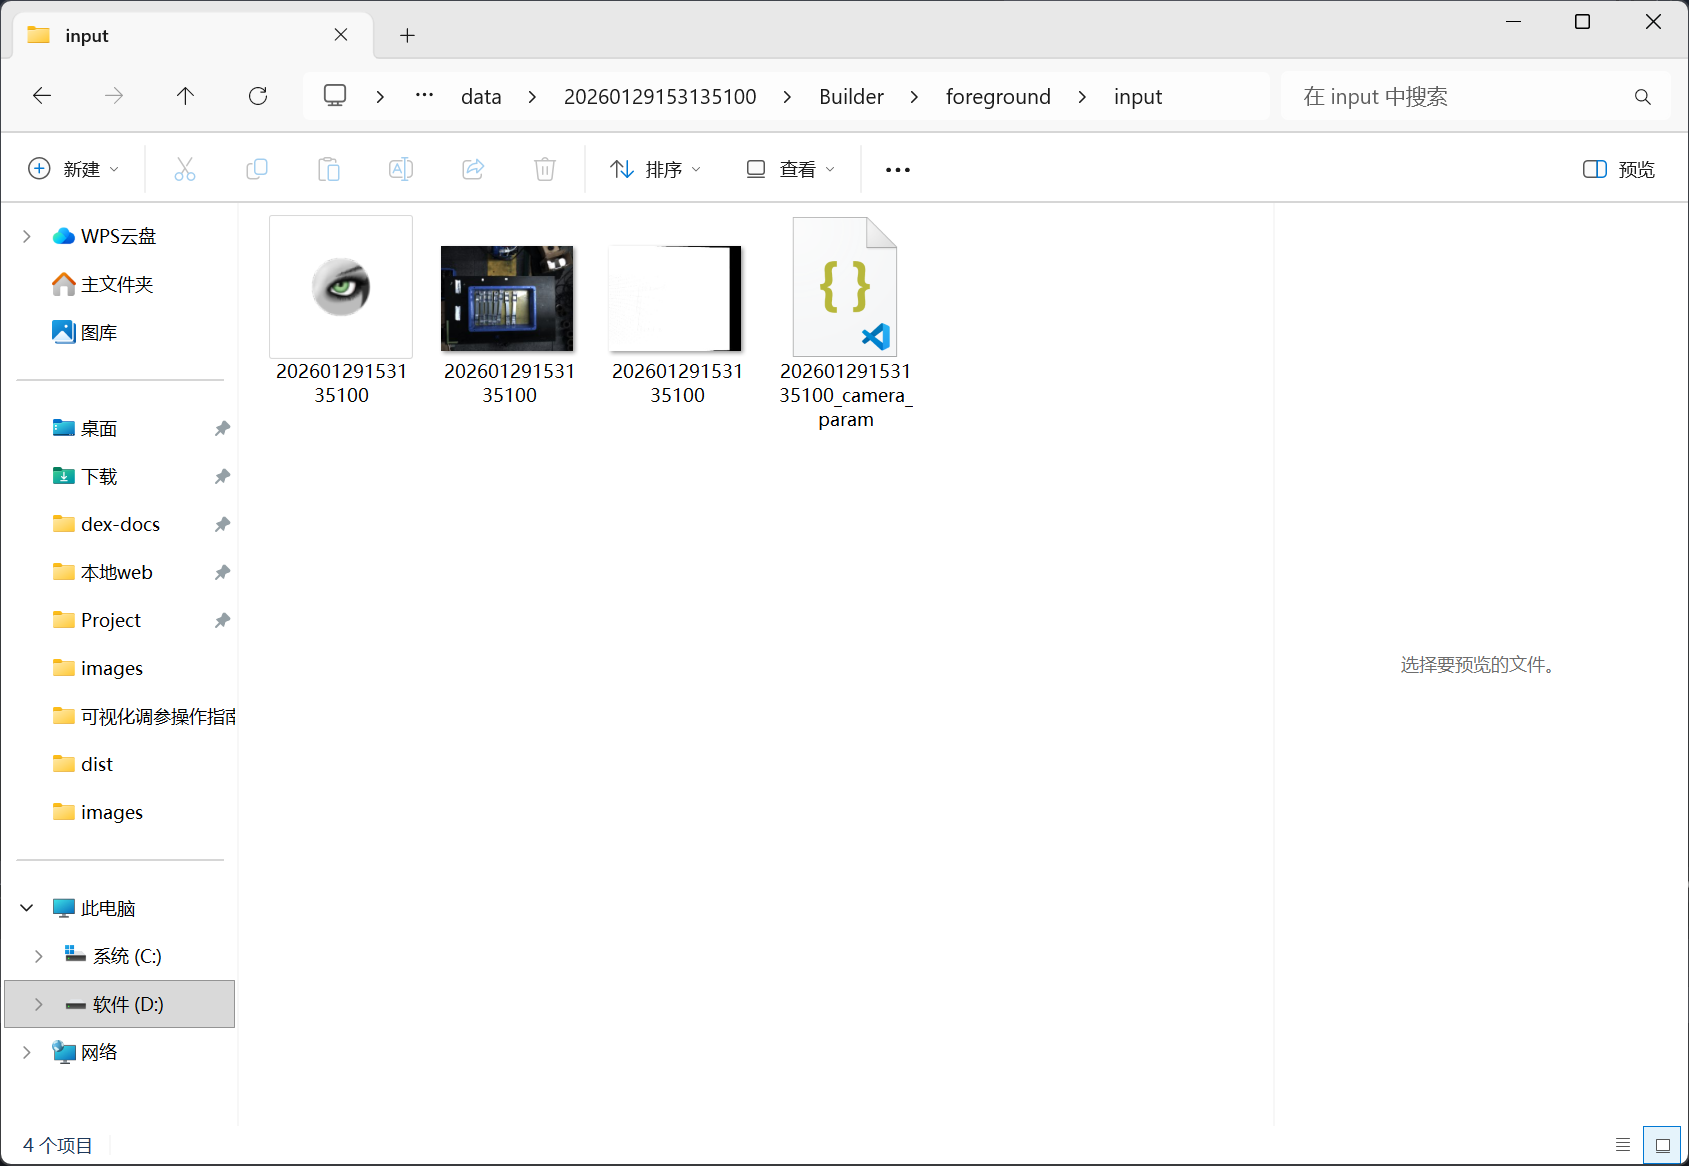
Source data path: select a complete historical data folder, usually in the project folder\data\PickLight\historical data\Builder\foreground\input
Template data generation path: By default, it is generated in the data folder of the current project and can be modified to other local folders.
Select the ROI area of the desired Target in the left window frame, click Generate TargetPoint Cloud, Point Cloud will appear in the left window, and edit the required TargetPoint Cloud through the Point Cloud editing tool in the upper right corner.
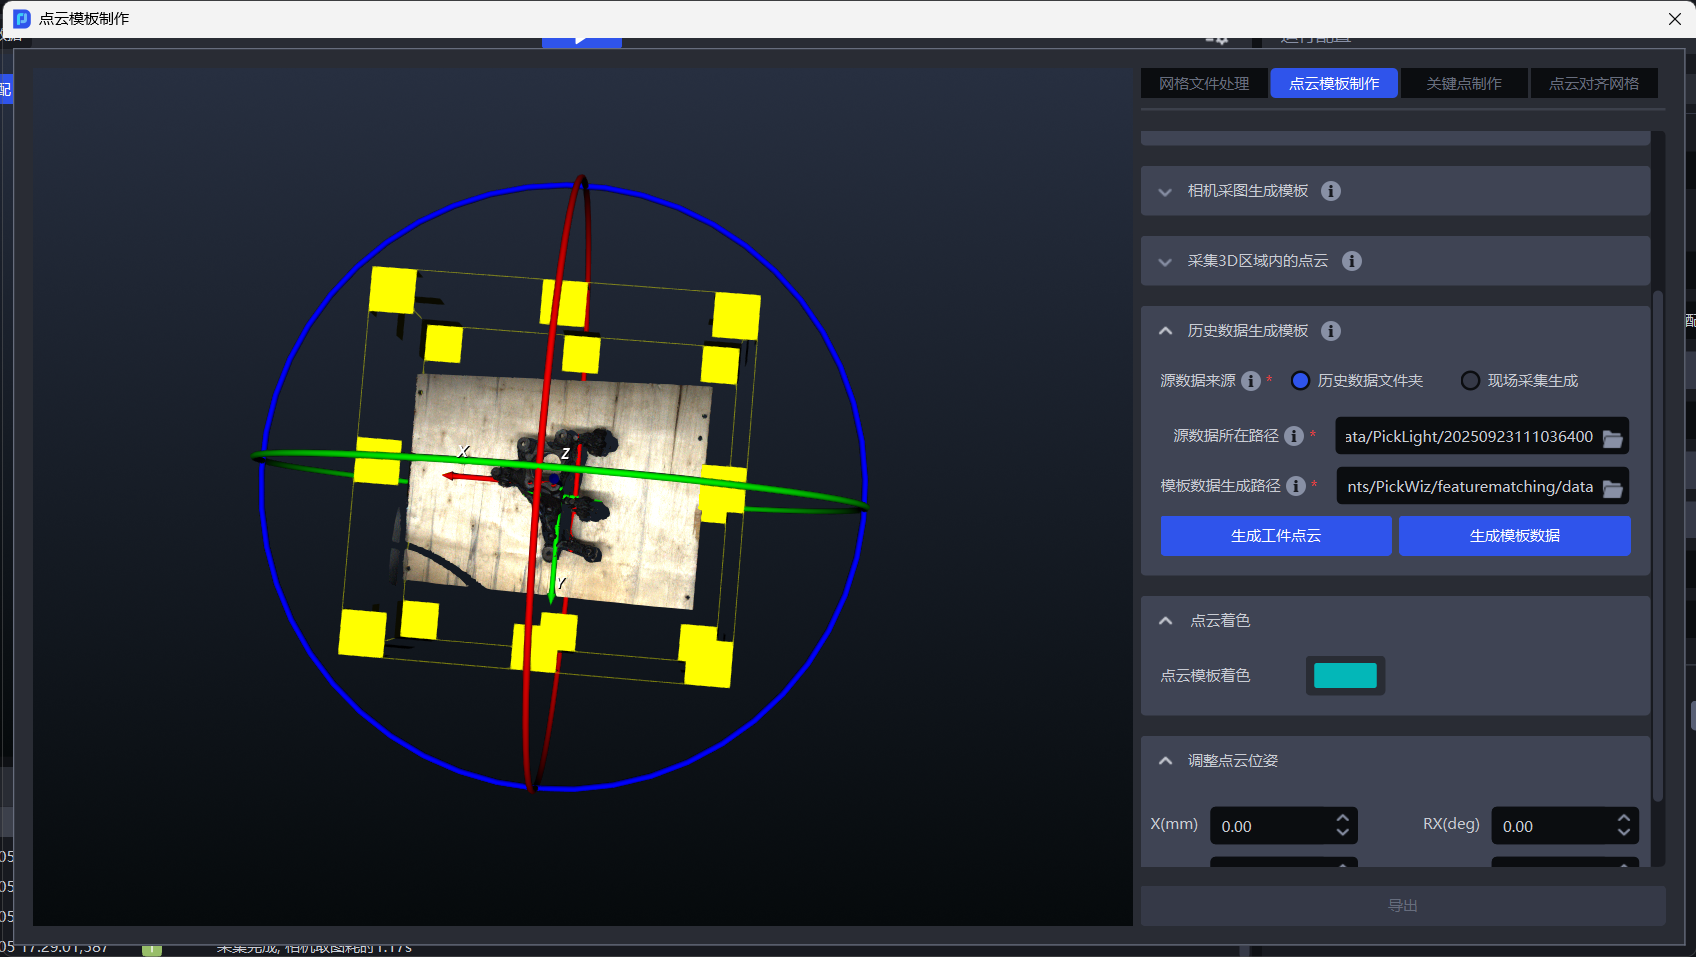
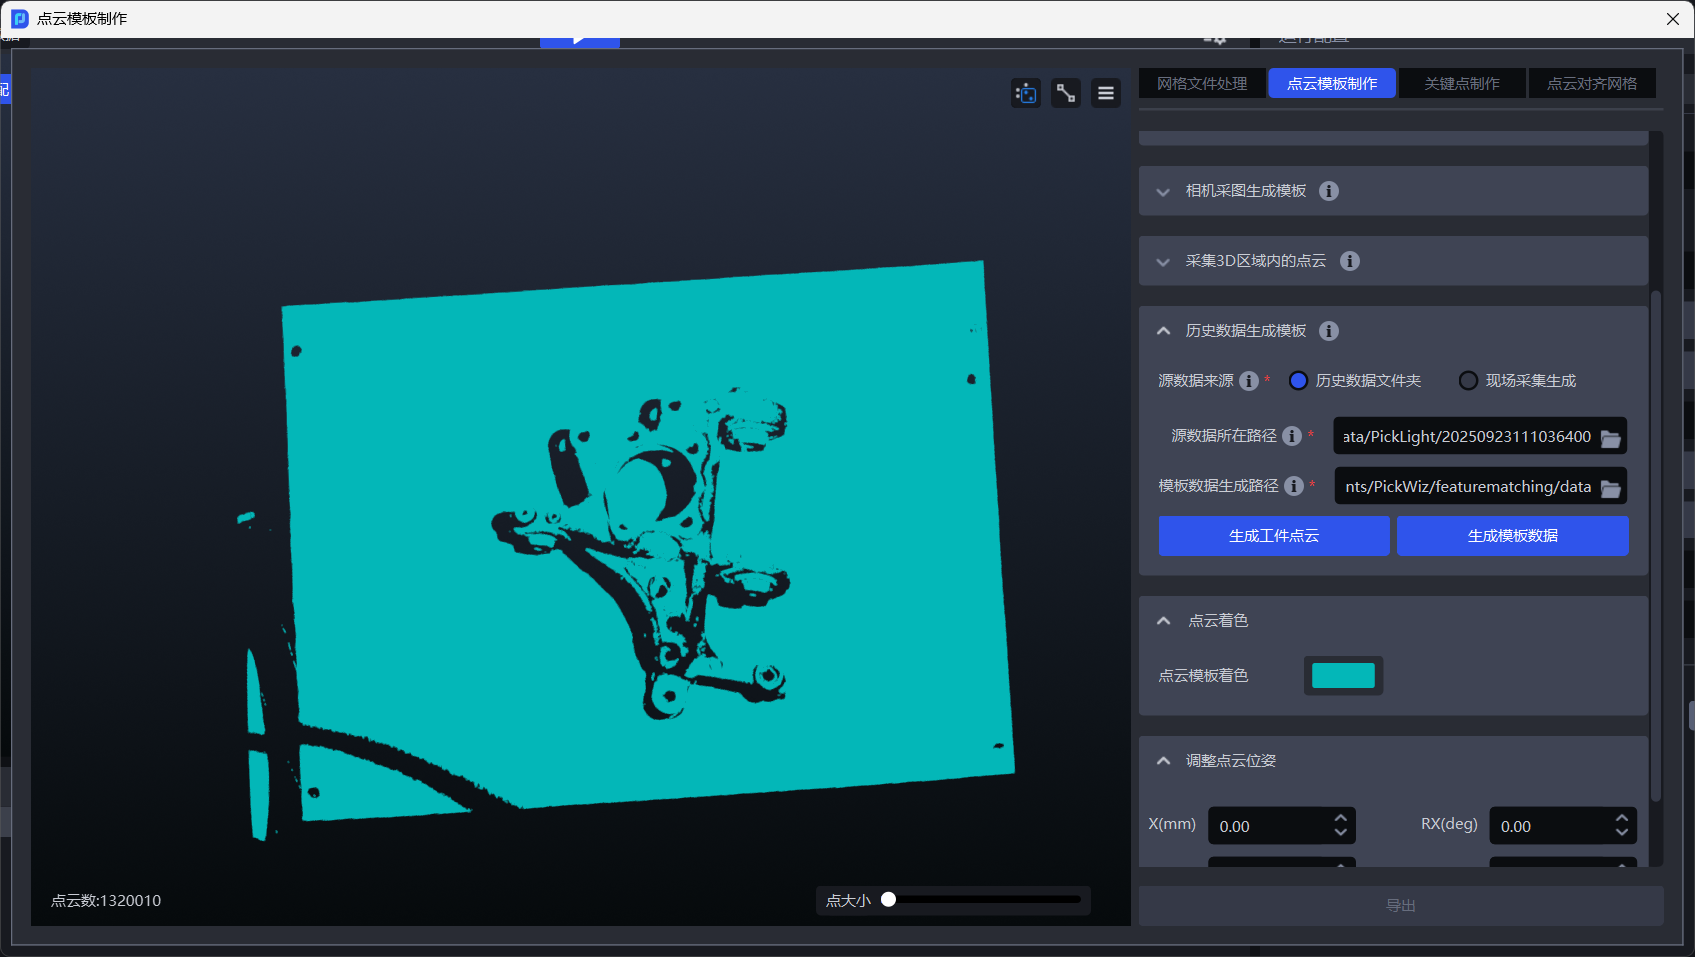
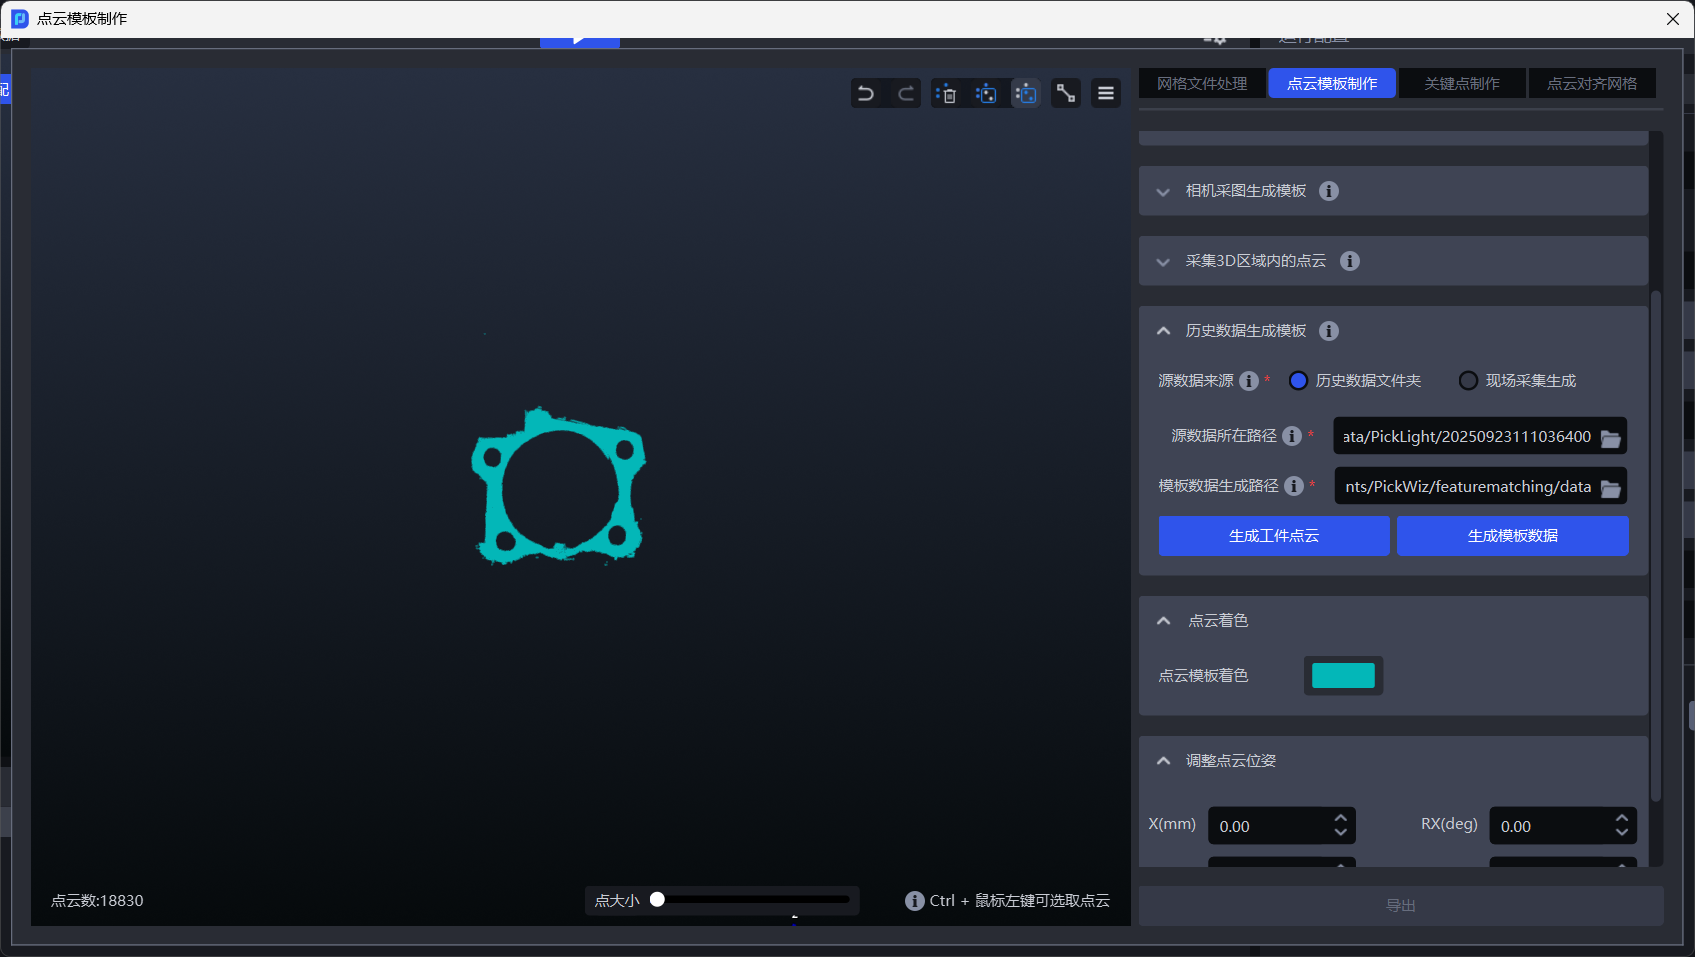
After TargetPoint Cloud is created, click Generate Template Data to complete the template generation.
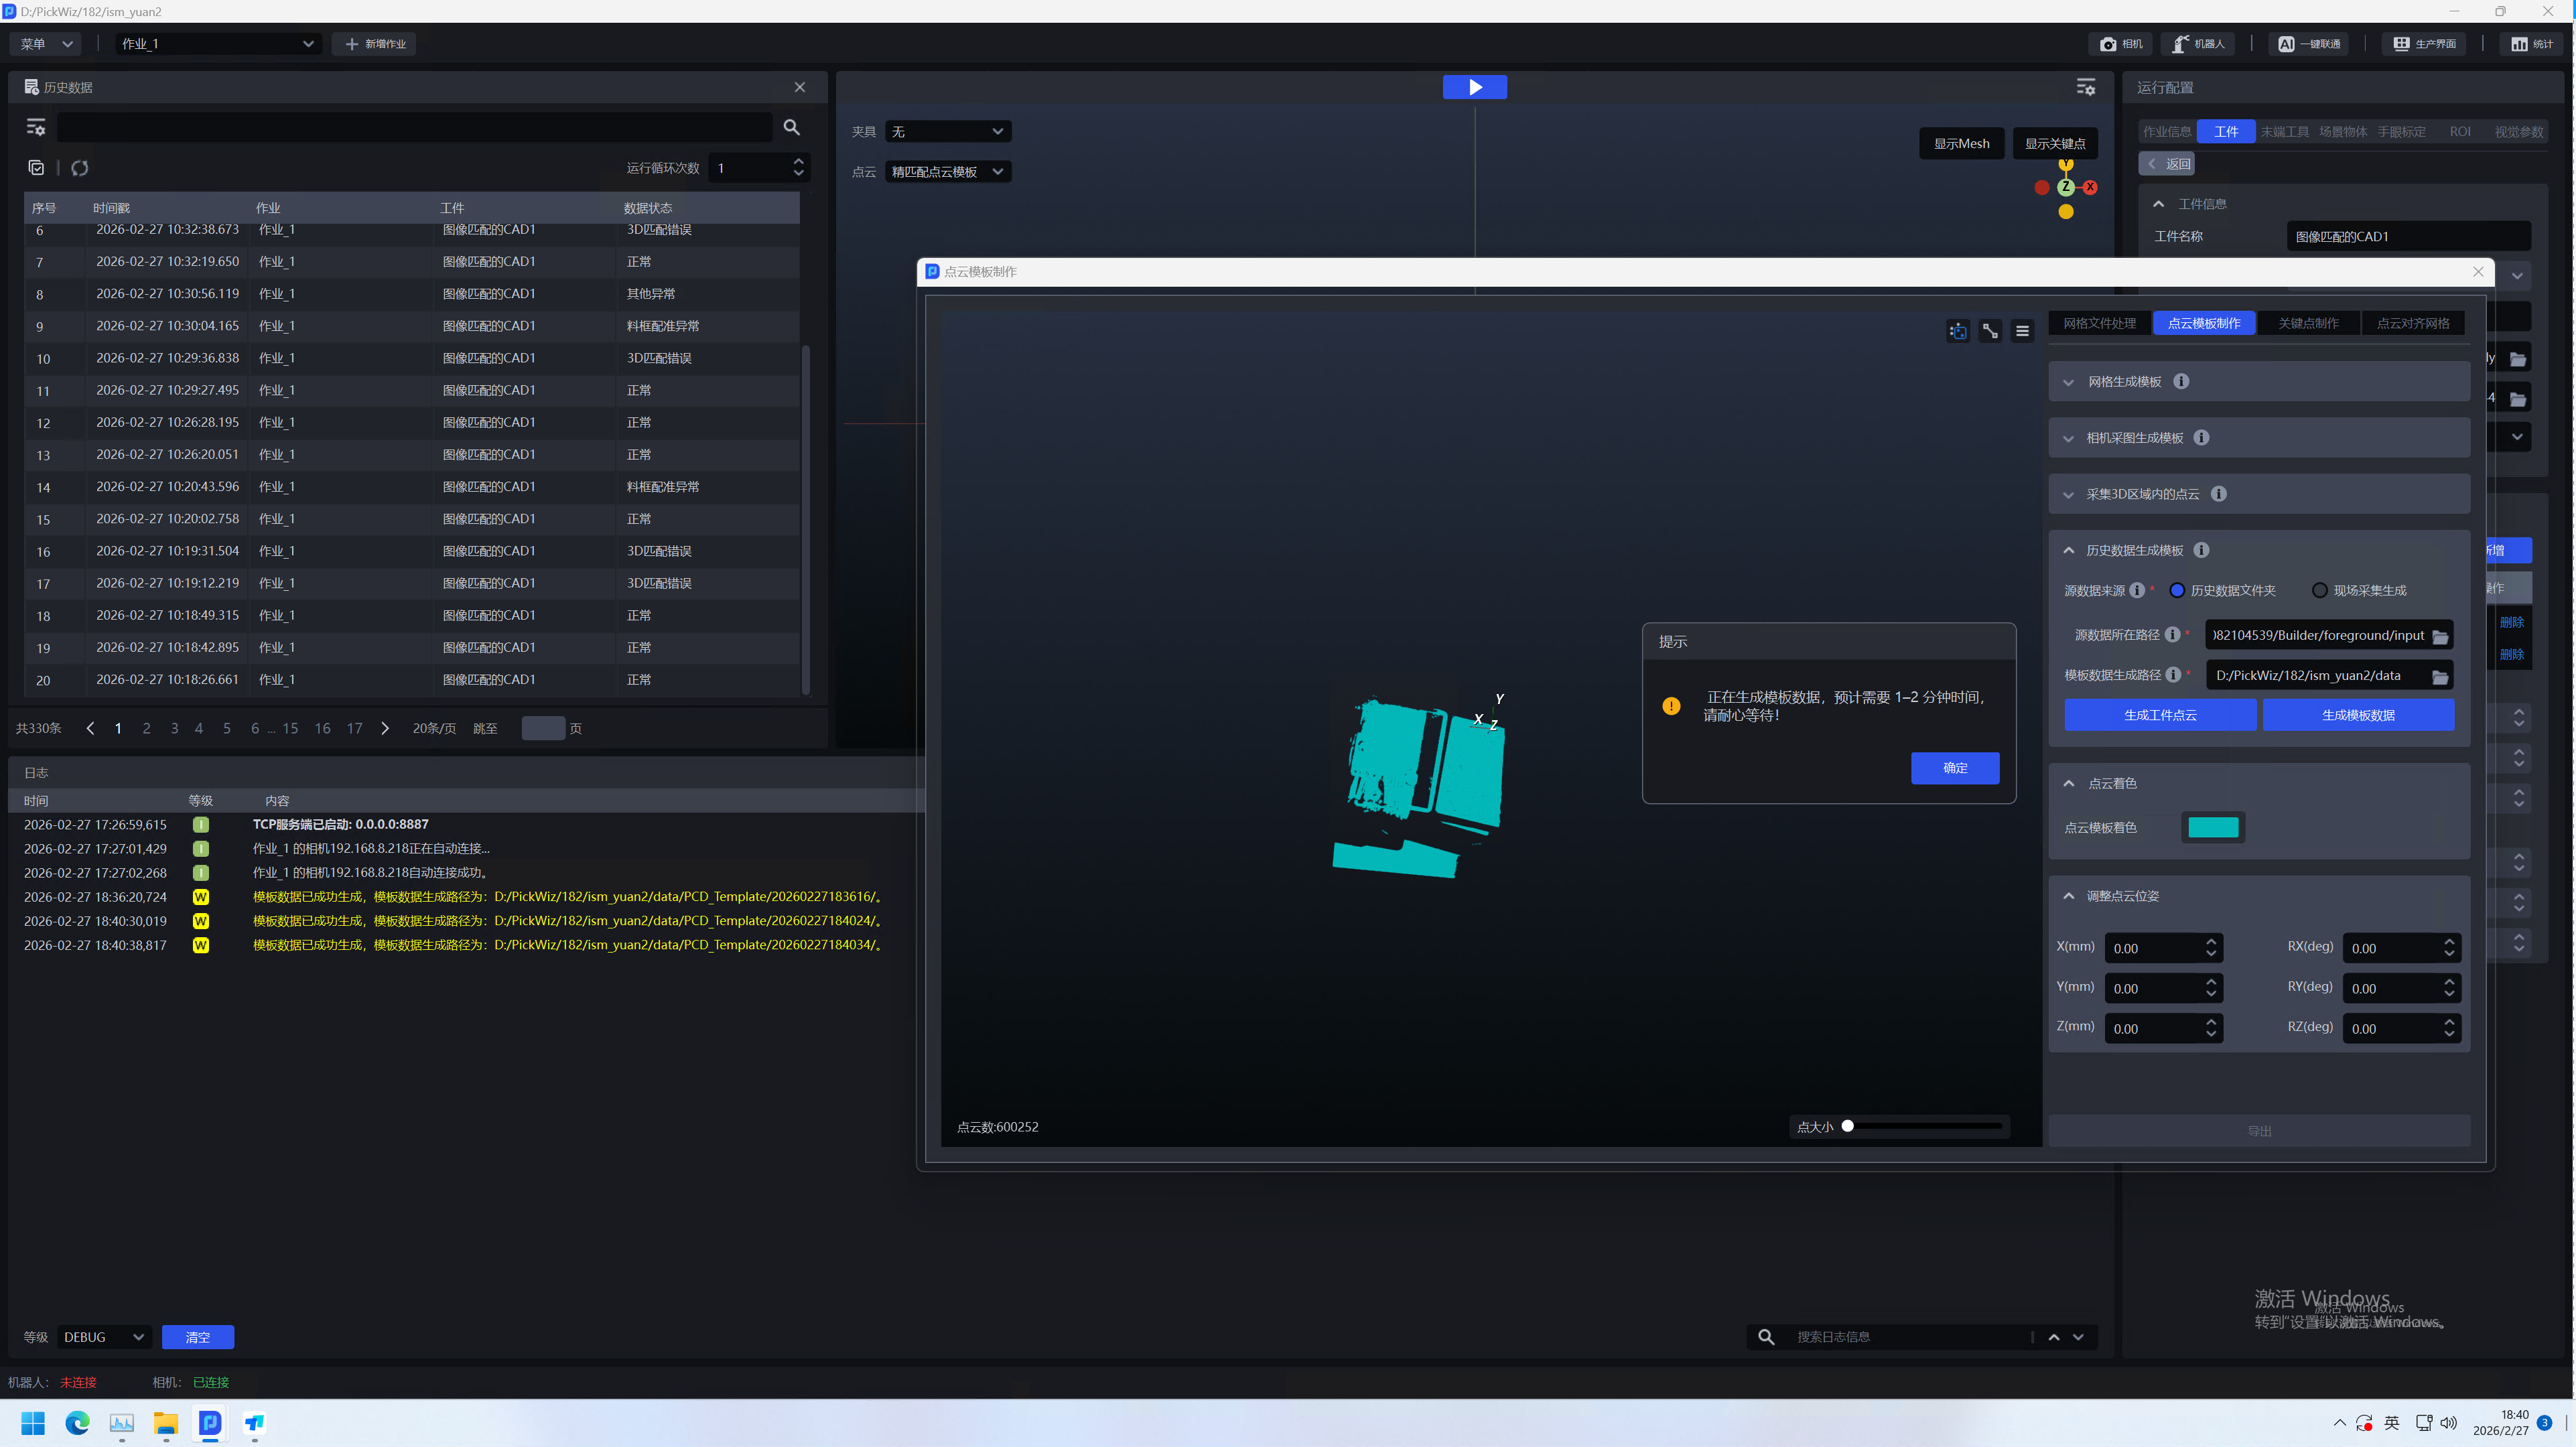
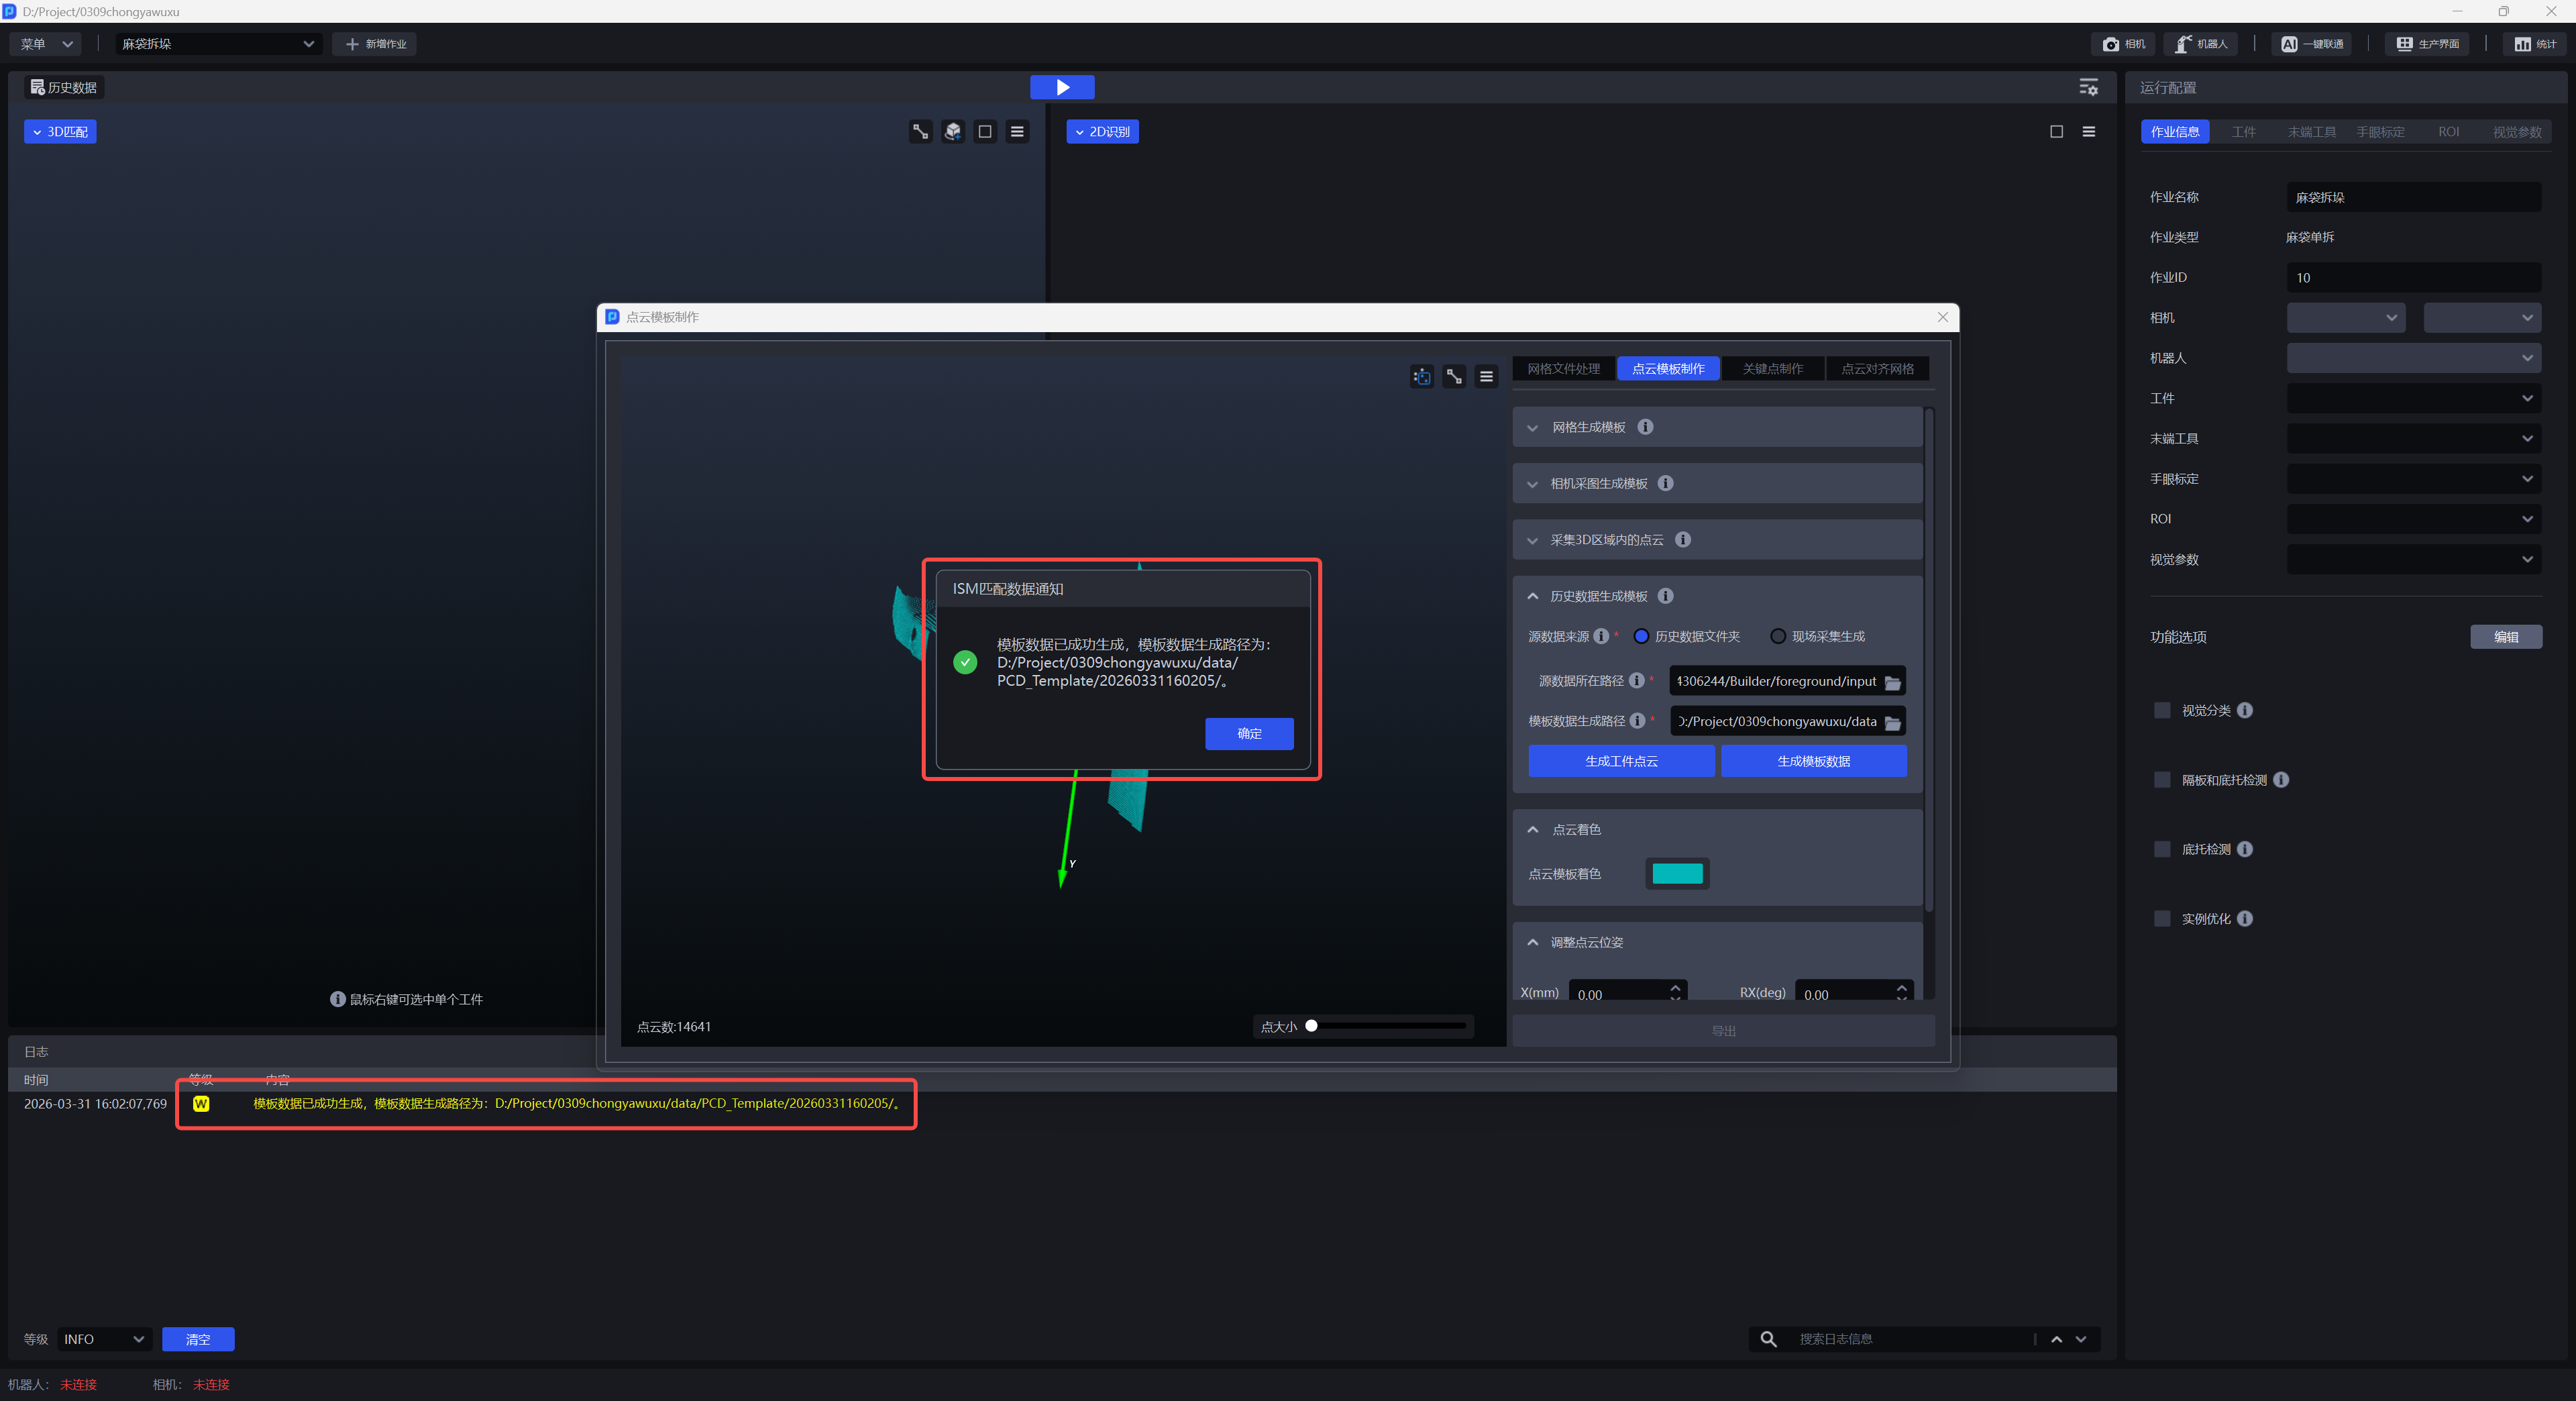
- Source data source: On-site collection and generation
Confirm that the Camera is connected and configure the Camera in the Task information, click Collect Image to generate the Point Cloud image, select the ROI of the Target location, click Generate TargetPoint Cloud, the Point Cloud will appear in the left window, edit the required TargetPoint Cloud through the Point Cloud editing tool in the upper right corner.
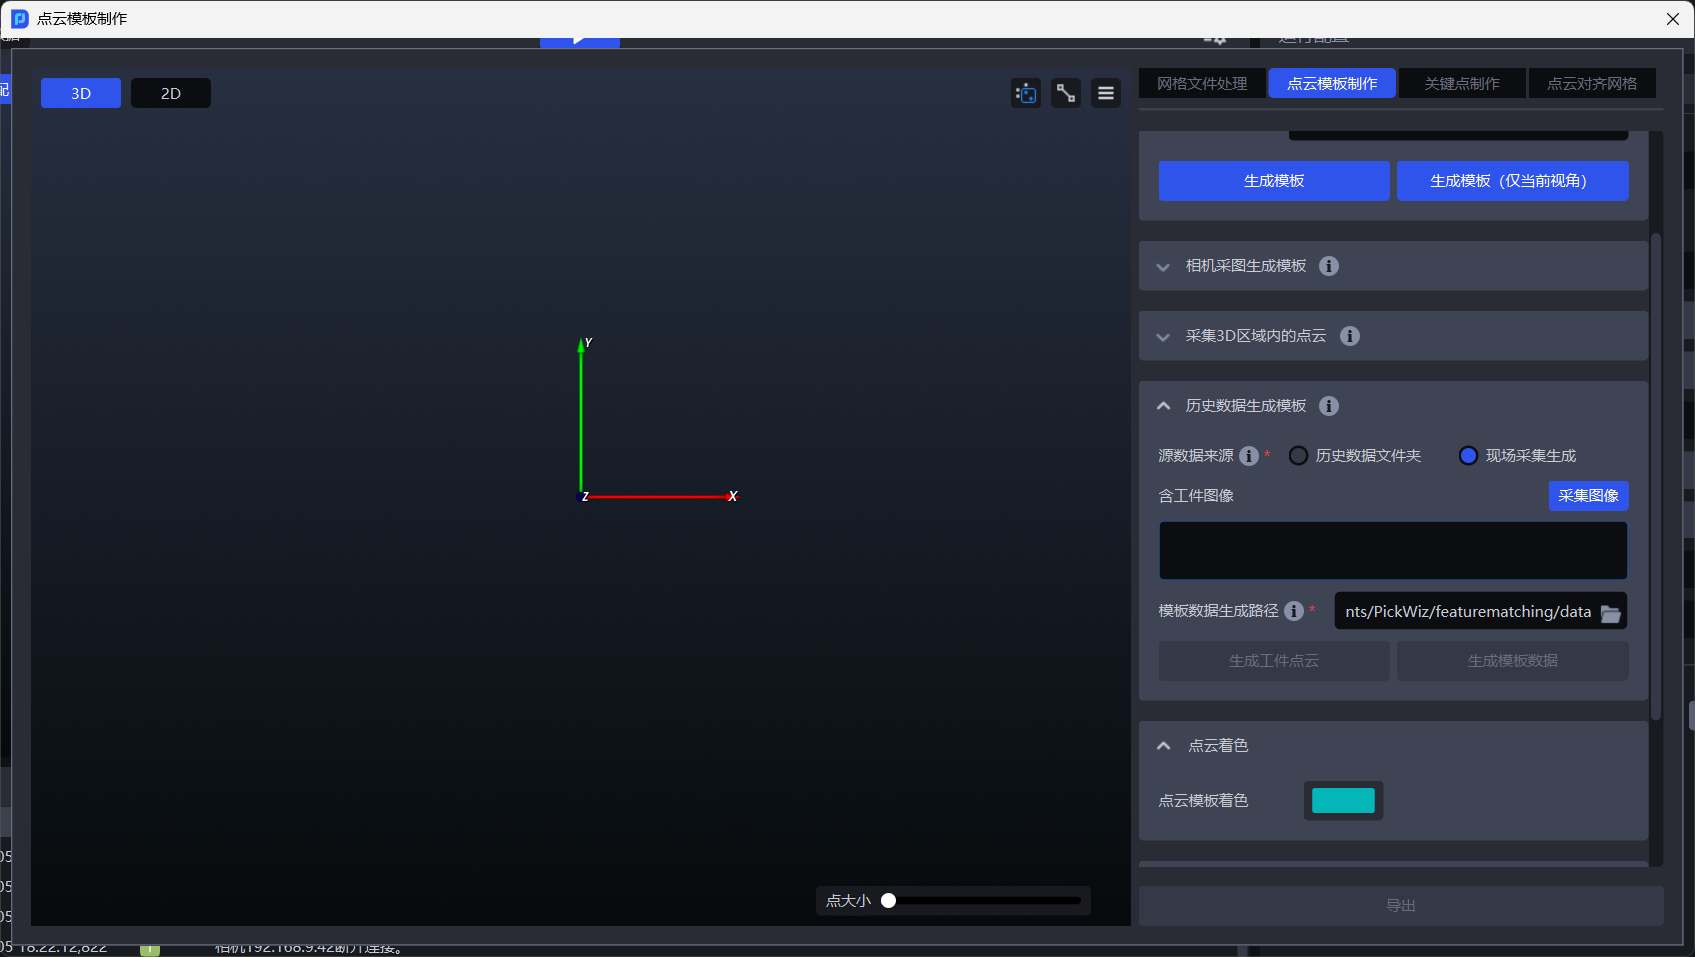
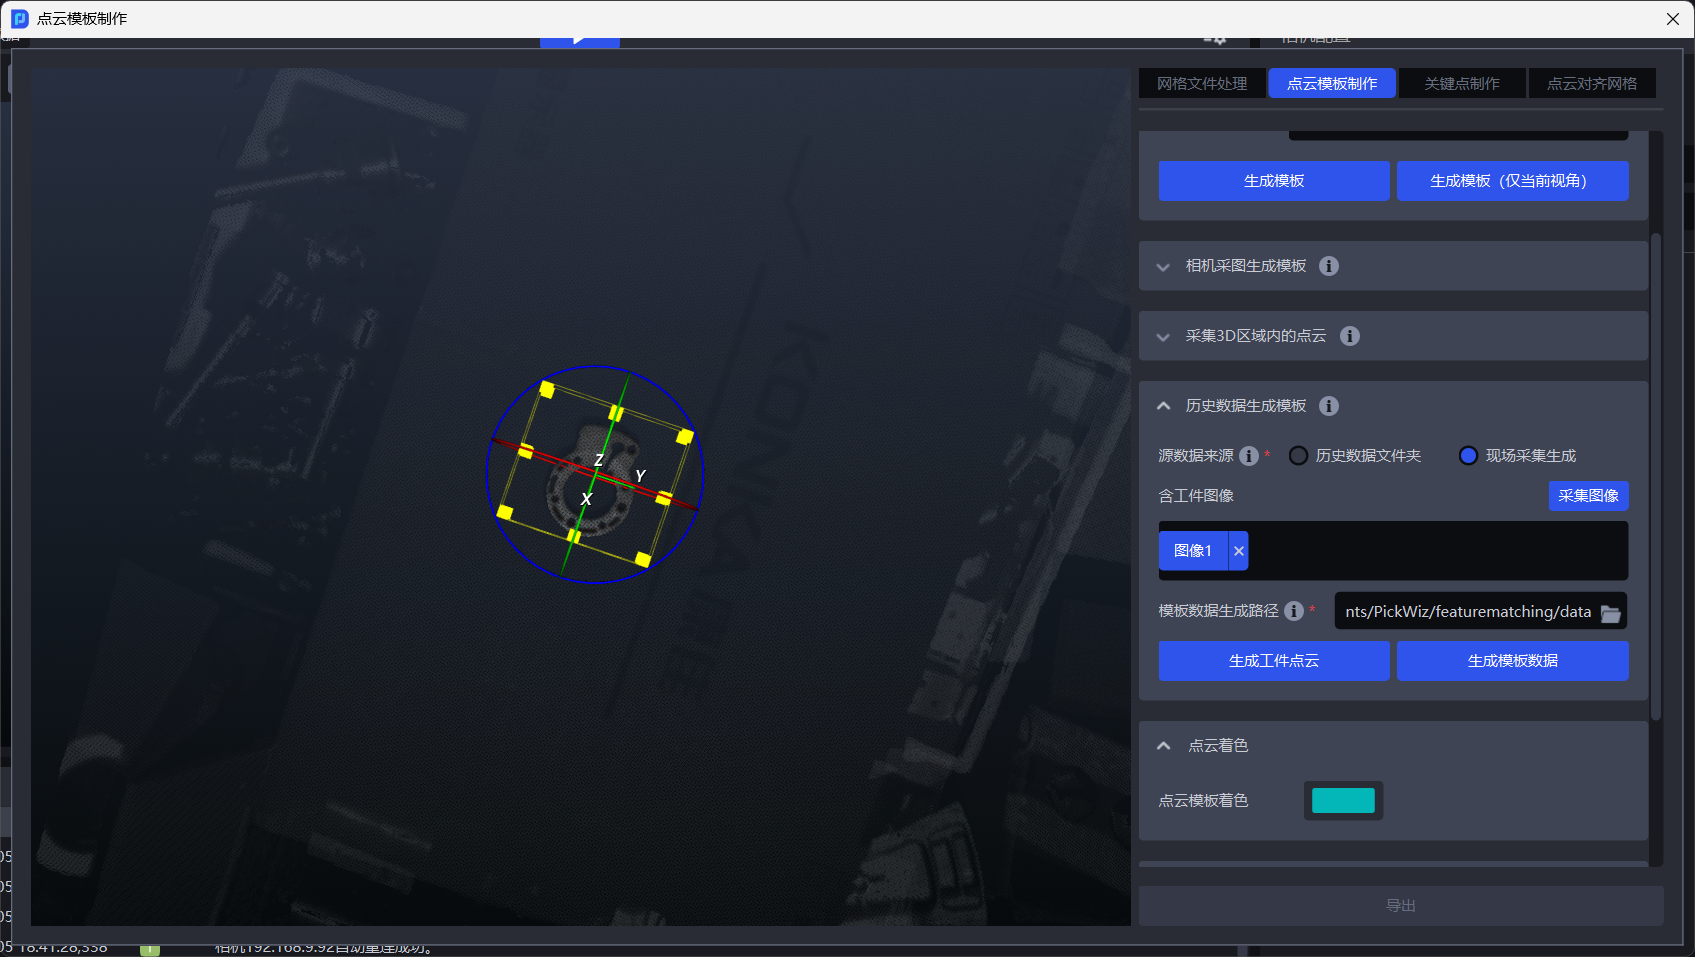
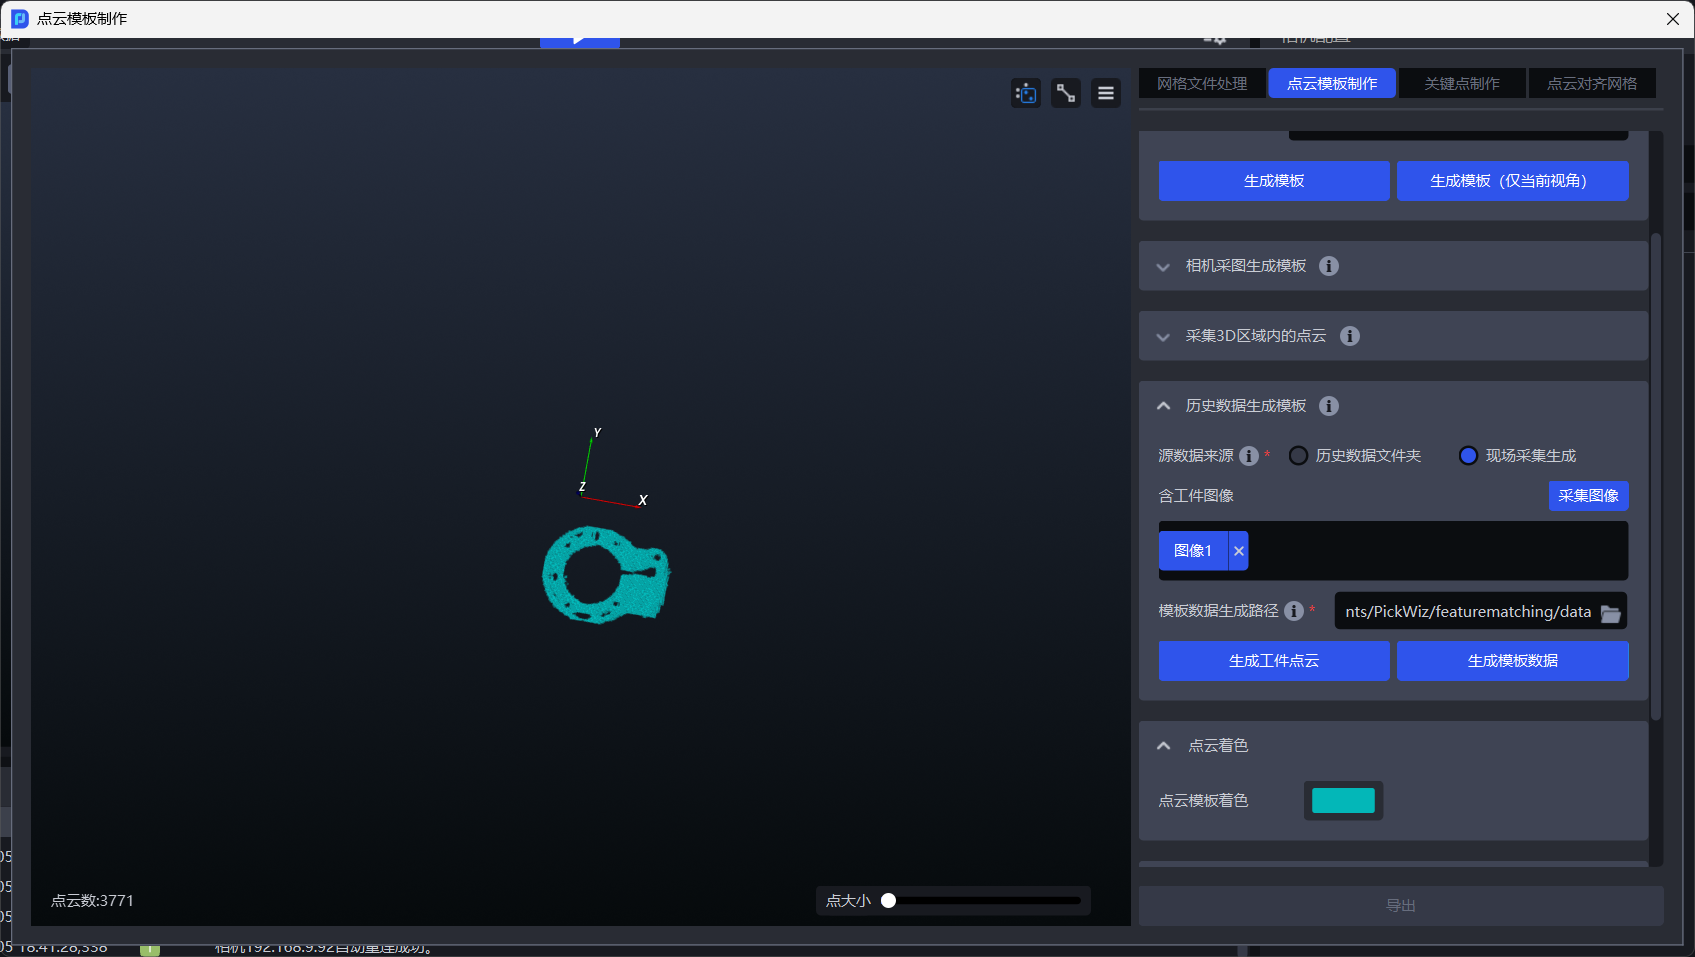
After TargetPoint Cloud is created, click Generate Template Data to complete the template creation.
When generating a template from historical data, the generated Point Cloud template does not allow operations such as adjusting the Point Cloud pose, aligning the coordinate origin, Point Cloud template downsampling, resetting, and exporting.
2.2 Point Cloud TemplateEdit
2.2.1 Adjust Point Cloud pose
Supports custom adjustment of Point Cloud pose. After the adjustment is completed, click Export at the bottom to save and export the Point Cloud template currently in the left window.
You can align the center of the Point Cloud template to the origin of the Camera coordinate system with one click. After clicking `Align Coordinate Origin', the center of the Point Cloud template will be moved to the origin of the Camera coordinate system.
note
- After the center of the Point Cloud template is aligned with the origin of the Camera coordinate system, "Point Cloud aligned to grid" calculation is not supported.
- The Point Cloud template generated based on the "Historical Data Generation Template" does not support functions such as adjusting the Point Cloud posture alignment coordinate origin/Point Cloud template downsampling and other functions.
2.2.2 Point Cloud Shading
You can customize the color of the Point Cloud template. After the adjustment is completed, click Export at the bottom to save and export the Point Cloud template currently in the left window.
2.2.3 Point Cloud template downsampling
Point Cloud templates can be downsampled to reduce the number of Point Clouds and improve visual computing speed.
Downsampling point spacing (mm): Point Cloud template downsampling point spacing. The larger the value, the fewer the number of Point Clouds after downsampling, and the visual computing speed will be accelerated, but the accuracy may decrease. The smaller the value, the opposite is true; limited range: [0.0, 1000.0], default value: 0.0, unit: mm.
Each time the downsampling point spacing is input, downsampling takes effect, and downsampling will be performed again based on the last downsampling. The current number of Point Clouds is displayed in the lower left corner of the left window, and the user can adjust the downsampling point spacing according to the number of Point Clouds.
Reset function:
- When the
Resetbutton is clicked, the Point Cloud template displayed in the left visual window is automatically restored to the currently expanded function part and the Point Cloud template generated when theGenerate Templatebutton was clicked last time, which is equivalent to regenerating the corresponding Point Cloud template. - The downsampling point spacing is reset to the default value of 0.0mm, and the Point Cloud number is also updated.
3. Key point production
Key points are feature points with clear semantic or geometric meaning in the three-dimensional model, which are used to describe the local structure or global posture of the Target. In key point-based posture estimation, the overall position and posture of the Target are inferred by detecting the positions of these points.
3.1 downsampling generates key points
Function description
Through the imported standardized grid file, key points evenly distributed throughout the Target can be generated with one click.
Applicable to Scene
Most common TargetScenes are applicable.
Switch to the
Key Point CreationwindowUpload the standardized grid file
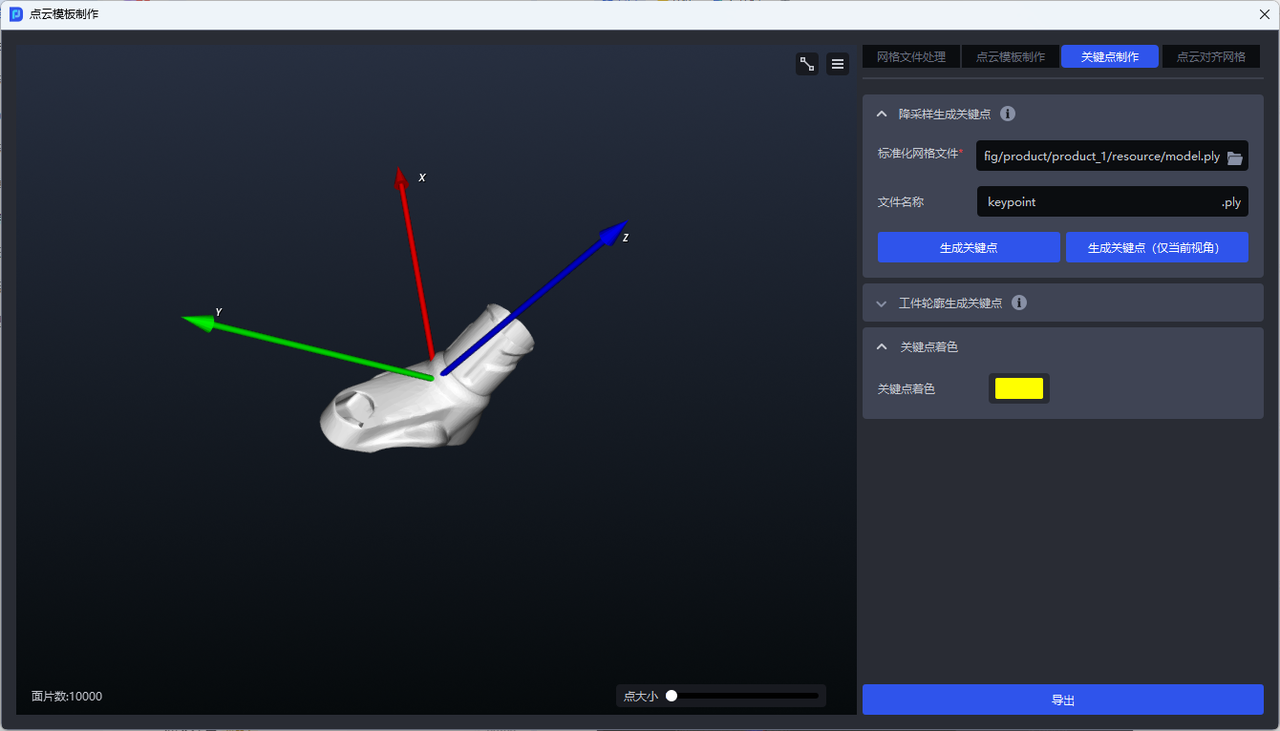
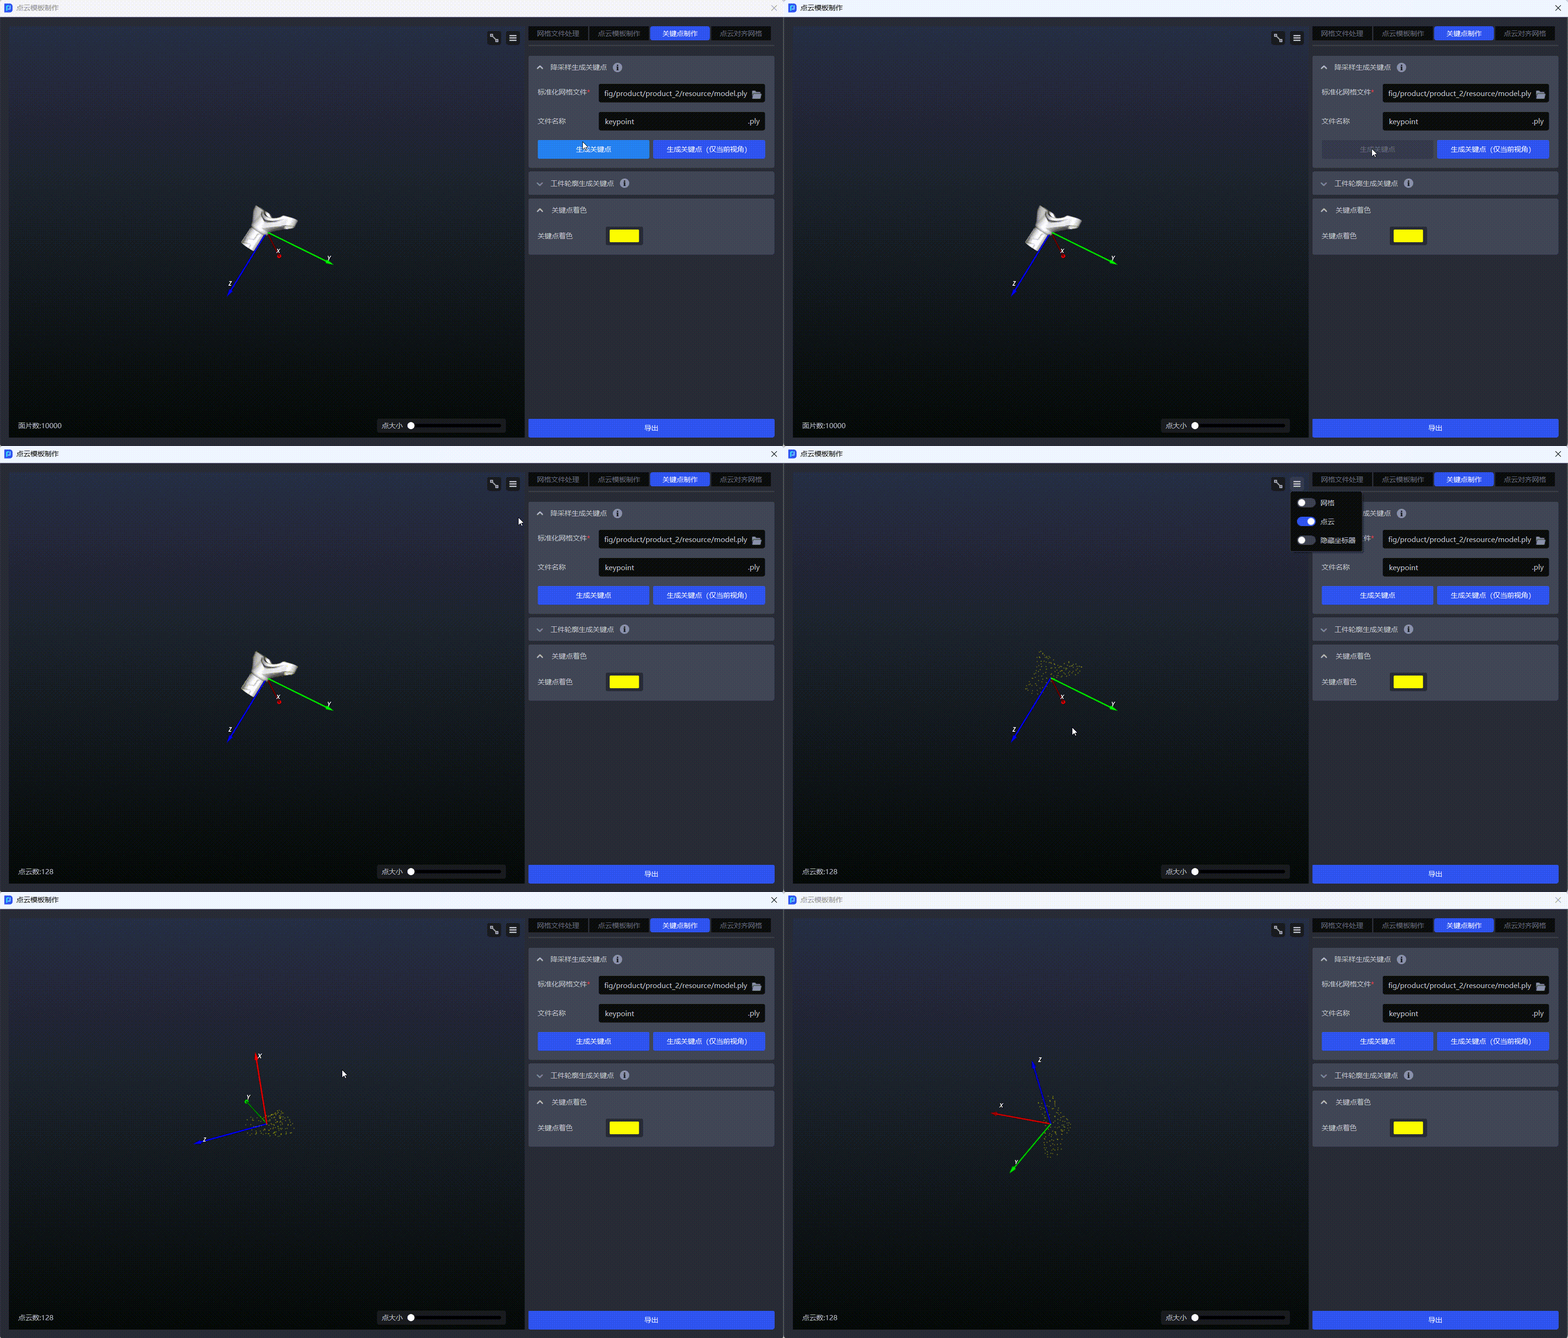
- If you need to generate all key points of Target, you can click
Generate Key Points. The full number of key points generated will be as shown in the figure below.
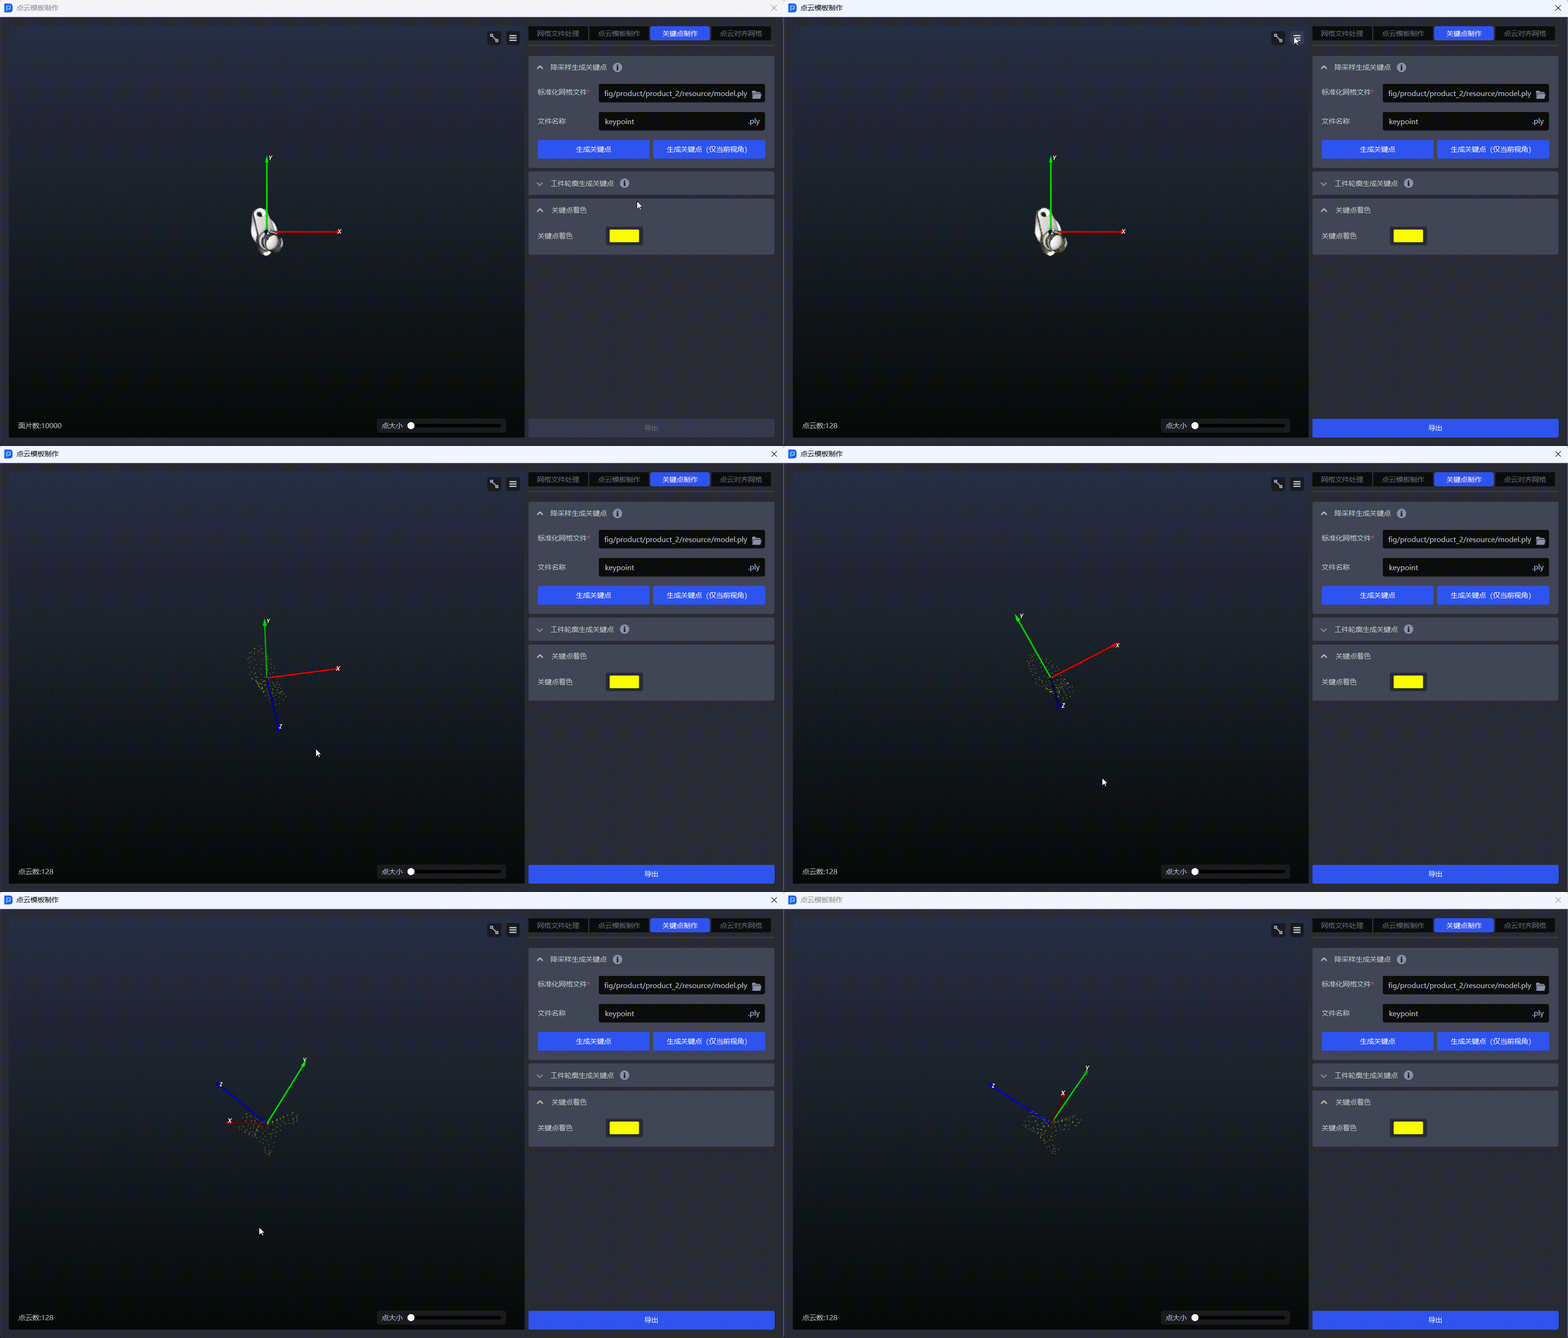
- If you only need to generate key points of the current perspective, you can click
Generate key points (current perspective only). The generated key points of the current perspective are as shown in the figure below.
3.2 Target contour generation key points
Function description
Through the imported standardized mesh file, key points distributed on the Target outline can be generated with one click.
Applicable to Scene
It is suitable for general TargetScene when evenly distributed key points cannot correctly identify the Target characteristics, especially when the Target has symmetry, positive and negative characteristics, etc. The key points generated based on the Target outline can be matched more accurately.
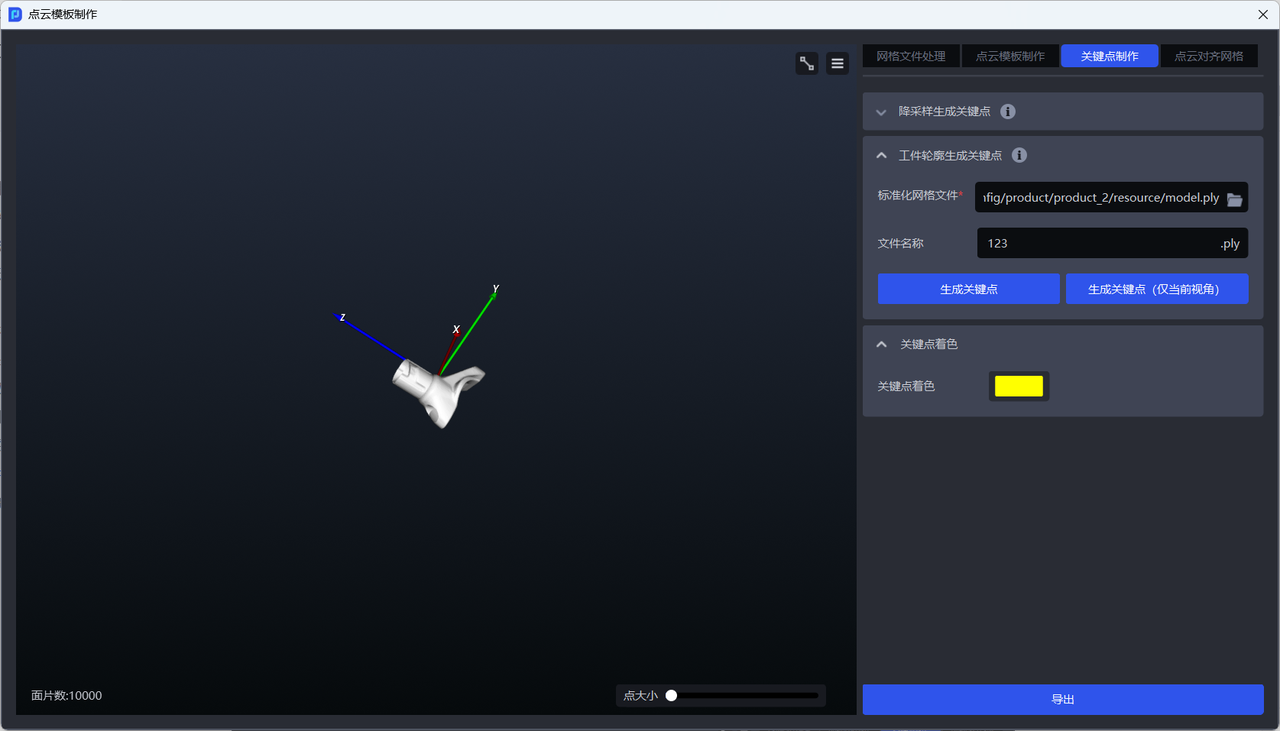
Switch to the
Key Point CreationwindowClick
Target outline to generate key pointsand upload the standardized grid file
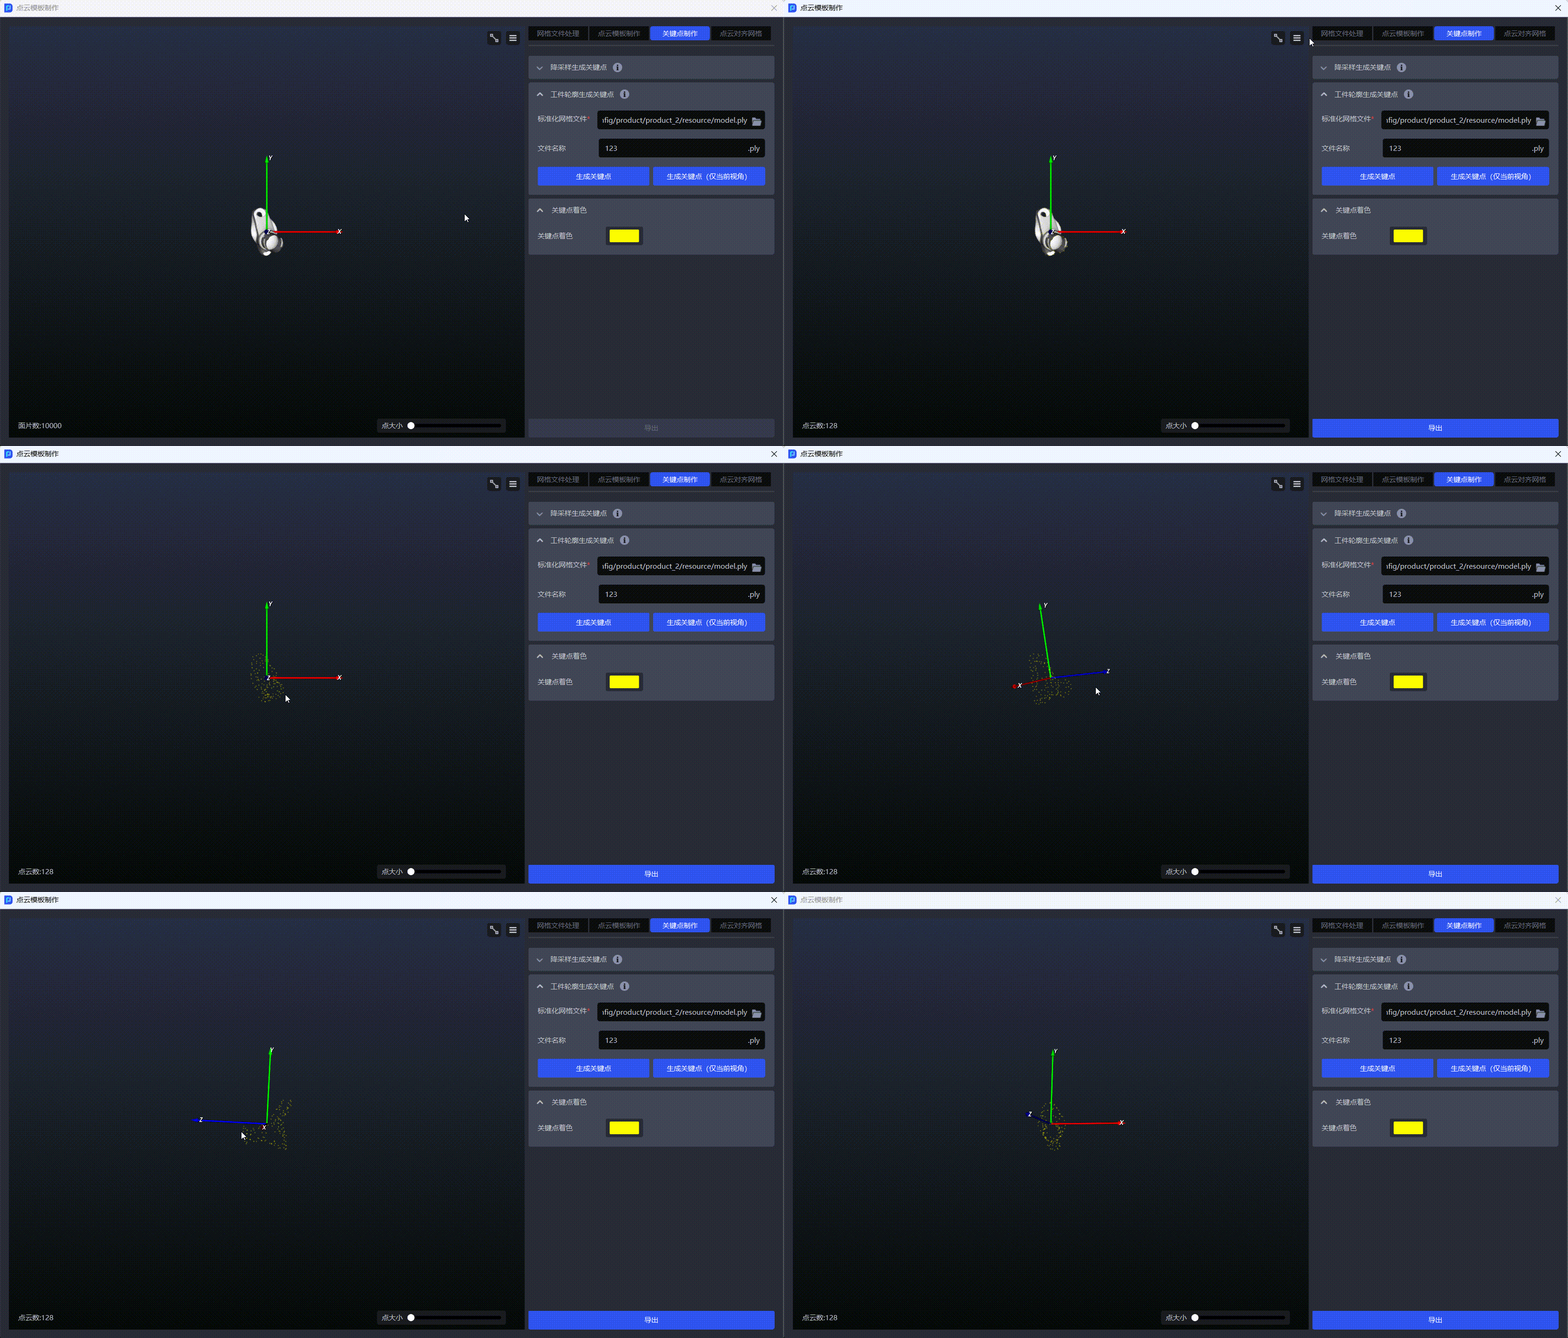
- If you need to generate all key points of Target, you can click
Generate Key Points. The full number of key points generated will be as shown in the figure below.
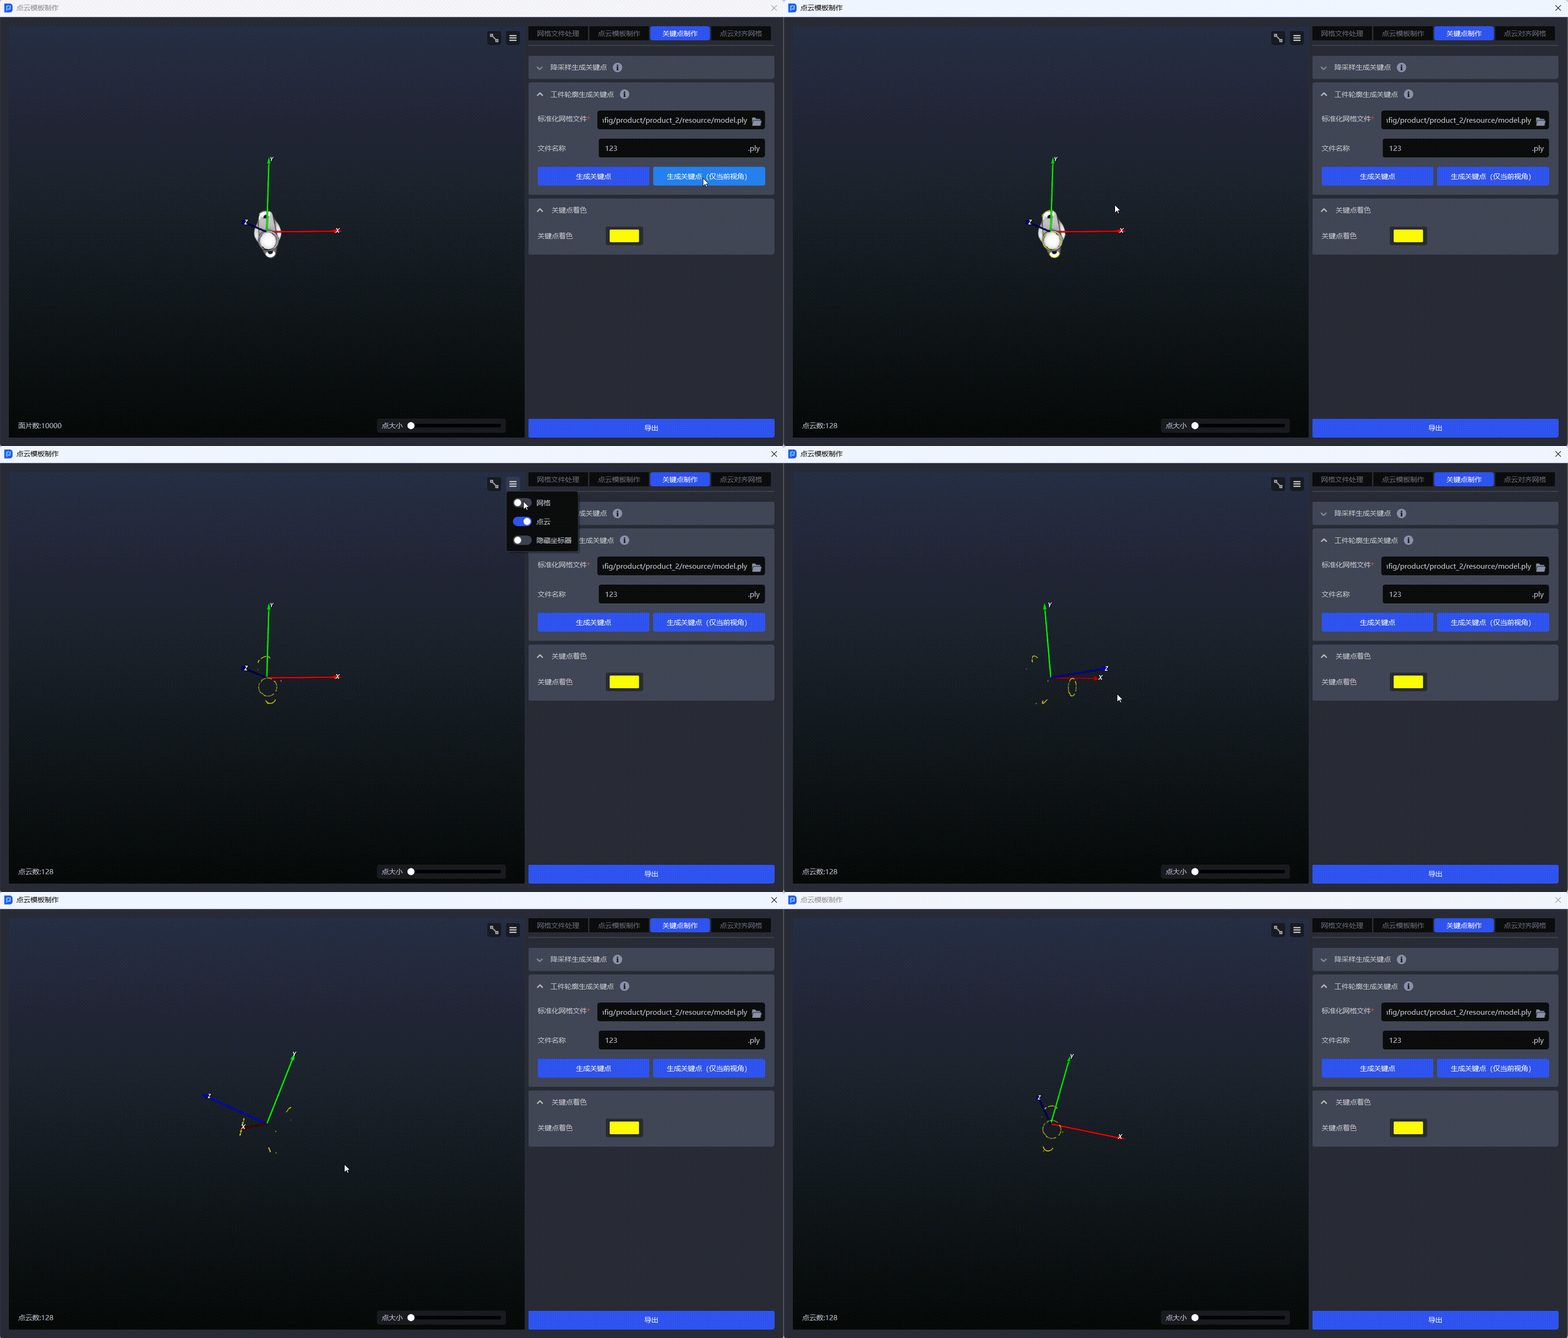
- If you only need to generate key points of the current perspective, you can click
Generate key points (current perspective only). The generated key points of the current perspective are as shown in the figure below.
4. Point Cloud Alignment Grid
Function description
Align PCD (Point Cloud Data) to the coordinate system of the standardized grid file.
Applicable to Scene
Applicable to universal TargetScene, this function is required when the standardized grid file is inconsistent with the coordinate system of the TargetPoint Cloud template (such as the Point Cloud template generated through Camera capture).
The reason for the need to align is: the Point Cloud template generated by the Camera image collection defaults to the Camera coordinates as the origin, and needs to be aligned with the coordinates of the standardized grid file to achieve consistent coordinate relationships between the grid file, key points (generated through the grid file, consistent with the grid file coordinate system), and the TargetPoint Cloud template. Only then can the universal Target perform normal subsequent identification and matching.
You need to connect the Camera before using Point Cloud Align Grid
Operation steps: Upload the standardized grid file and PCD (Point Cloud Data), fill in the name of the exported PCD (Point Cloud Data) and click Alignment Calculation. It supports custom adjustment of Point Cloud pose and Point Cloud template color.