DexVerse Operation Manual
DexVerse is a cloud platform that combines cloud native technology and MixedAI capabilities to automatically trigger, manage, schedule and monitor deep learning training tasks. It mainly serves industrial Visual Model training and embodied intelligence research and development scenes.
Core functions and features include:
Task management capabilities: Support the full life cycle management of deep learning training tasks, including automatic triggering, dynamic scheduling, real-time monitoring, etc. You can view task status, download data or models, and handle task failure, cancellation, resume, and other operations.
Advantages of technology integration: Based on cloud native technology, it realizes resource elastic scaling and dynamic task scheduling, combined with MixedAI's simulation and machine learning capabilities, lowering the threshold for MixedAI application. Users do not need to manage MixedAI versions or subdivide hardware resources by themselves.
Integrated use of Scene: Through the "one-click connection" function of PickWiz, data generation and model training can be completed in the cloud based on the exported training configuration (such as zip file) (only supported for intranet use).
Embodied intelligence support: In embodied intelligence research and development, it provides functions such as model full life cycle management (pre-training, fine-tuning, inference), data engine (Real2Sim data projection, generative data amplification, automated skill amplification), online adaptive fine-tuning, and high-fidelity simulation verification.
1. Create tasks
(1) Access the DexVerse training platform address of the production environment http://192.168.4.135:8081/,打开如下登录界面,使用飞书扫码登录。
(2) After logging in, enter the "New Task" page in the "Task Management" module, as shown in the figure below:
(3) You can create a new training task in the page shown below. Note: At this time, you must fill in the task name and upload the task data file (compress the generated zip file after modification in Step2), and click the "Create Task" button to create a new task. The following figure:
(4) After the new task is successfully created, it will automatically jump to the task list page, as shown below:
(5) Click the "Details" button on the far right to open the detailed information page of the corresponding task, as shown below:
(6) Click the circular icon in the upper right corner to open the personal center and log out of the login page. Among them, the personal center page is as follows:
(7) The logout page is as follows:
2. View the trained model type
PickWiz 1.7.1 adds new model type field
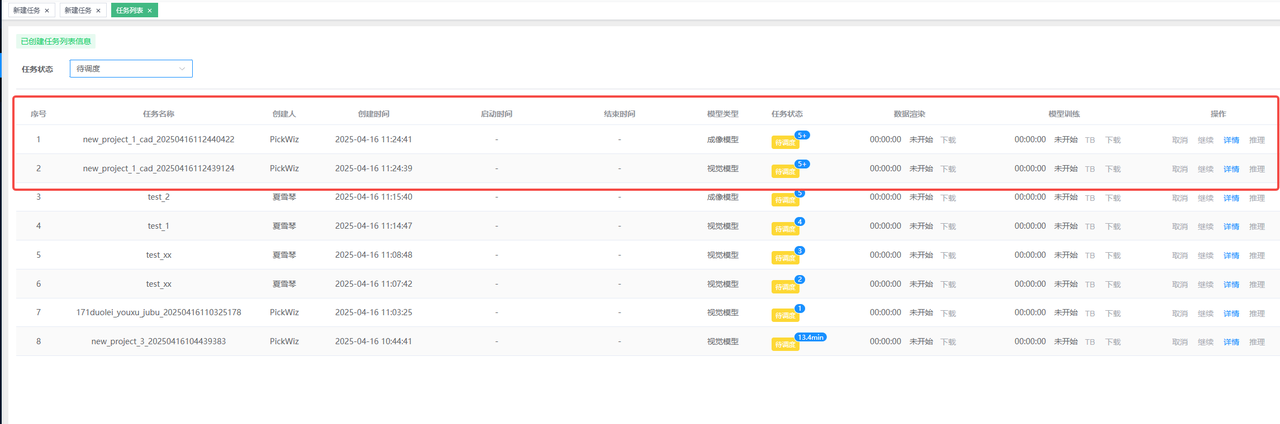
3. View task details
4. Cancel task
Currently, only tasks in the following statuses can be canceled:
To be scheduled
Scheduling
Running
5. Resume the task
Continuing a task, or task resume, means that a failed task can be restarted. The task will run again on the server where it was last executed. If the target server has no available resources (GPU) at this time, it will be queued to wait.
6. Download the model exported by the task
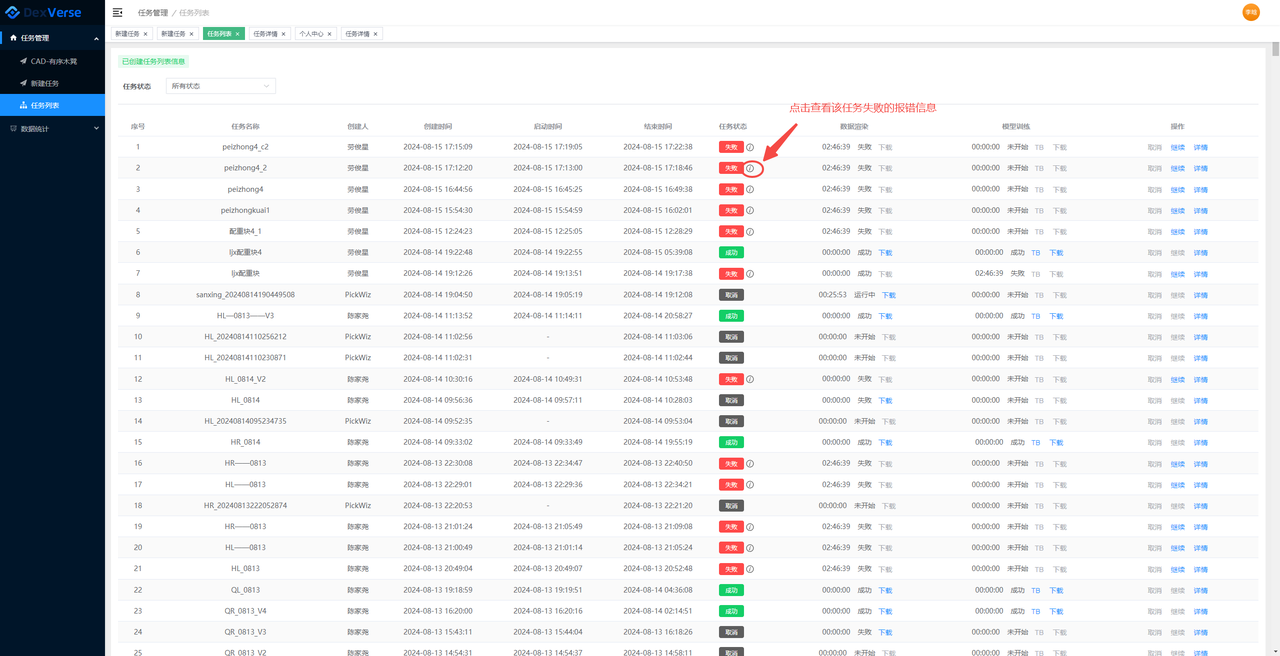
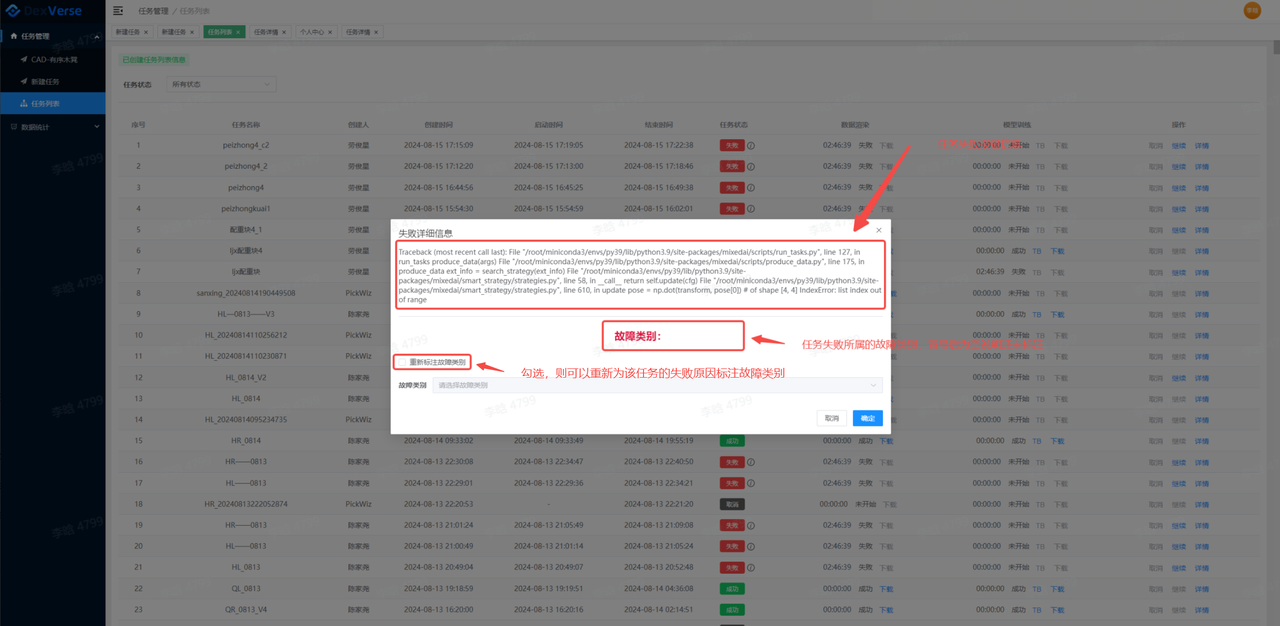
7. Check the reason for failure