Front-Back Identification (via Point Cloud Template) Usage Guide
Front-Back Identification (through Point Cloud template) can import the Point Cloud templates of the front and back of the Target to match and capture the front or back of the Target, and the Pick Point can be set for the front or back of the Target respectively. This article mainly introduces how to configure the front and back of the Target and adjust the related visual Parameters after turning on Front-Back Identification (through the Point Cloud template).
Front-Back Identification (through Point Cloud template) function is applicable to Picking randomly arranged general type target objects, Picking of randomly arranged plane type target objects, Surface type ordered/Loading and unloading of randomly arranged target objects, General Target ordered/unordered loading and unloading, Surface type Target ordered loading and unloading (materials are isolated from each other), Plane type Target positioned assembly (only Point Cloud matches), Plane type Target positioned assembly and General Target positioned assembly
Positive and negative template production: PickWiz’s Point Cloud template production function
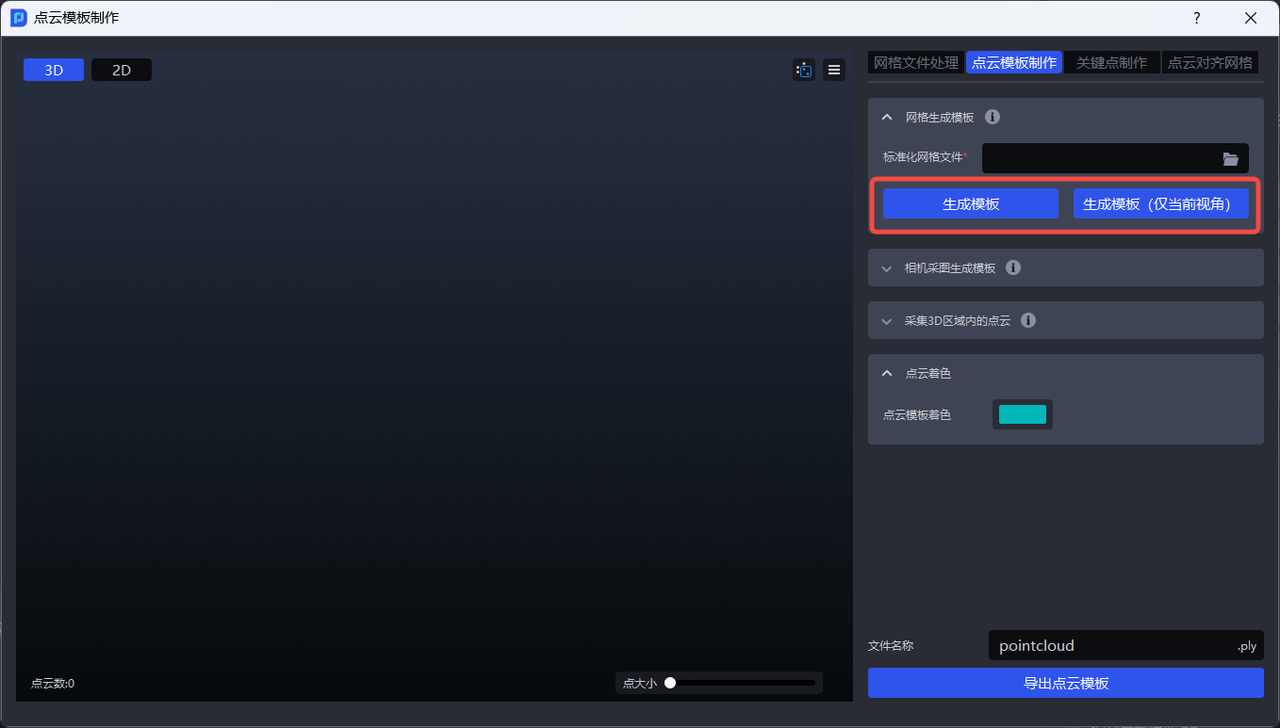
Operation Guide
1. Face type Target
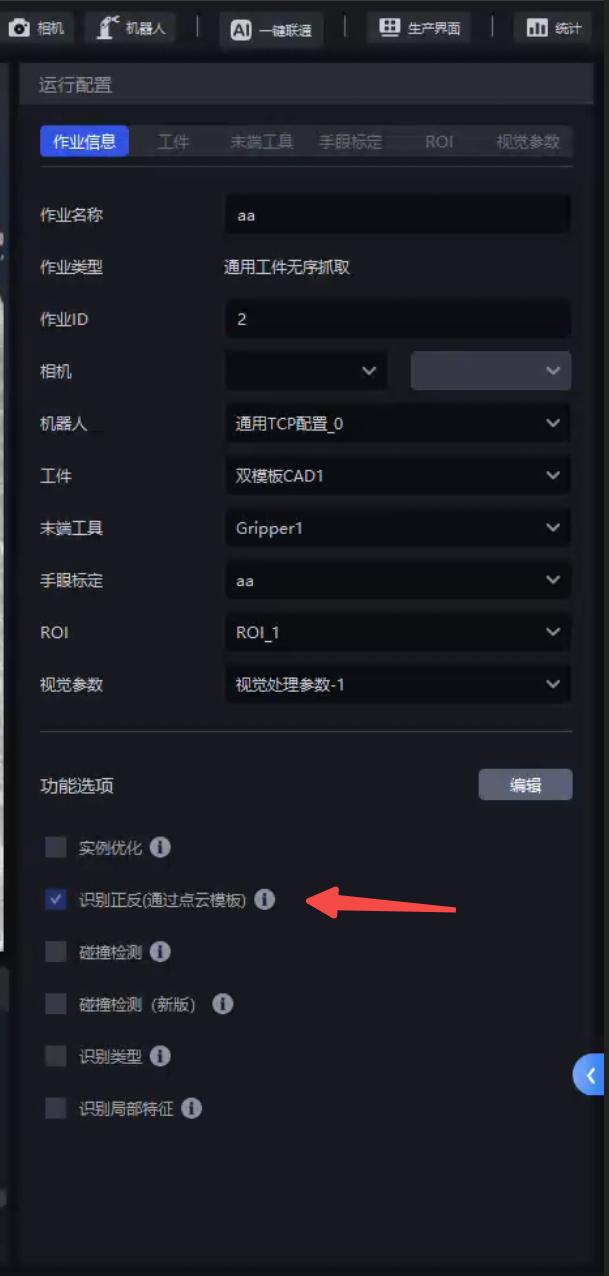
1.1 When the front and back sides of the Target in the actual Scene are quite different, check the Front-Back Identification (via Point Cloud template) function when creating a new project; if it is not checked when creating a new project, click Edit in the lower right corner of the Task information interface, then check Front-Back Identification (via Point Cloud template) and save.
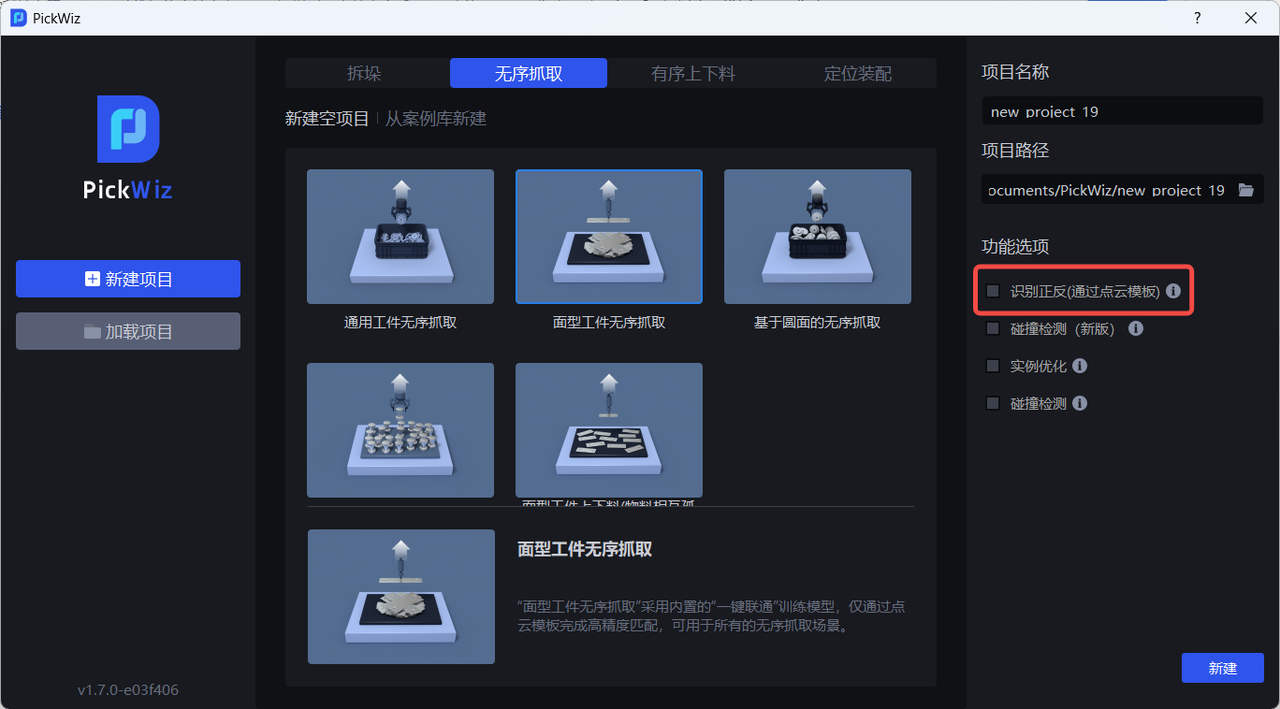
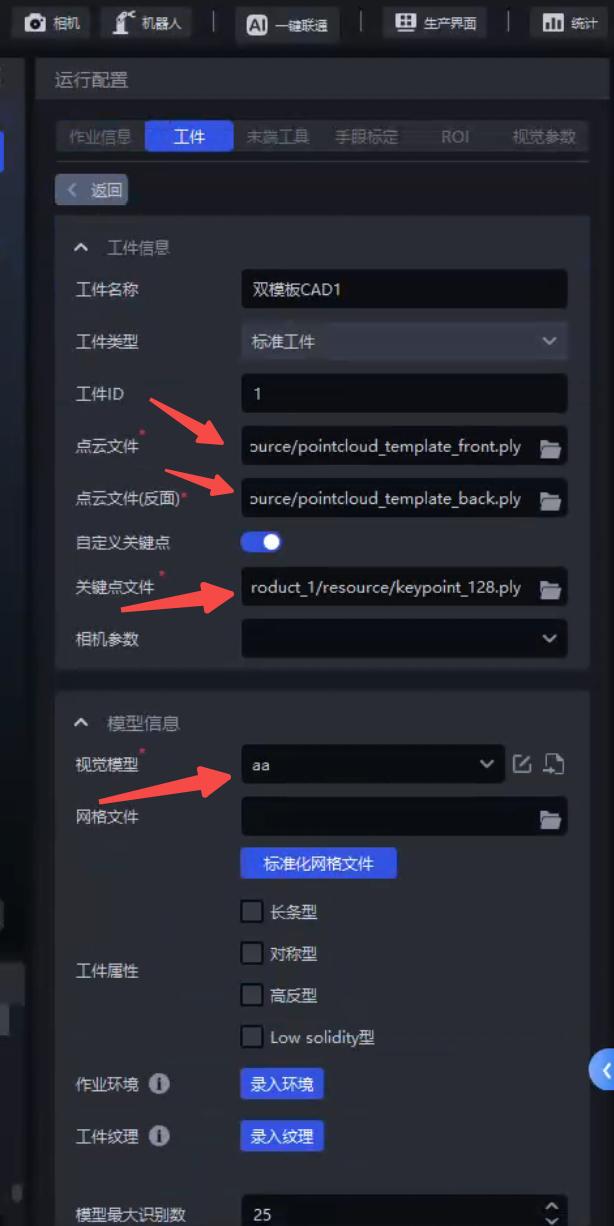
1.2 Configure dual template CAD on the Target interface, upload Target's PCD (Point Cloud Data), PCD (Point Cloud Data) (reverse side), Visual Model and custom key points.
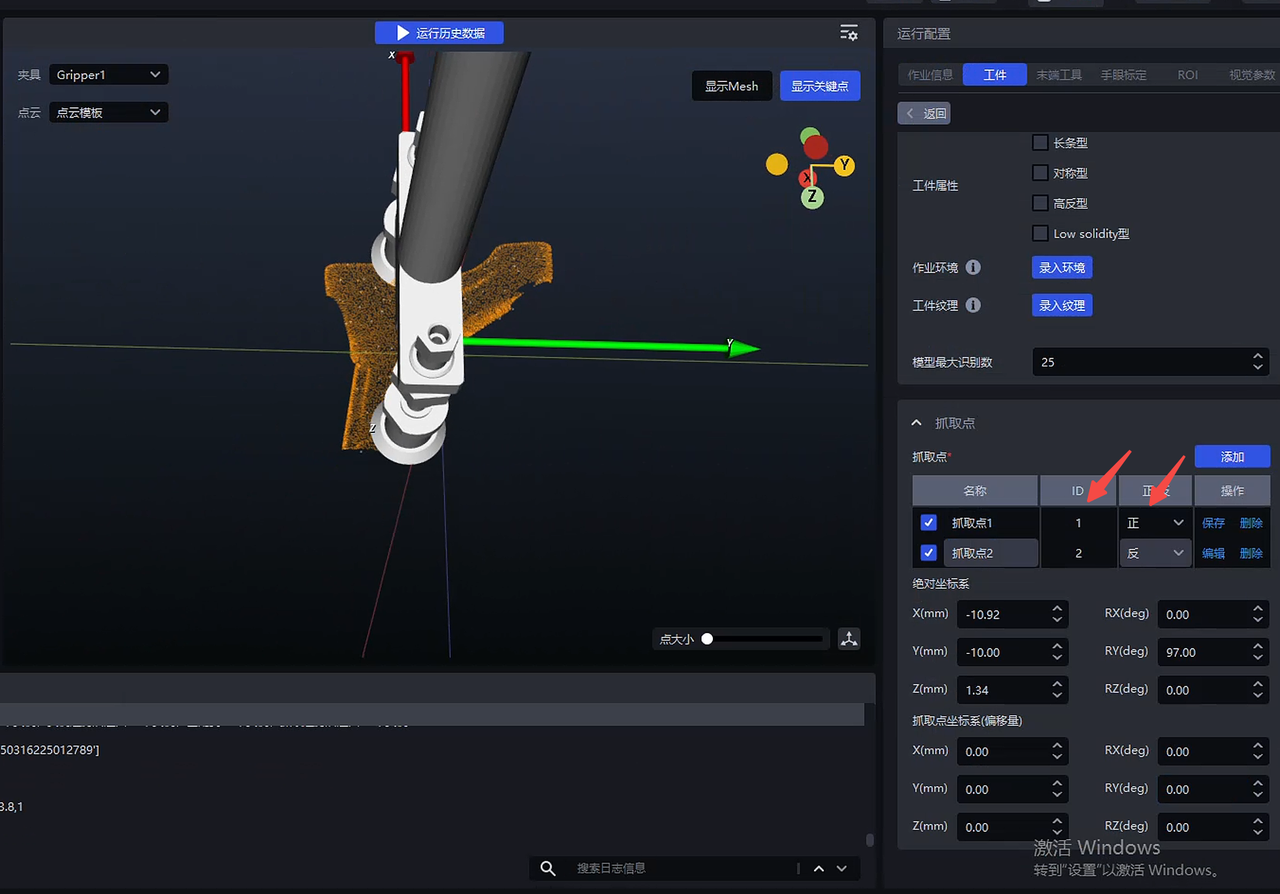
1.3 Set the Pick Point corresponding to the front and back templates respectively.
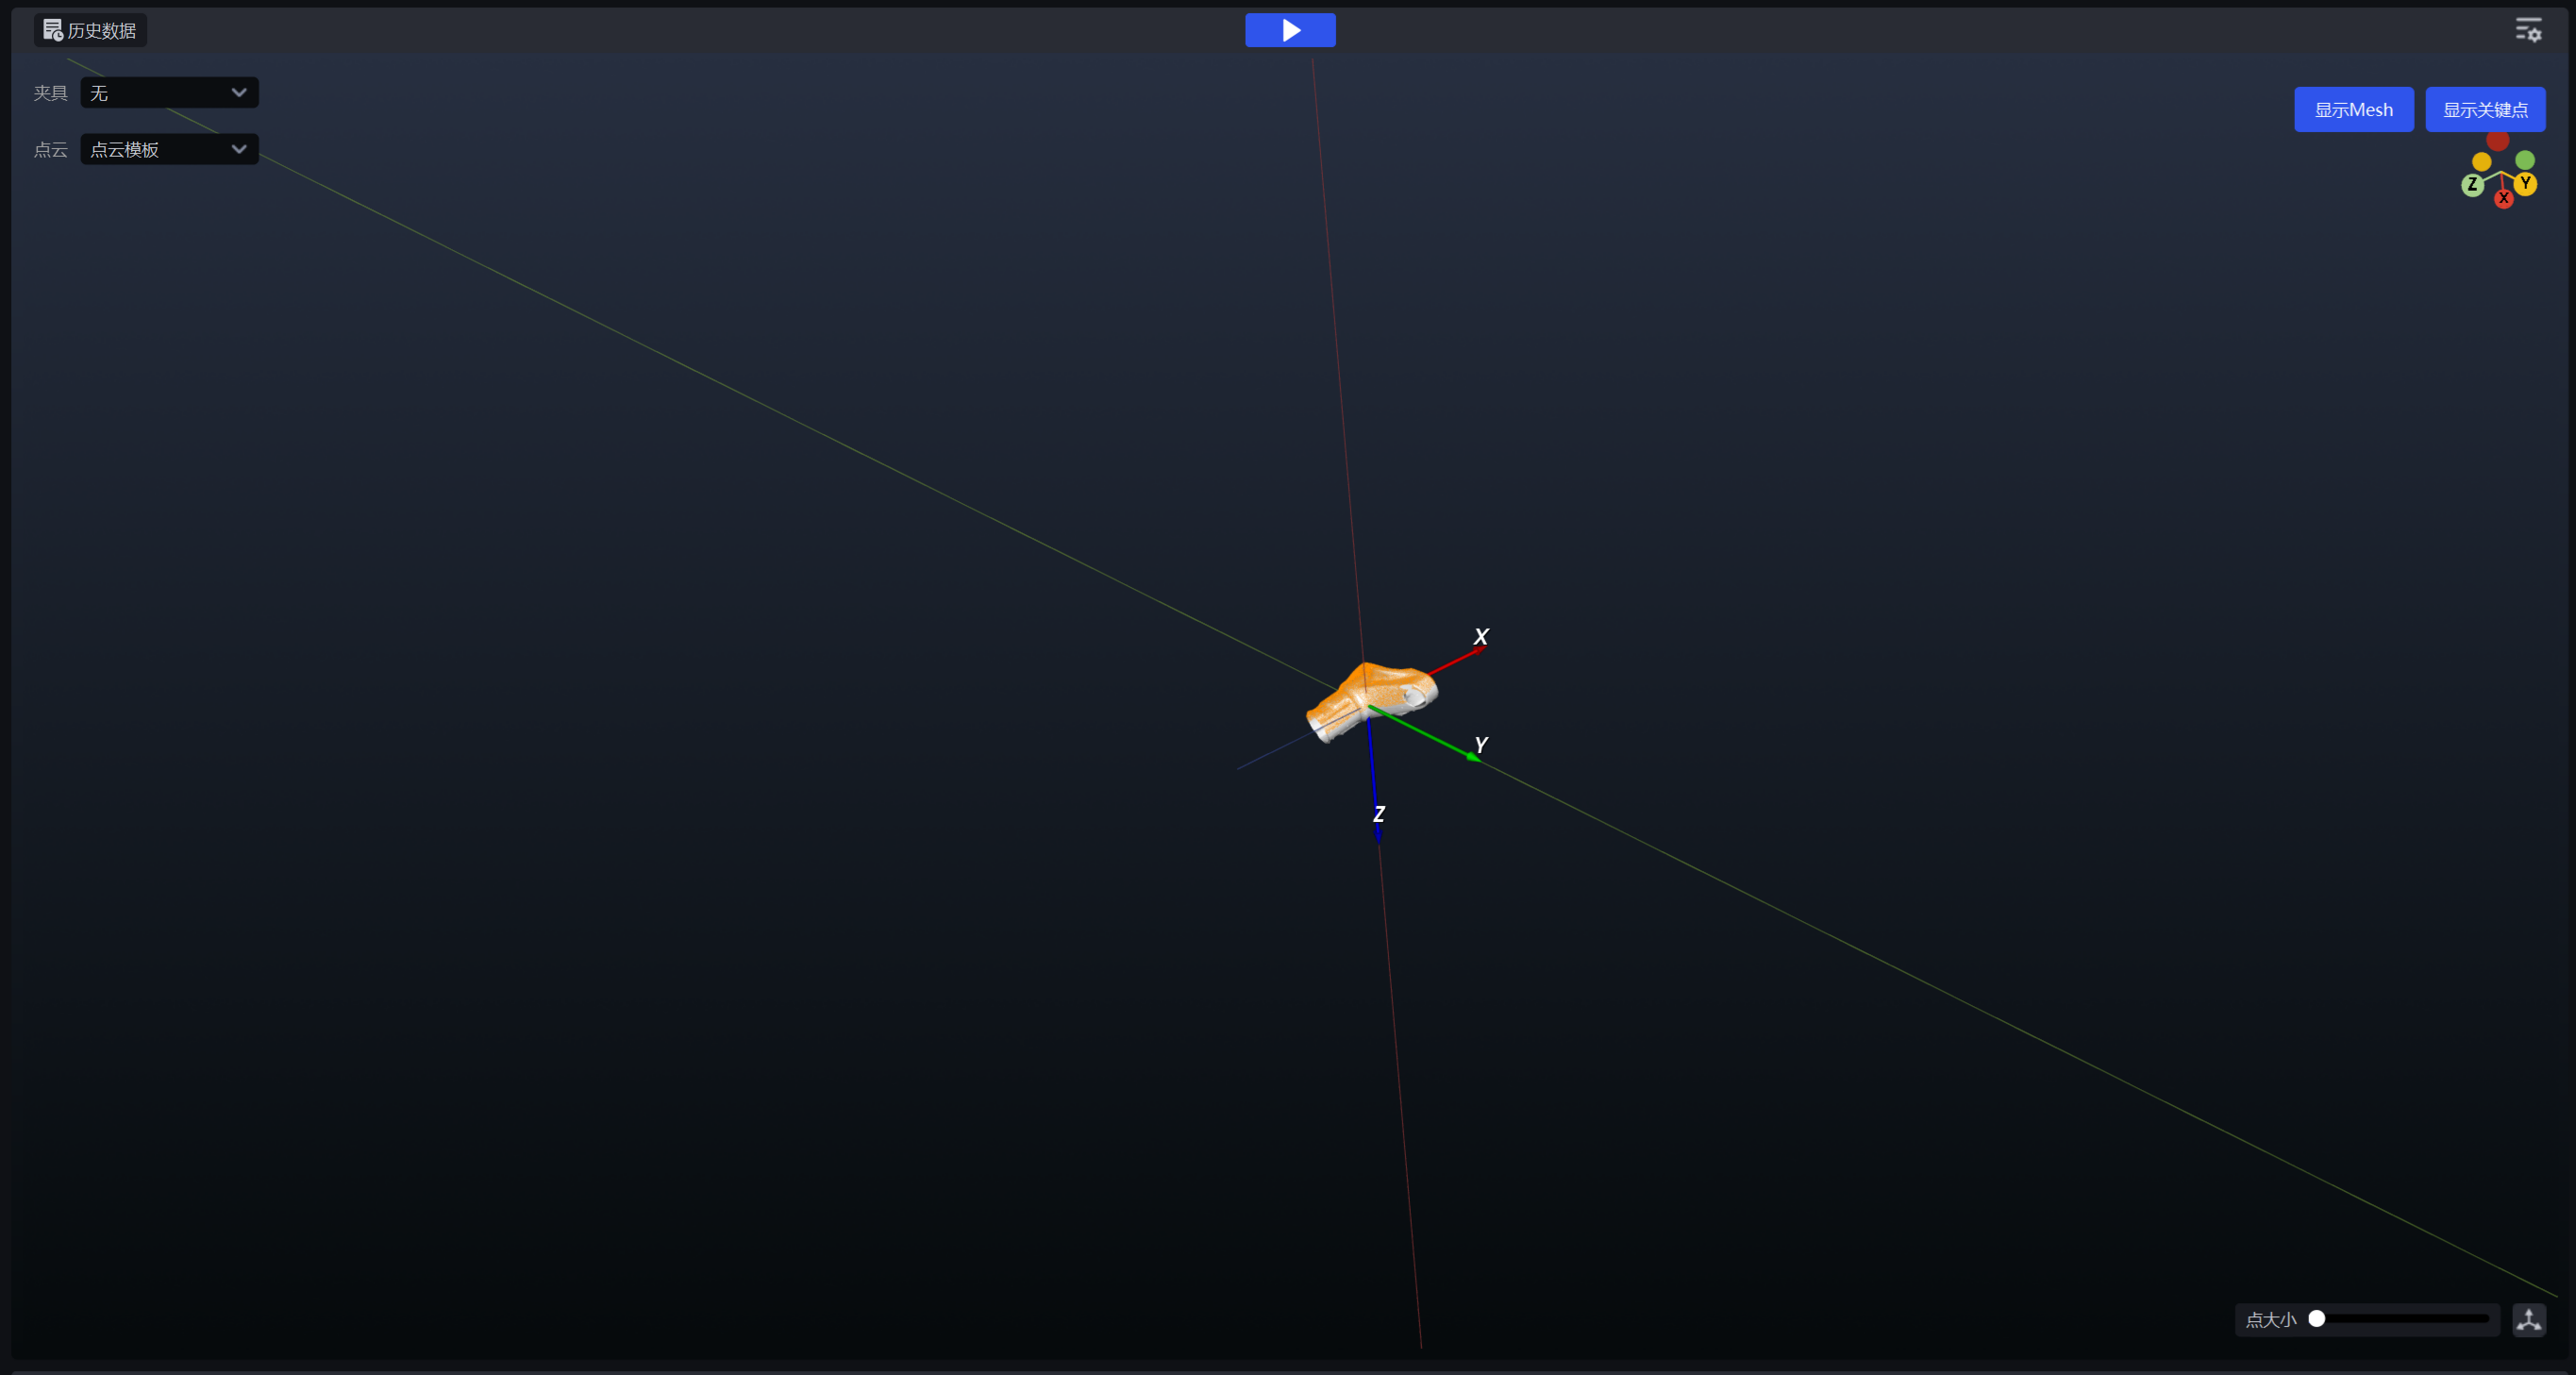
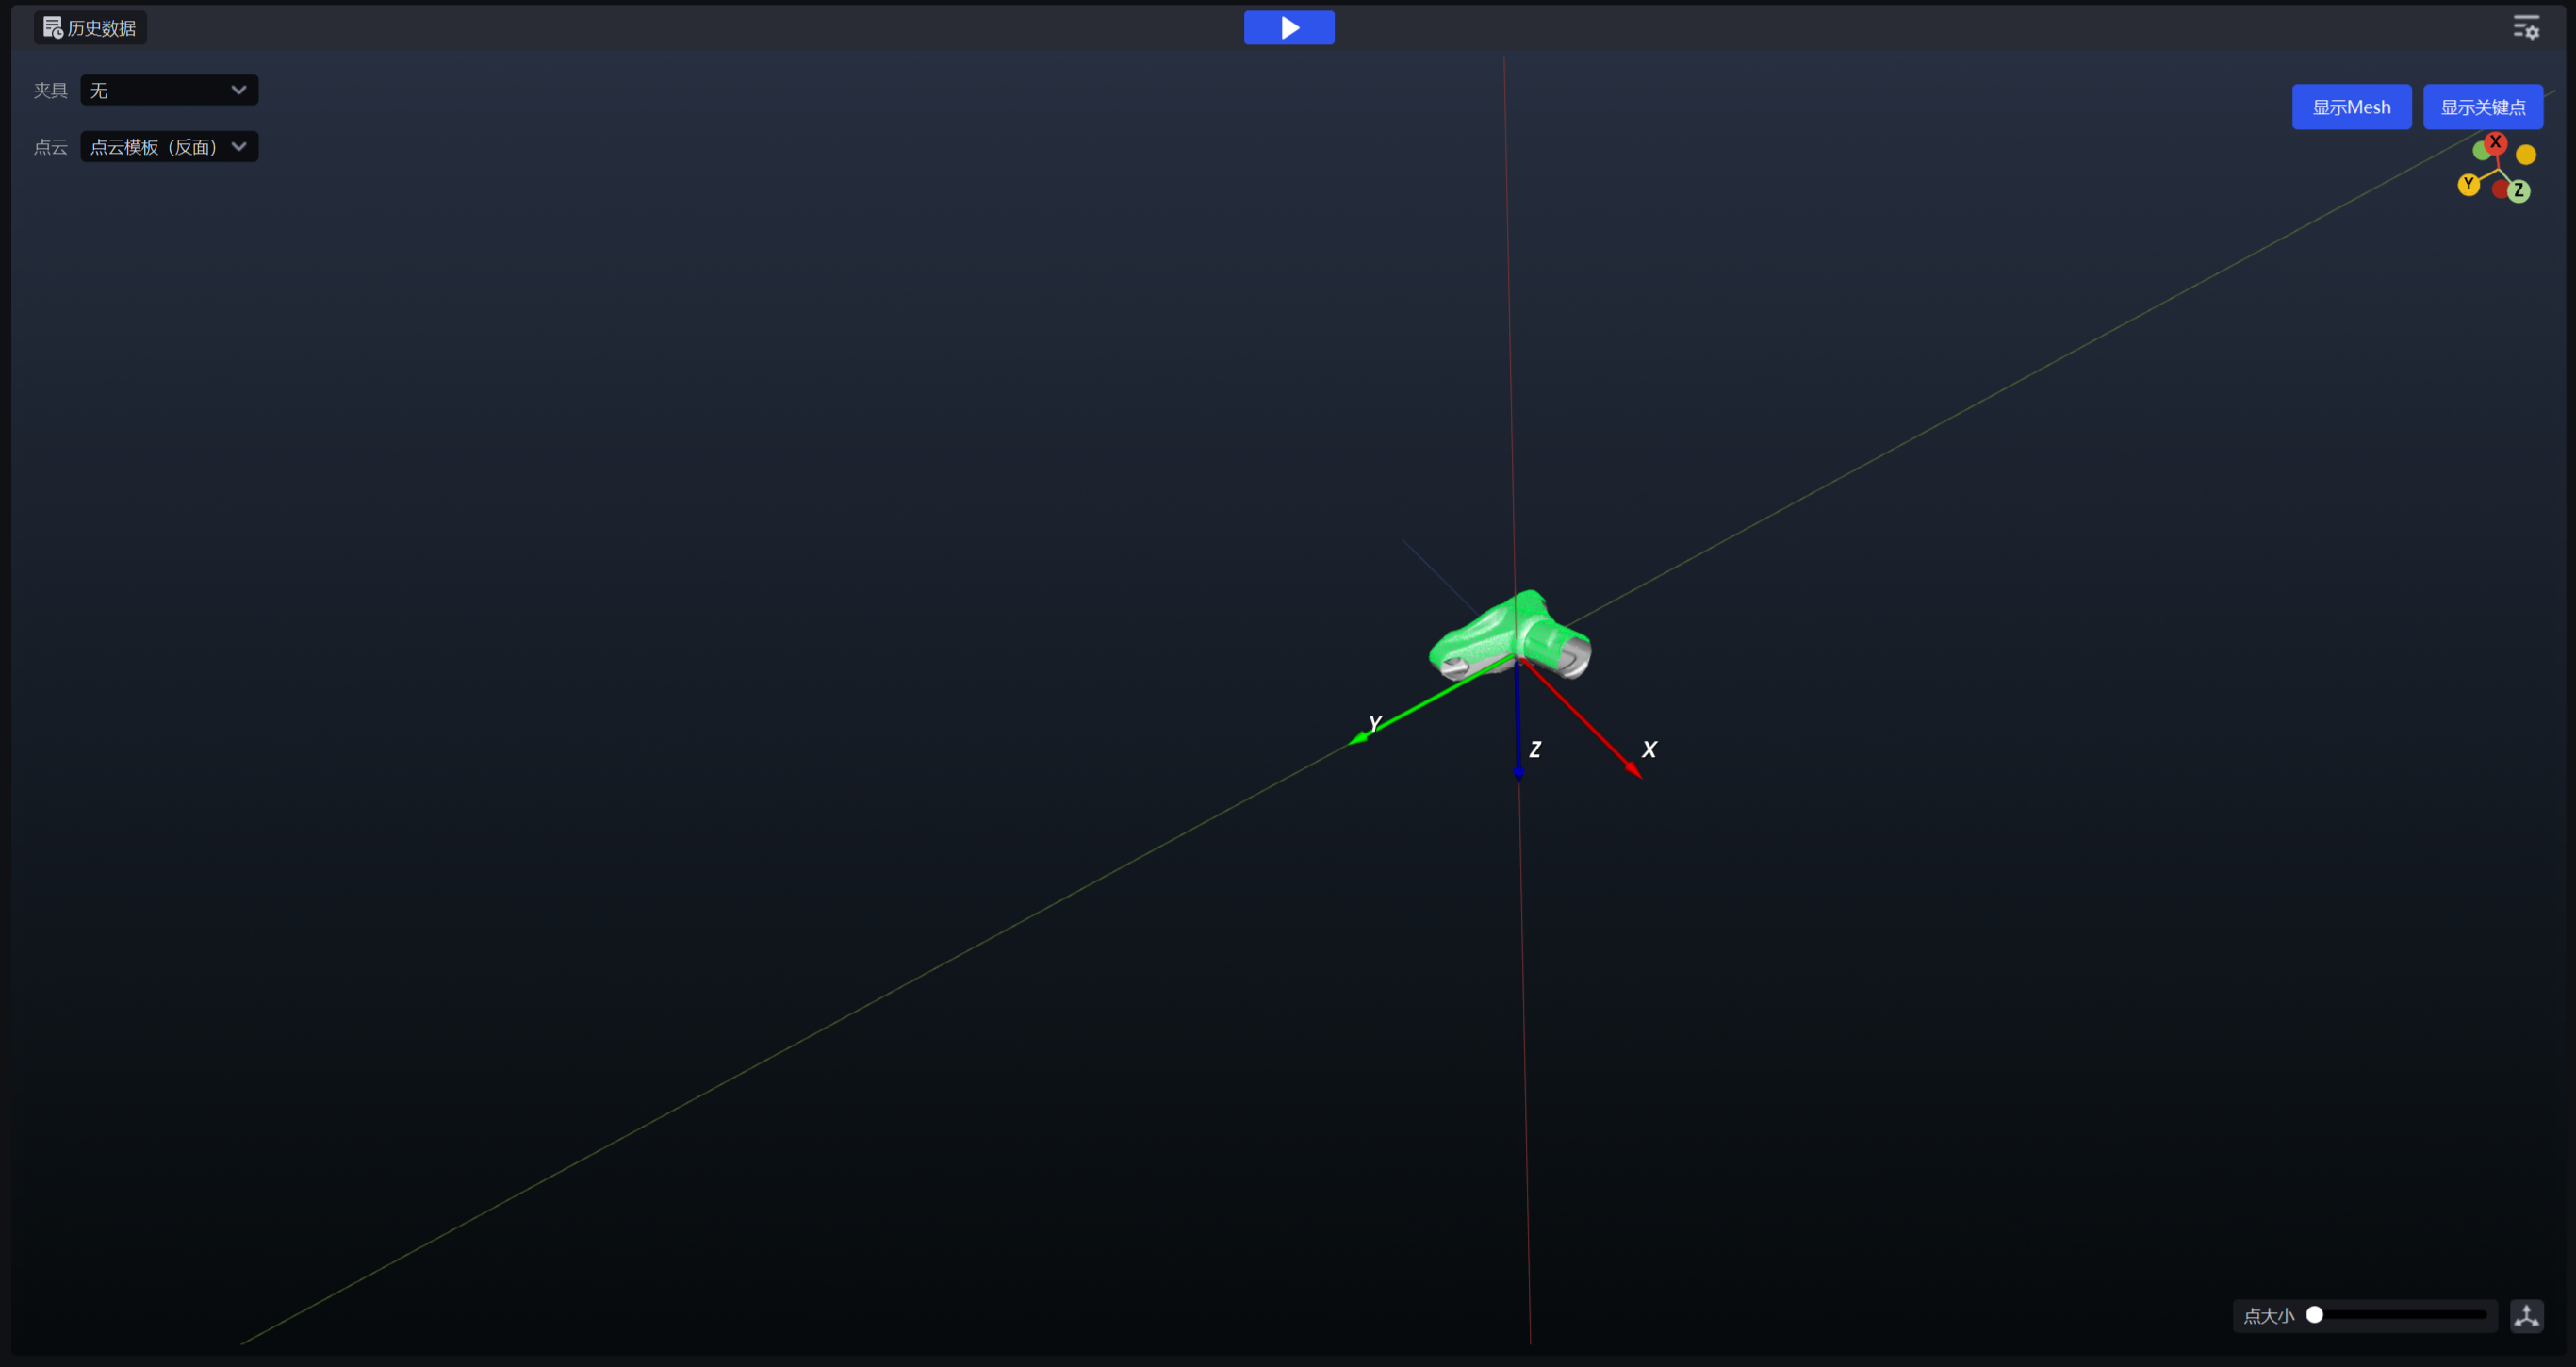
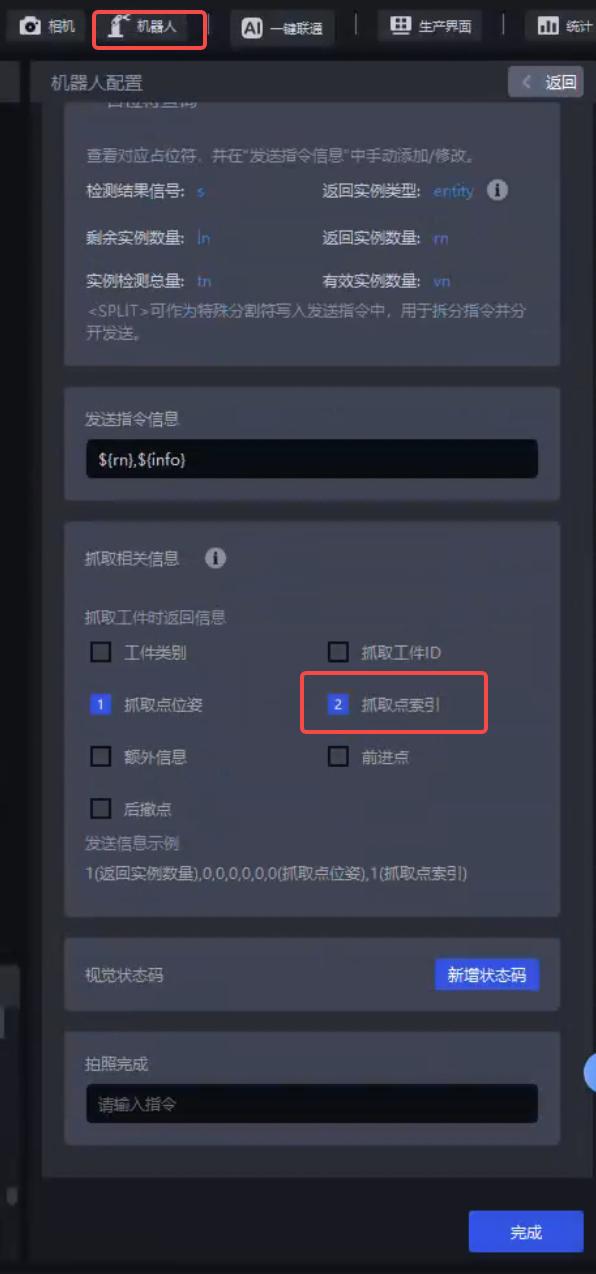
1.4 In Robot configuration, grab relevant information and check Pick Point Index
Notice
The Pick Pointid returned by Robot should correctly correspond to the positive and negative templates
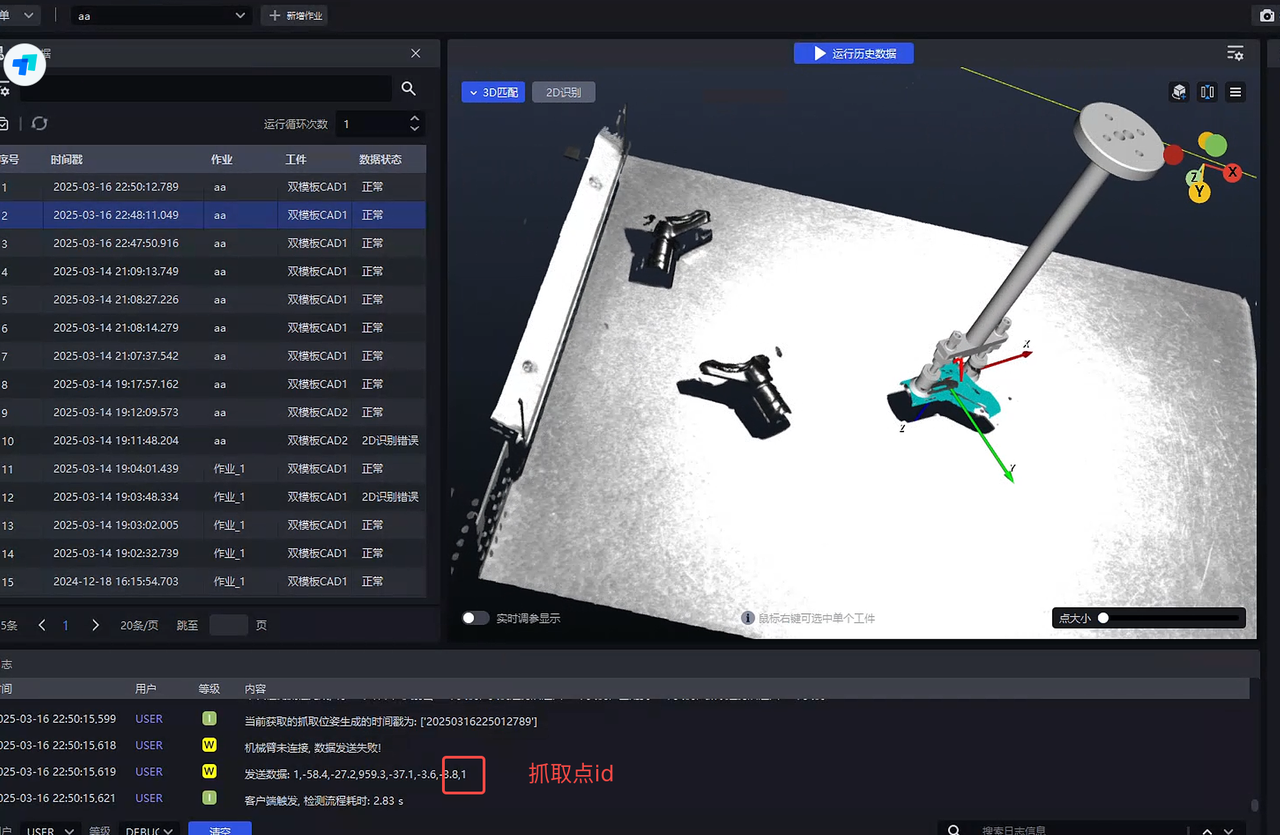
2. Universal Target and the front and back of the Target are the same shape
Examples are as follows:
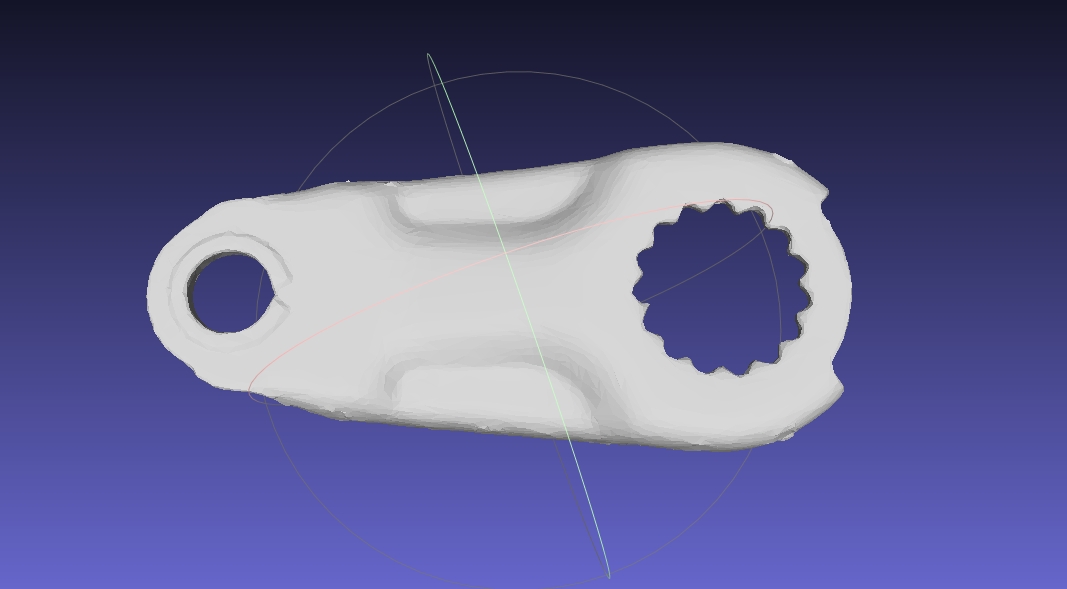 Front Front | 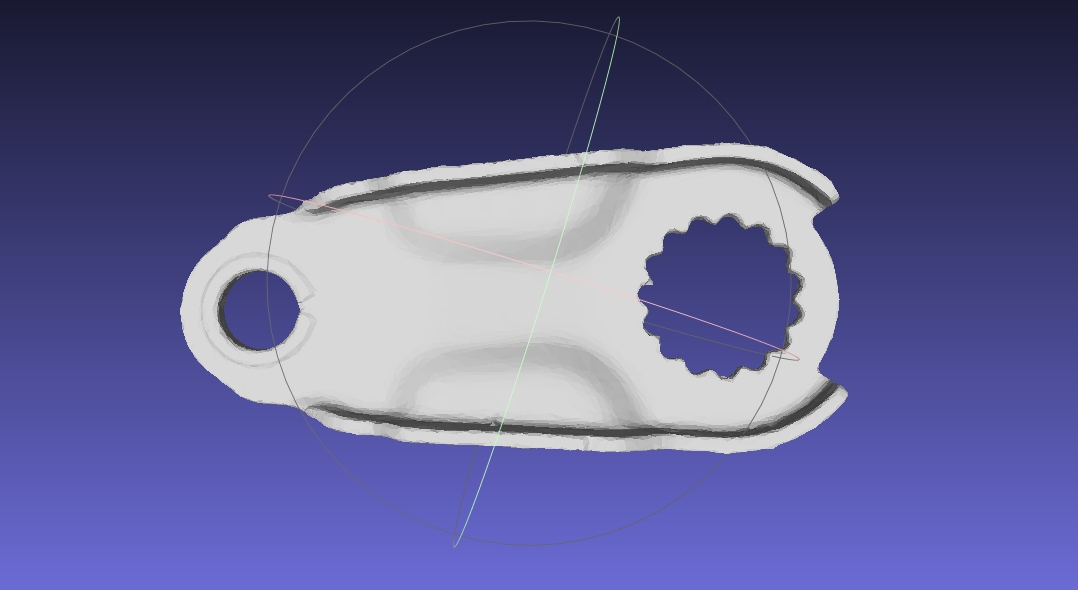 Back Back |
|---|
2.1 Same as above1.1
2.2 Configure dual template CAD on the Target interface, upload Target's PCD (Point Cloud Data), PCD (Point Cloud Data) (reverse side), Visual Model and custom key points.
PickWiz will match the general target based on the original template according to the key point situation. If the key point prediction is wrong, it will match the reverse direction. In this case, use the score comparison of the interleaved template to correct the error. The front and back templates cannot fit the front and back of the CAD, but must be modified to intersect with each other.
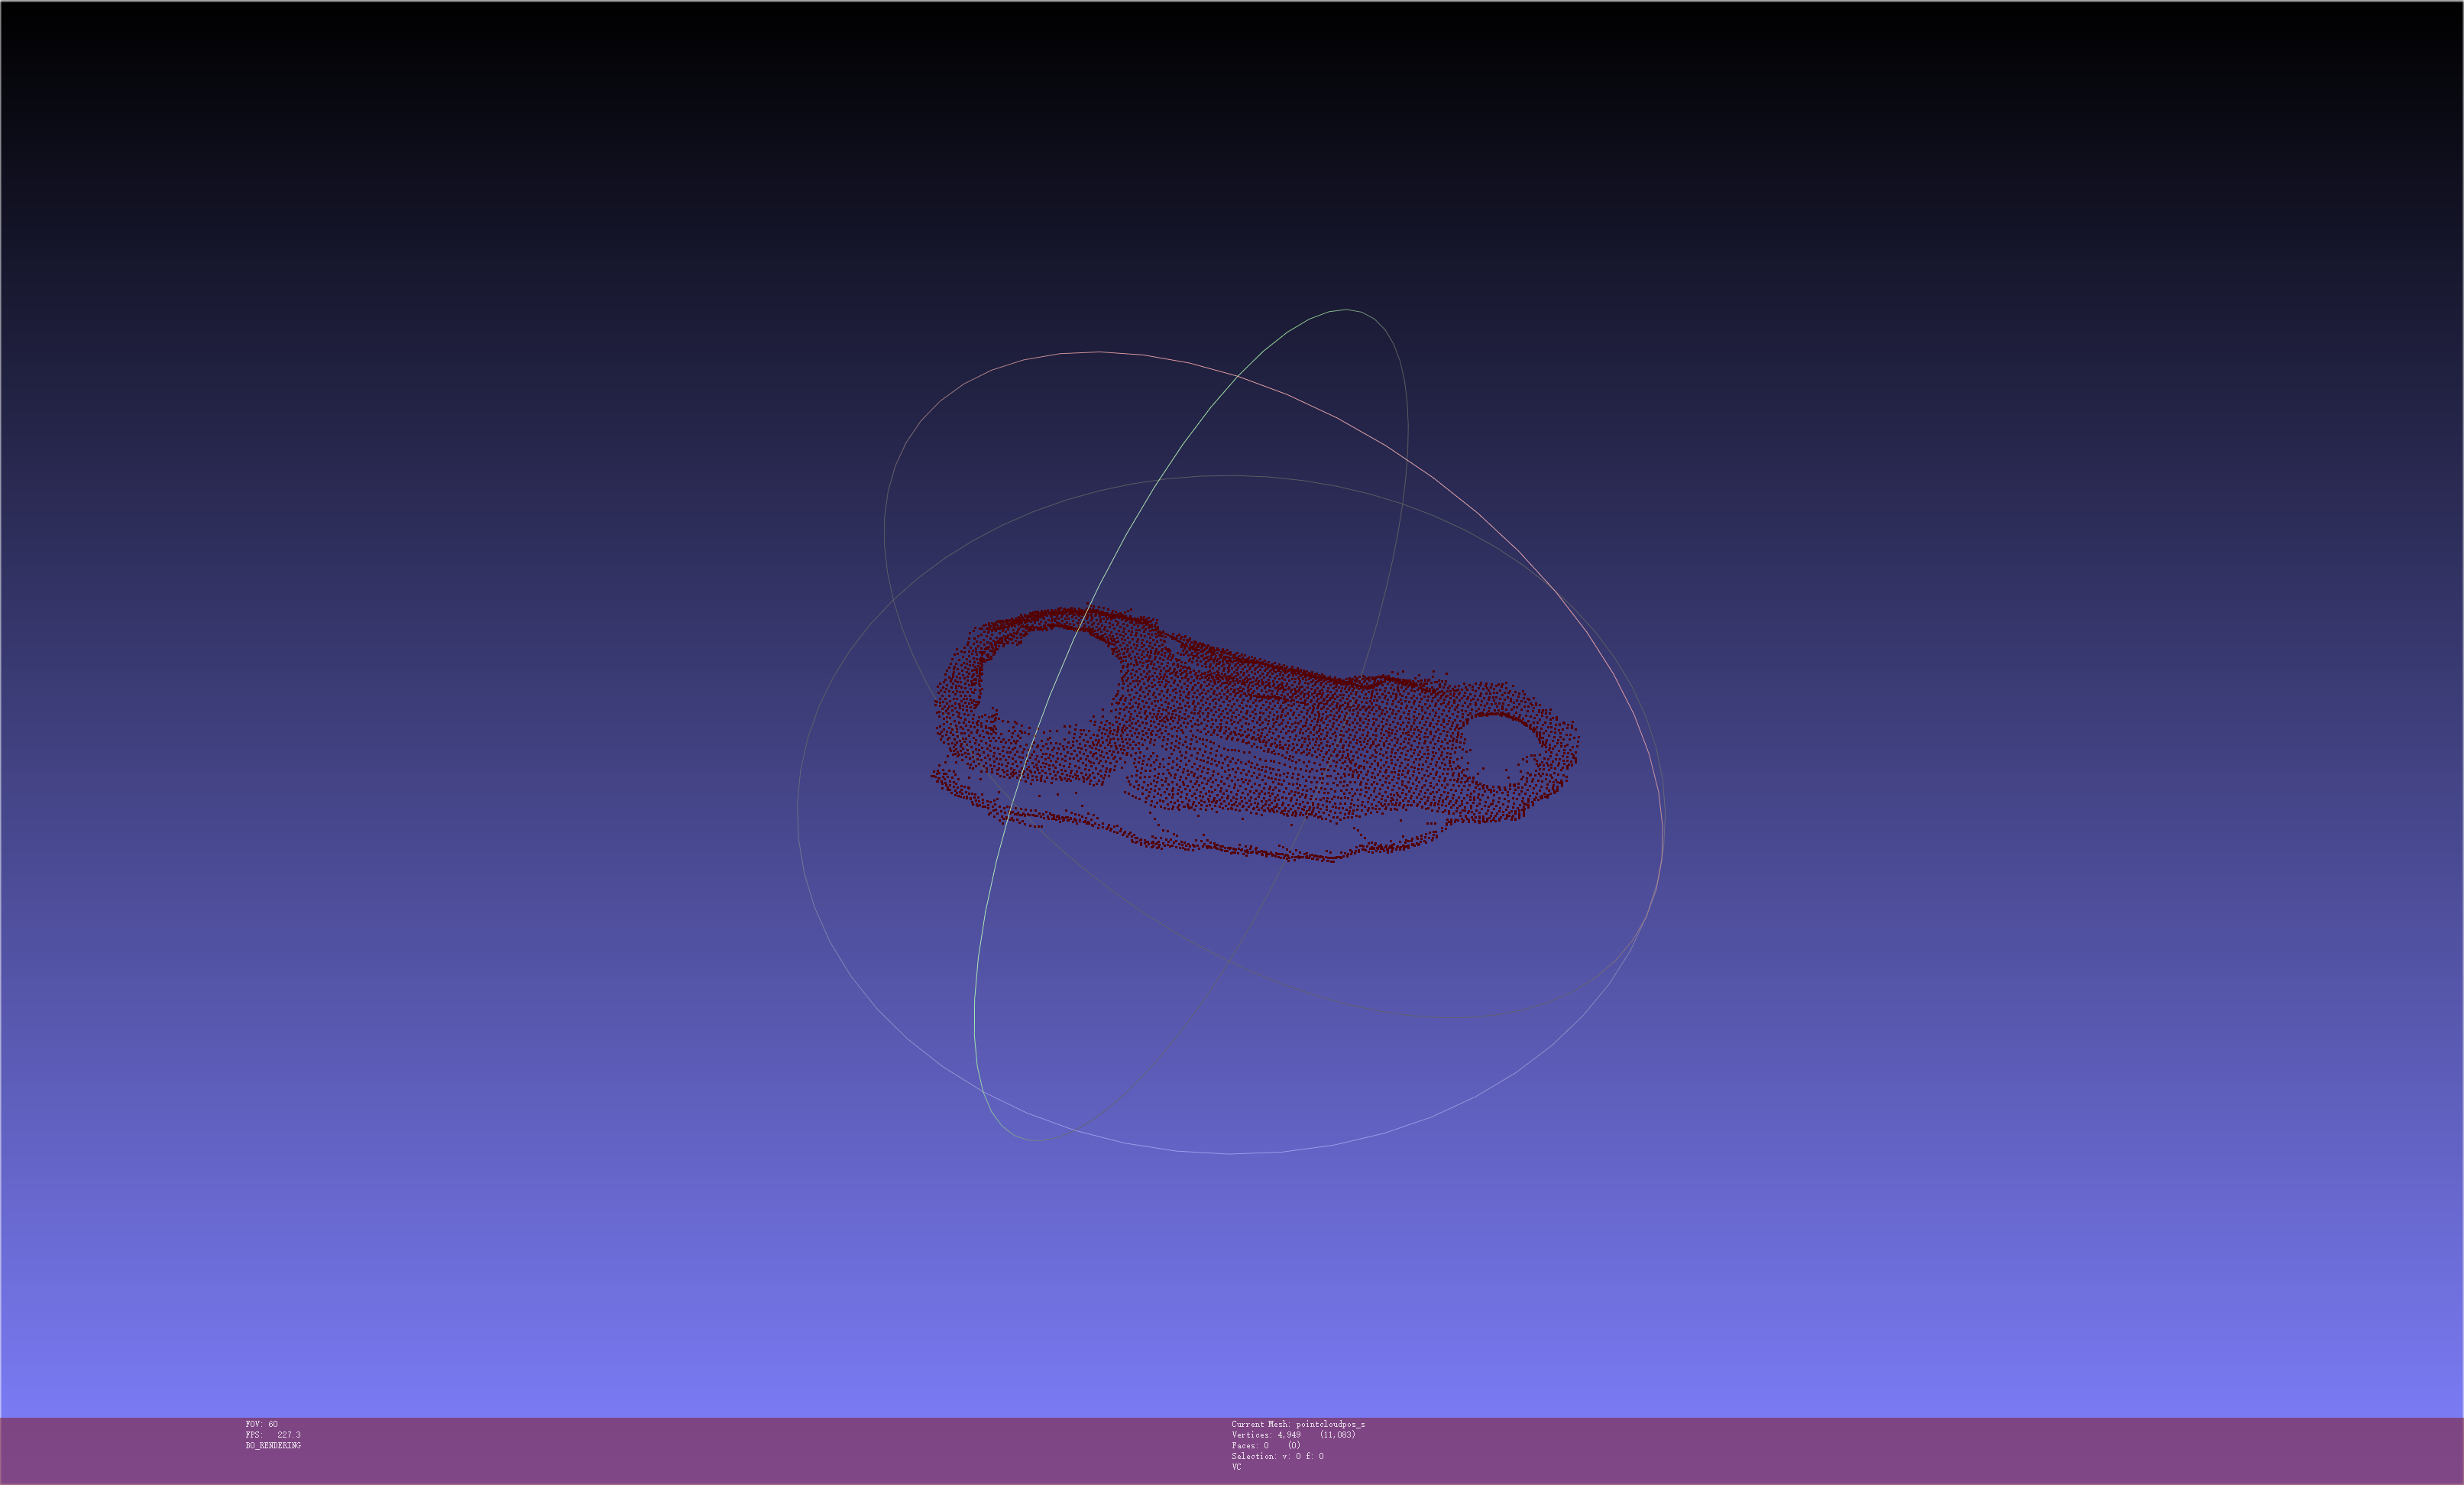
When the Target is of the same shape, the front and back templates need to be staggered with each other and on the same level. As shown below.
The following are the front and back templates of TargetPoint Cloud. The two templates need to be staggered on the same horizontal plane.
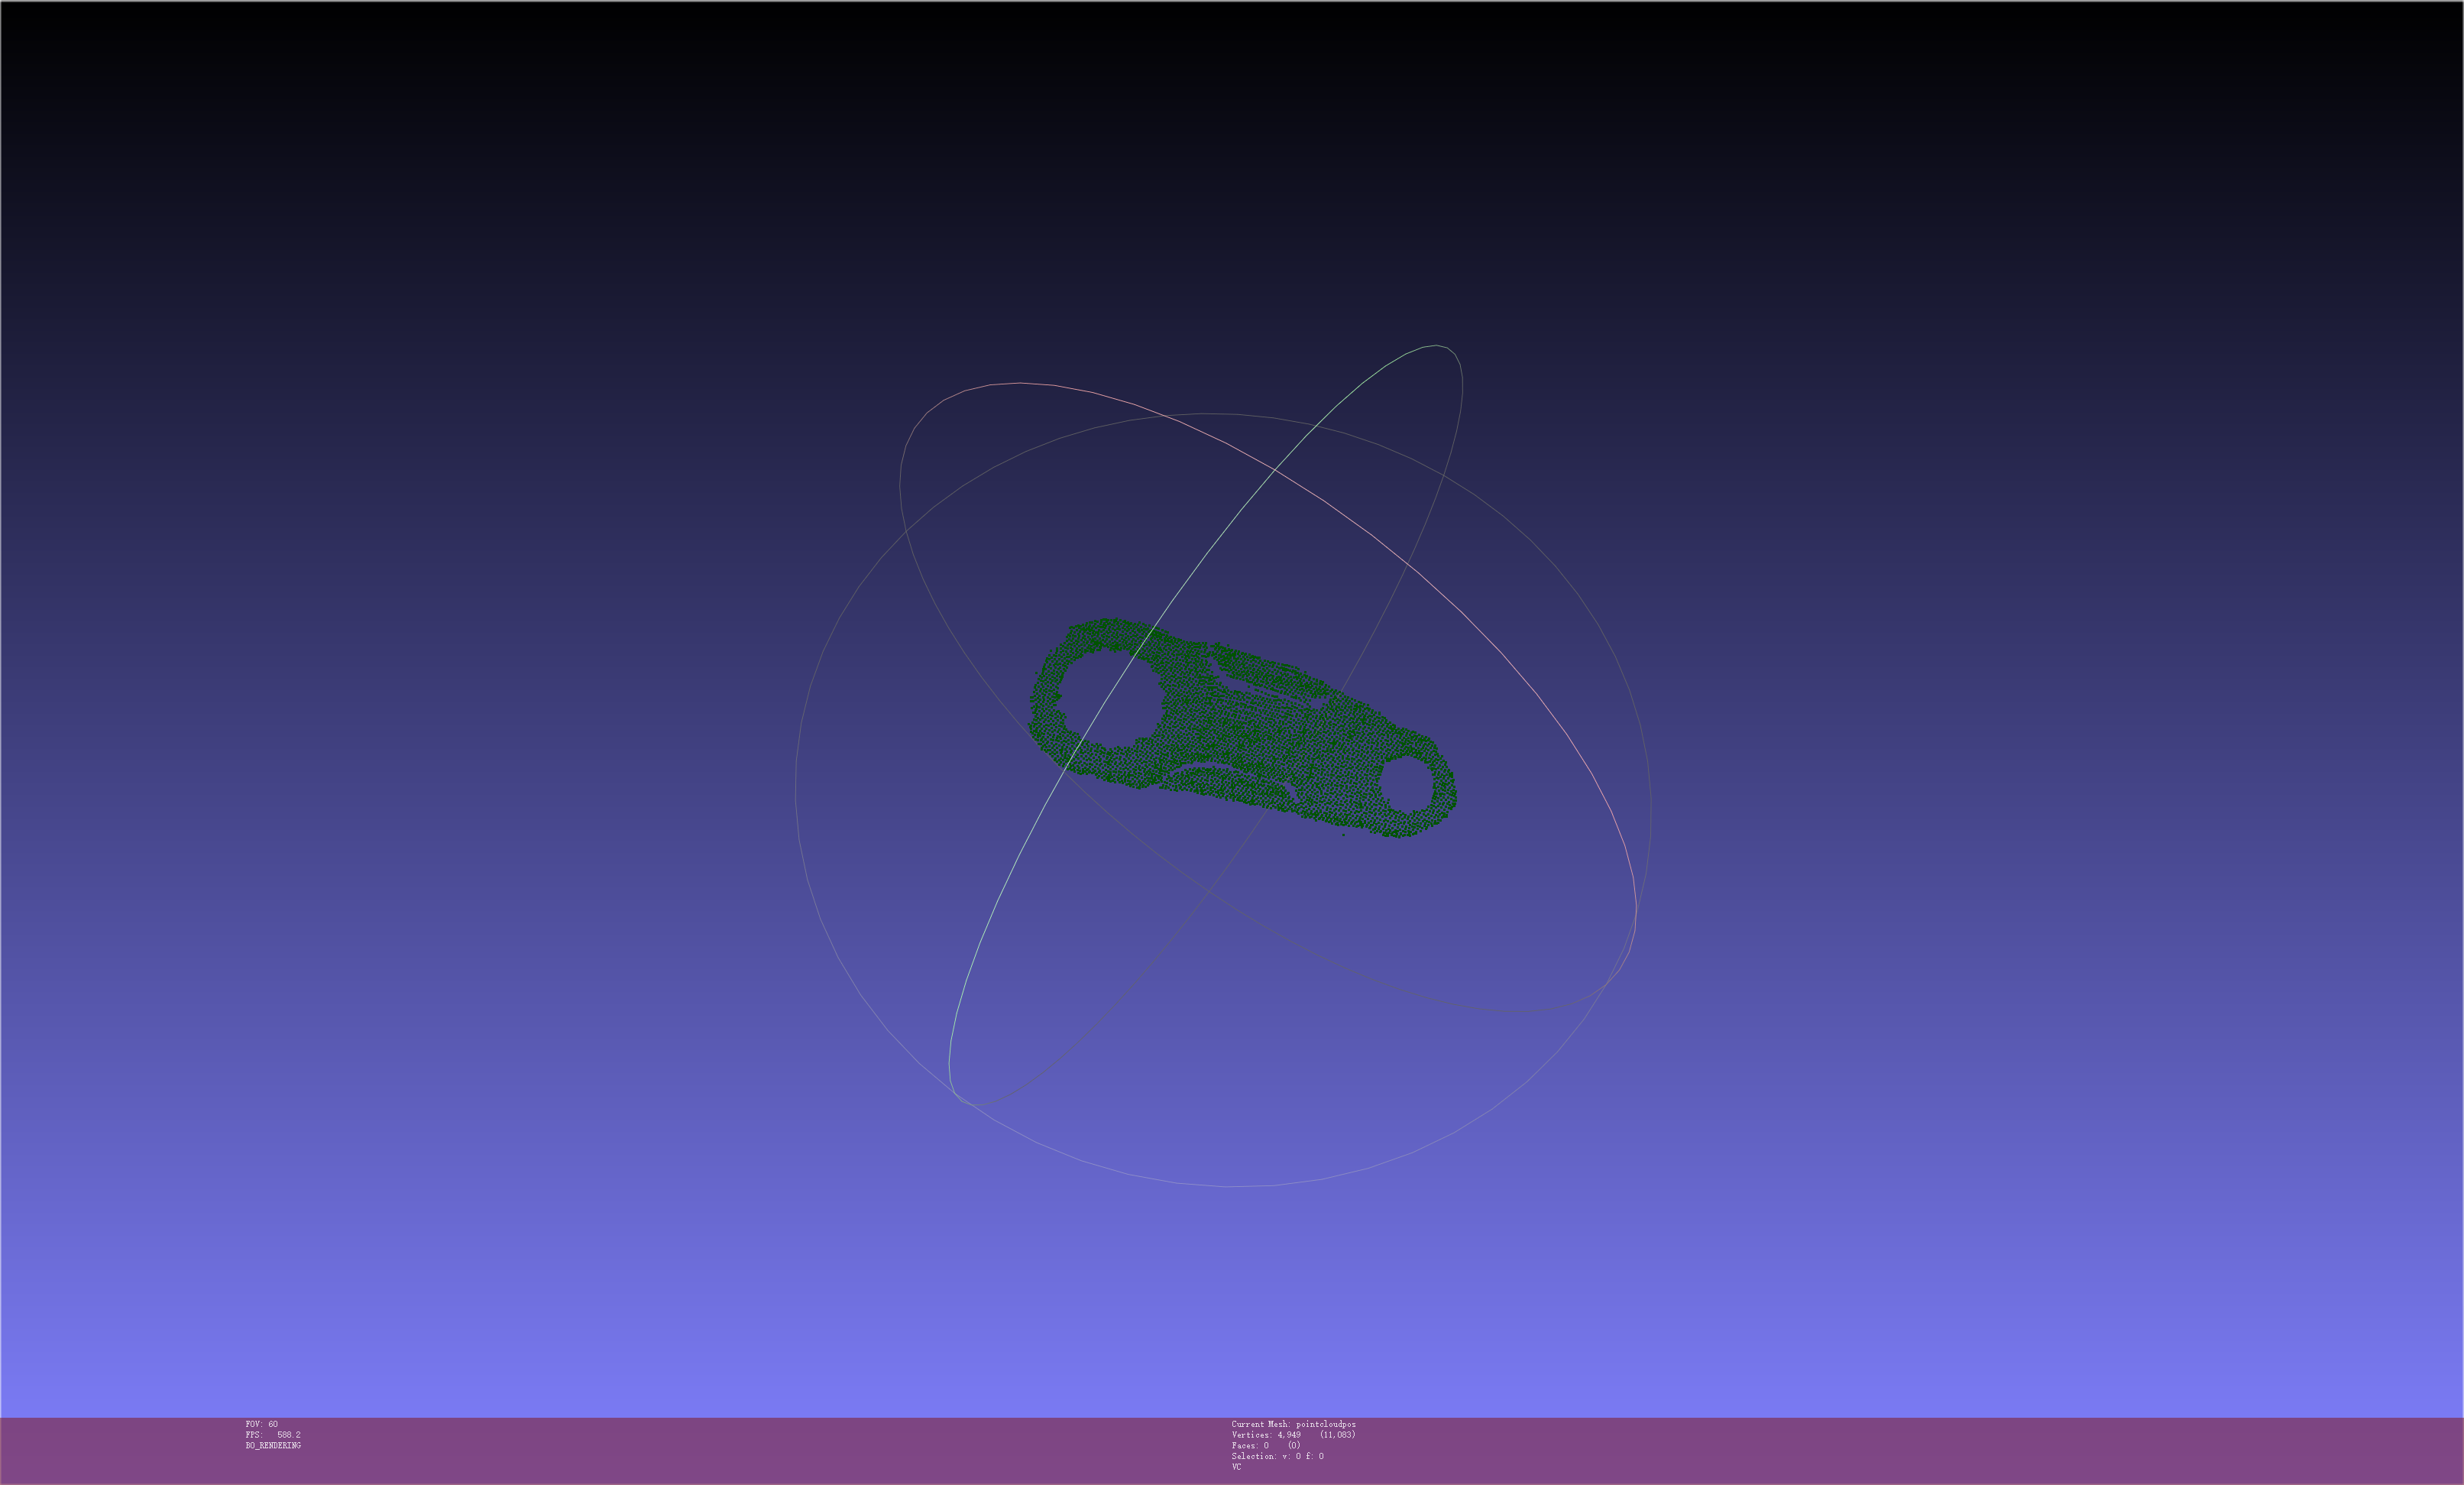
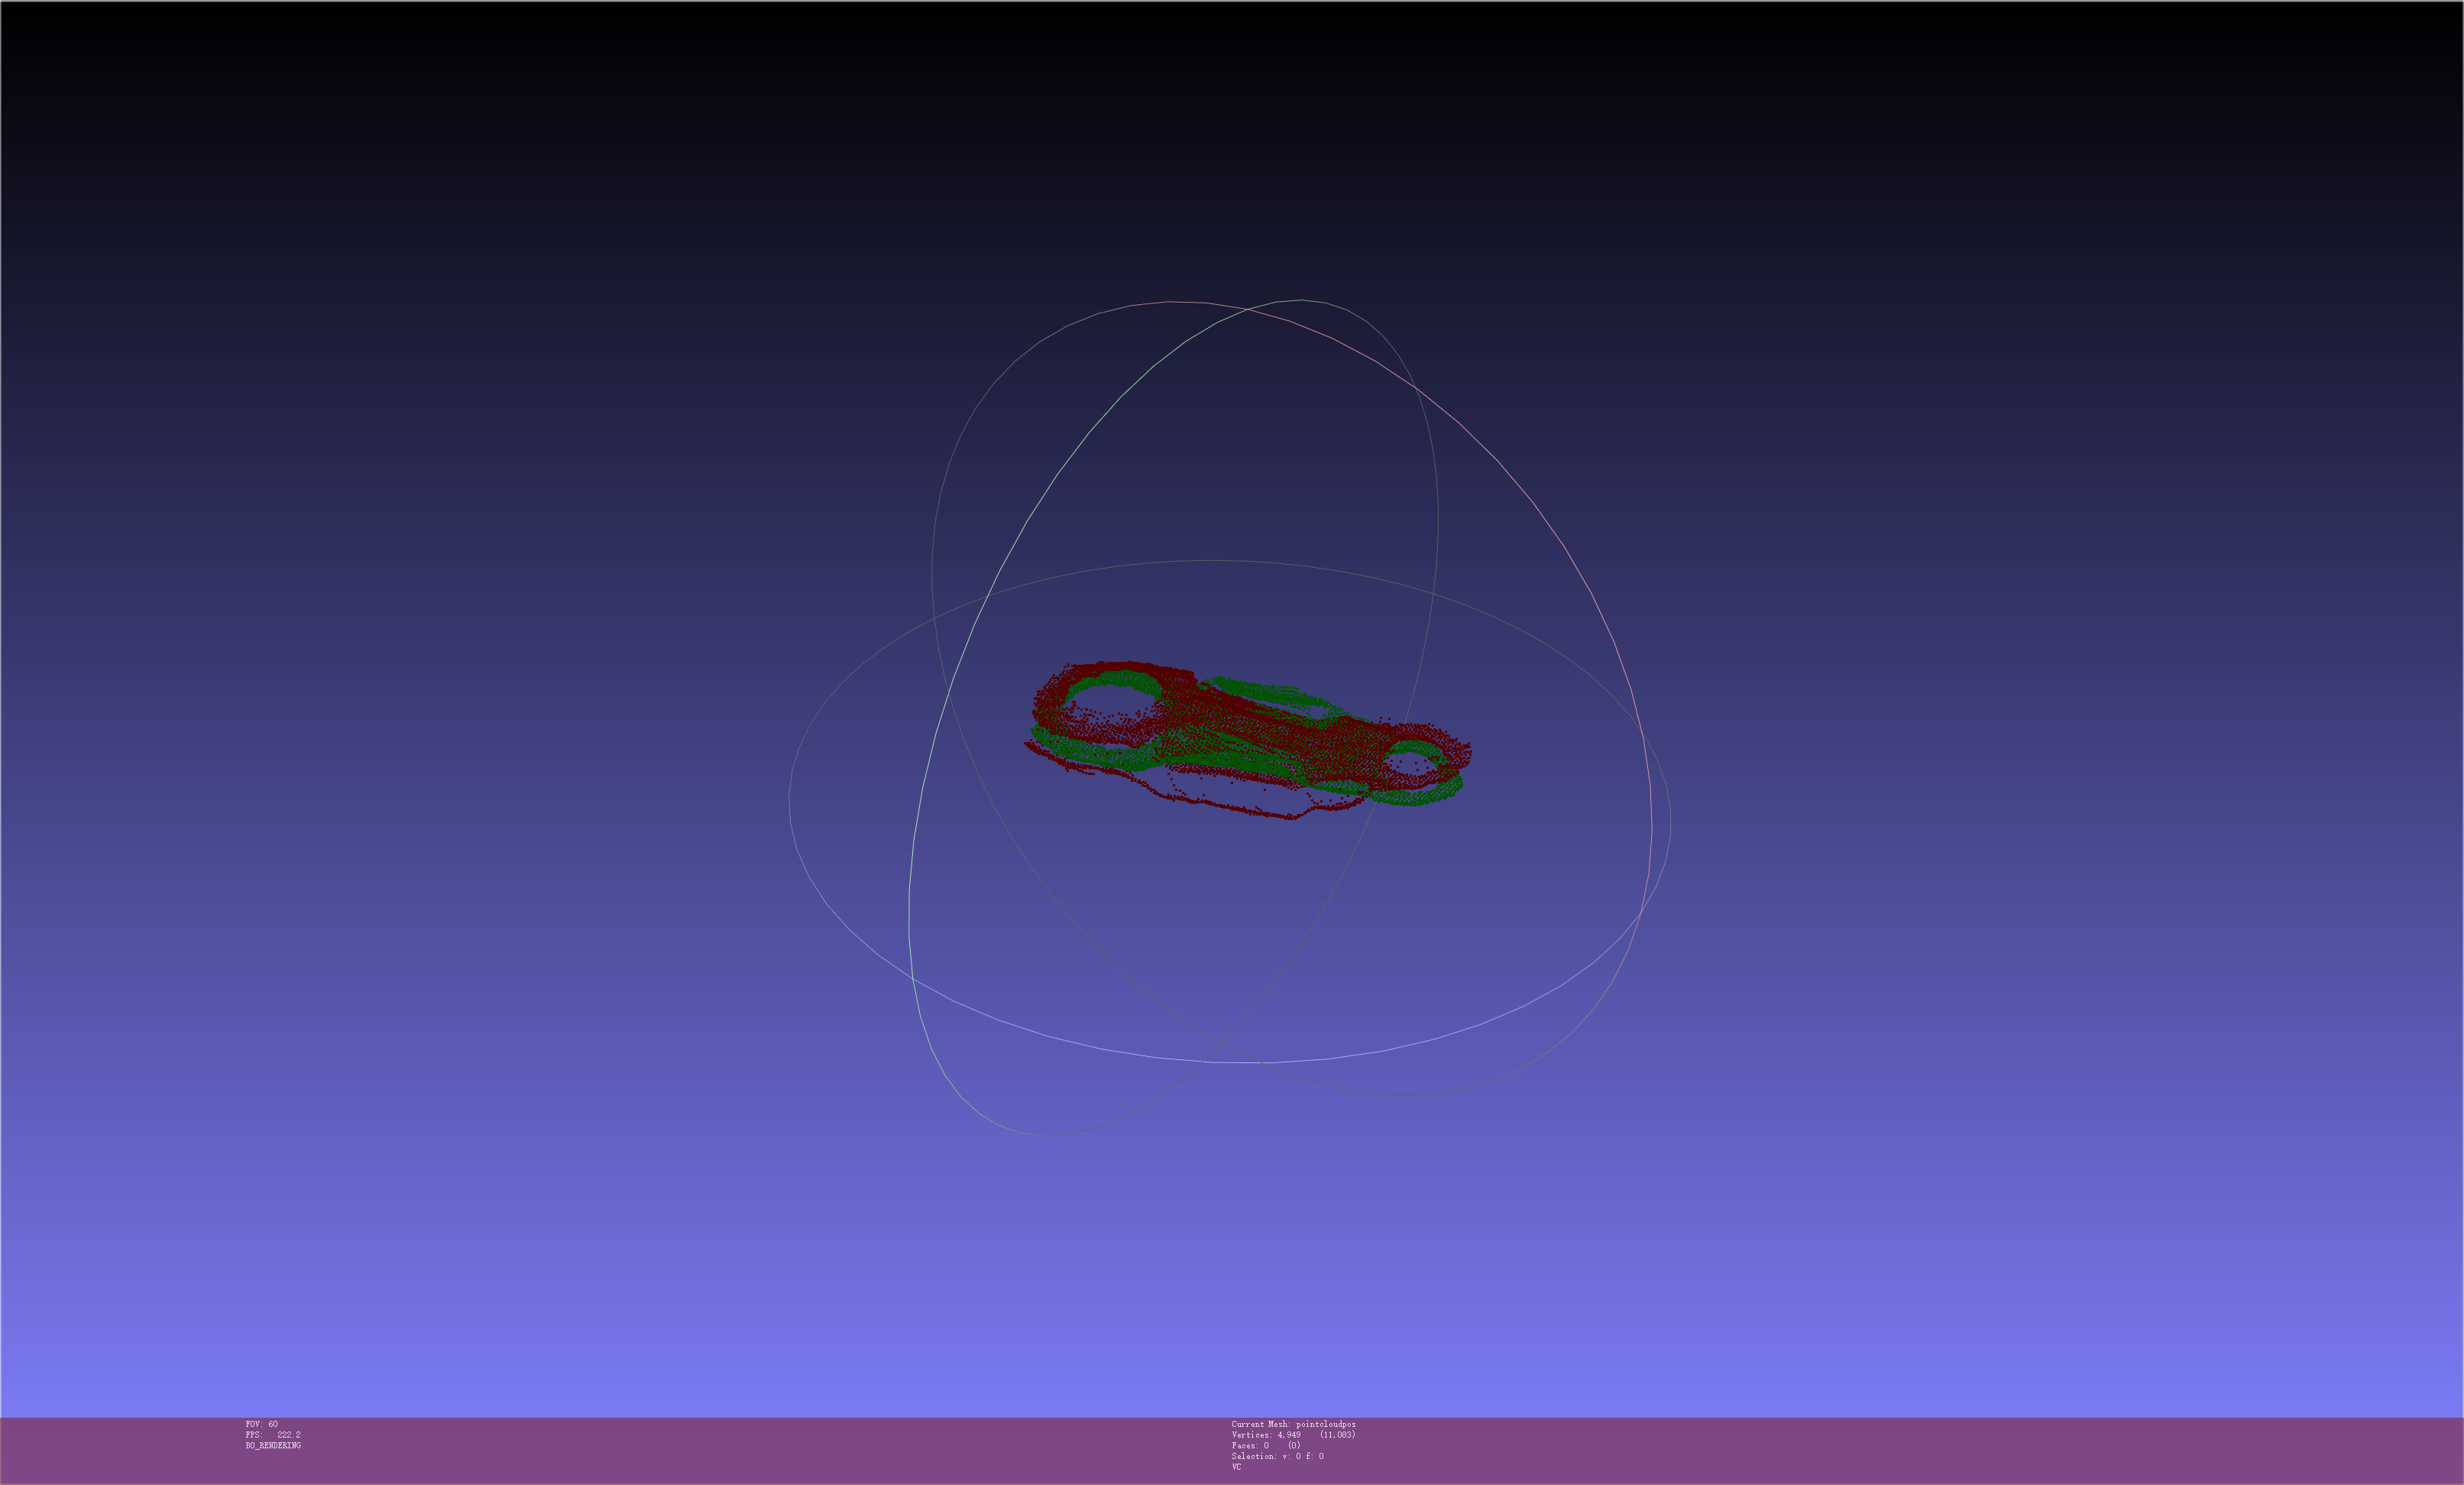
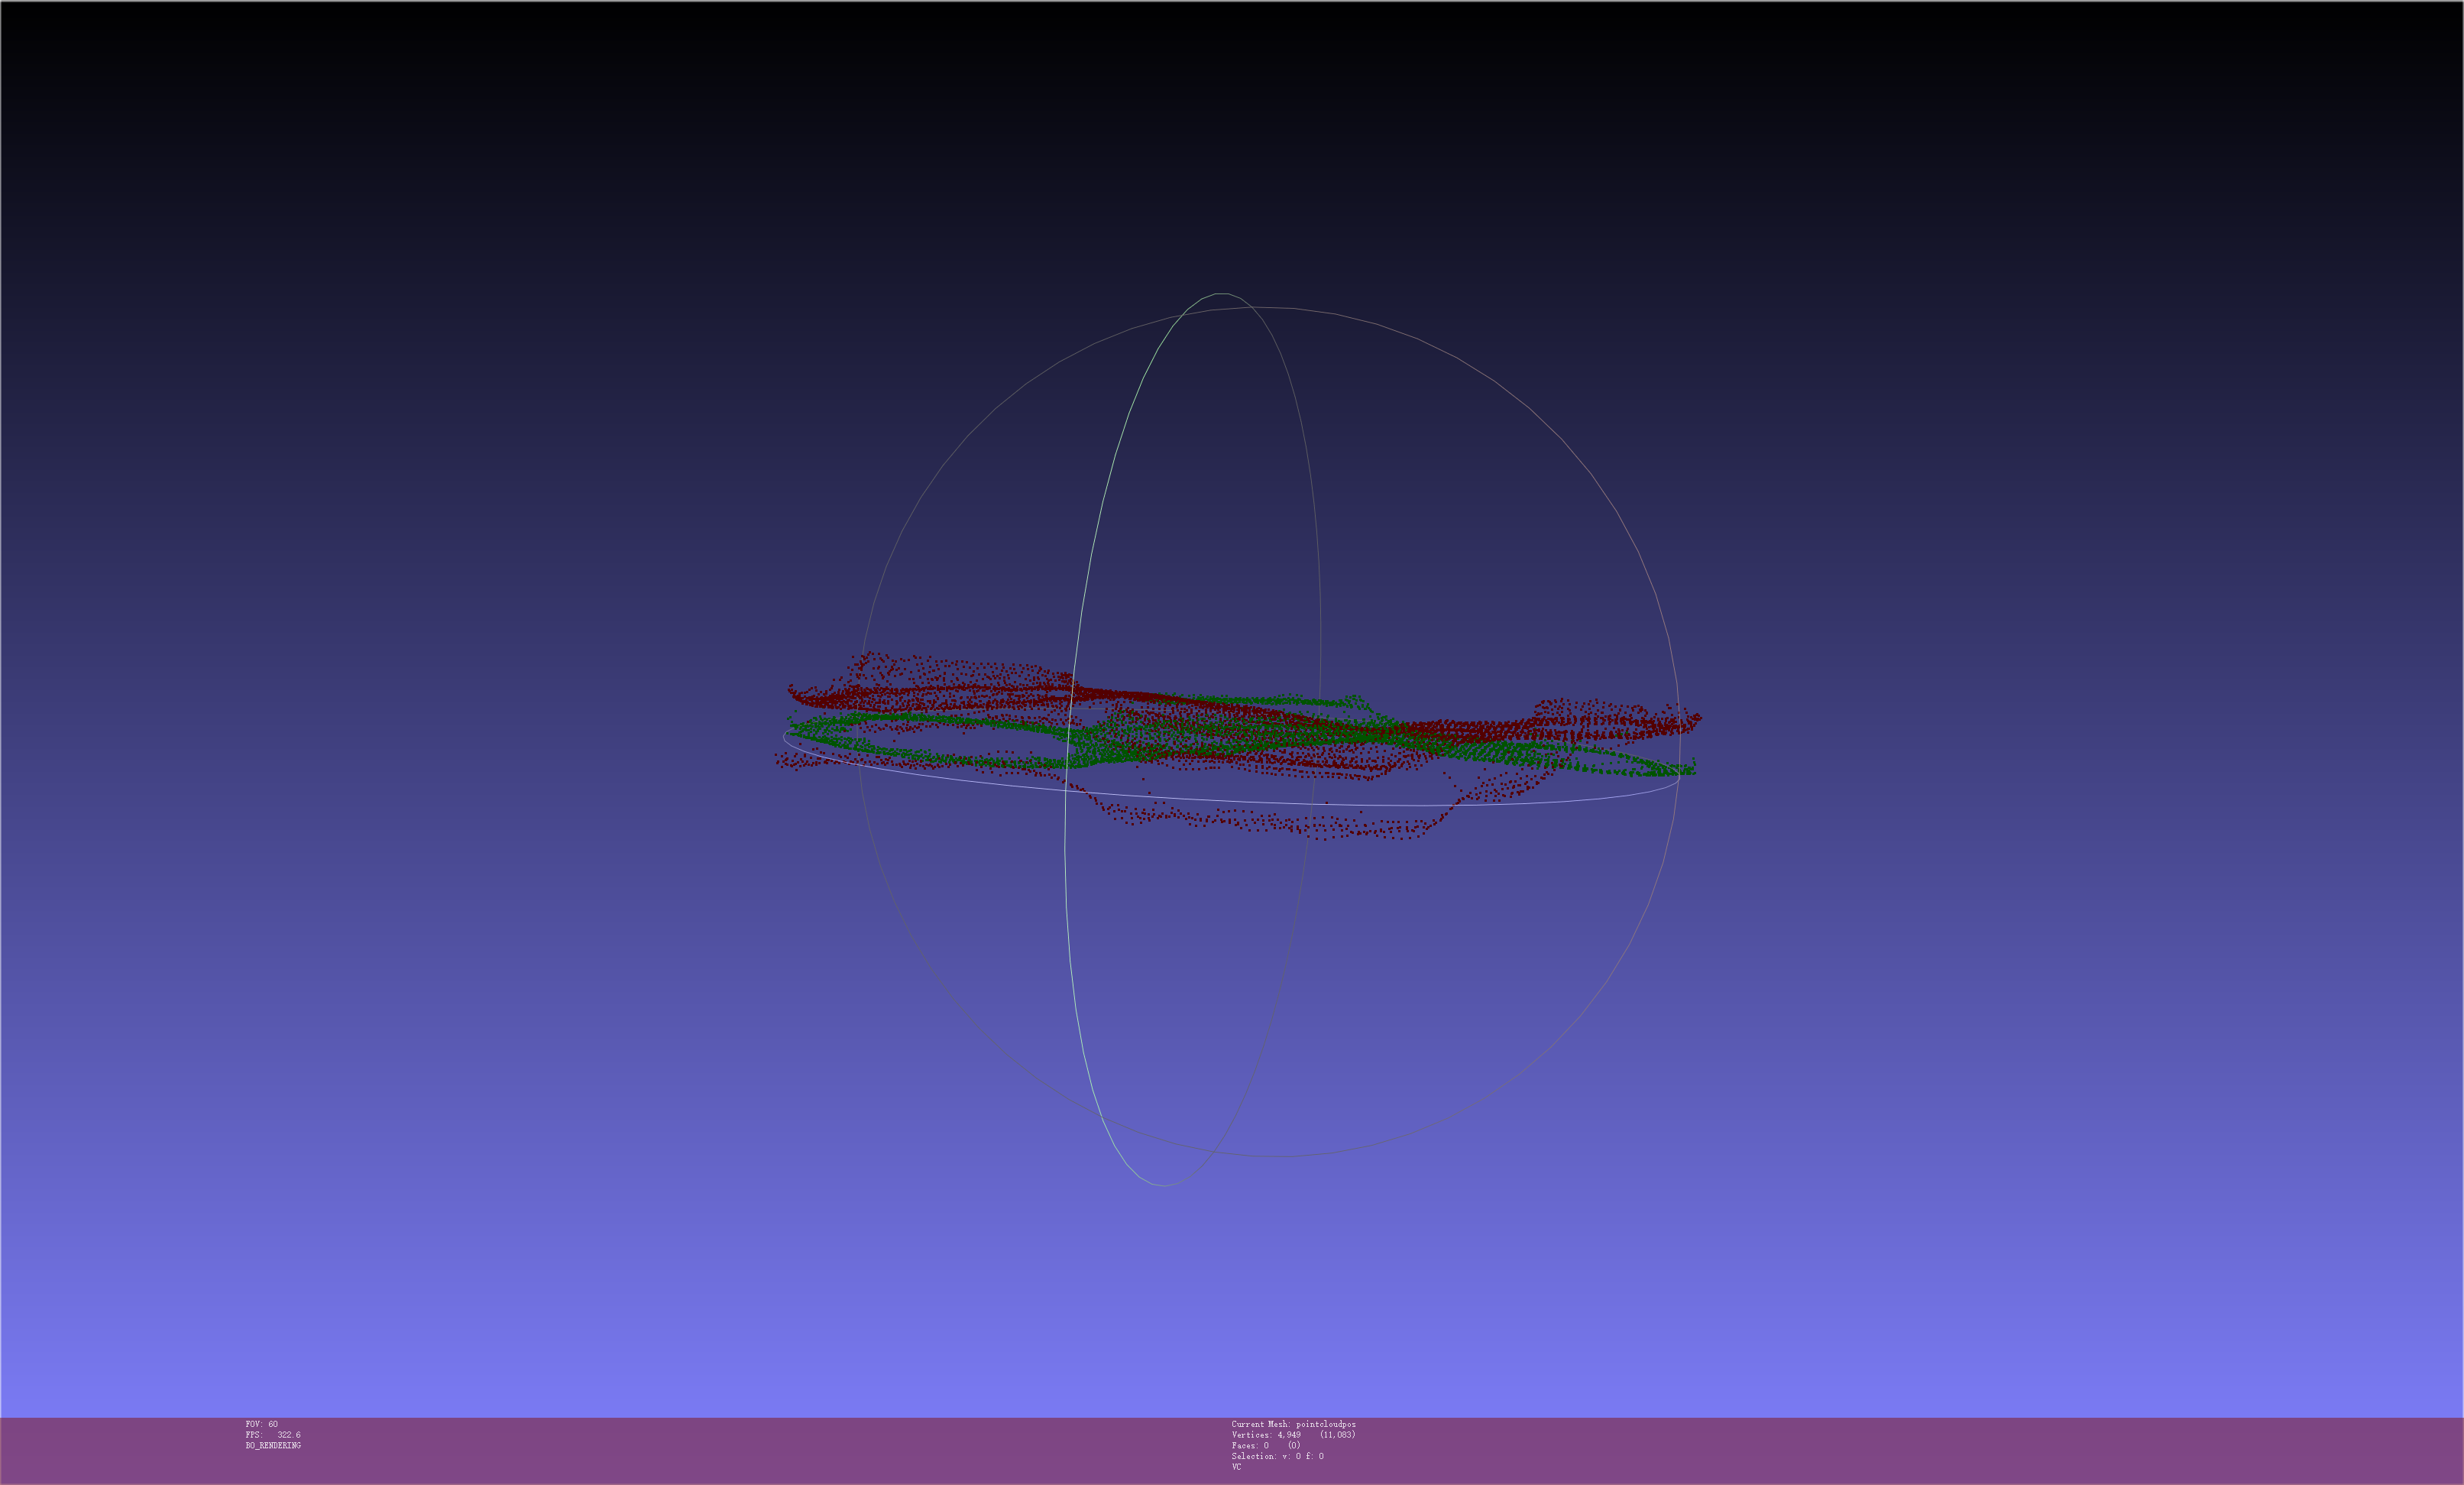
2.3 Set Pick Point
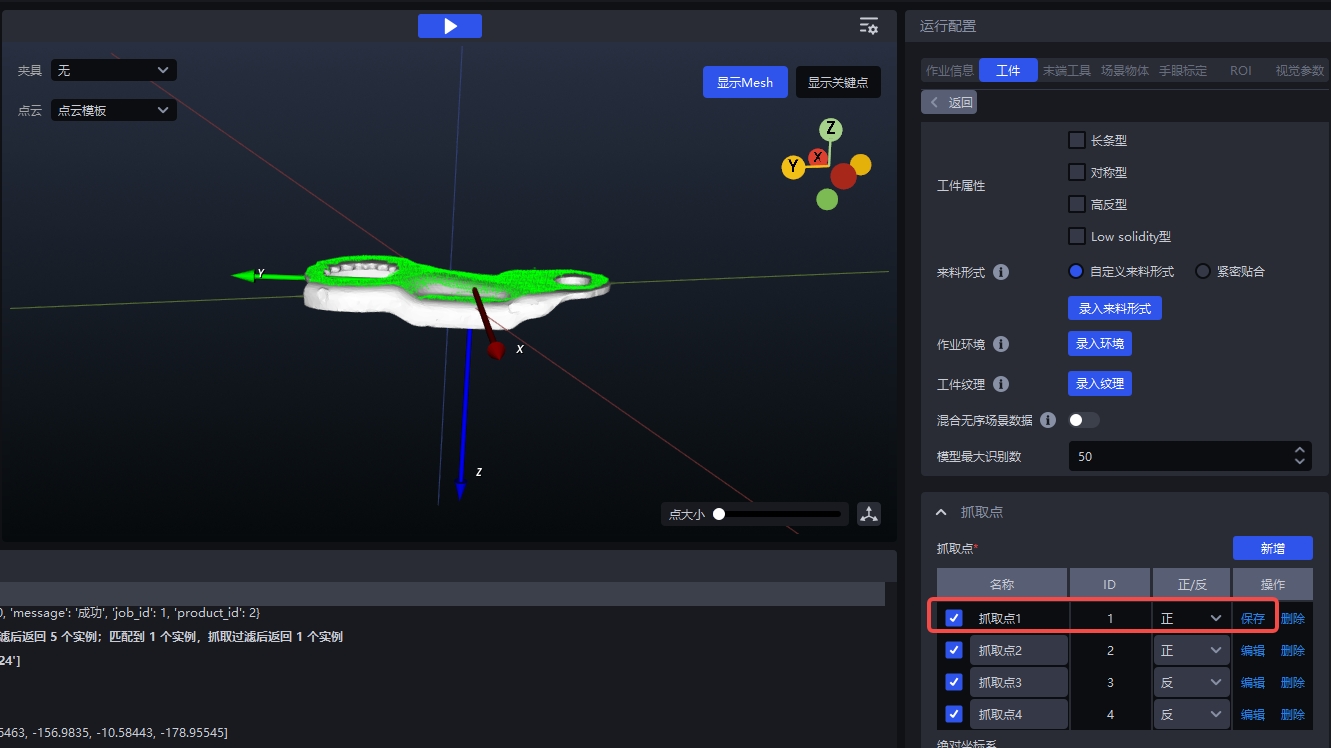
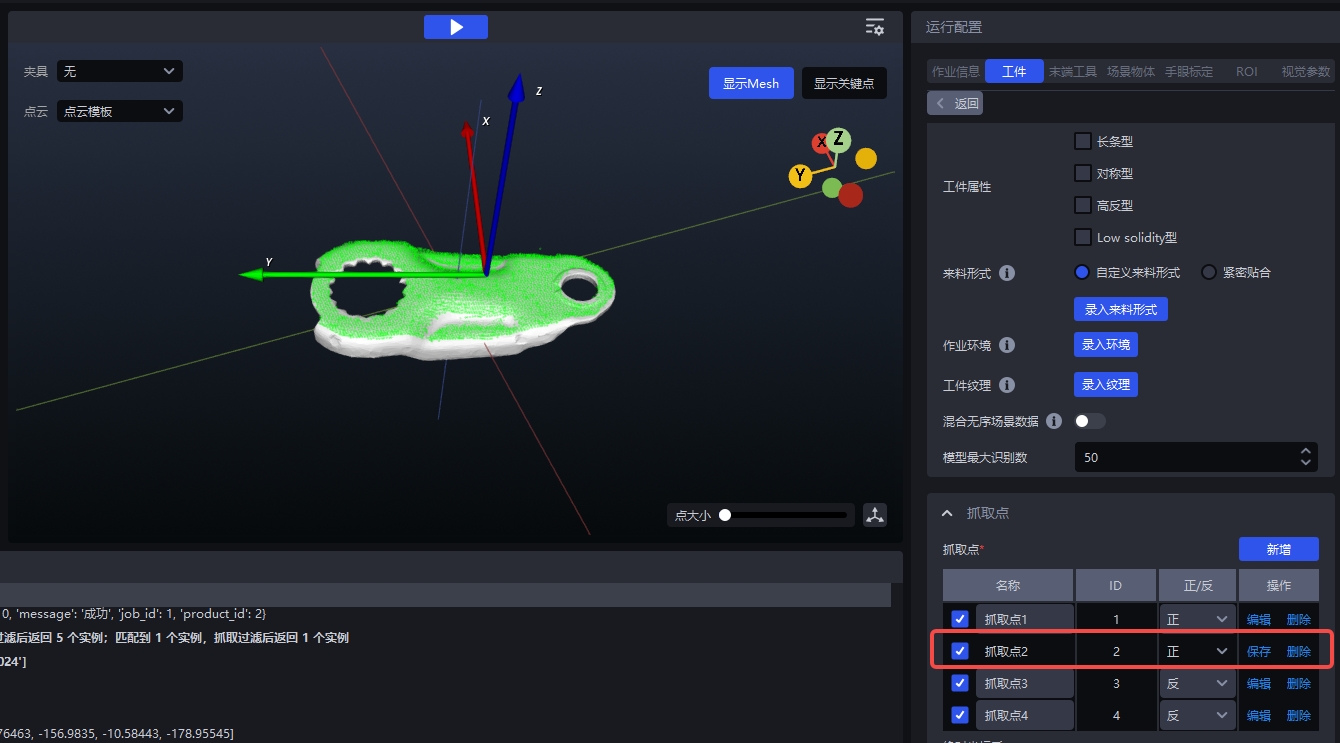
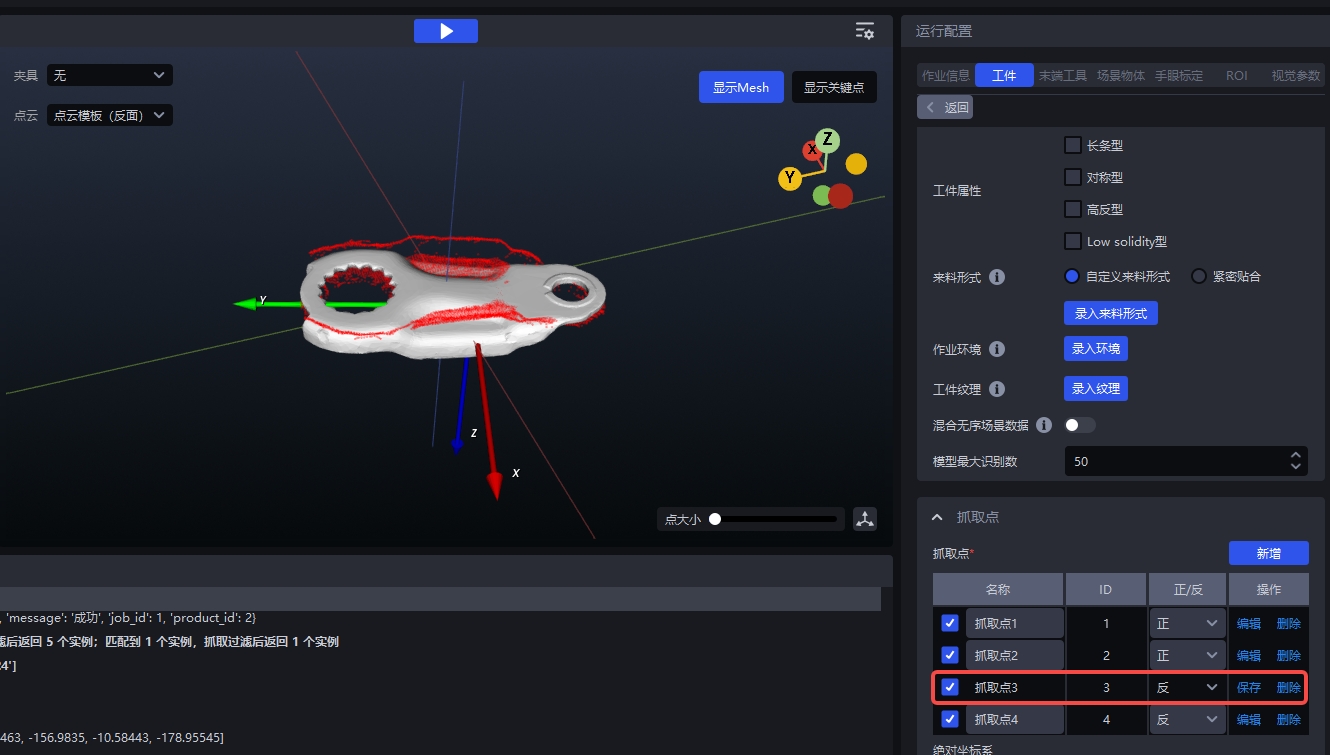
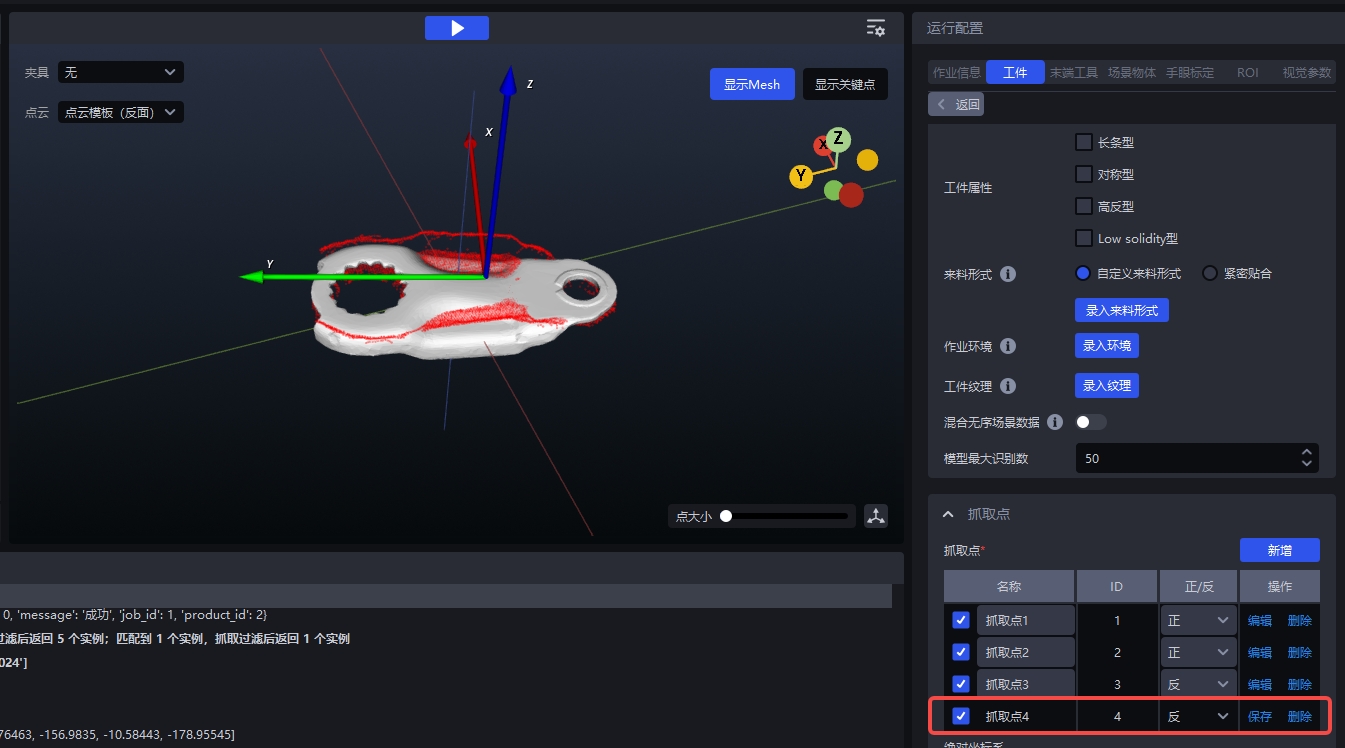
Click Add to set the Pick Point of the front and back templates, check the front and back attributes, and adjust the Pick Point positions of the front and back template Point Clouds according to the visualization window.
Both front and back templates need to set two Pick Points:
- The first Pick Point ensures that the correct Pick Point is output when the front template matches the front Target correctly;
- For the second Pick Point, when the Target is front, if the front template is incorrectly matched and the reverse template is inverted and matched successfully, the result can be output according to the reverse Pick Point and set according to the reverse Pick Point. The same goes for the opposite.
2.4 In Robot configuration, grab relevant information and check Pick Point index Same as above 1.4