Task Operation Guide
Task, in PickWiz, refers to a combination of a series of related tasks performed by Robot in a specific industrial scene. Specific tasks include depalletizing, disordered grabbing, orderly loading and unloading, positioning and assembly, etc.
In PickWiz, Task is a smaller software work unit than project and contains a variety of Task-related configurations, including Target, End-effector, Eye-hand calibration, ROI (Region of Interest), Visual Parameter, Camera, Robot, etc.
1. Create a new Task
1.1 Create the first Task
When creating a new project, you need to select a TaskScene. After creating a new project, PickWiz provides the first Task by default. Please refer to Project Operation Guide to create a new project.
When creating a new project, a Task will be provided by default
1.2 Create multiple tasks
In some industrial scenes, multiple material areas may appear, such as parts assembly. In this case, a robot needs to grab multiple materials at the same time, or perform moving tasks between multiple material areas, and may need to complete different tasks, such as depalletizing, orderly loading and unloading, and disordered grabbing.
In order to meet this demand, in PickWiz, you can create multiple tasks in the same project according to different working conditions and perform subsequent task configuration. In this way, Robot can perform multiple tasks at the same time, greatly improving industrial production efficiency.
Click +New Task in the upper left corner of the main interface, and the interface will automatically jump to the new Task page.
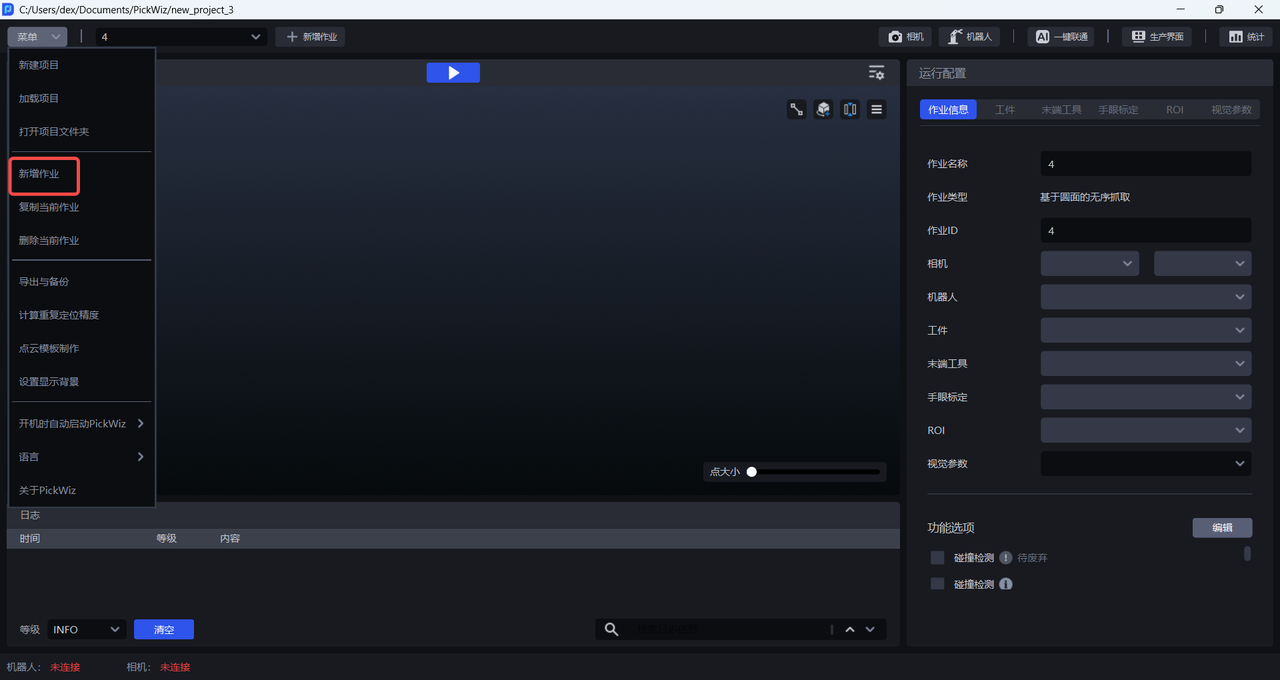
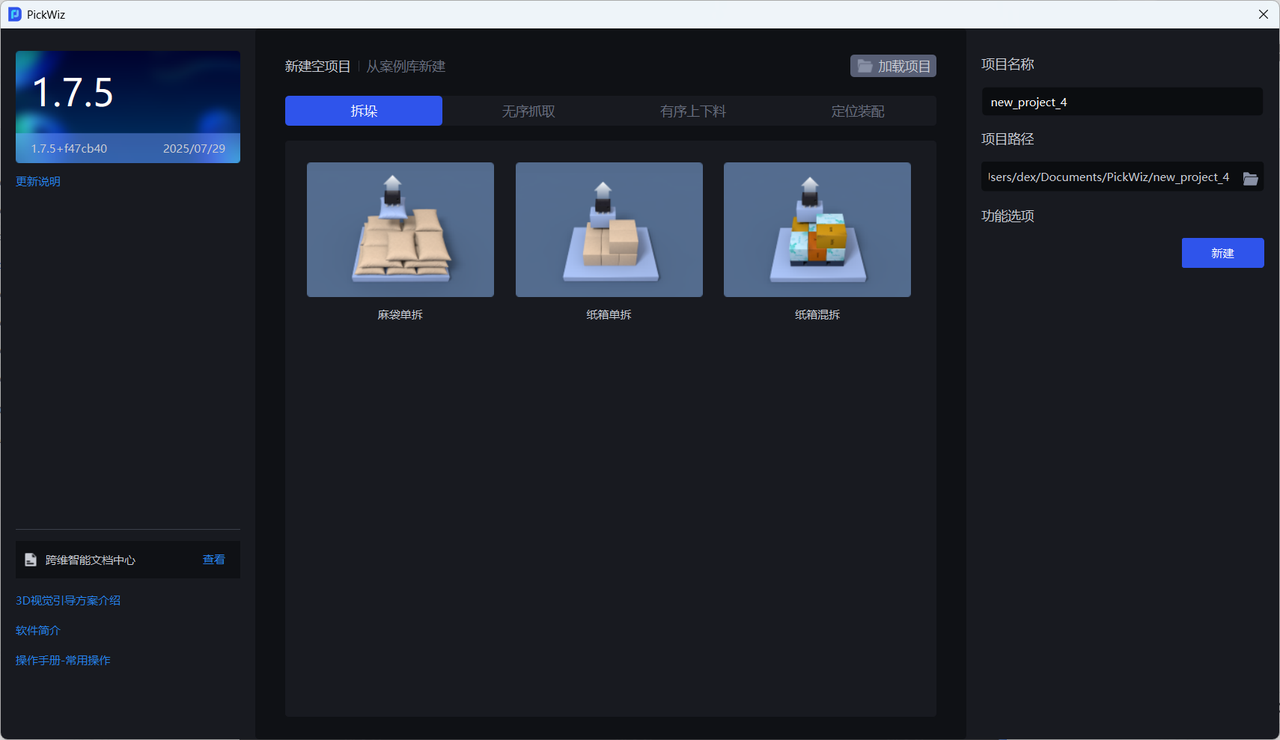
According to the actual needs, select the corresponding TaskScene, enter the "Task name", and finally click New to create a new Task.
Please refer to Introduction to 3D Visual Guidance Solution to select the required TaskScene
2. Configure Task
Before running the Task, you need to select all configuration items in the Task information.
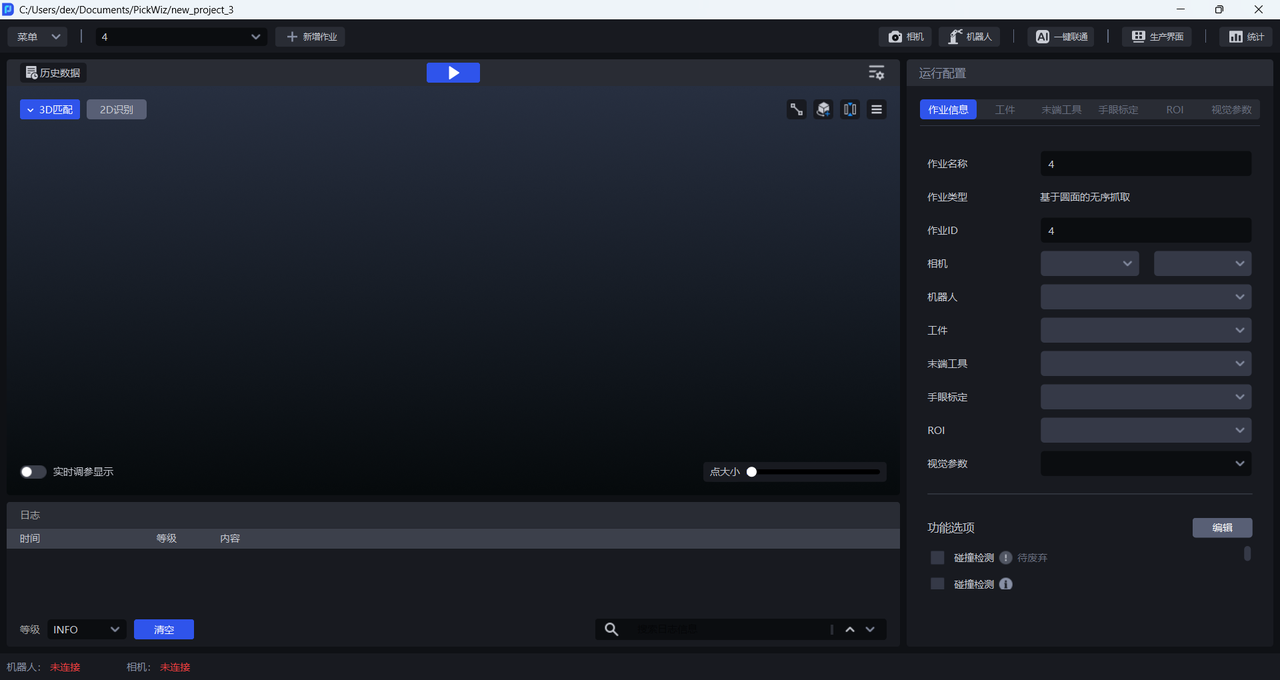
| Configuration item | Description |
|---|---|
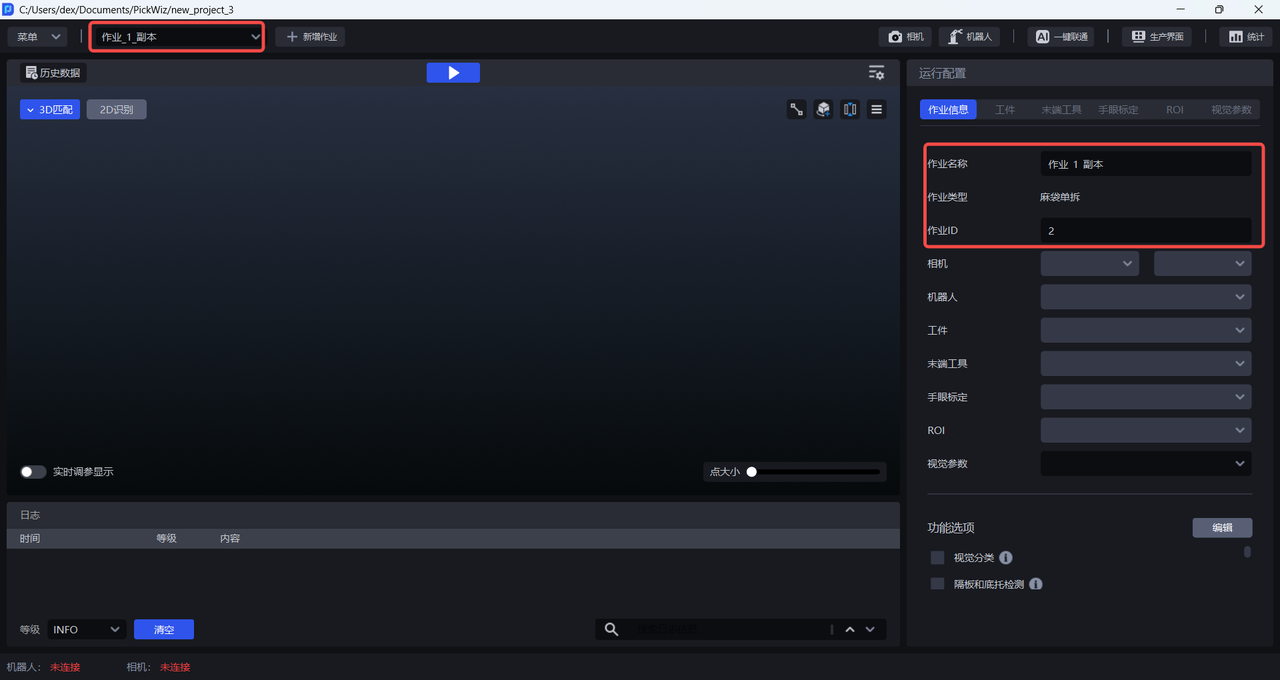
| Task name | The name of the current Task, which can be modified |
| Task type | The type of the current Task, i.e. TaskScene, corresponds to the TaskScene selected when creating a new Task and cannot be modified |
| TaskID | Identifies the current Task. Robot can switch Tasks through this ID |
| Camera | Camera and CameraParameter when the current Task is running. To connect the Camera and adjust the Camera imaging, please refer to Camera Connection and Parameter Adjustment Guide |
| Robot | The Robot when the current Task is running. To establish communication with the Robot, please refer to Robot Configuration and Communication Operation Guide |
| Target | The Target configuration of the current Task is configured to the Task information after adding it in the Target interface. To add a new Target, please refer to Target Operation Guide |
| End-effector | End-effector configuration when the current Task is running. Configure it to the Task information after adding it in the End-effector interface. To add an End-effector, please refer to End-effector User Guide |
| Scene Object | Various objects in the current TaskScene, including material frames, bottom brackets, etc., check Collision Detection, Pallet Detection, Partition and Pallet Detection in Function Options before the Scene Object interface will appear. After adding a Scene Object, you need to configure it to the Task information. For the specific process, please refer to Pallet Detection User Guide, Collision Detection User Guide, Partition and Pallet Detection User Guide |
| Eye-hand calibration | The Eye-hand calibration configuration when the current Task is running. After adding it in the Eye-hand calibration interface, configure it to the Task information. For the specific process, please refer to Eye-hand calibration operation guide |
| ROI | The ROI configuration when the current Task is running is configured to the Task information after adding it in the ROI interface. For the specific process, please refer to ROI Operation Guide |
| Visual Parameter | The visual Parameter configuration when the current Task is running is configured in the Visual Parameter interface. For the specific process, please refer to the Visual Parameter Adjustment Guide |
After selecting all configuration items, click the  button to run the current Task.
3. Delete Task
(1) Delete any Task: Click the Task drop-down box to view all Tasks. When the mouse cursor hovers over the Task to be deleted, the 🗑 function button will be displayed; click 🗑 to delete the Task and its configuration.
(2) Delete the current Task: Open the menu and click Delete Current Task to delete the current Task and its configuration.
4. Copy Task
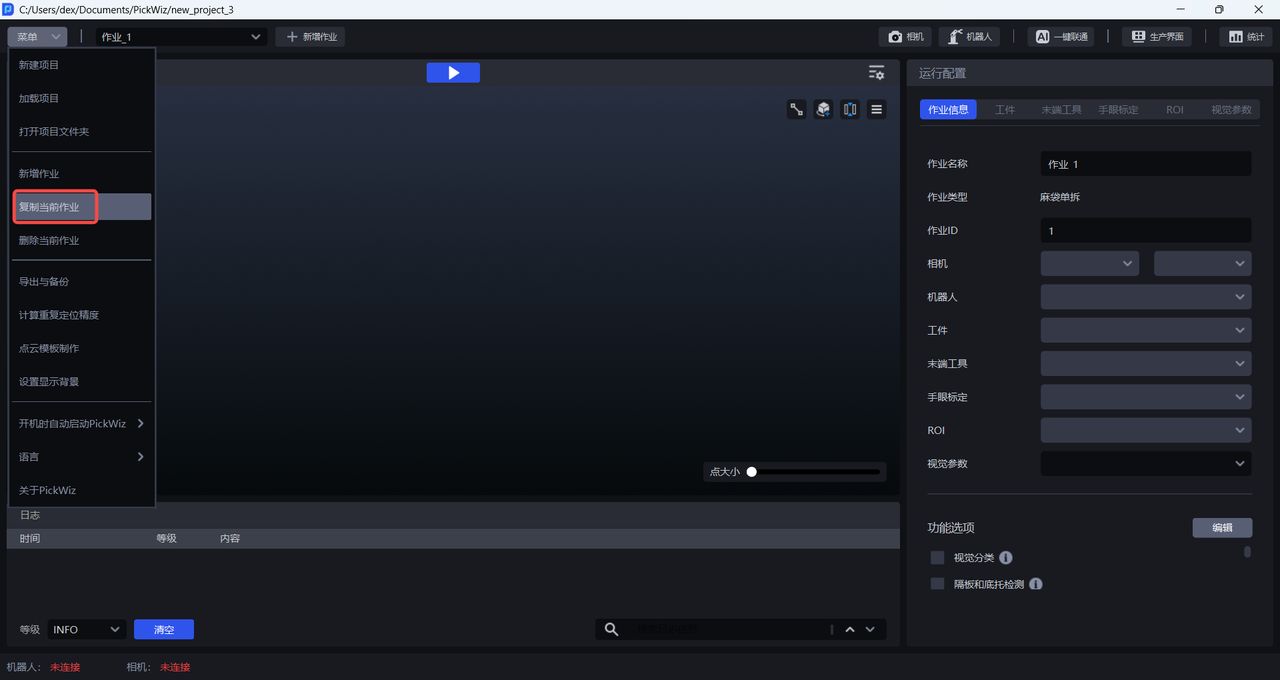
Open the menu and click Copy current Task to get a new Task copy, which copies all configurations of the original Task.
5. Switch Task
During the Task process, there are two ways to switch Tasks: Switching Tasks on the Pickwiz software side, and switching Tasks on the Robot side.
5.1 Pickwiz Switch
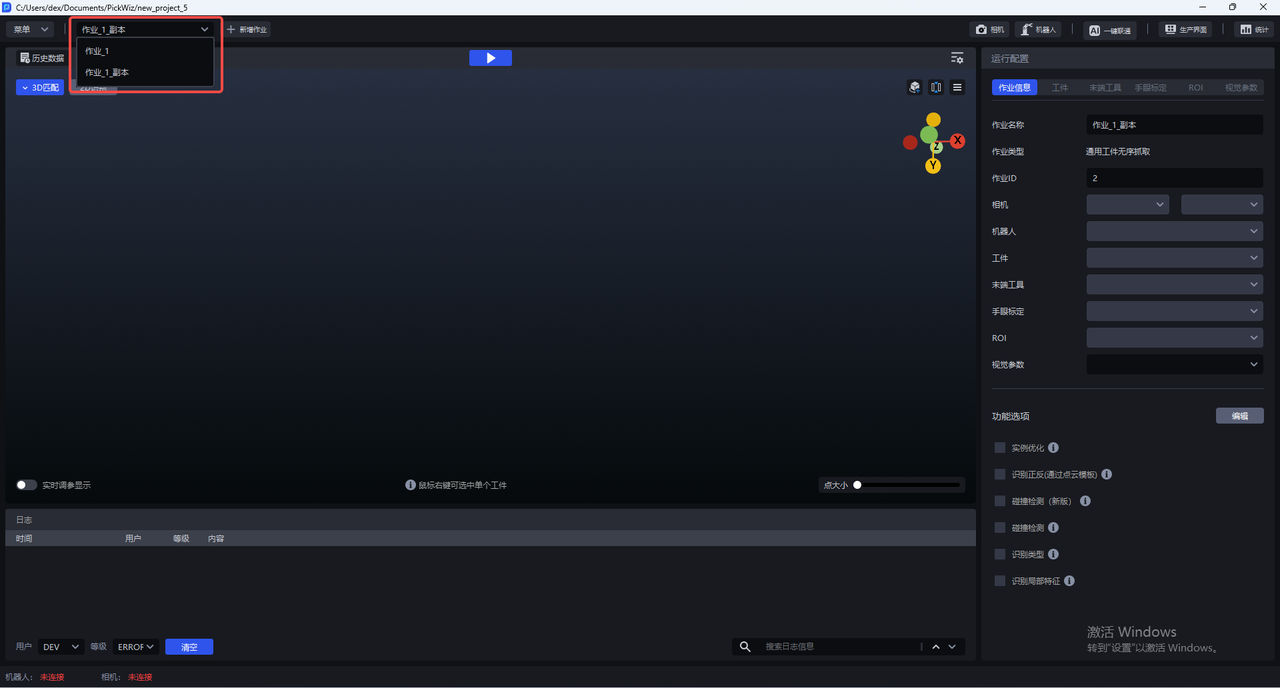
You can click the Task drop-down box in the upper left corner of the main interface to select the Task that currently needs to be run.
5.2 Robot switch
You can import project files with business logic on the Robot side, and let Robot send signals to PickWiz to switch tasks. Robot can communicate with PickWiz through the command content {wid} (TaskID) and complete Task switching.
For the communication methods and instructions between Pickwiz and Robot, please refer to Robot Configuration and Communication Operation Guide