Historical Data Usage Guide
Historical data is the running record of Pickwiz in the past period. It saves the input data and output results of each process of 2D recognition, 3D calculation, and Pick Point processing, and is used to trace back abnormal problems.
1. View historical data
Prerequisite knowledge
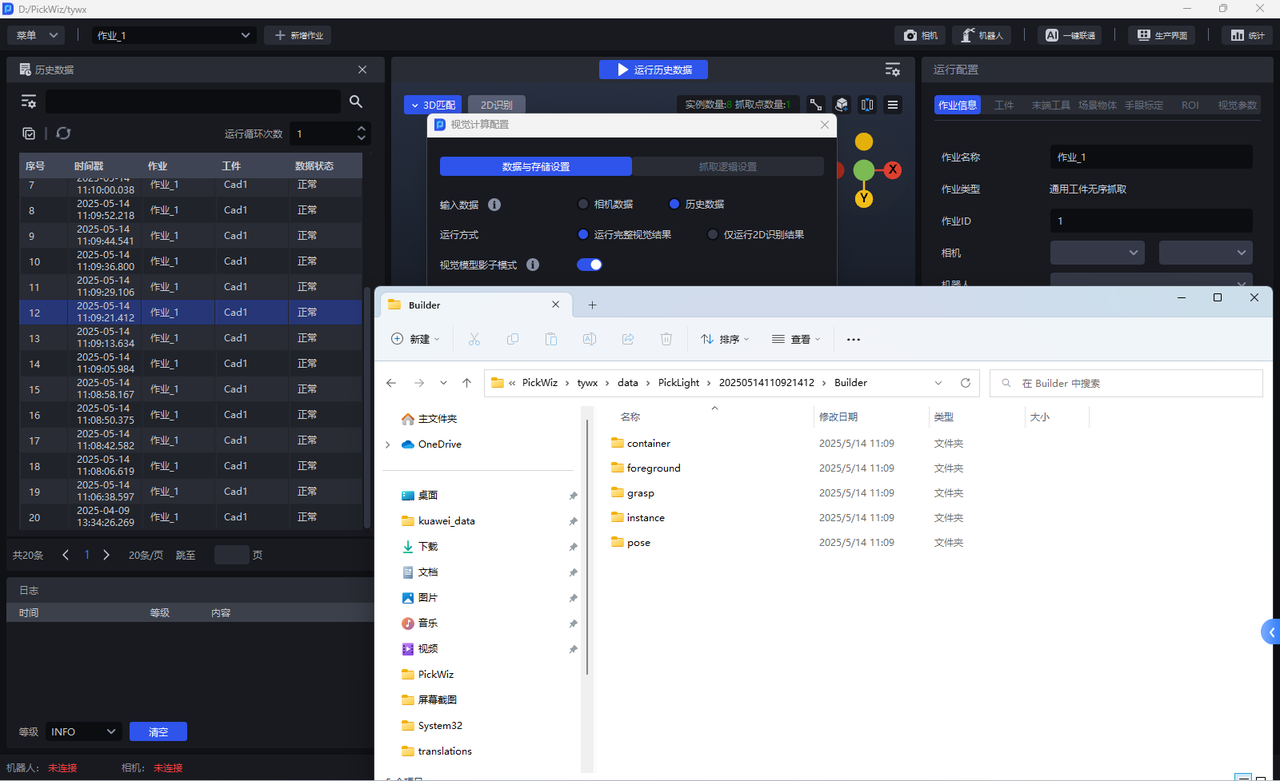
The name of the historical data folder corresponds to the node name:
Builder - generates related nodes
Criteria - filter related nodes
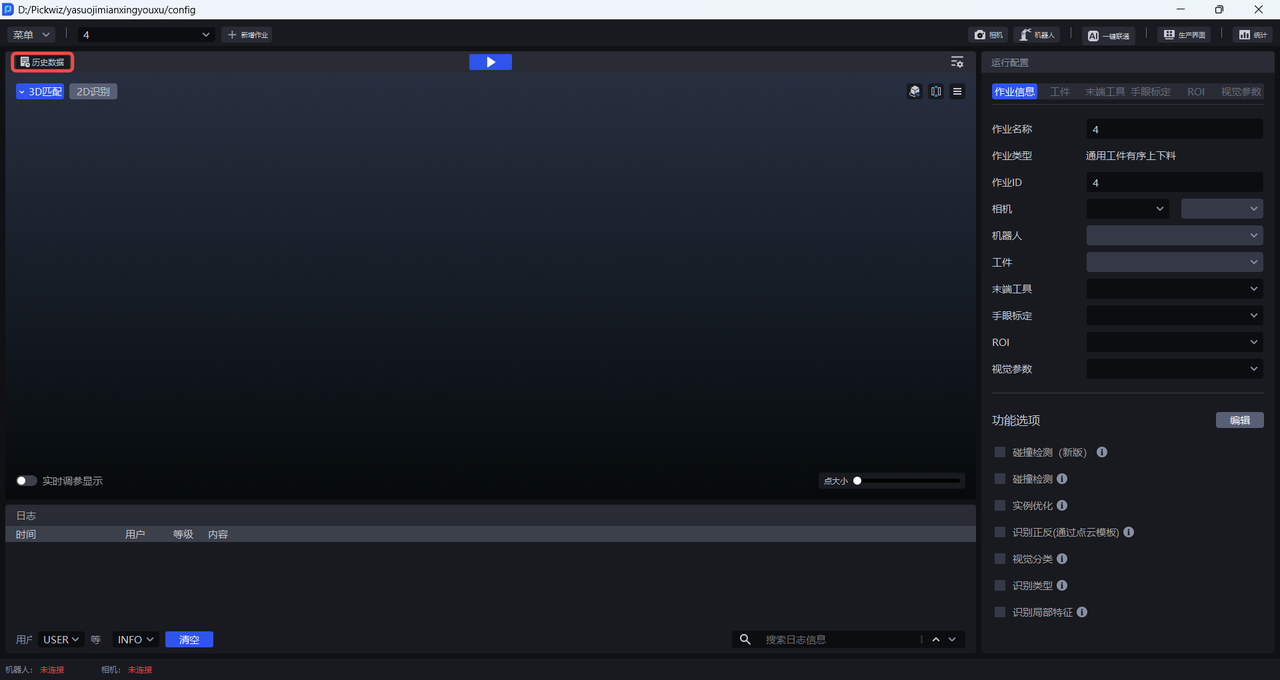
Click Historical Data on the main interface to open the historical data panel and view the historical data list.
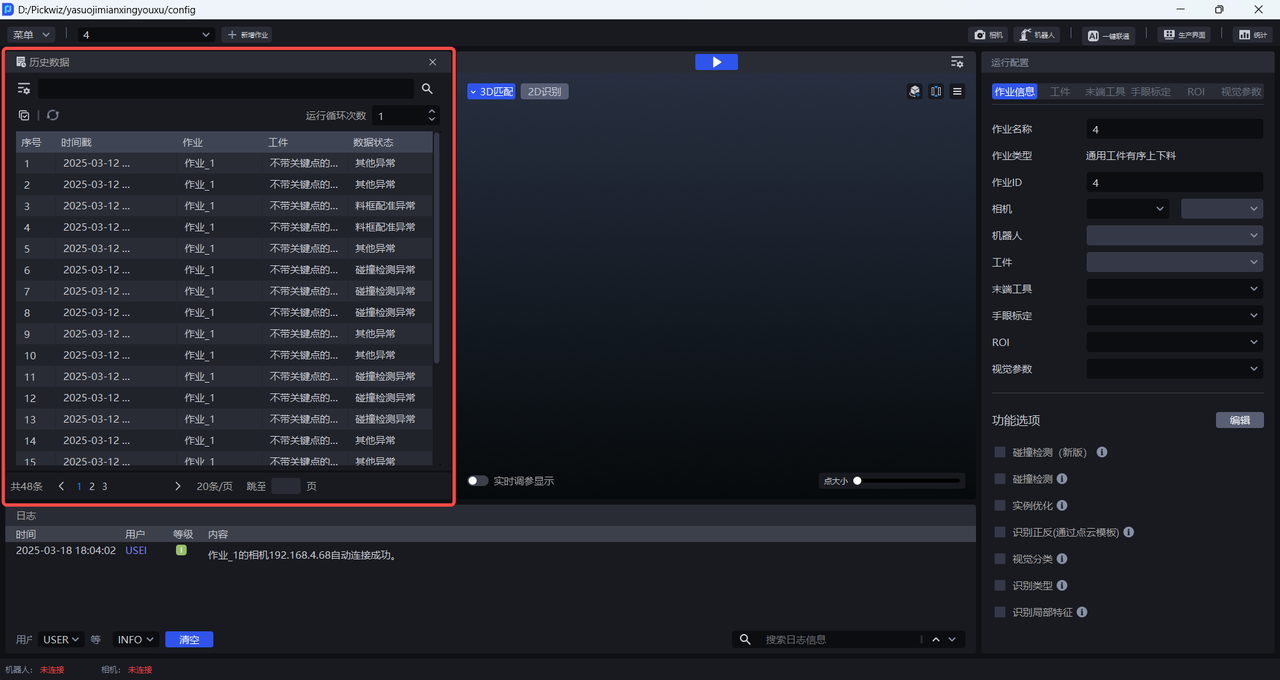
Each piece of historical data displays its timestamp, task, target, and data status. The timestamp is the time when the historical data was run. Task is the task name of the historical data. Target is the target name of the historical data. The data status is the running result of the historical data.
Hover the mouse cursor over the timestamp, Task, Target, and data status of each piece of historical data to view the corresponding full name.
Click "<"">" or fill in "Jump to page" to turn the page and view the historical data on the next page of the list.
Click on specific historical data to view the 3D matching results and 2D recognition results of the historical data in the visualization window on the right.
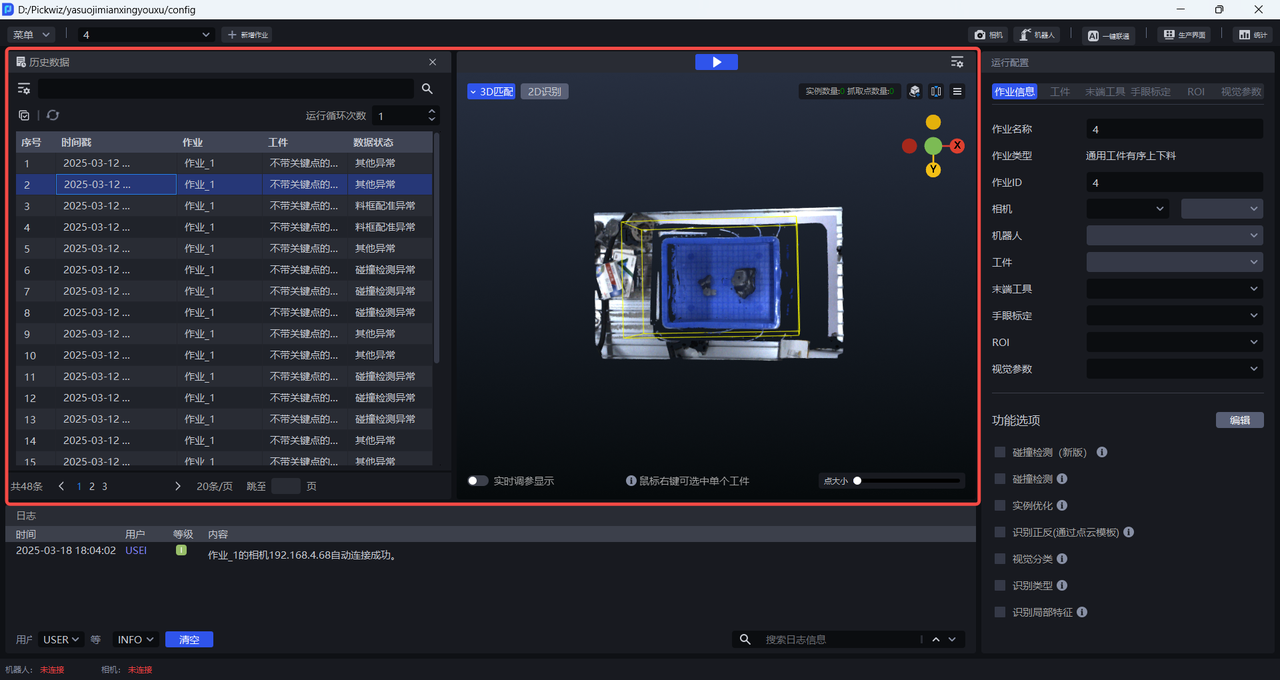
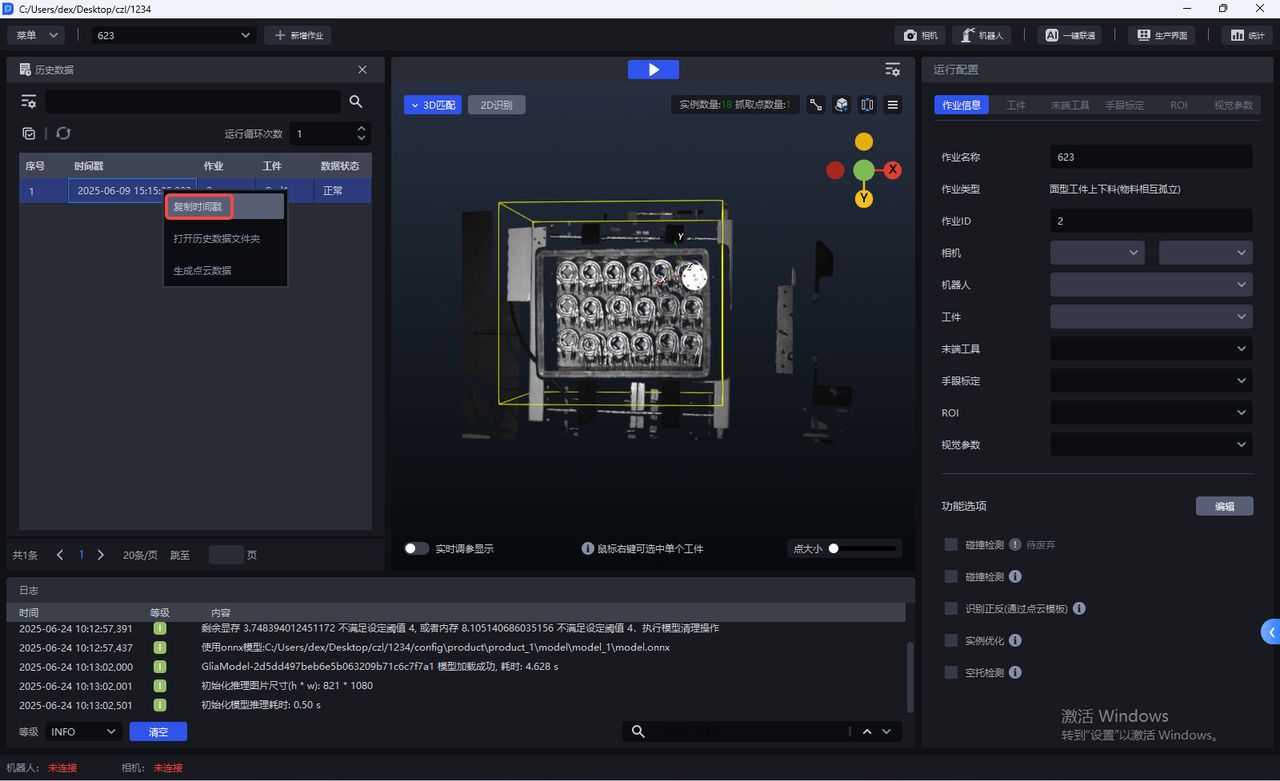
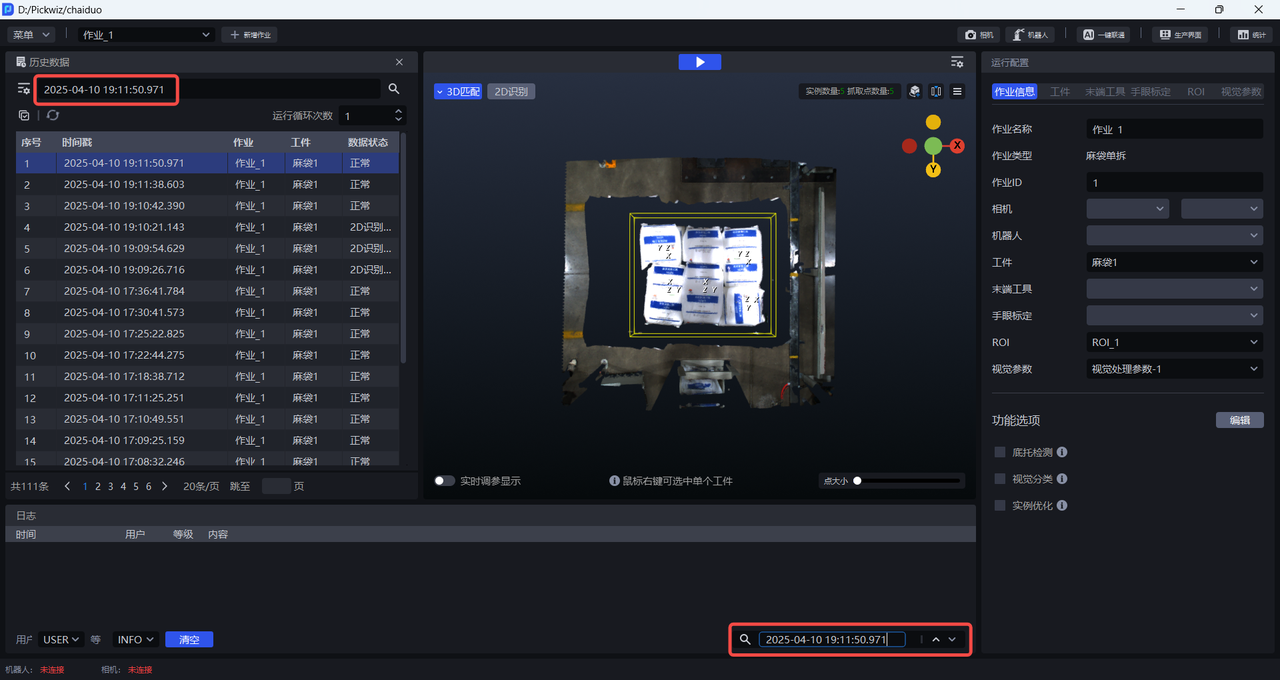
- Right-click on the timestamp of historical data to copy the timestamp of historical data, paste it in the search box of historical data or the search box of the log area, and search for the corresponding historical data or logs.
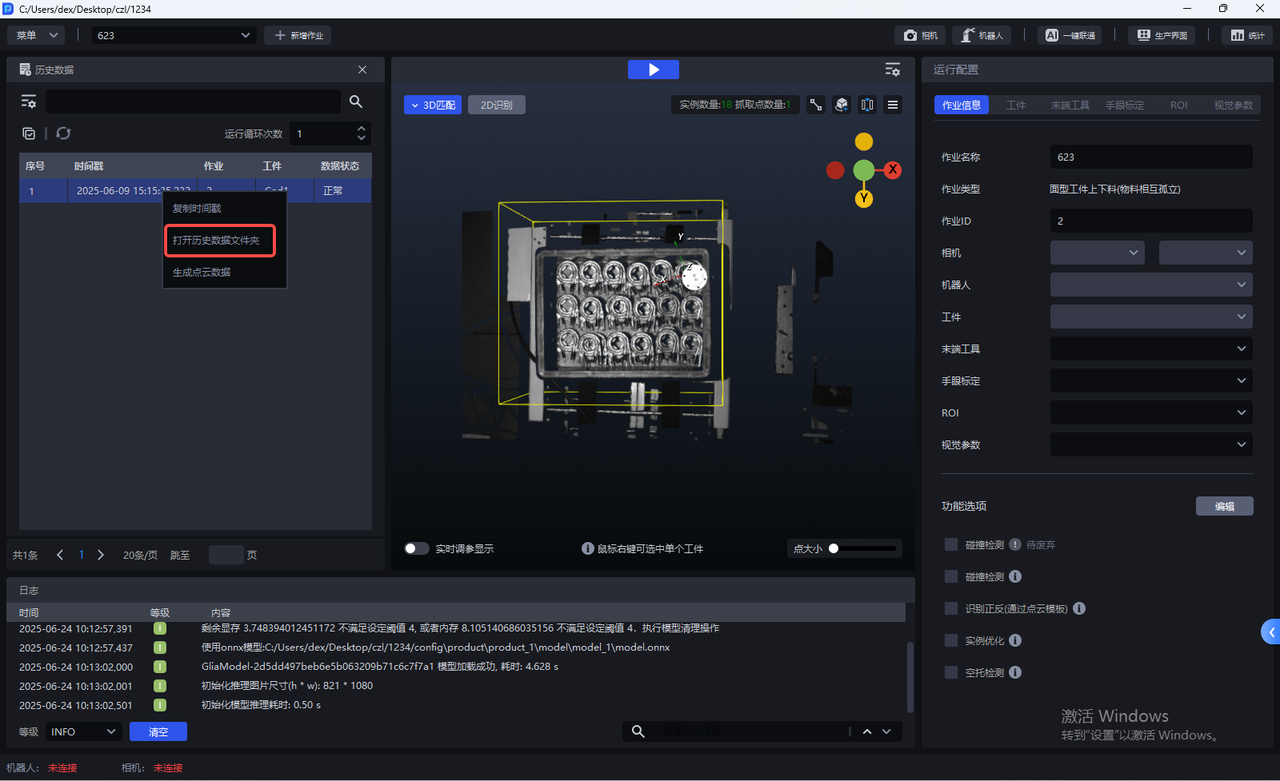
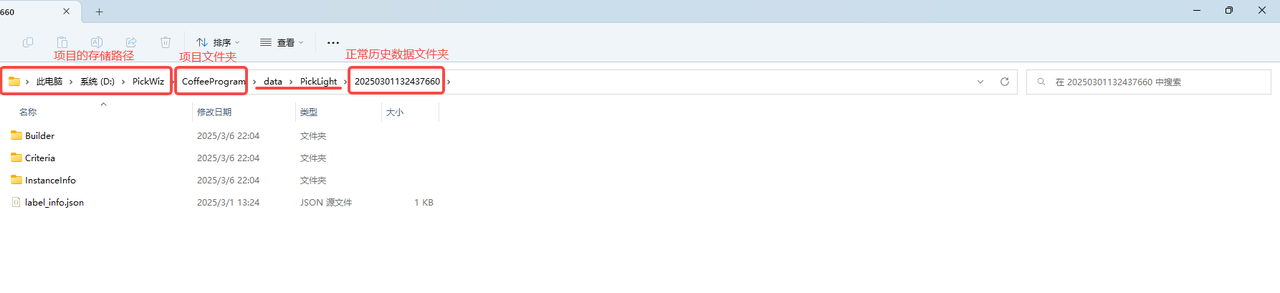
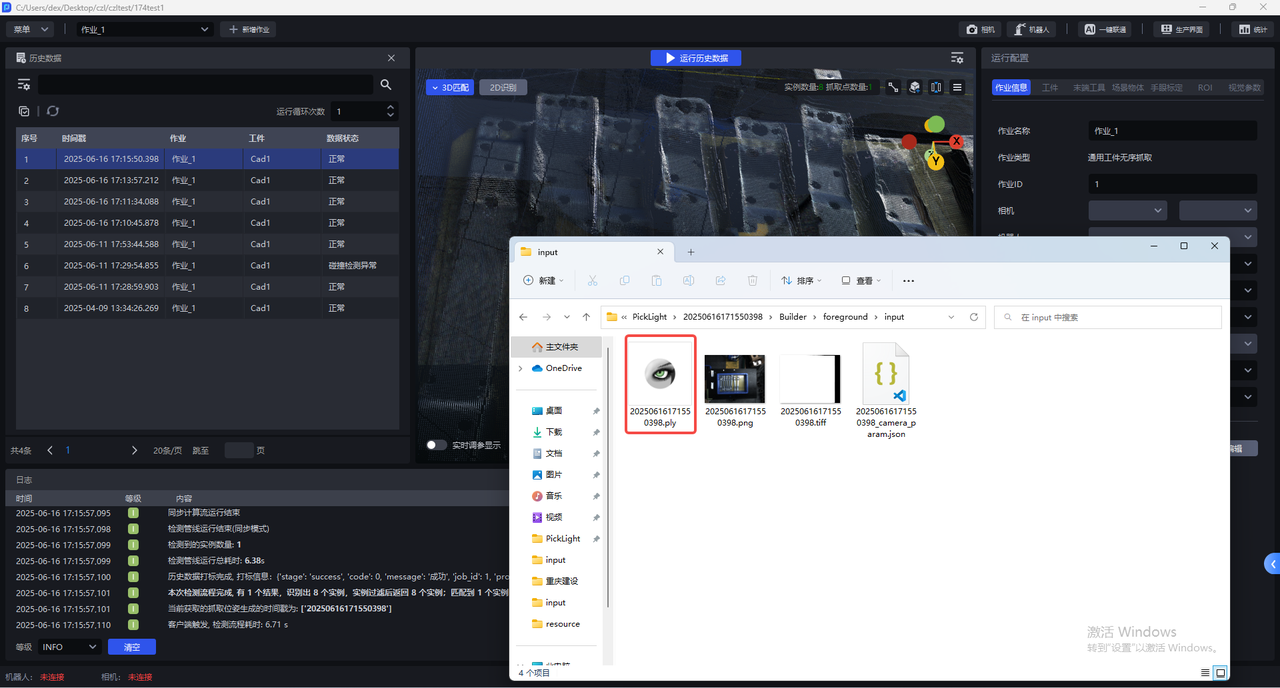
- Right-click on the timestamp of historical data to open the folder of the historical data.
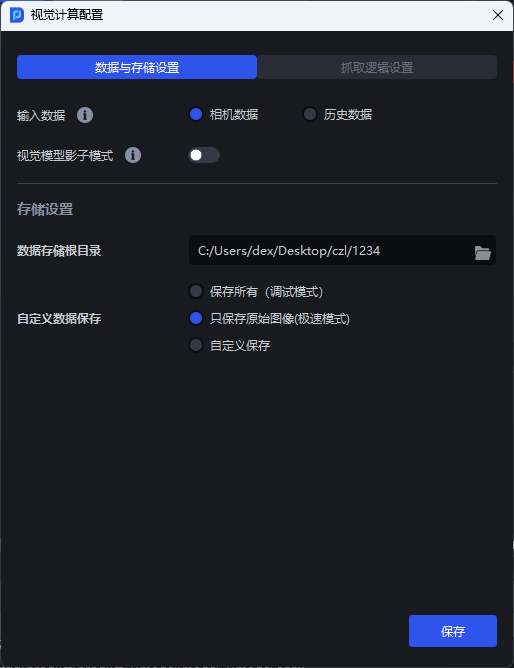
If Visual Computing Configuration selects Only save original images (extreme speed mode) for custom data saving, the historical data will not save Point Cloud data, resulting in the ROI area and Point Cloud template being unable to be adjusted, as shown in the figure below. (For ROI related instructions, please refer to ROI Operation Guide, for Point Cloud template related instructions please refer to Point Cloud Template Production Guide)
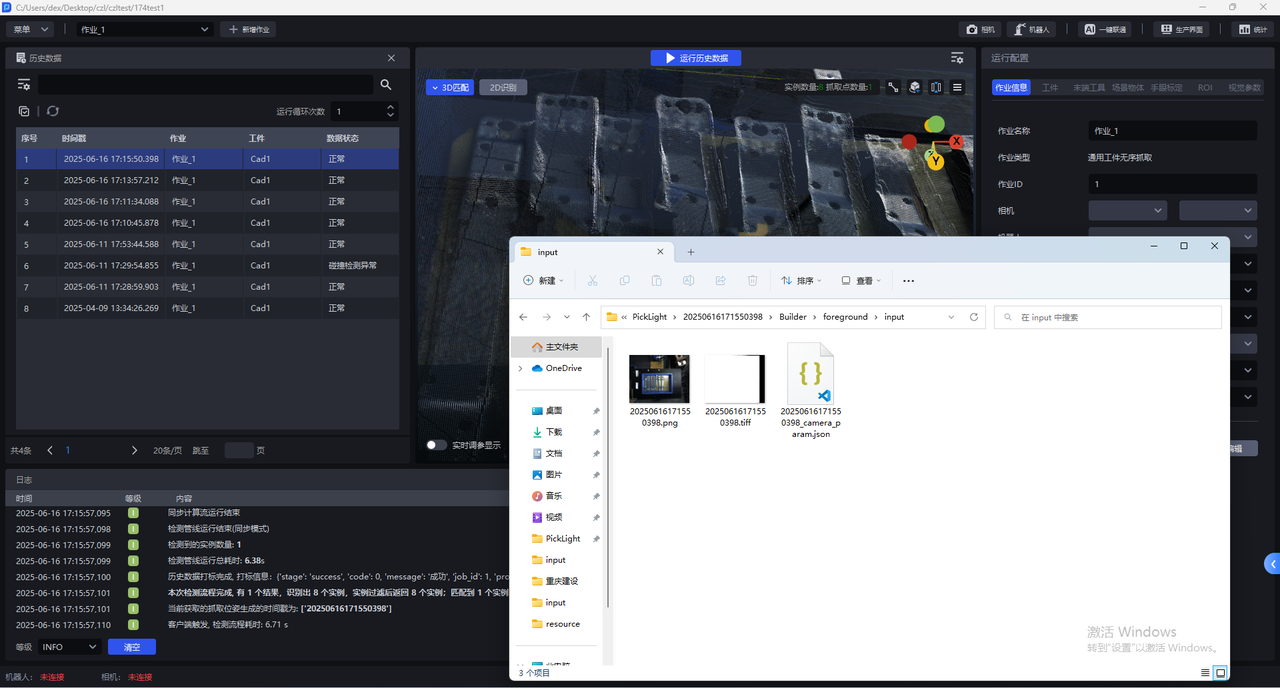
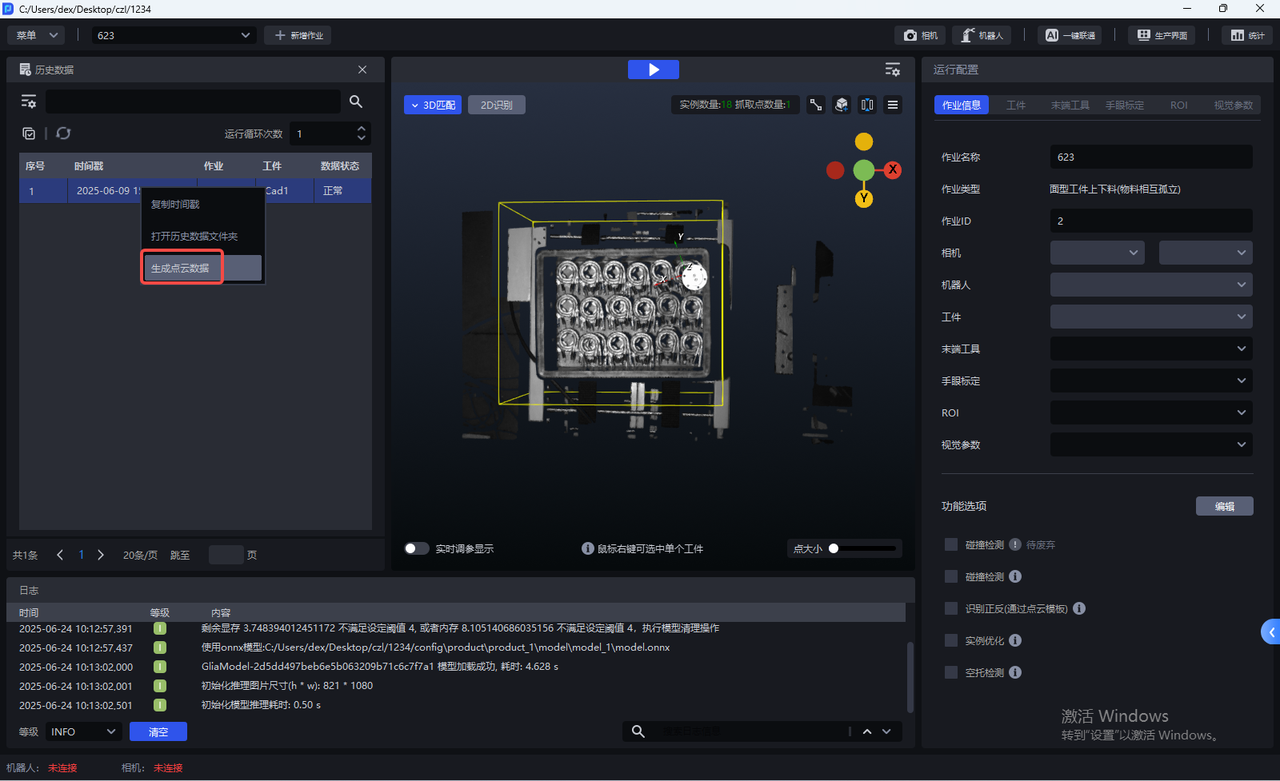
When the Camera is occupied and cannot obtain Camera data, and historical data can only be used to generate Point Cloud, you can right-click the timestamp of the historical data, and then left-click Generate Point Cloud Data. The system will generate a Point Cloud based on the original image and save it in the directory corresponding to the historical data, as shown in the figure below.
2. Search historical data
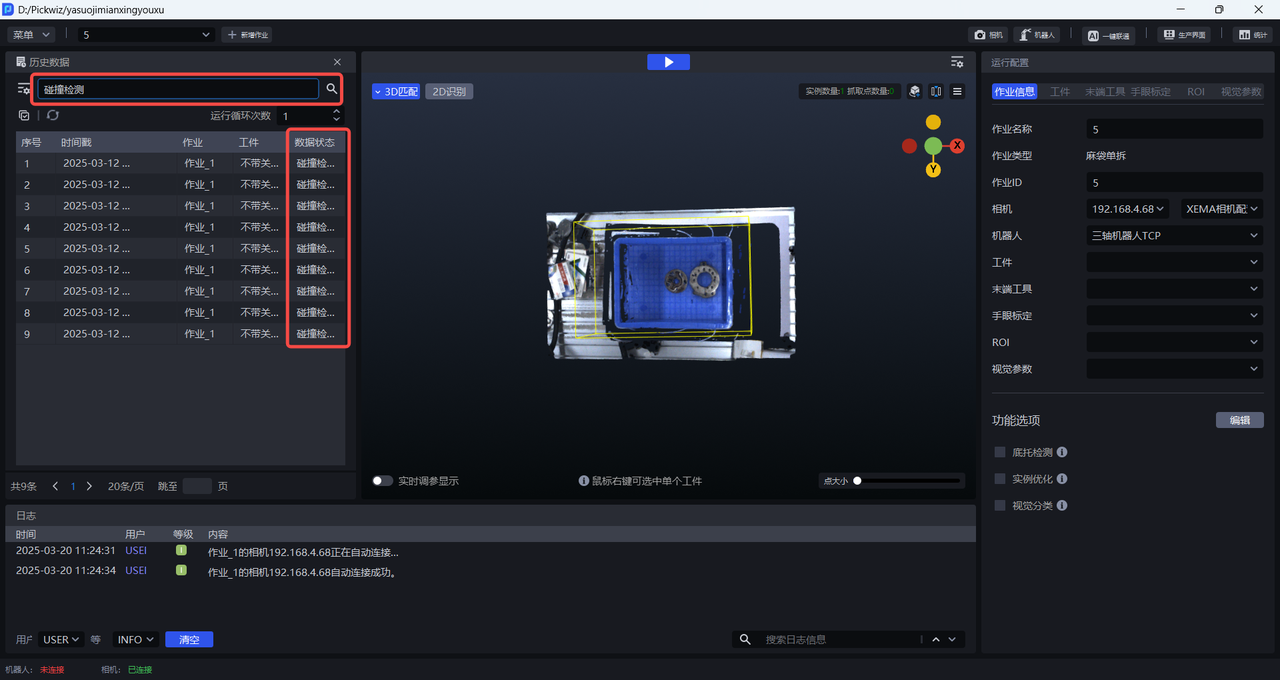
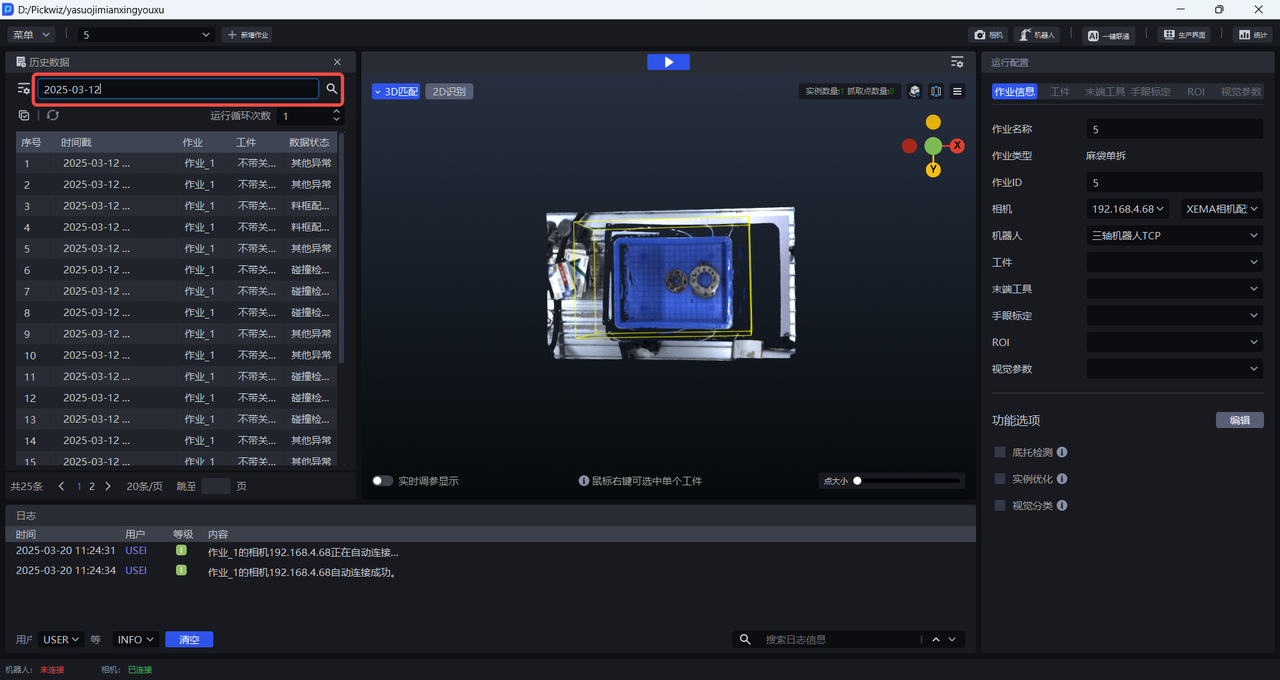
Enter the timestamp, Task, Target, and data status in the search box of the historical data panel to search for the corresponding historical data.
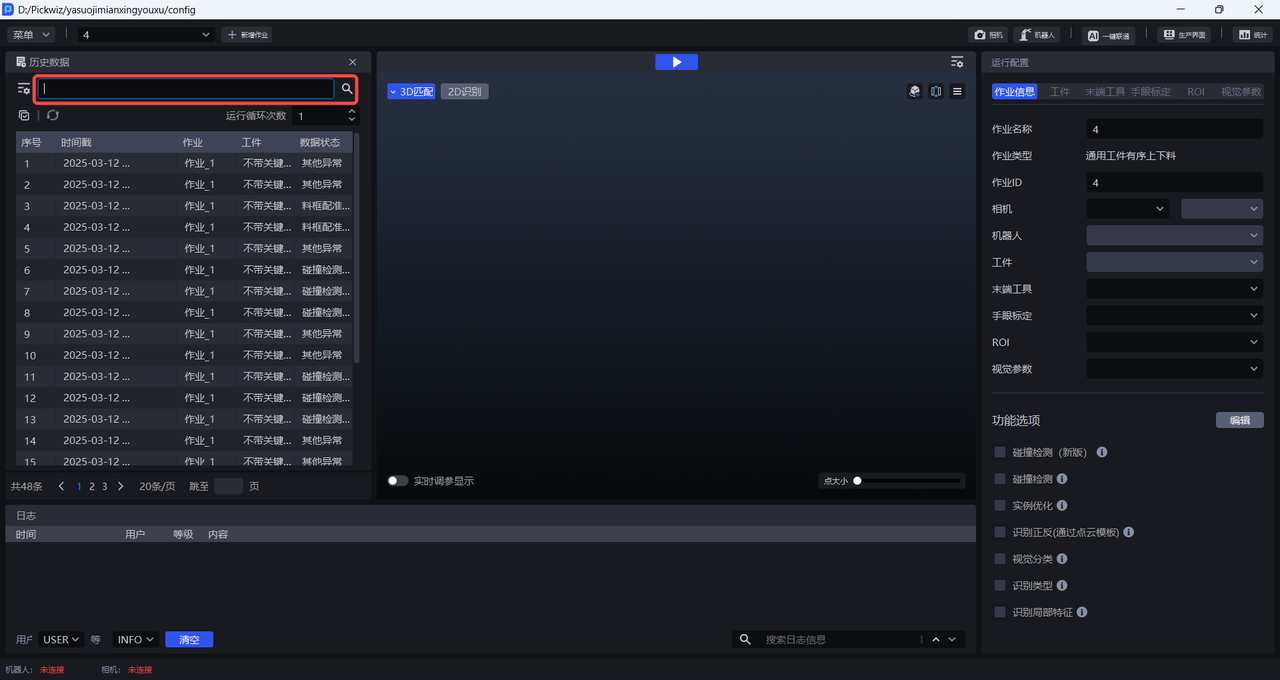
Input abnormal data status, such as abnormal material frame detection, 2D recognition errors, etc., to filter out abnormal situations in historical data.
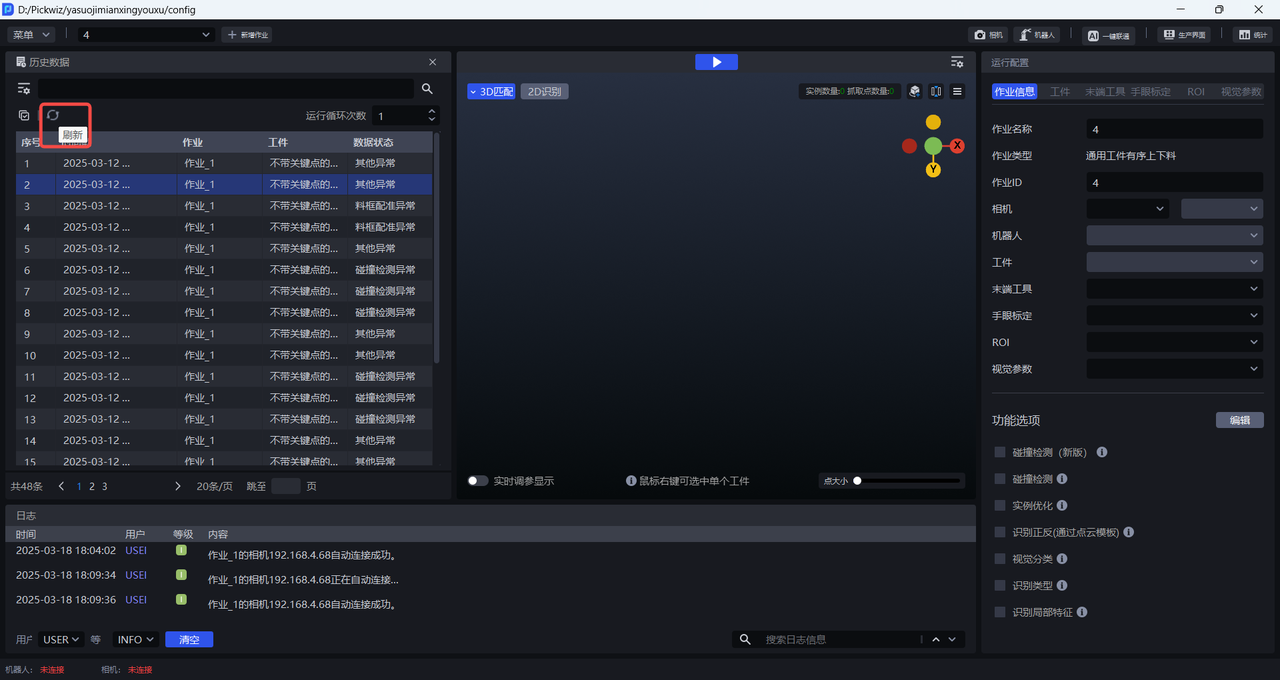
3. Refresh historical data
Click the Refresh button to refresh the latest historical data.
4. Run historical data
(1)PickWiz side running historical data
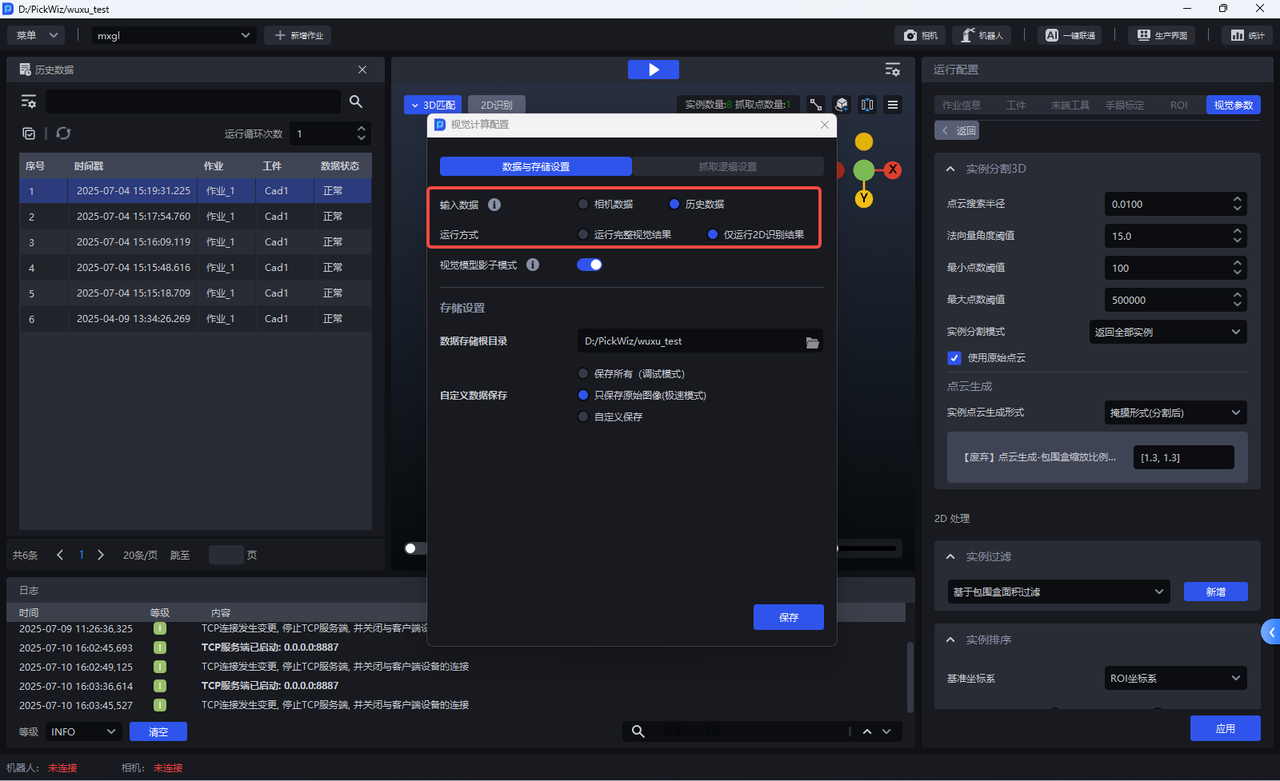
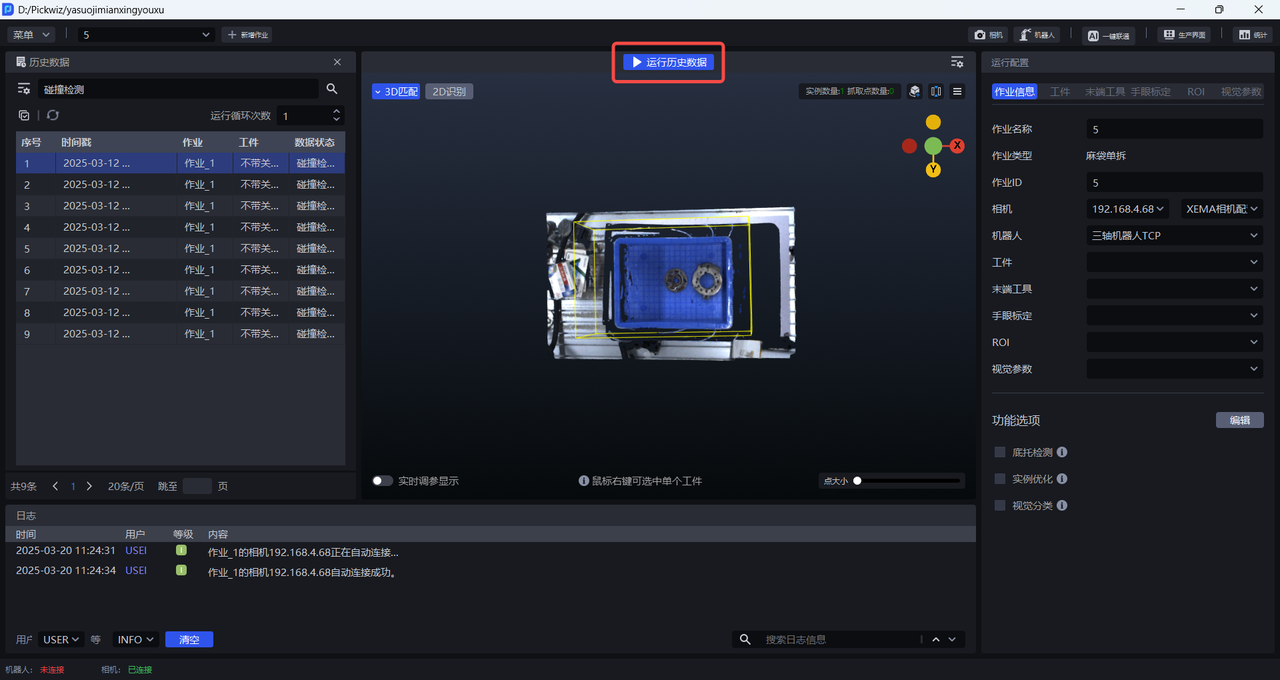
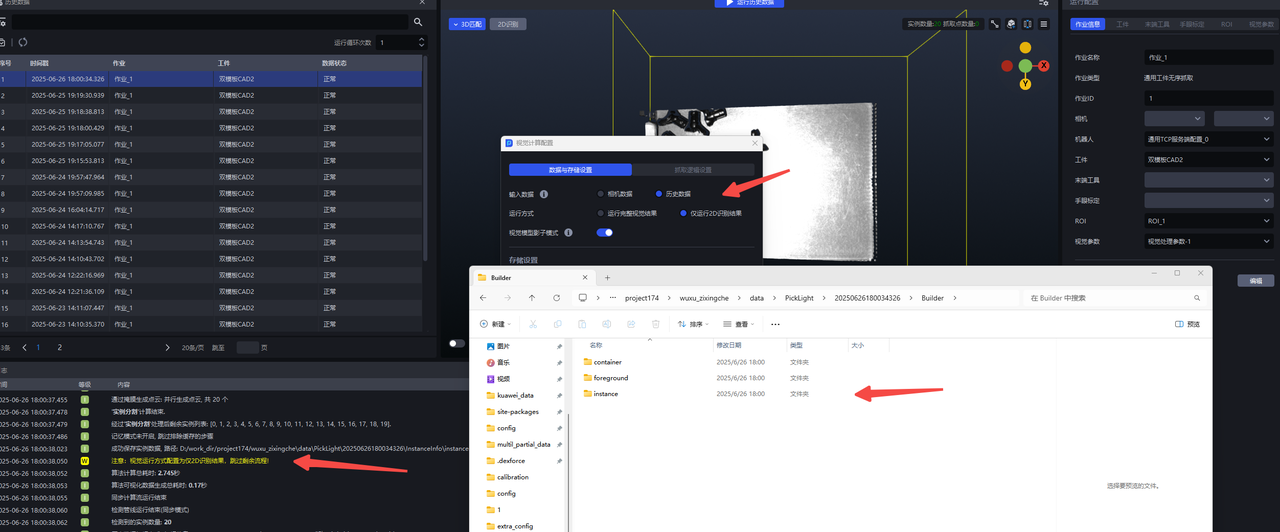
- If you need to rerun the selected historical data, you can enter the Visual Computing Configuration panel, adjust the Input Data to "Historical Data", and finally click the "Run Historical Data" button to rerun the historical data.
- If you want to view the 2D recognition results and Pick Point of this piece of historical data, you can click Run complete visual results. This running method will save the complete record of the rerun of this piece of historical data, as shown in the figure below.
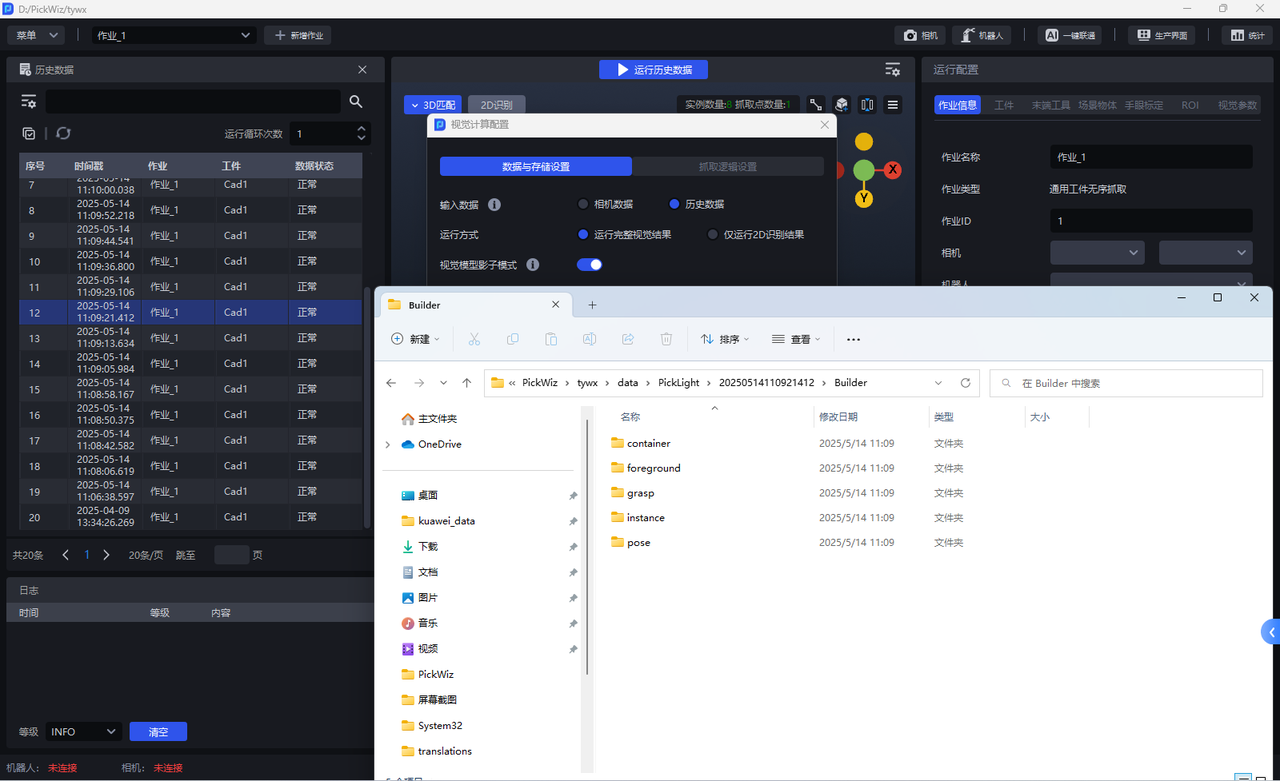
- If you only need to view the 2D recognition results of this historical data and do not need to view the Pick Point of this historical data, you can click Run only 2D running results. This running method will only save the 2D recognition results of the re-run of this historical data (the Builder folder only saves the foreground node foreground, material frame detection container, and instance detection instance, and does not save the pose estimation node pose and the Pick Point generation node grasp), as shown in the figure below.
(2) Historical data of Robot side operation
Select a piece of historical data and Robot sends the instruction co value to be 5, which will trigger the use of historical data to run visual results, as shown below.
Robotco instruction triggering only supports a single run of historical data and does not support batch run of historical data.
5. Batch operations
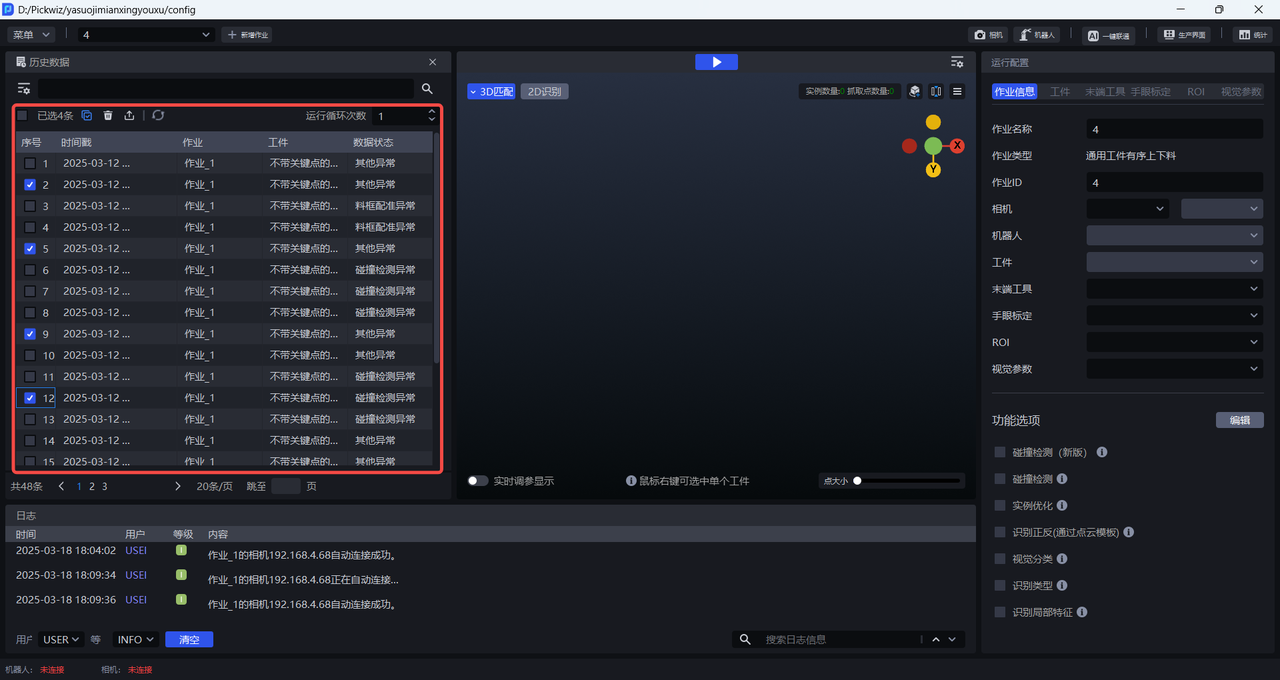
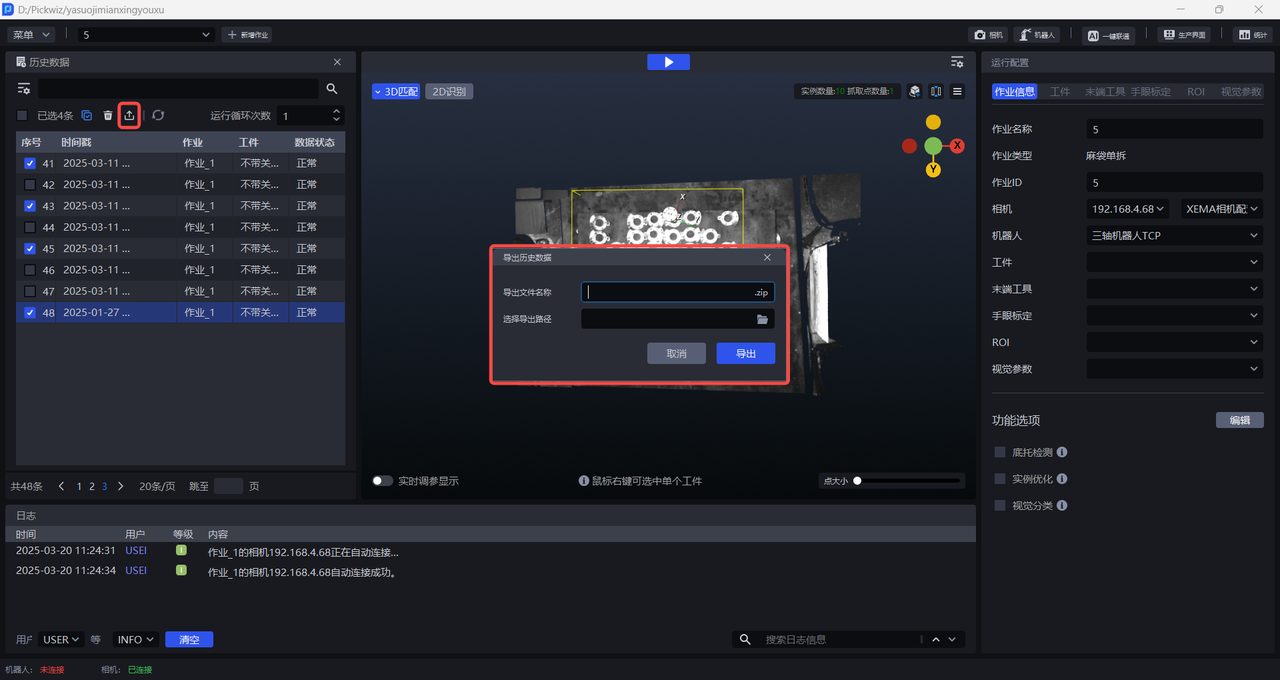
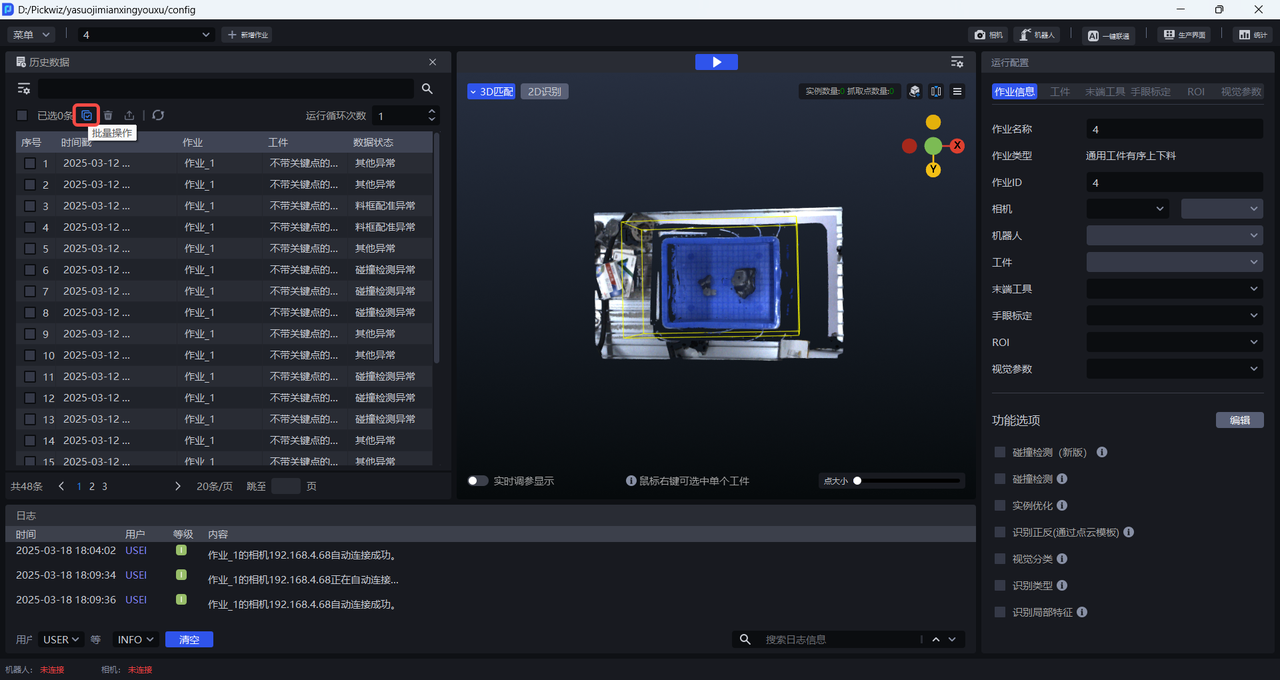
Click the Batch Operation button to select multiple pieces of historical data for batch deletion, export, and operation.
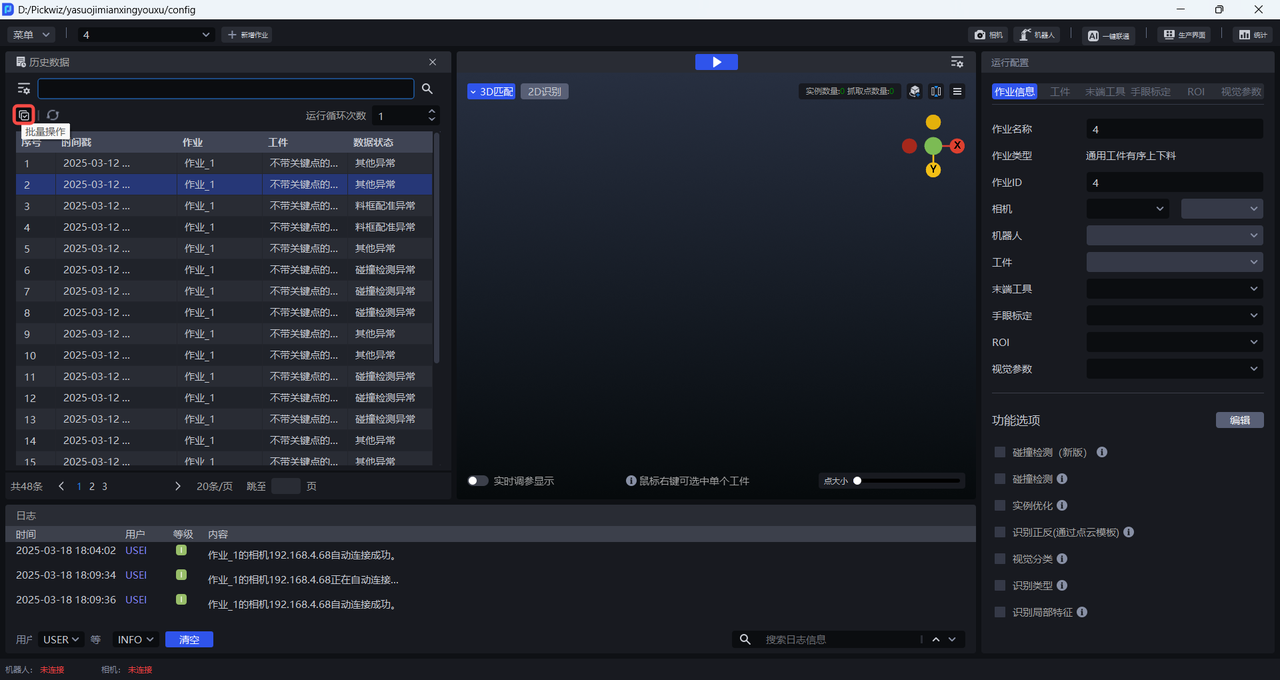
- Click the
🗑button to delete multiple historical data in batches
- Click the Export button to export multiple pieces of historical data in batches
- Click the Run Historical Data button to run multiple pieces of historical data in batches and one by one.
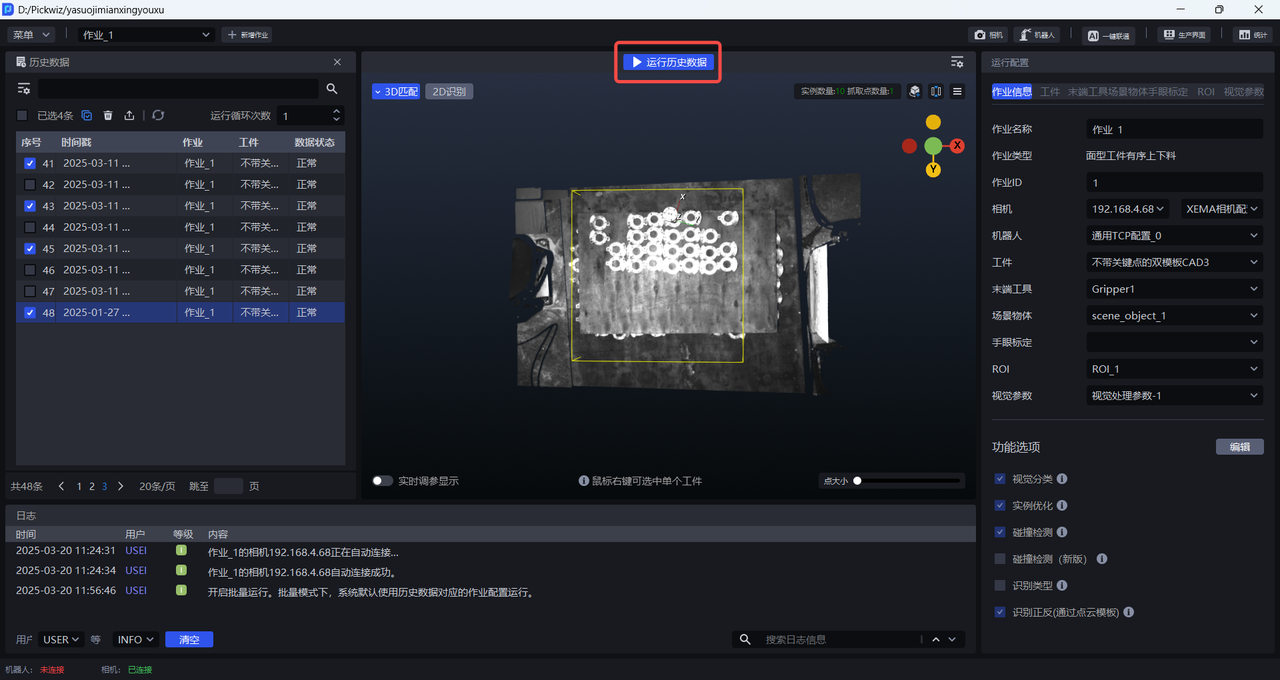
- Click the Batch Operation button again to uncheck the batch operation function.
6. Number of running cycles
The number of running cycles refers to running the selected historical data n times. If multiple pieces of historical data are checked and the number of running cycles is greater than 1, then the multiple pieces of historical data will be run one by one. After one round of running is completed, the next round of running will be carried out.
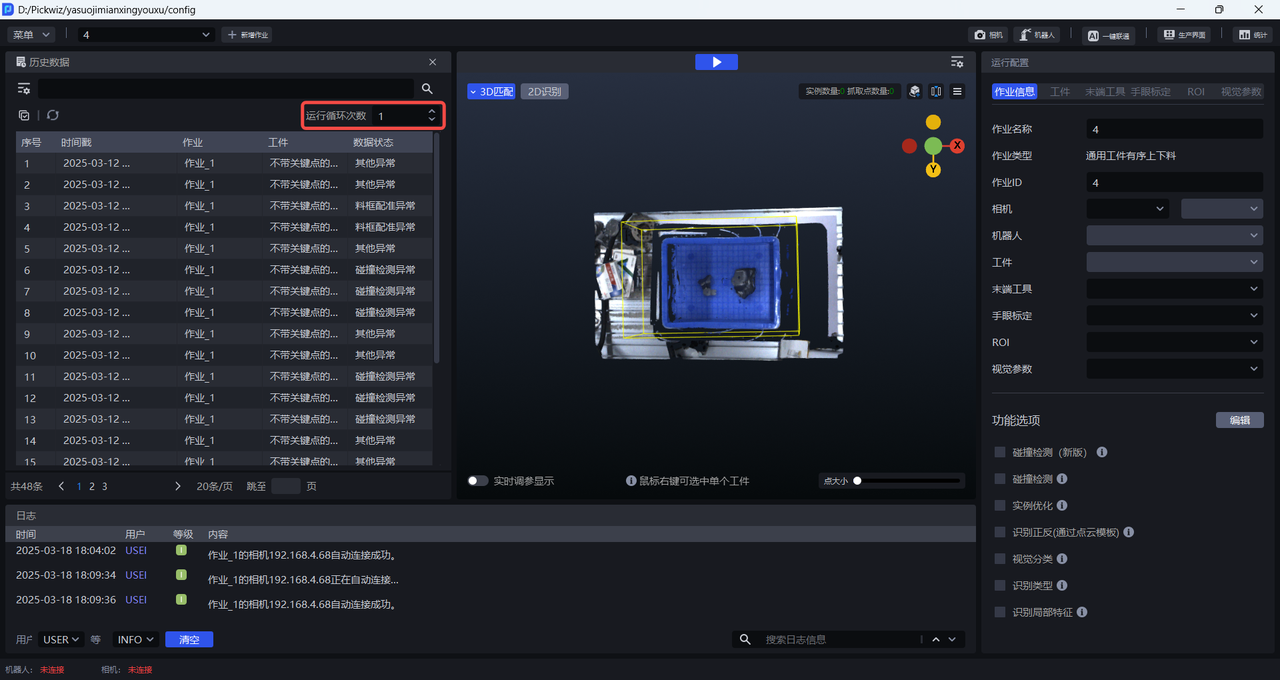
When the number of running cycles is greater than 1, you can view the current historical data running progress in the lower right corner of the main interface.

Click Stop Historical Data to stop the loop.

7. Historical data storage management
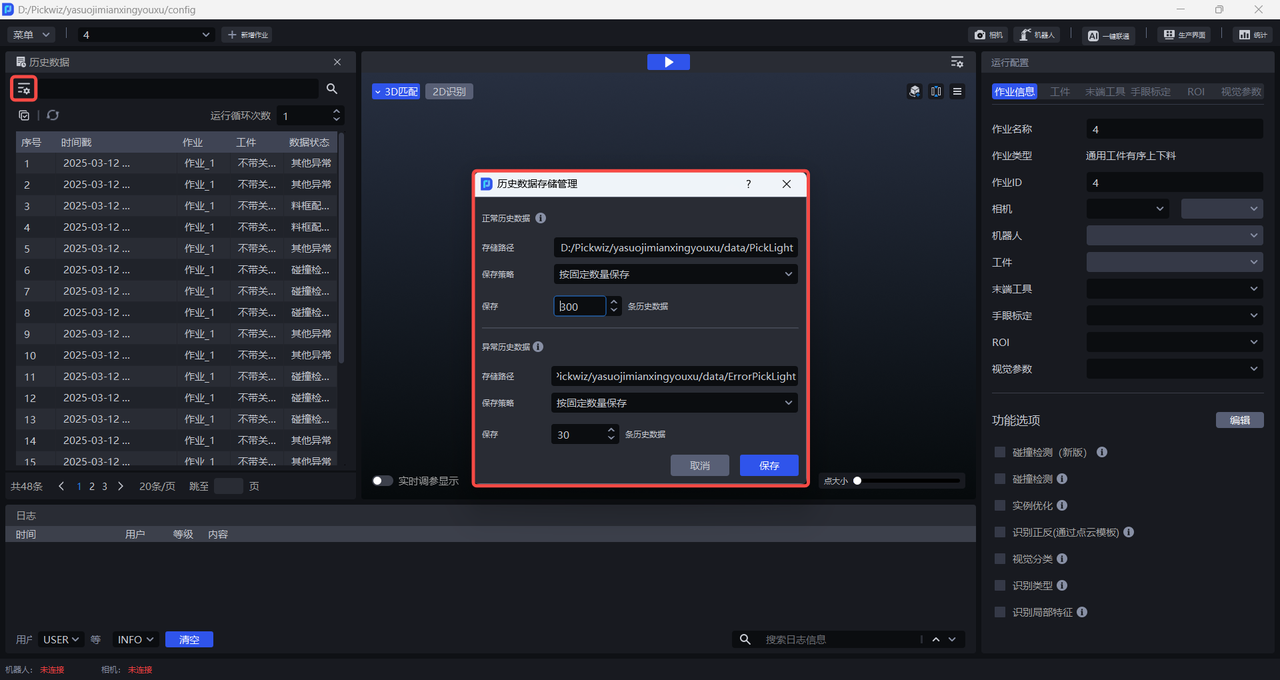
Click to open the historical data storage management panel, view the path to store historical data, and set the storage strategy for historical data.
- Normal historical data
The storage path of normal historical data is: project folder/project folder/data/PickLight
There are two storage strategies: saving according to a fixed quantity and saving according to a fixed time. Save n pieces of normal historical data according to a fixed number, and save 300 pieces by default; save normal historical data within n hours according to a fixed time, and save 24 hours by default.
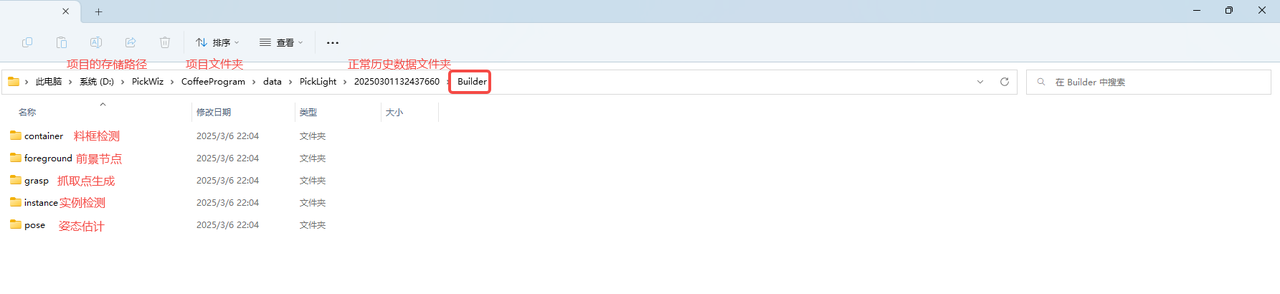

- Abnormal historical data
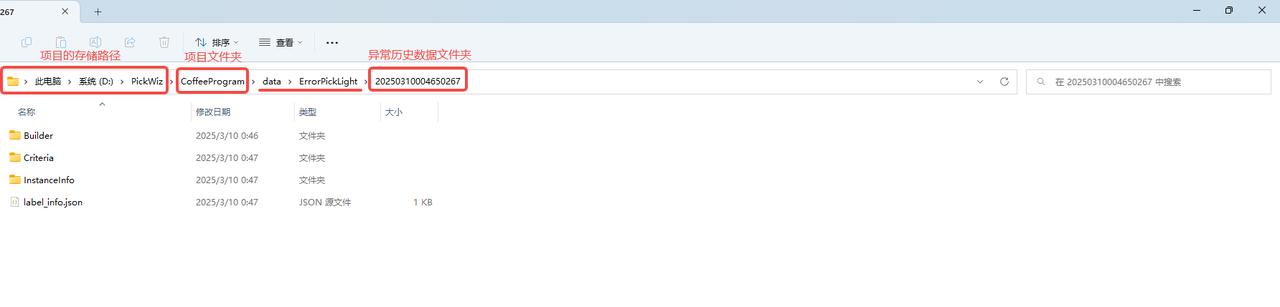
The storage path of exception historical data is: project folder/project folder/data/ErrorPickLight
There are two storage strategies: saving according to a fixed quantity and saving according to a fixed time. Save n pieces of abnormal historical data according to a fixed number, and save 30 pieces by default; save abnormal historical data within n hours according to a fixed time, and save 24 hours by default.
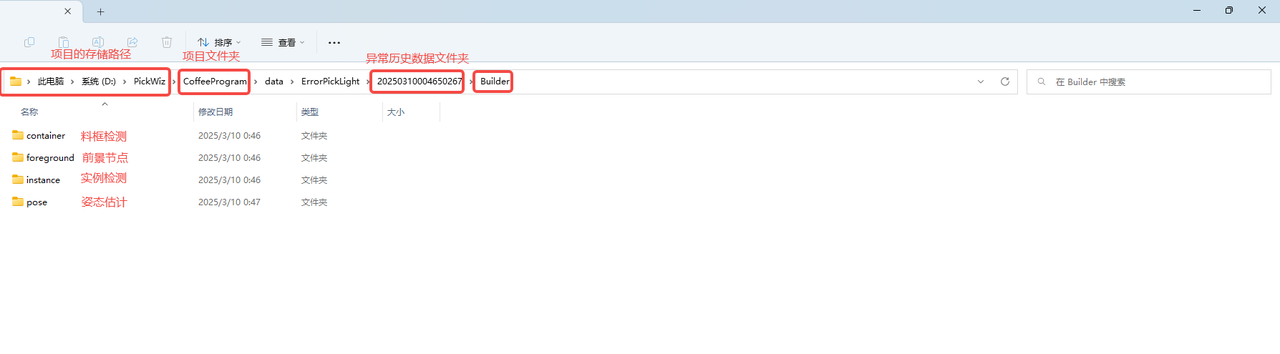

Abnormal nodes can be determined from the abnormal historical data. For example, the Pick Point generation folder (Builder/Pose) of the abnormal historical data in the figure above is missing, which means there is an error in Pick Point generation.