
Robot Configuration Guide
1. Overview
Robot configuration and communication establish a connection between PickWiz and a robot or PLC (Programmable Logic Controller), allowing both sides to exchange data reliably in real time.
PickWiz supports five communication methods: TCP Server, TCP Client, ModBus, Mitsubishi MC, and Siemens Snap7. This guide covers preparation, communication method selection, and general robot configuration. For connection parameters, messages, registers, and commands specific to each protocol, see the corresponding guide.
2. Before You Begin
Complete the following steps before configuring communication:
- Create or load a project as described in the Project Operations Guide.
- Import the robot communication program and related configuration files into the robot or PLC system.
- Connect the industrial PC to the robot or PLC with an Ethernet cable.
- Confirm that the robot or PLC and the industrial PC are on the same IP subnet.
3. Select a Communication Method
The roles for the five communication methods are as follows:
| Communication Method | PickWiz Role | Peer Role | How It Works |
|---|---|---|---|
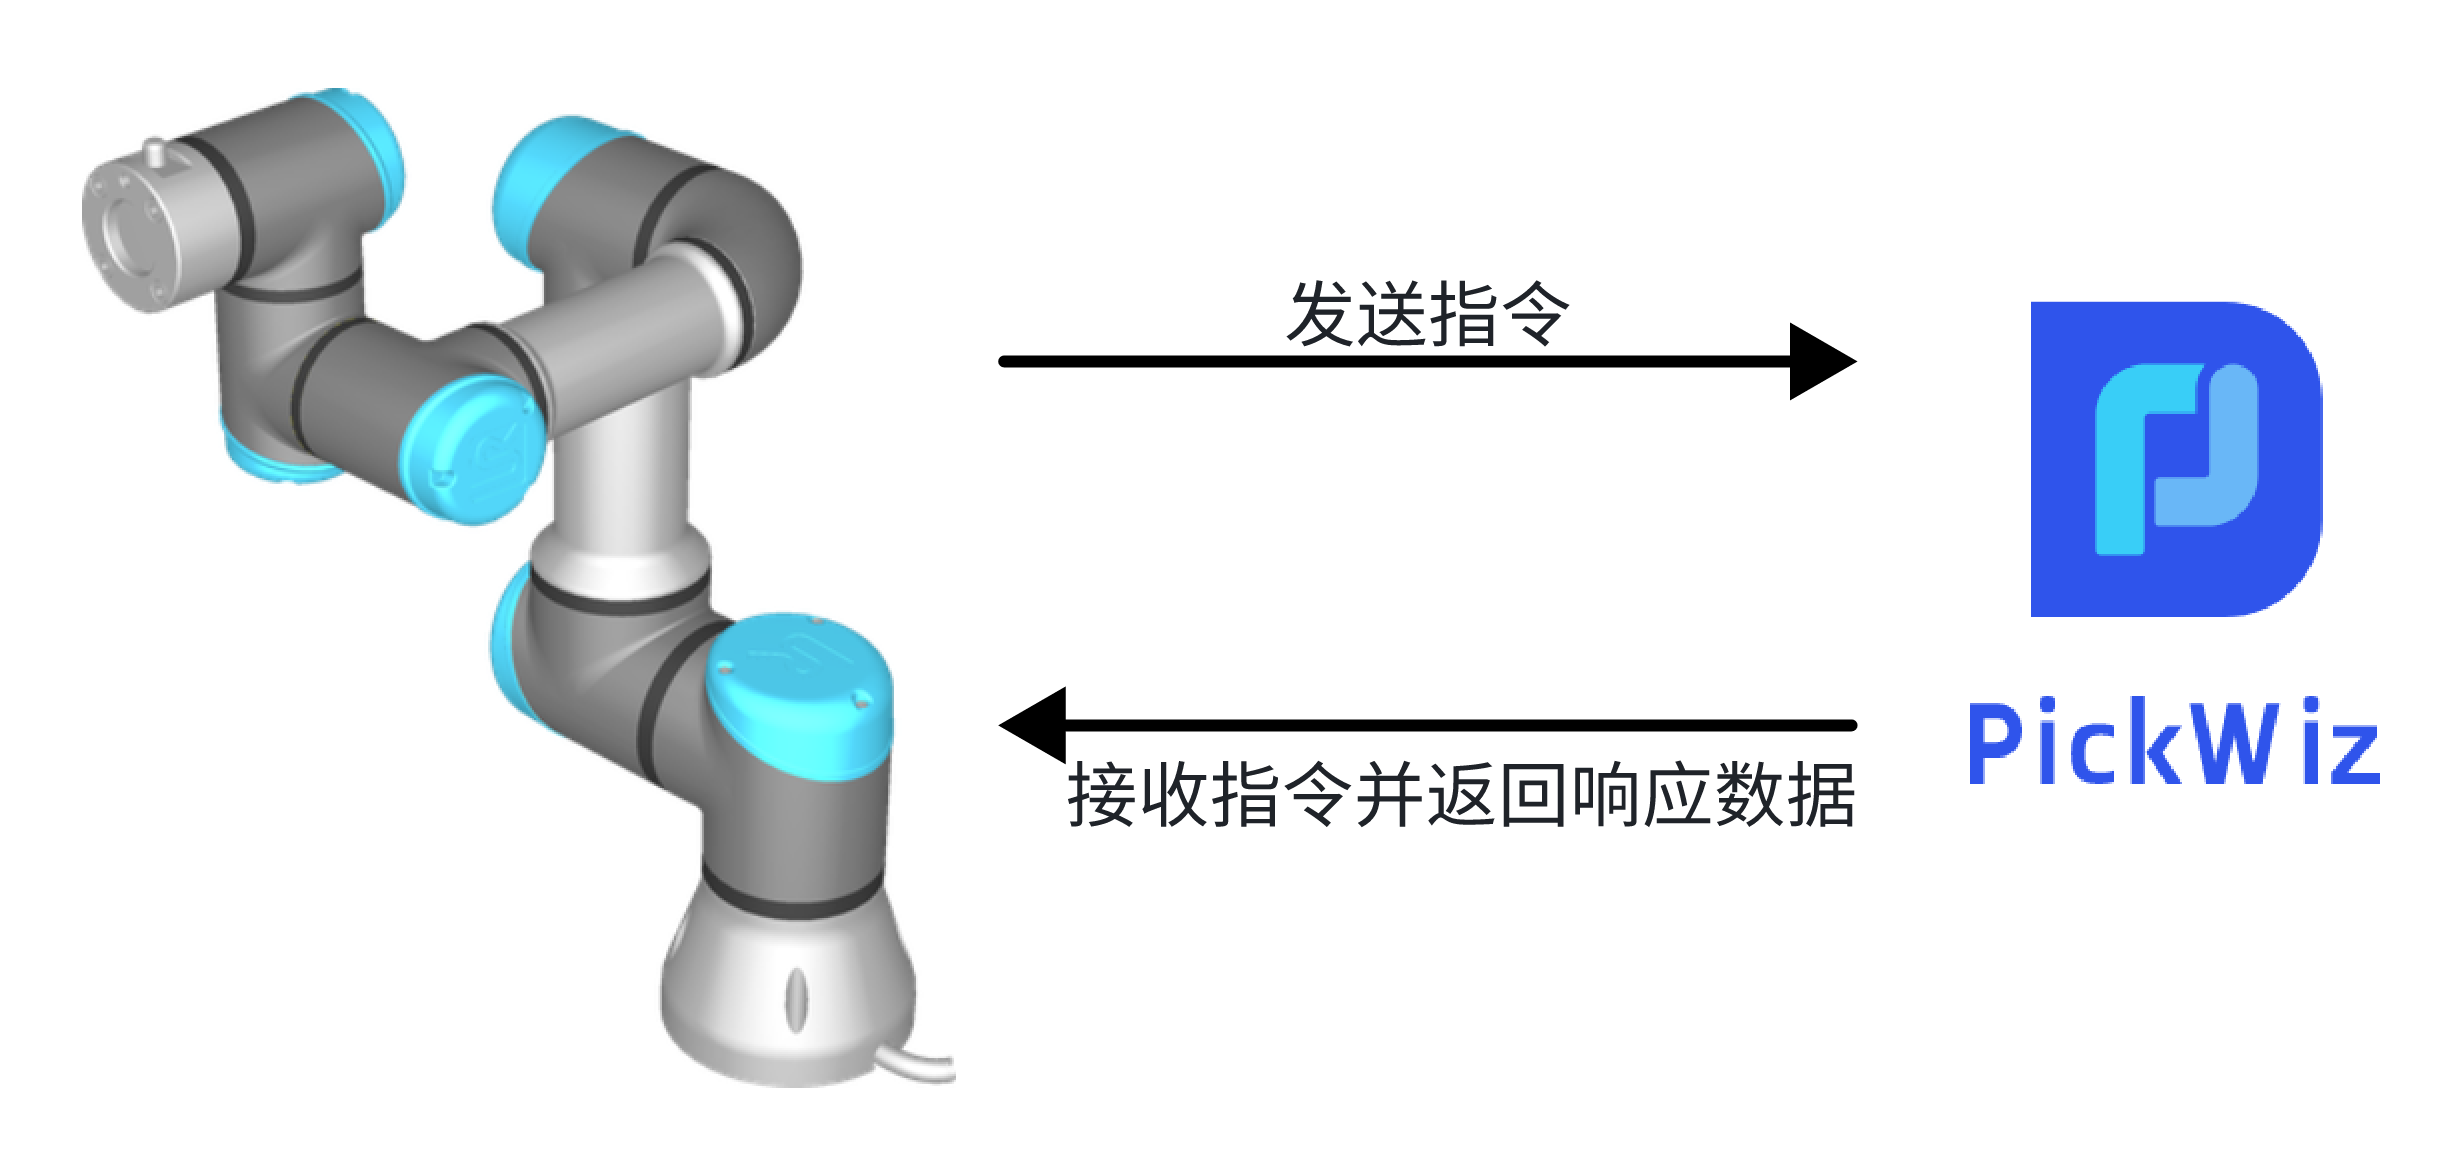
| TCP Server | Server | Robot as client | The robot sends TCP commands to PickWiz. PickWiz receives the commands and returns response data. A communication program must be written on the robot side. |
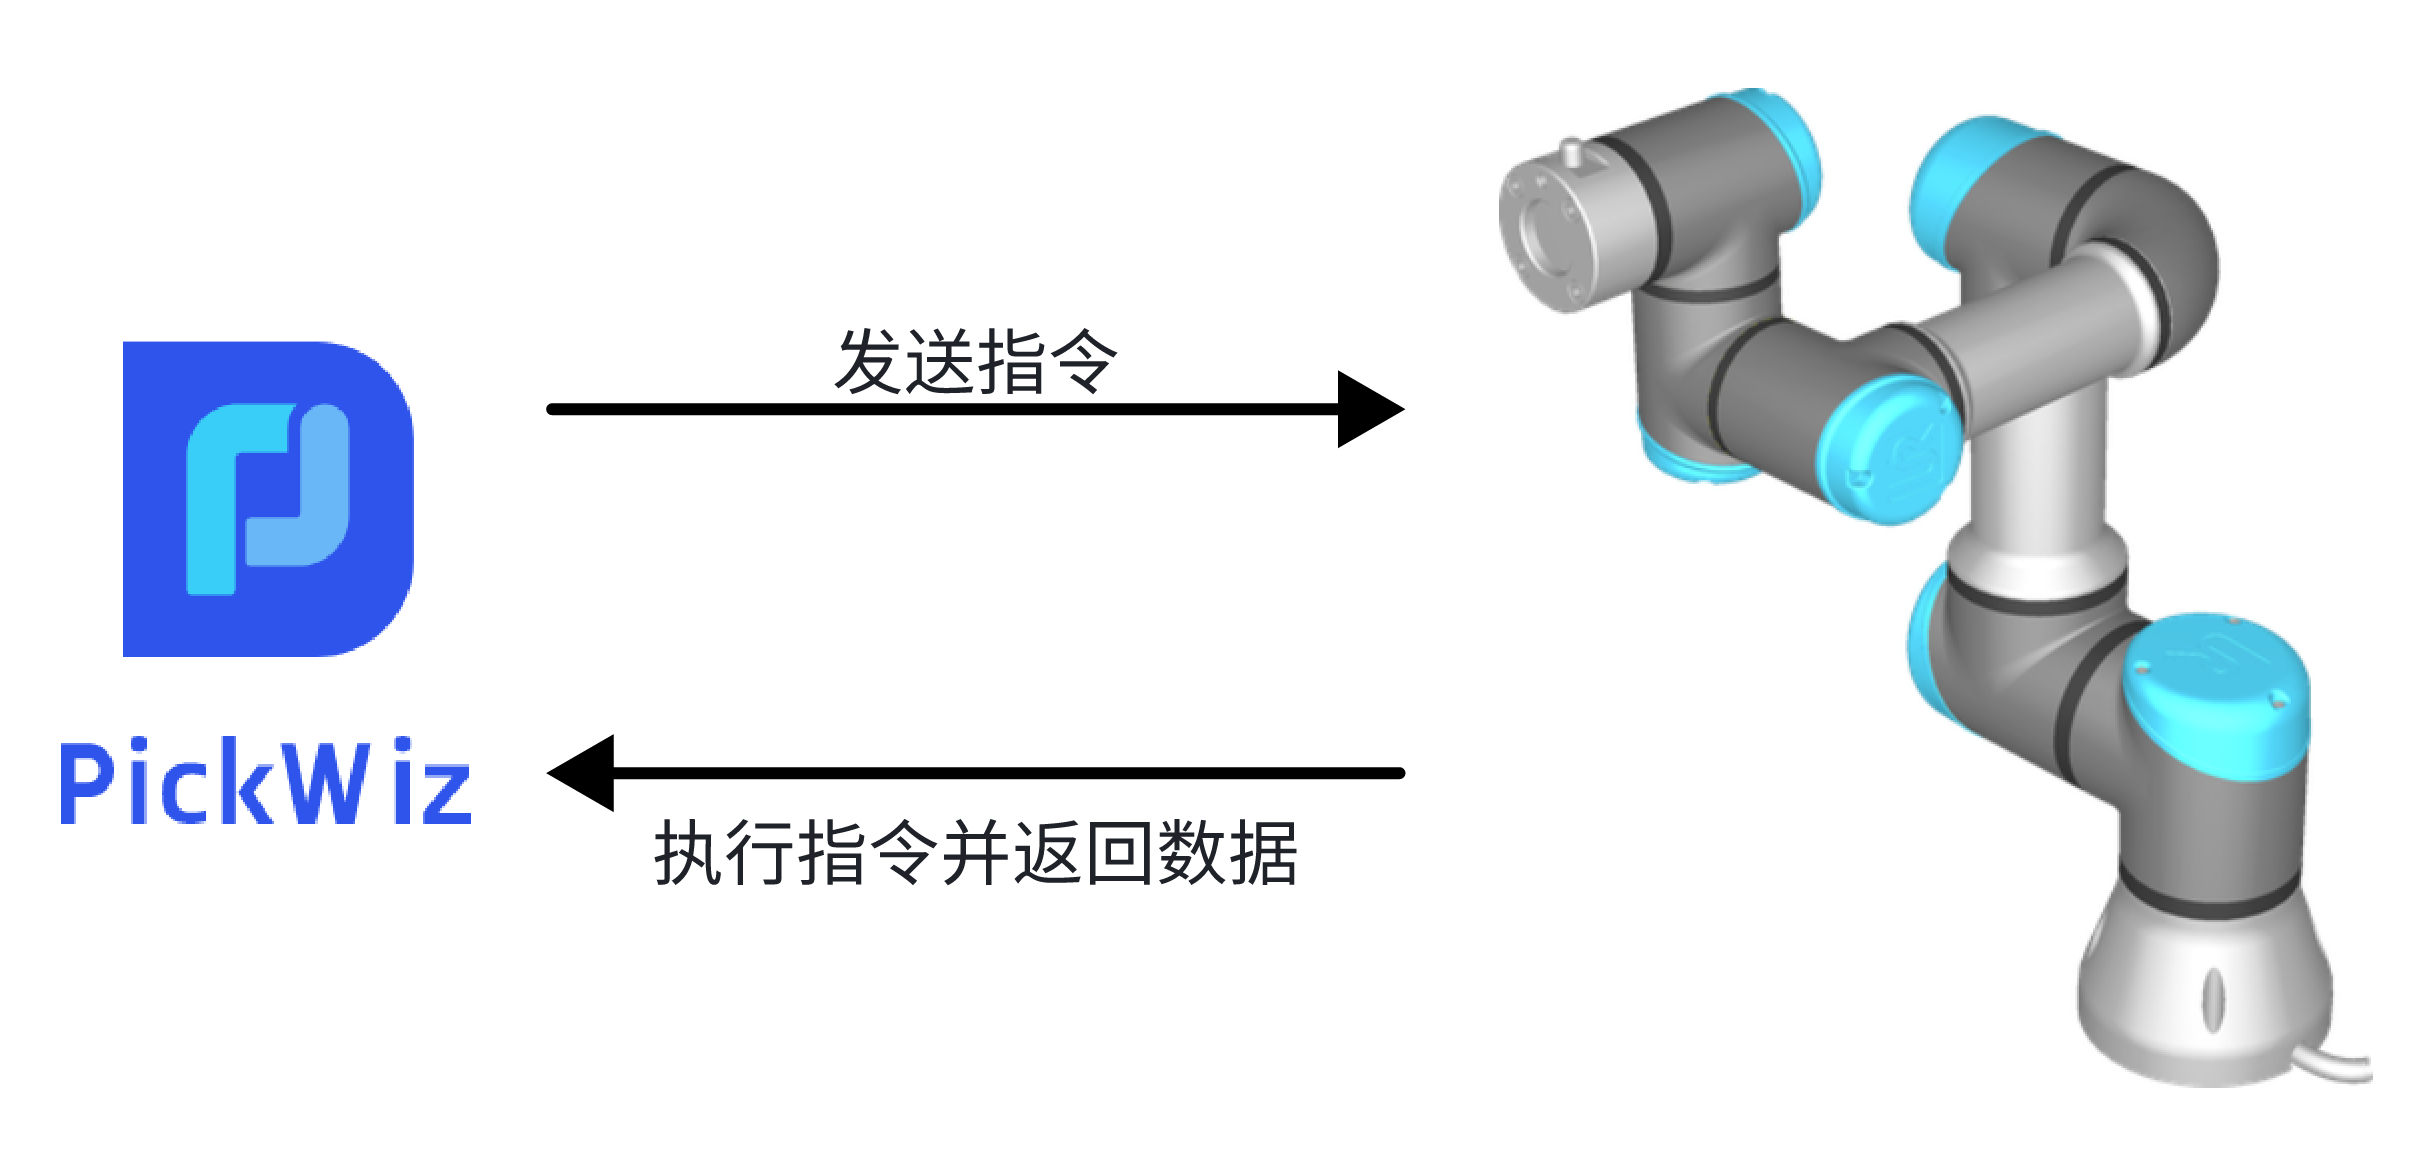
| TCP Client | Client | Robot as server | PickWiz sends commands to the robot. The robot executes the commands and returns data. |
| ModBus | Client | Robot or PLC as server | PickWiz exchanges data with the peer through ModBus configuration. |
| Mitsubishi MC | Client | Mitsubishi device as server | PickWiz exchanges data with the peer through Mitsubishi MC configuration. |
| Siemens Snap7 | Client | Siemens PLC as server | PickWiz exchanges data with the Siemens PLC through Snap7 configuration. |
The TCP Server communication relationship is shown below:
For the other four communication methods, PickWiz acts as the client:
4. Add and Configure a Robot
4.1 Open the Robot Configuration Panel
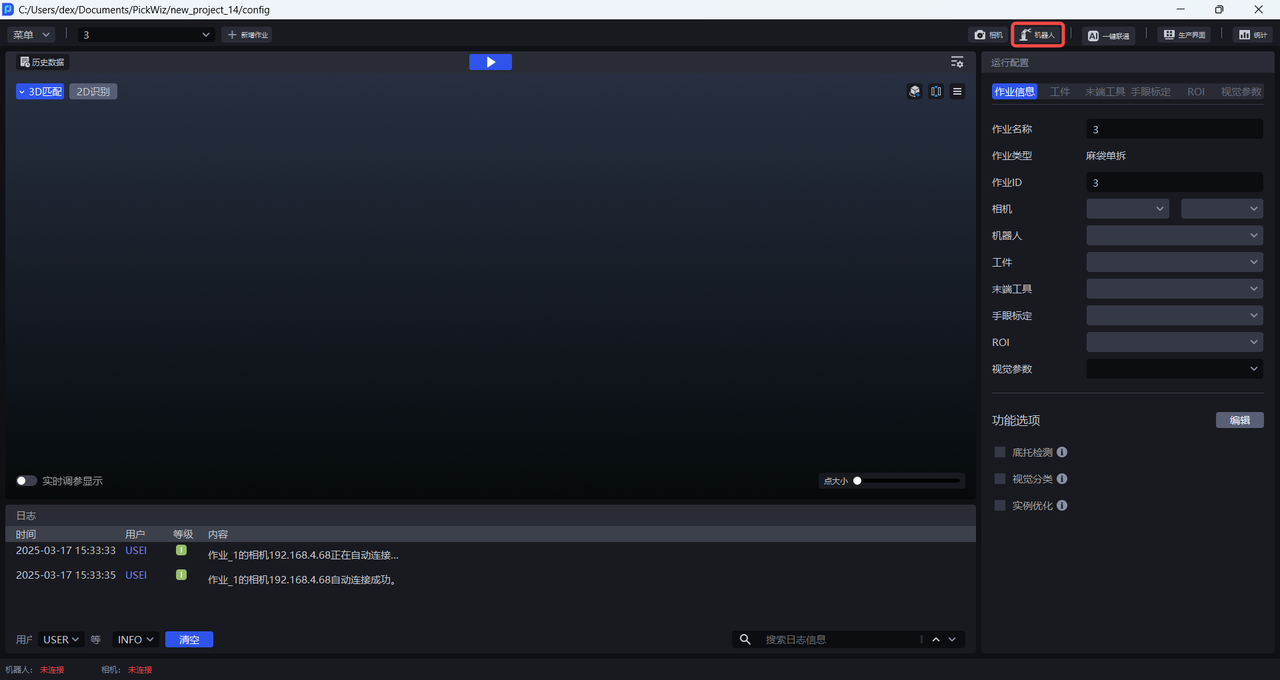
On the PickWiz main screen, click Robot Configuration Panel to open the Add Robot screen.
Click + Add Robot, then select the communication method used by the equipment on site.
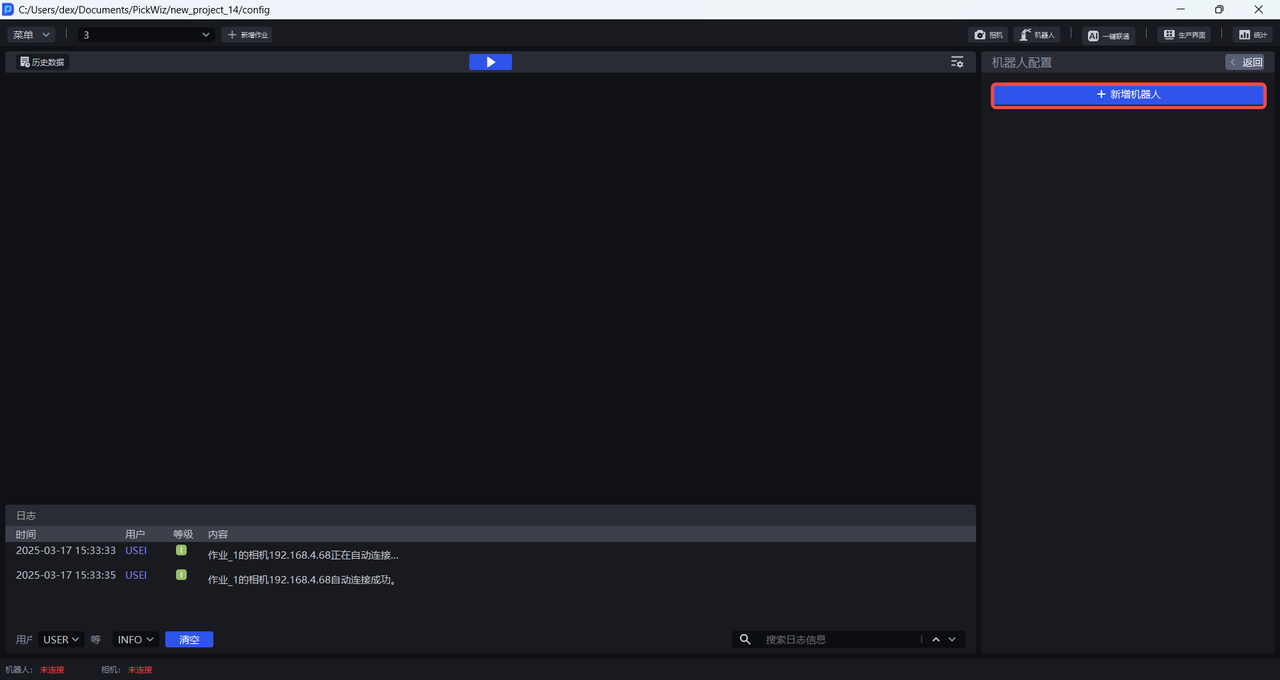
After selecting a communication method, click Next to open the Robot Configuration screen.
4.2 Enter Robot Information
The common robot information settings are listed below:
| Setting | Description |
|---|---|
| Communication Method | The protocol used for communication between PickWiz and the robot. It cannot be changed after the configuration is created. |
| Configuration Name | The name of the robot configuration. Supports Chinese and English characters, numbers, and symbols. |
| Configuration ID | The unique ID of the robot configuration. It can be changed and supports numbers only. |
| Brand | The robot brand. If connecting to a PLC, select “Other Device.” |
| Model | The robot model. If connecting to a PLC, select “Other Device.” |
| Device Model | If “Other Device” is selected for both Brand and Model, upload a device model in urdf format. |
| Number of Axes | The number of axes on the robot arm. Select three, four, or six axes. |
| Rotation Representation | Describes the robot's orientation in 3D space. Select Euler Angles or rotation vector. The Euler Angles order can be changed. |
4.3 Configure Communication Parameters and Commands
Communication addresses, read and write formats, messages, registers, and command settings vary by protocol. See the guide for the selected communication method:
Configure TCP communication in which the robot connects to PickWiz
Configure TCP communication in which PickWiz connects to the robot
Configure ModBus addresses, data formats, and communication fields
Configure Mitsubishi MC addresses, data formats, and communication fields
Configure Siemens Snap7 addresses, data formats, and communication fields
5. Manage and Select Robot Configurations
5.1 Edit, Copy, and Delete Configurations
- Edit: On the Add Robot screen, left-click a robot configuration.
- Copy: On the Add Robot screen, right-click a robot configuration, then select the copy action.
- Delete: On the Add Robot screen, right-click a robot configuration, then select the delete action.
5.2 Select a Robot Configuration for a Task
After completing communication configuration, select the corresponding configuration in the robot configuration selector on the task Main Screen. PickWiz will attempt to use that configuration to connect to the robot or PLC.
When the connection succeeds, the robot communication status in the lower-left corner of the main screen shows “Connected.” If it shows “Disconnected,” check the following:
- The Ethernet cable between the industrial PC and the robot or PLC is securely connected.
- Both IP addresses are on the same subnet.
- The correct communication program is loaded and running on the robot system.
- The correct robot configuration is selected for the current task.
6. Advanced Configuration
Understand how the number of transmitted instances, Pick Points, calculated poses, and instance filtering relate to one another
Extend site-specific logic during reception, placeholder processing, and transmission
7. Next Steps
After establishing robot communication, you can continue with the following configurations:
Check whether the robot, Camera, and calibration environment meet the calibration requirements
Configure the visual computation workflow and verify detection results