Visual Computing Configuration Guide
Visual computing configuration is a customized system configuration for the entire process of PickWiz visual computing. Users can customize system behavior according to specific Scene requirements. By configuring "data and storage settings" and "Picking Logic Settings", it ensures that PickWiz achieves the best balance between pick accuracy, pick cycle time and pick stability, and guides Robot to achieve accurate and efficient picking.
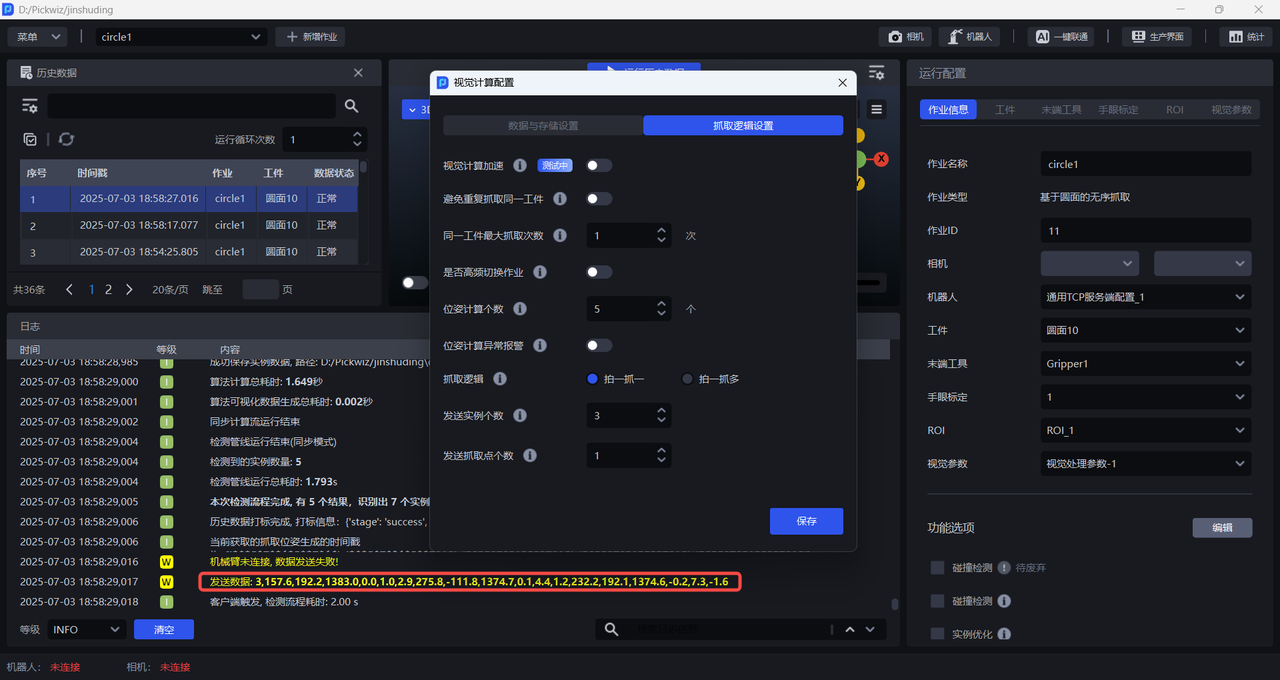
Click on the PickWiz main interface

Enter the visual computing configuration interface, as shown in the figure below.
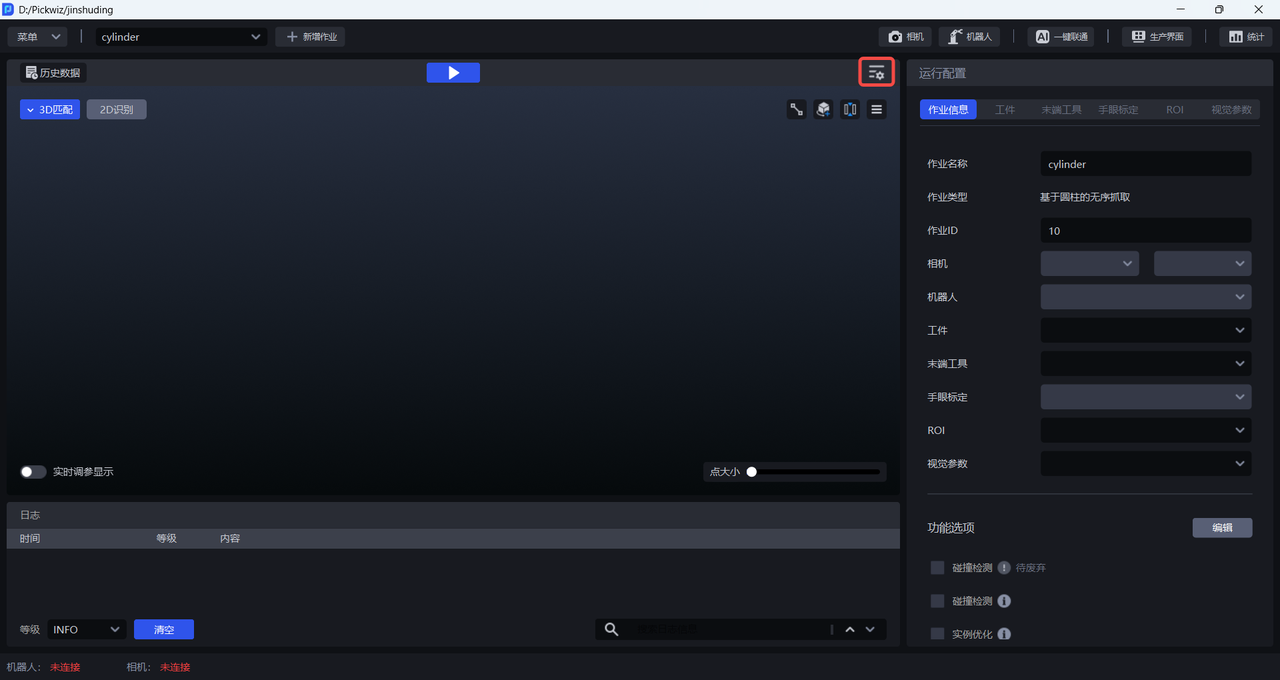
1. Data and storage settings
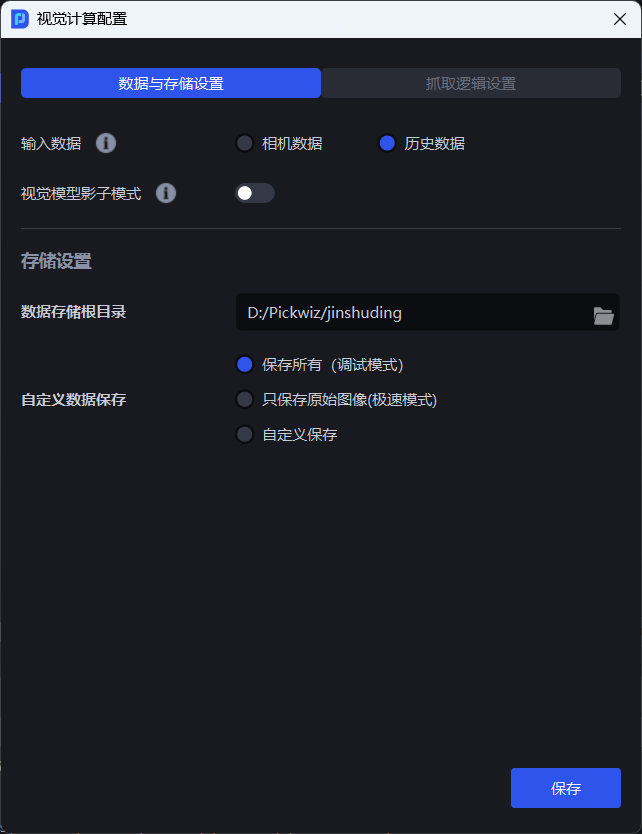
1.1 input data
When performing visual calculations, input Camera data or historical data into the workflow corresponding to the Scene. After the workflow performs 2D recognition, 3D calculation, and Pick Point processing on the input data, the Pick Point is output on the Target.
1.1.1 Camera data
Camera data is Scene data collected by Camera in real time, including 2D images, Depth images, and Point Cloud images, as shown in the figure below.
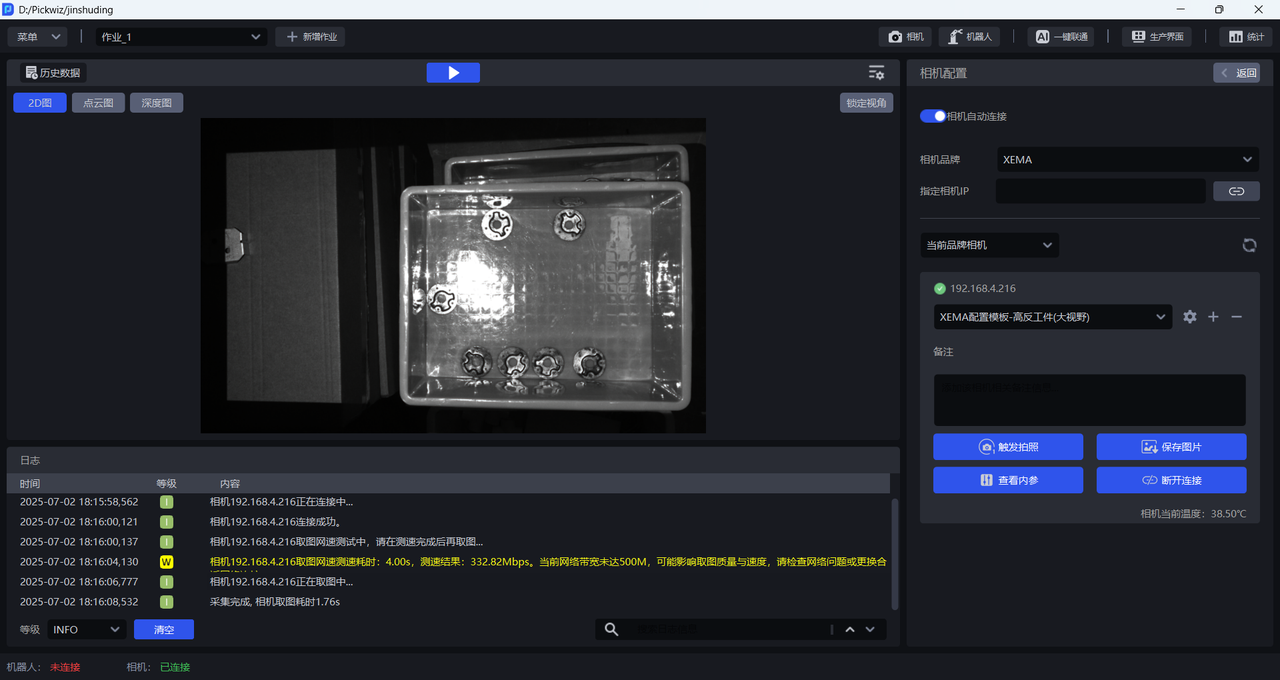
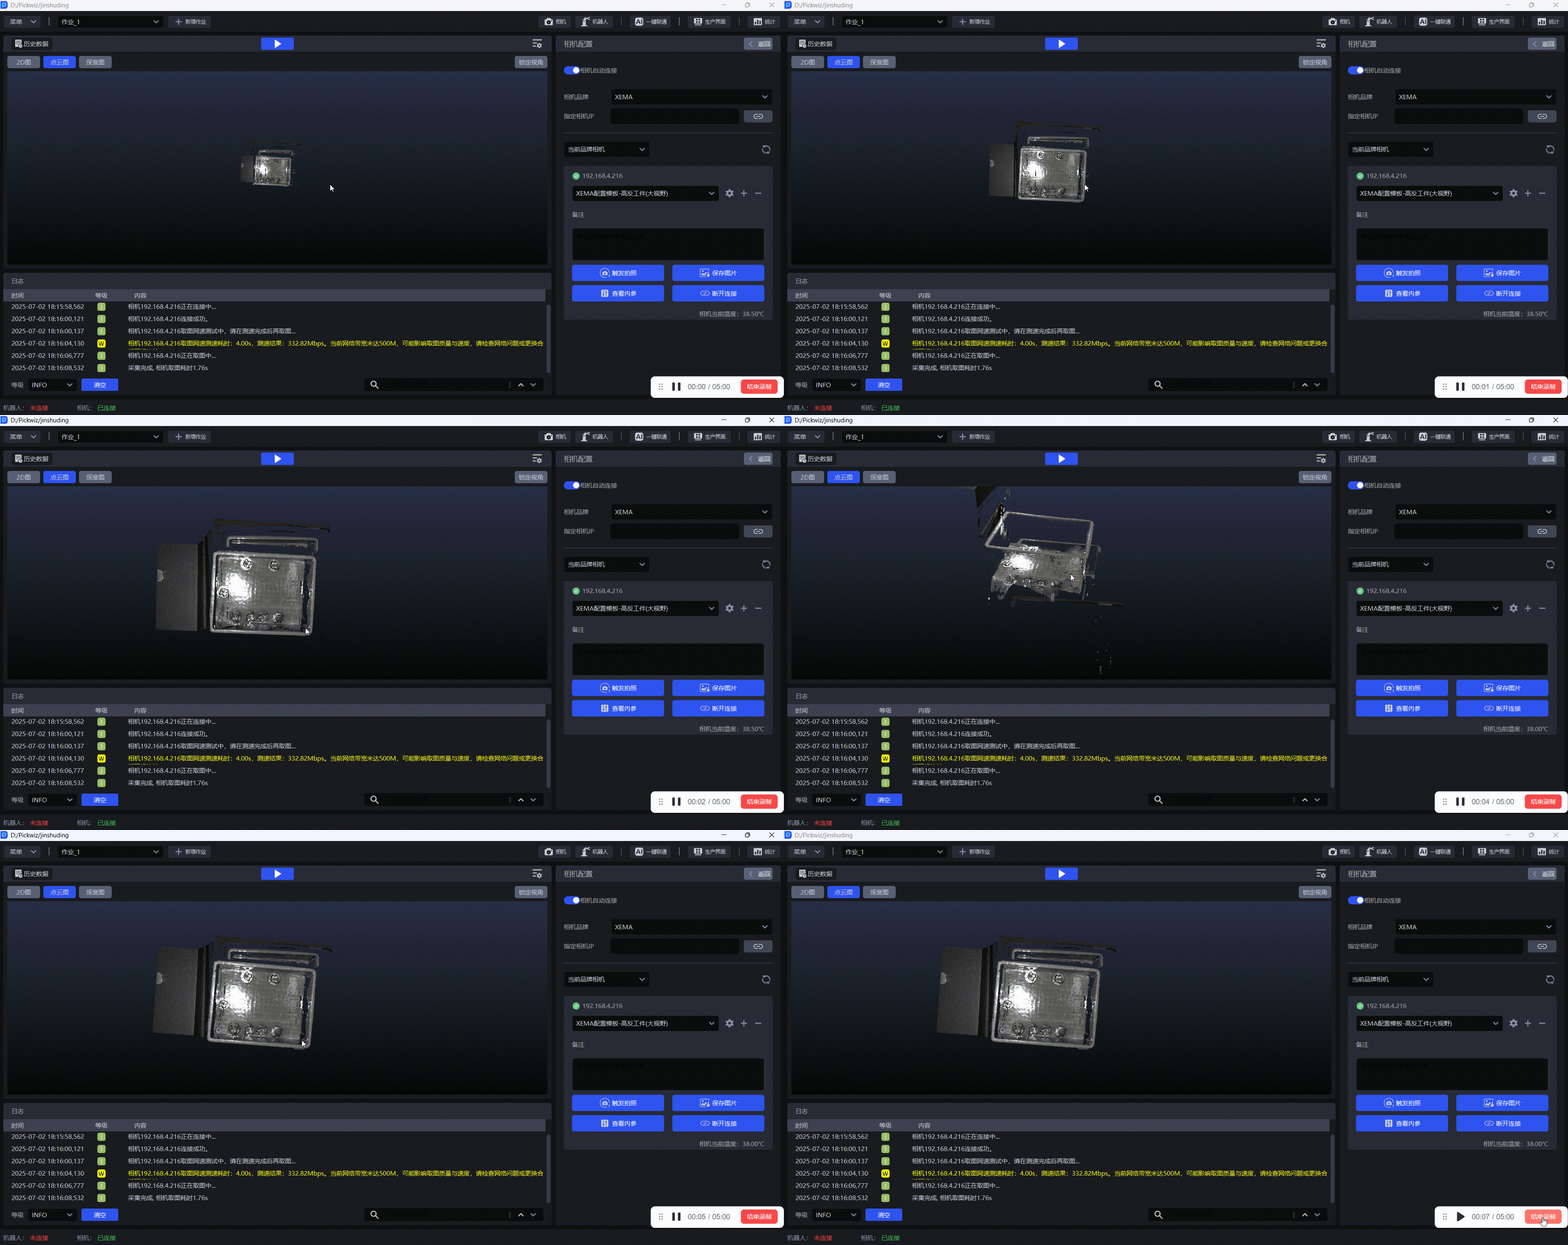
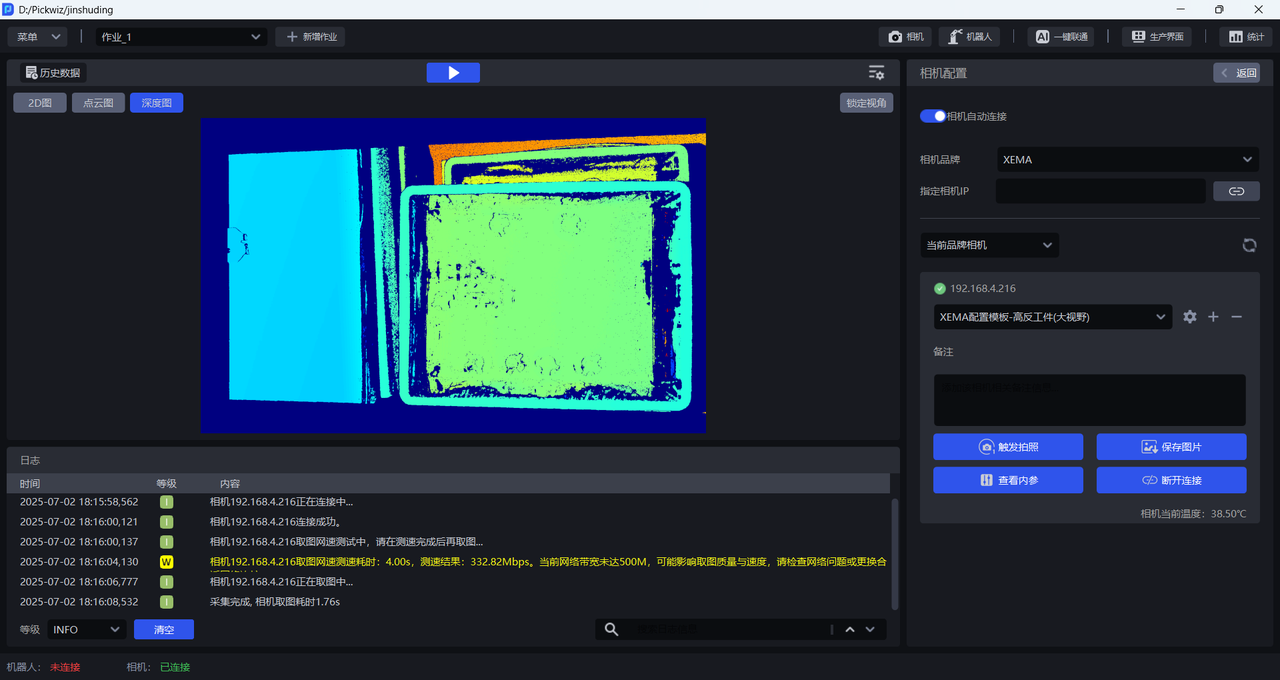
The process of inputting Camera data for visual calculation is as follows:
(1) Create a new project and Task, connect the Camera and Robot and configure the Task information. For specific operations, please refer to Project Operation Guide, Task Operation Guide, Camera Connection and Tuning Guide, Robot Configuration Guide.
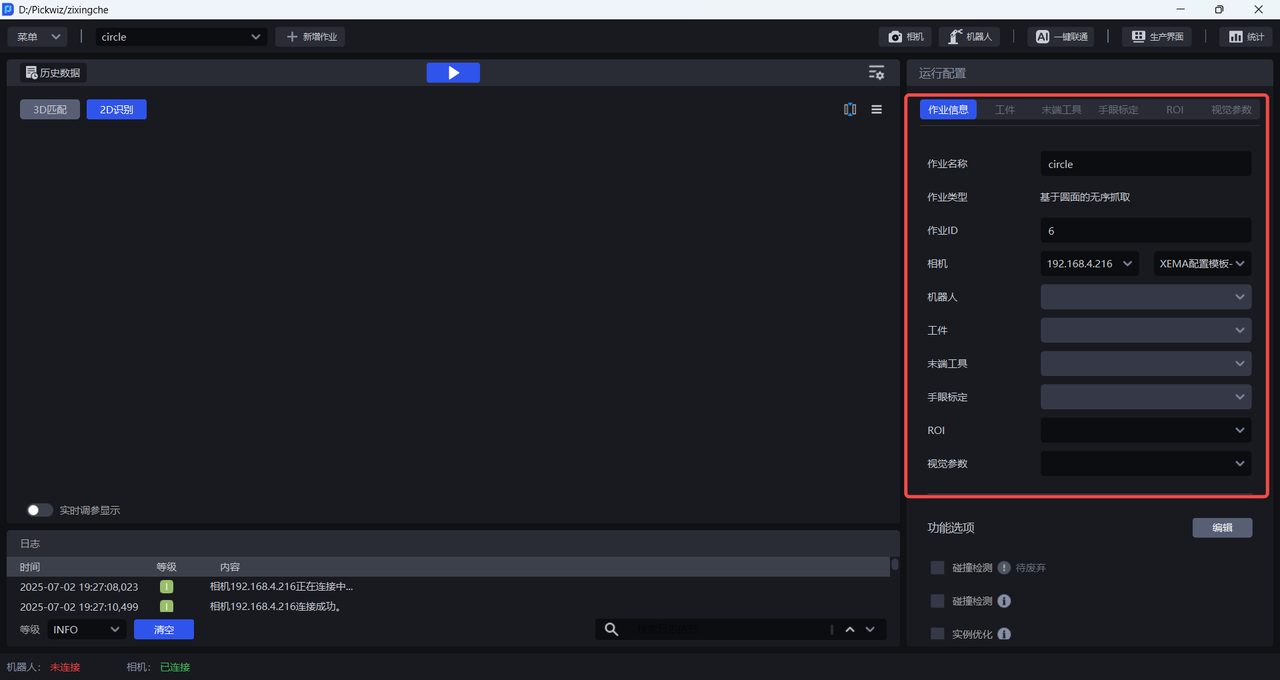
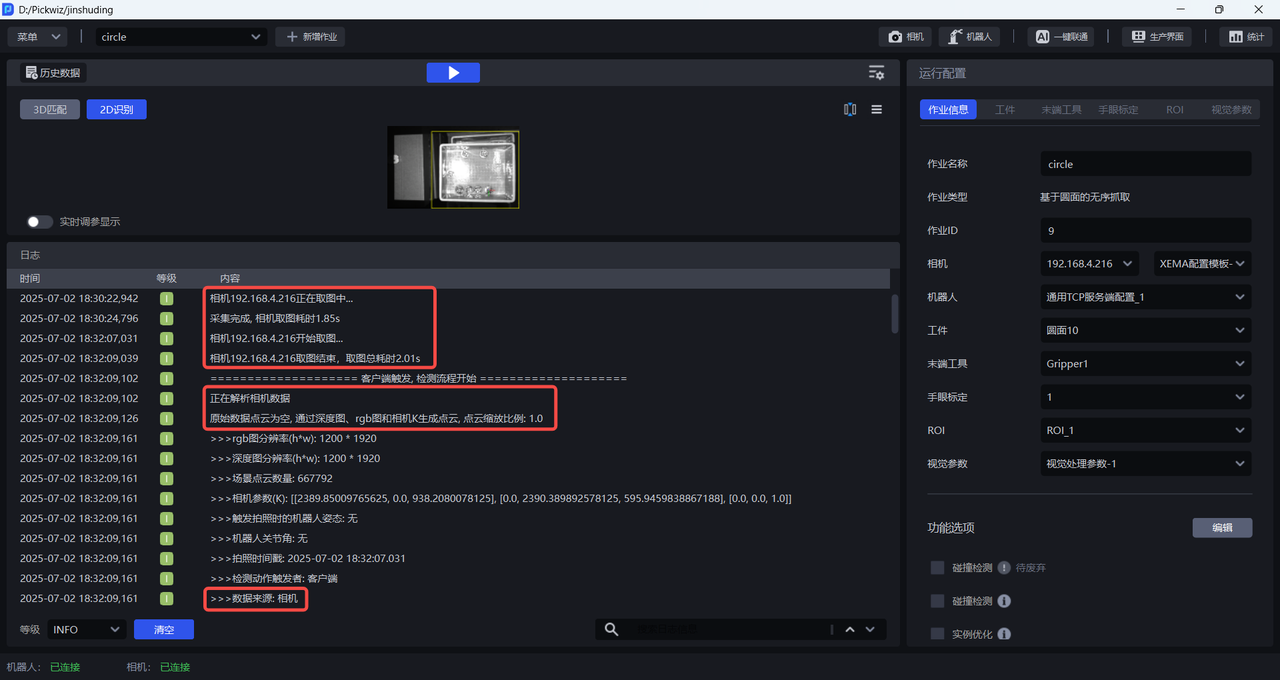
(2) After clicking Run, the Camera data is input into the workflow for visual calculation, and the Pick Point is finally output. The beginning of the log will show that the data source is Camera data, as shown in the figure below.
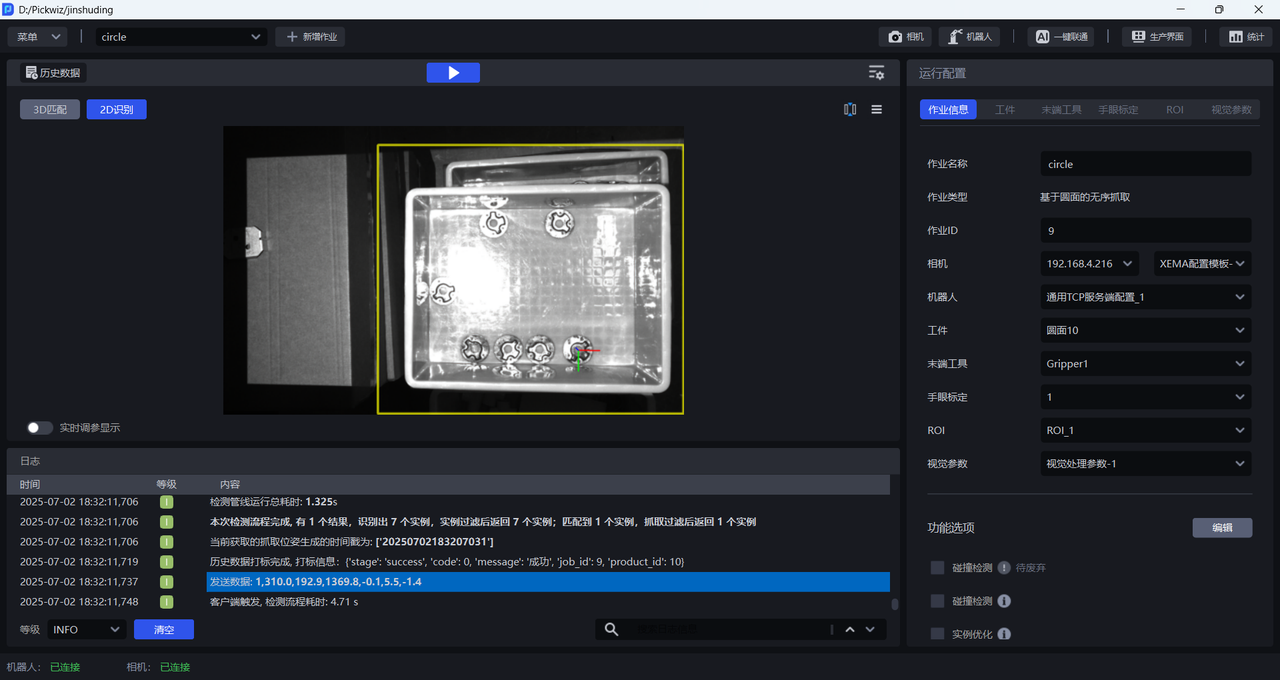
1.1.2 historical data
Historical data is the running record of Pickwiz in the past period. It saves the input data and output results of each process of visual computing and is used to troubleshoot the cause of the failure, as shown in the figure below. For specific instructions, please refer to the Historical Data Feature Guide.
The process of inputting historical data for visual calculation is as follows:
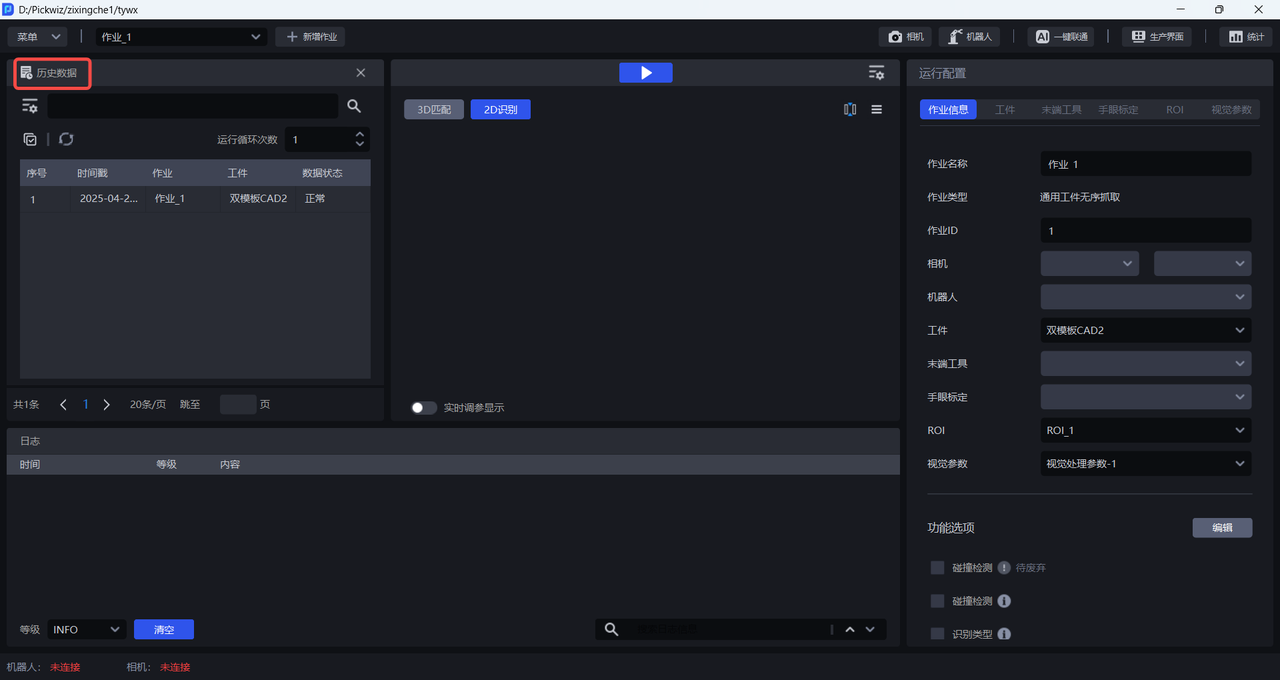
(1) Click Historical Data to open the historical data pop-up window
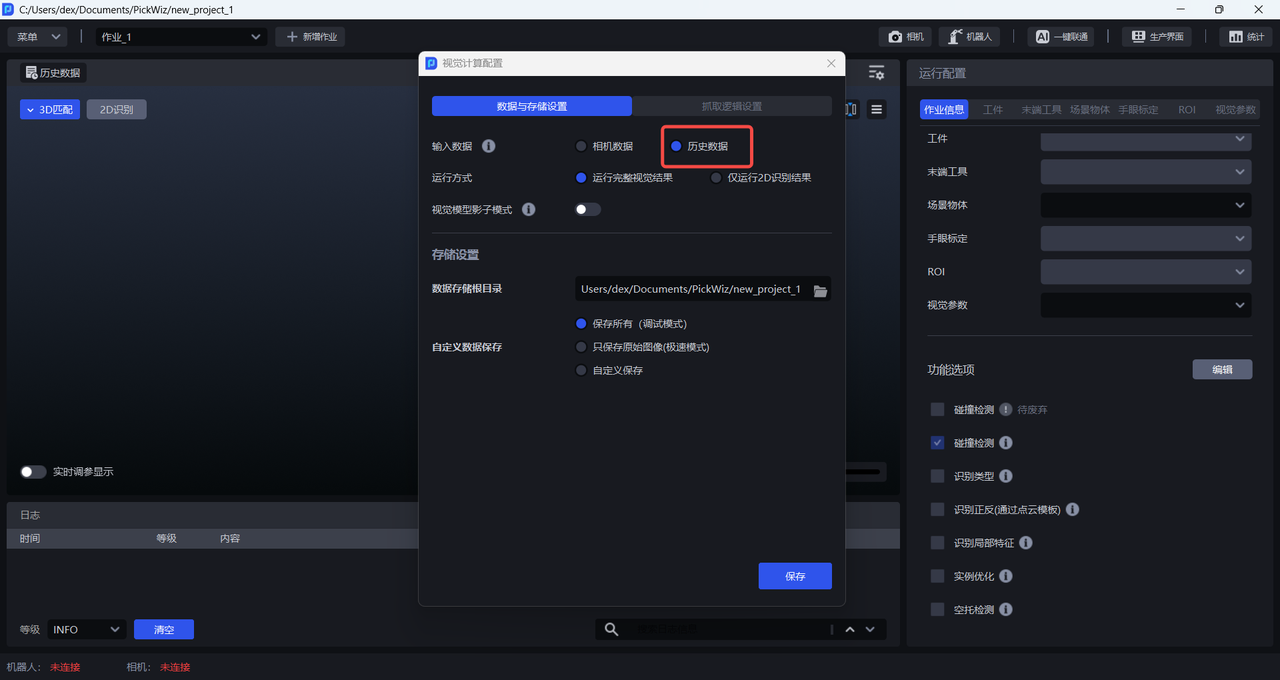
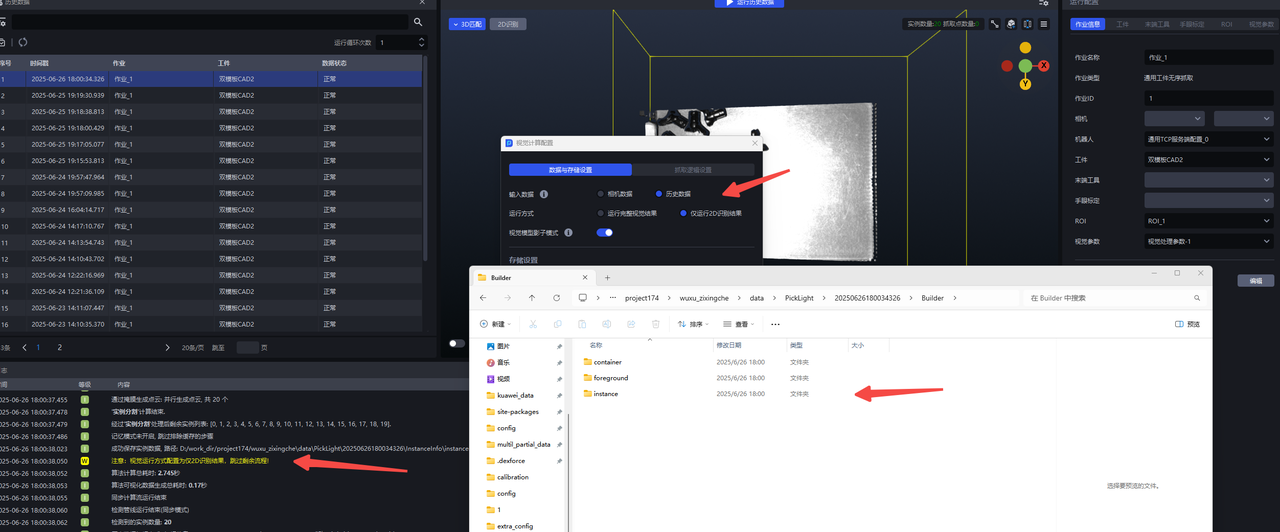
(2) Open the Visual Computing Configuration pop-up window, switch Input data to Historical data, input historical data optionally Run complete visual results and Run only 2D recognition results.
Selecting Run full visual results will save a complete record of the historical data rerun, as shown in the image below.
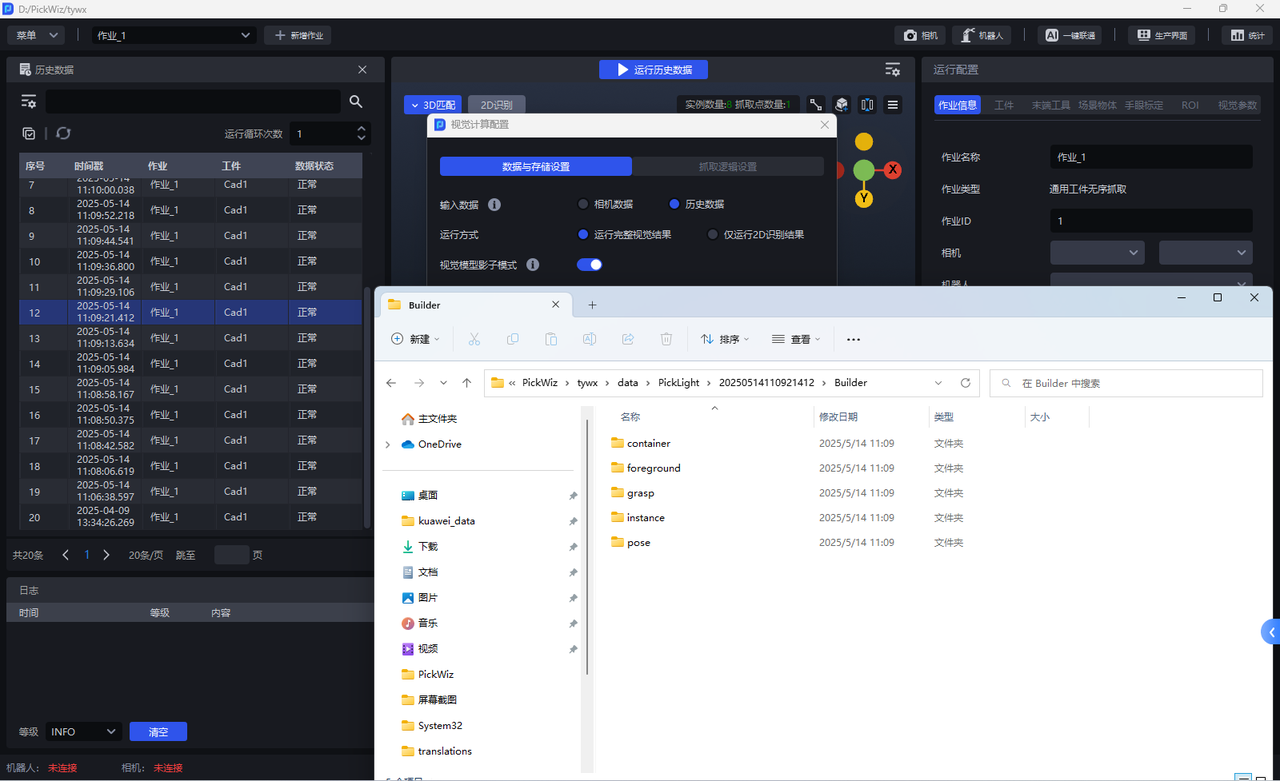
Select Only run 2D recognition results, and only the 2D recognition results of the re-run of this historical data will be saved (the Builder folder only saves the foreground node foreground, material frame detection container, and instance detection instance, and does not save the pose estimation node pose and the Pick Point generation node grasp), as shown in the figure below.
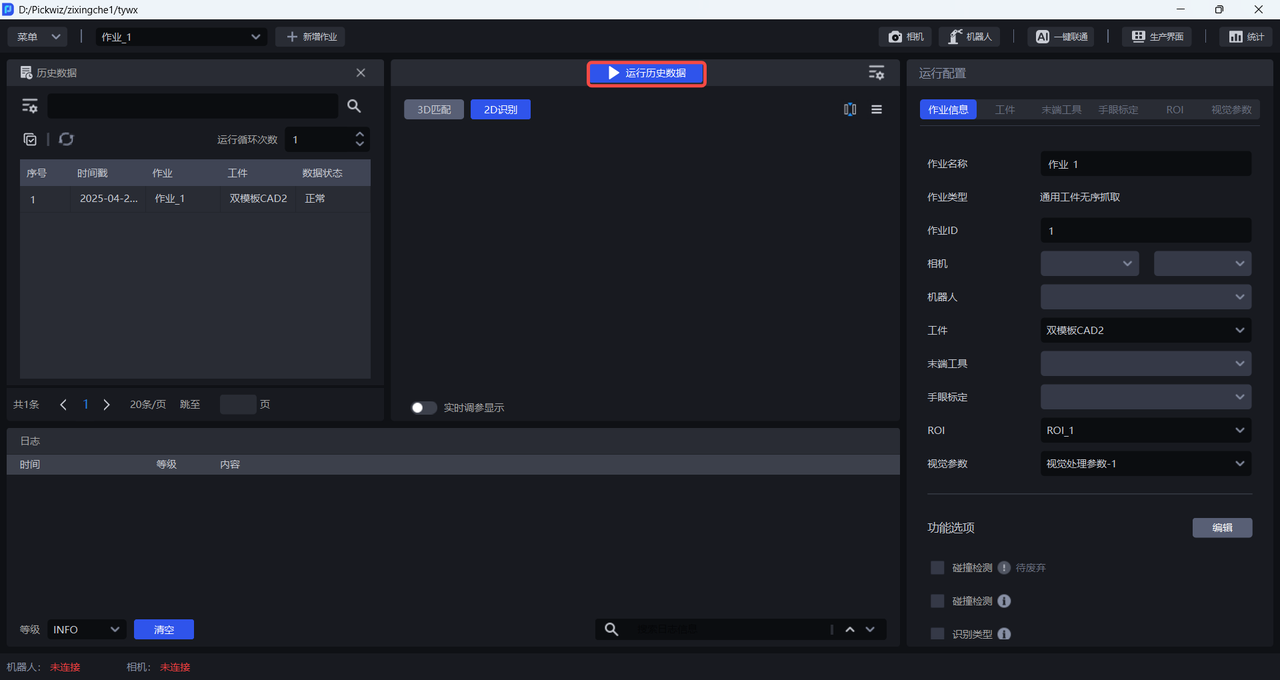
(3) After switching, the run button becomes the Run historical data button, as shown in the figure below.
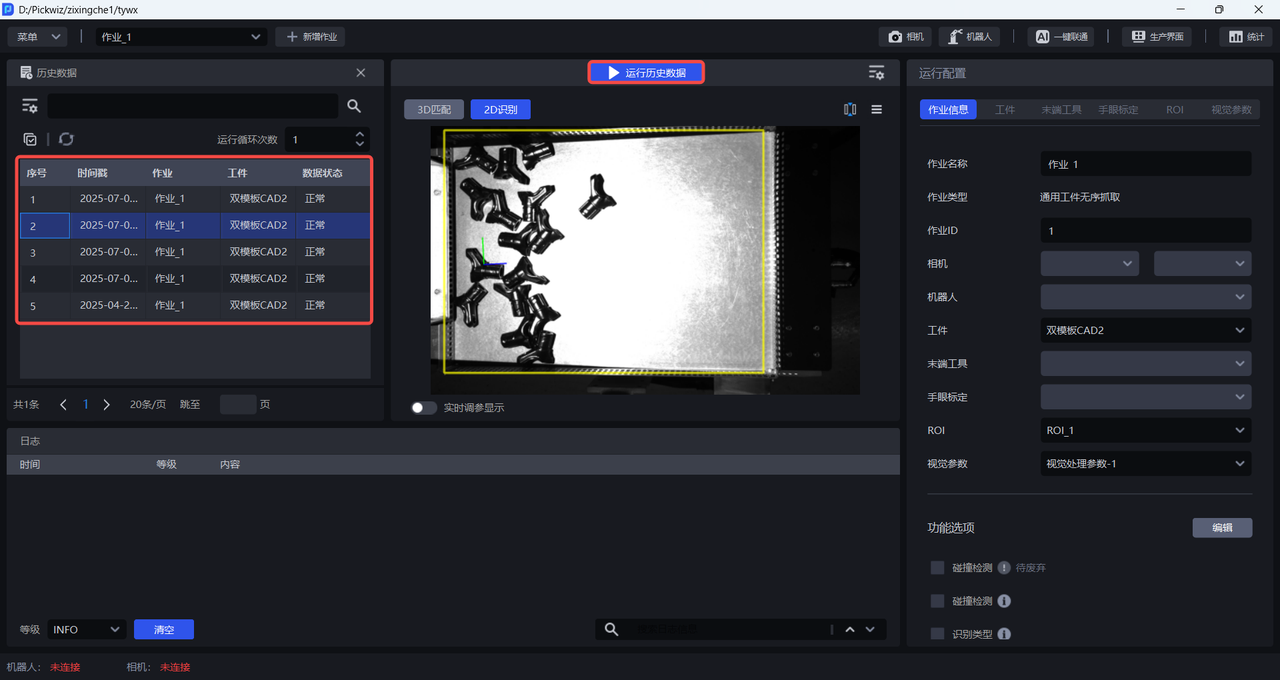
(4) Select a piece of historical data, and then click the Run Historical Data button to input the historical data into the workflow for visual calculation, and finally output the Pick Point. The data source will be displayed as historical data at the beginning of Log, as shown in the figure below.
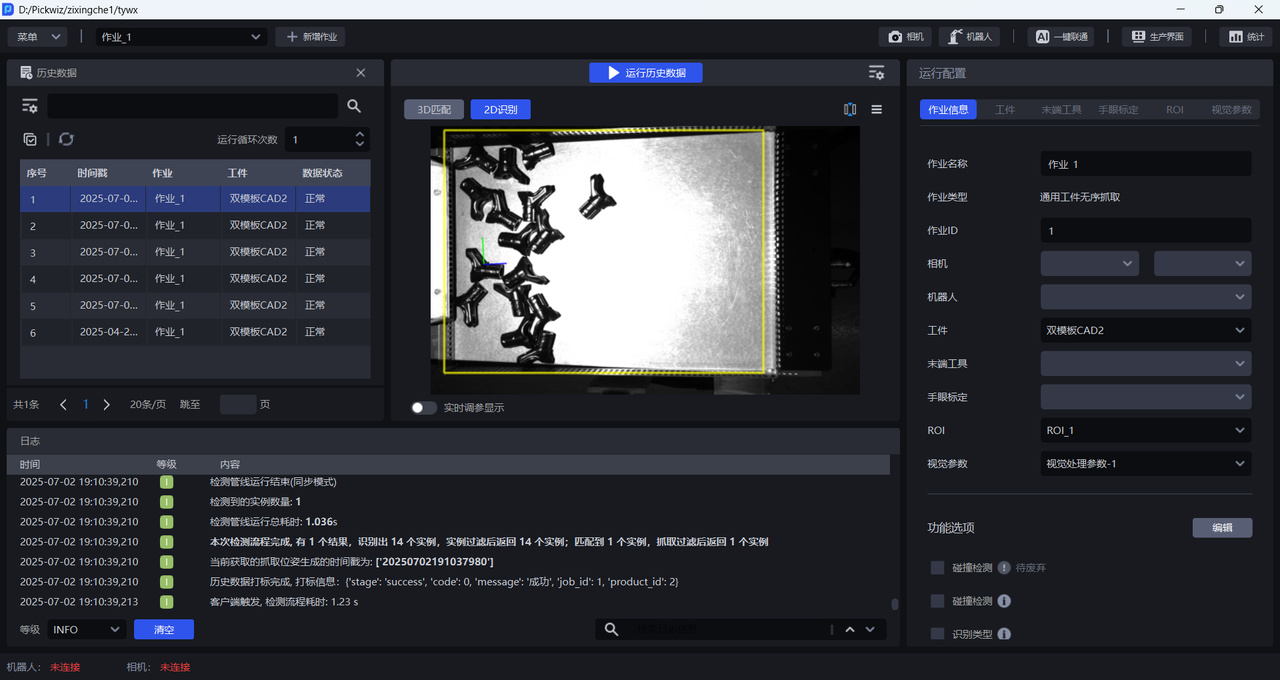
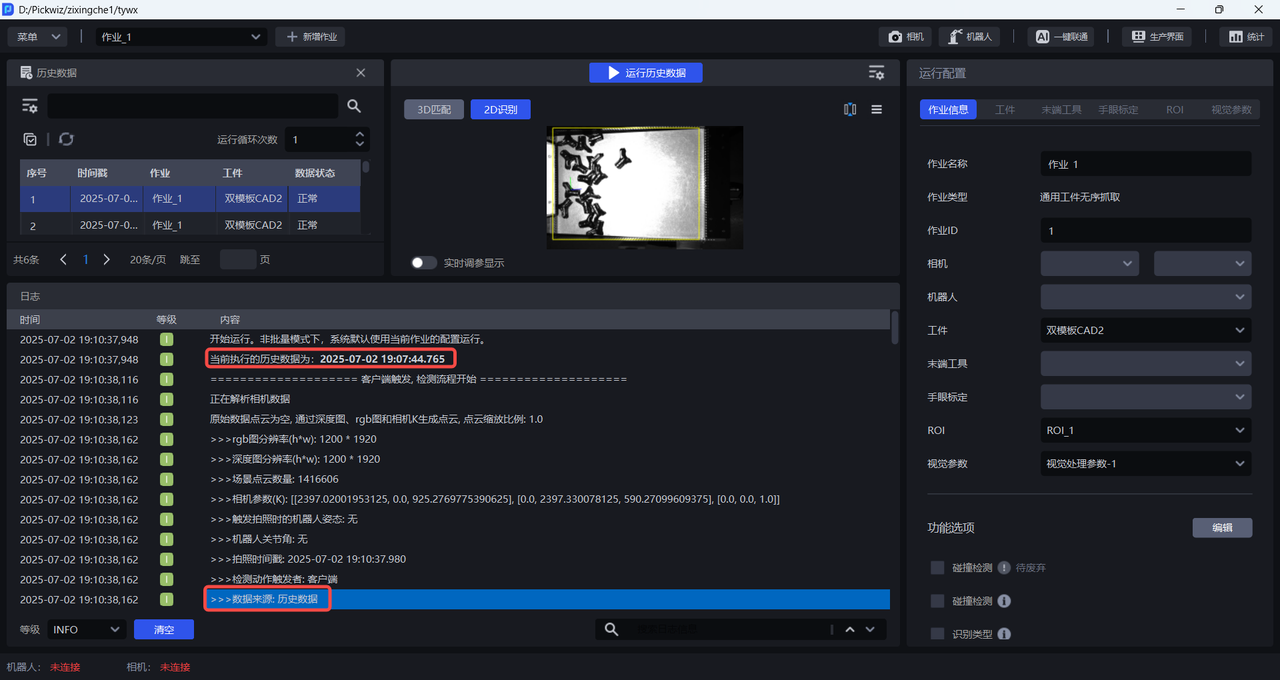
Before inputting historical data for visual calculation, there is no need to connect Camera and Robot, and there is no need to configure Task information. The workflow will use the current Task configuration to perform visual calculation on historical data.
1.2 Storage Settings
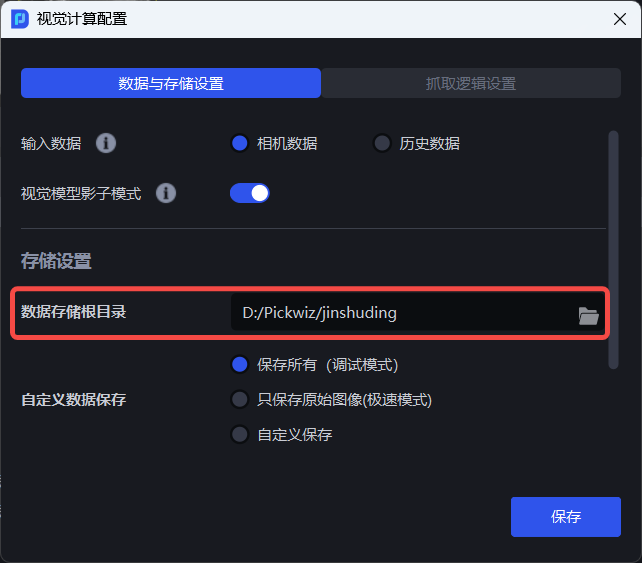
1.2.1 data storage root directory
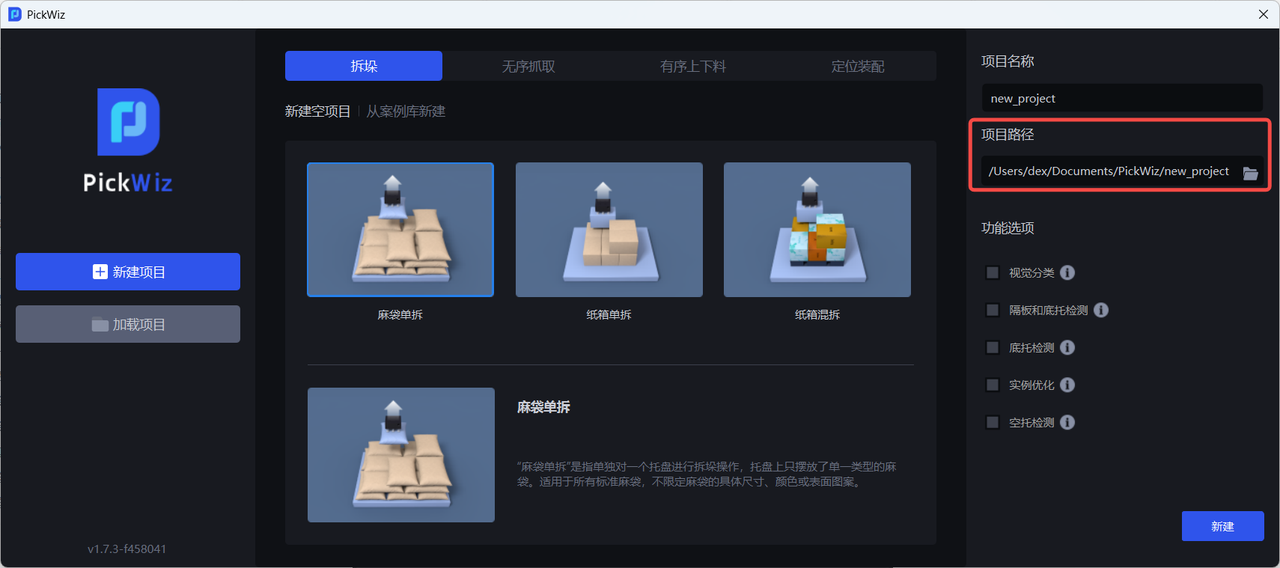
The data storage root directory is the storage path of the project, which is consistent with the project path selected when creating a new project and cannot be modified.
1.2.2 Custom data saving
Custom data saving means saving the content in the visual calculation process. You can choose to save all (debug mode), save only the original image (speed mode), or customize the save.
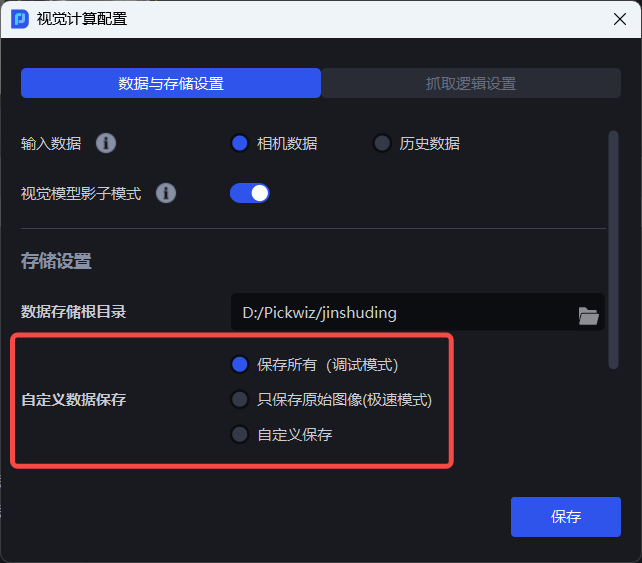
- Save all (debug mode), that is, save the input data and output results of the entire visual computing process, as shown in the figure below
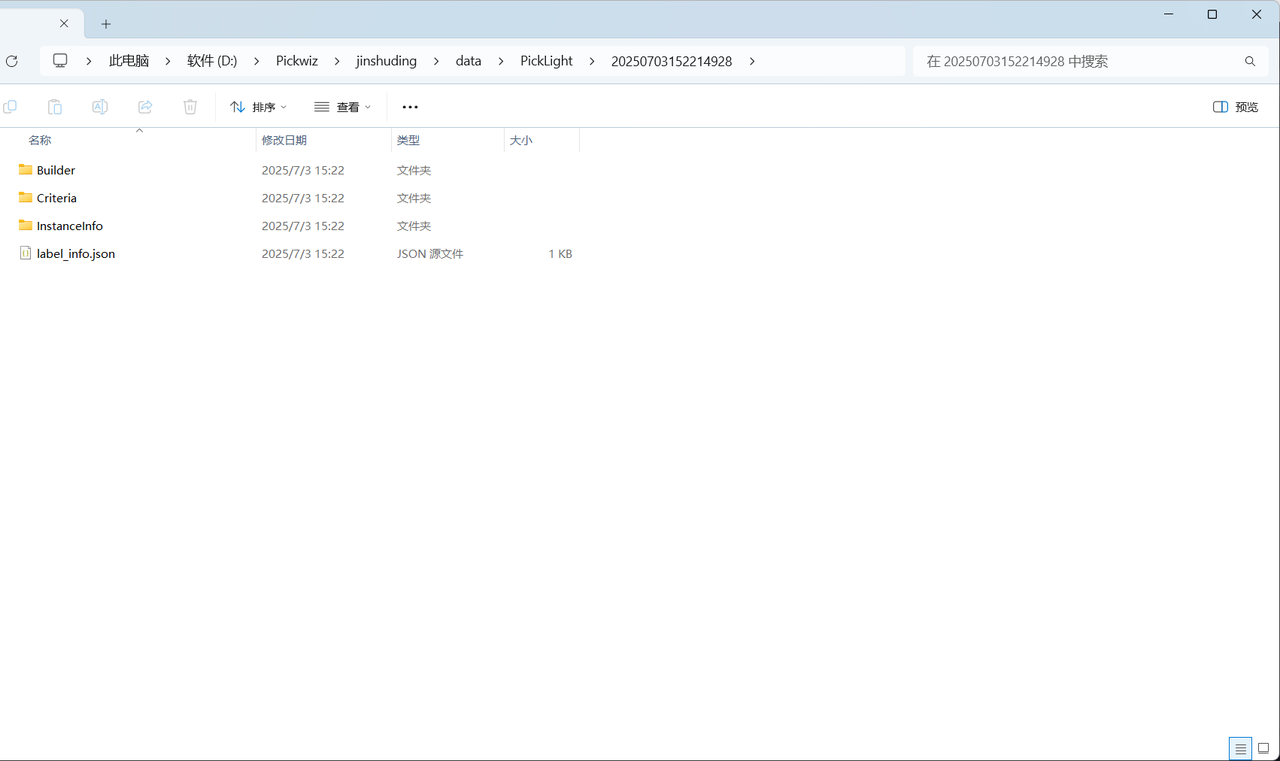
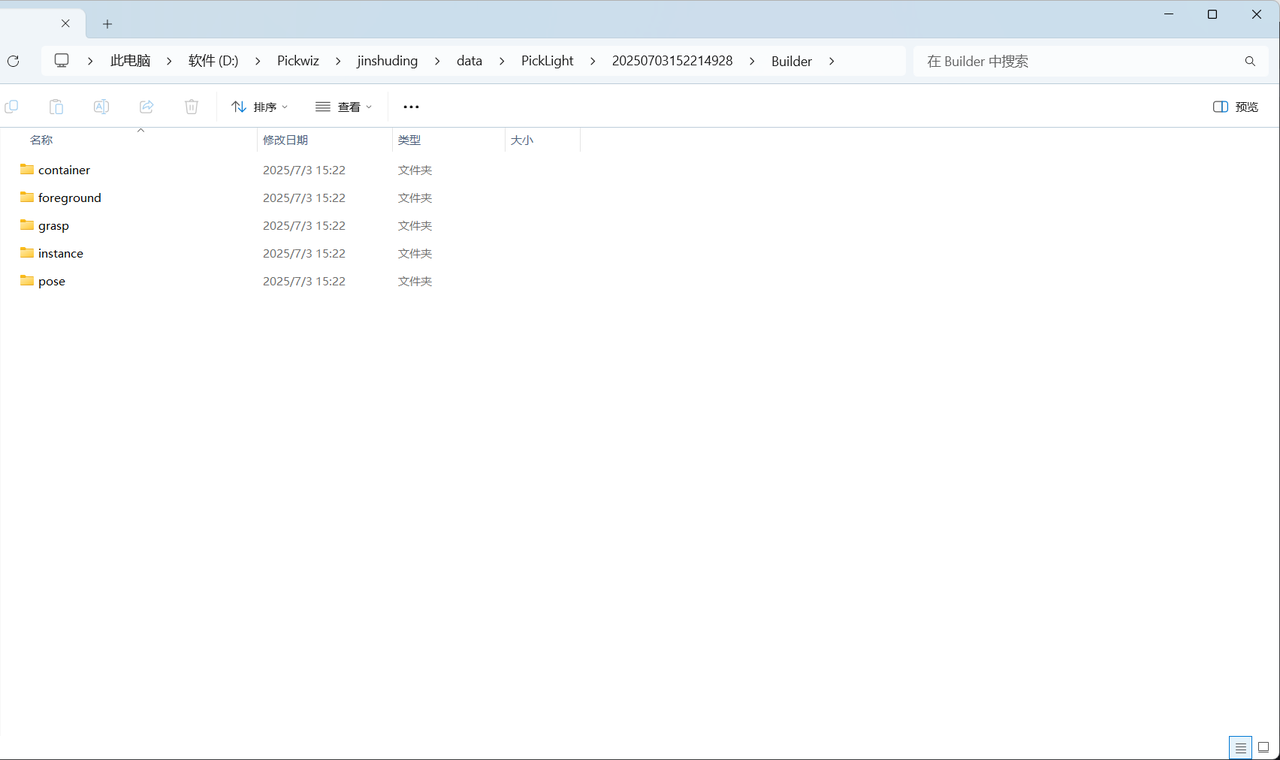
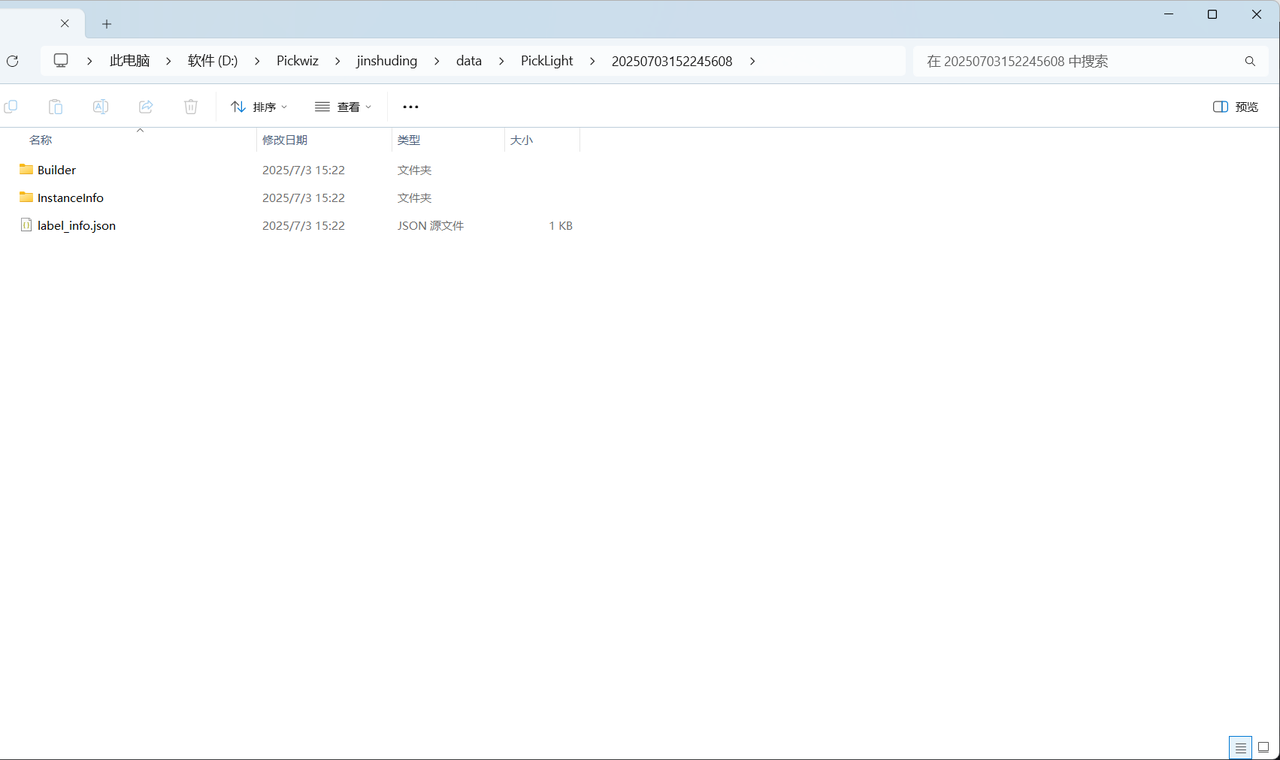
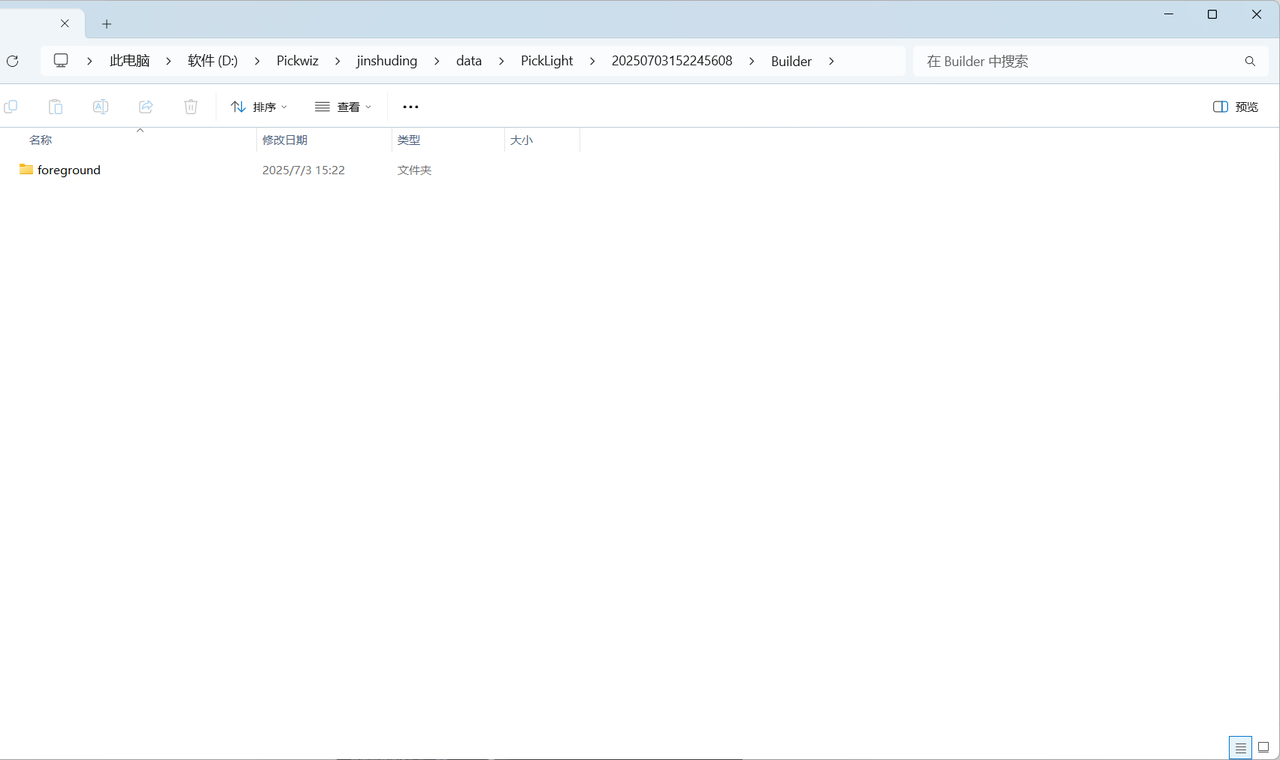
- Only the original image (extreme speed mode) is saved, that is, only the original 2D image and Depth image are saved, as shown in the figure below.
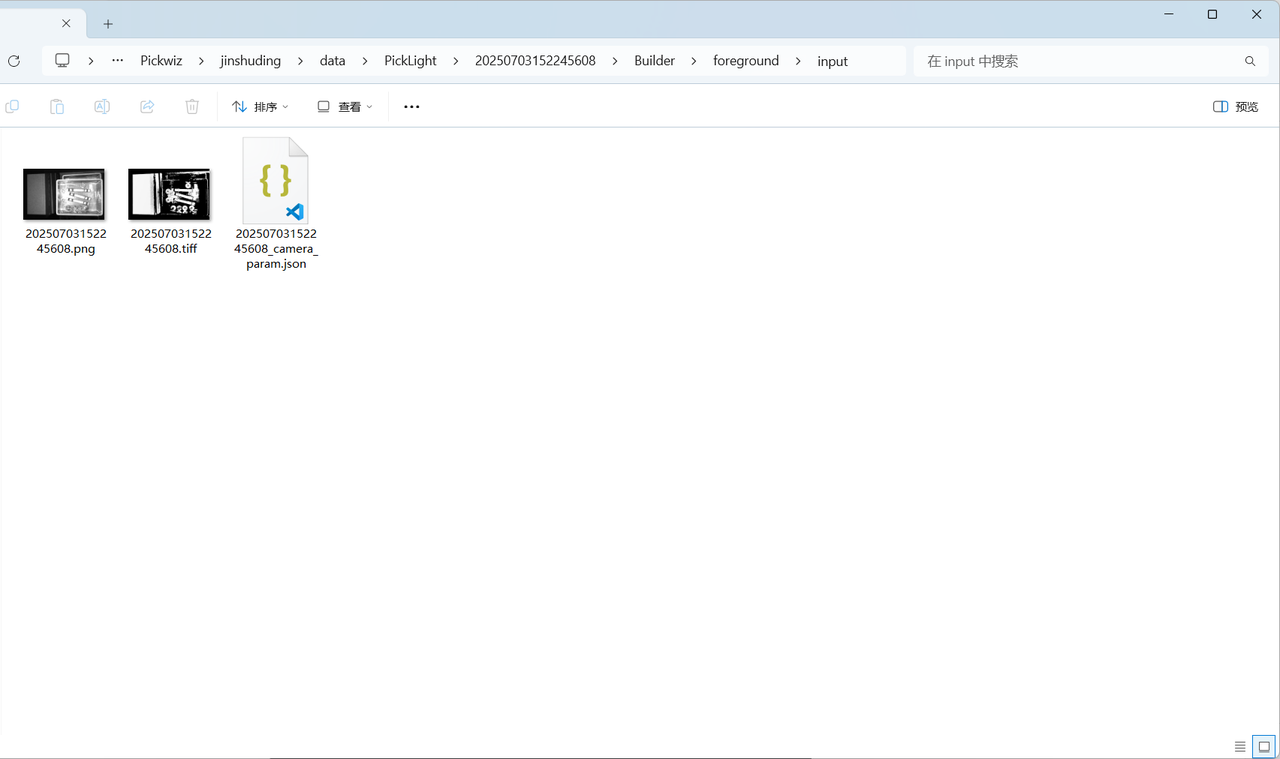
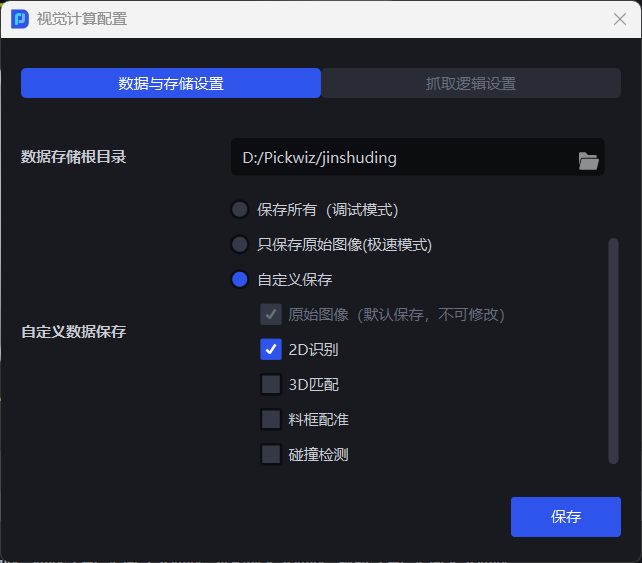
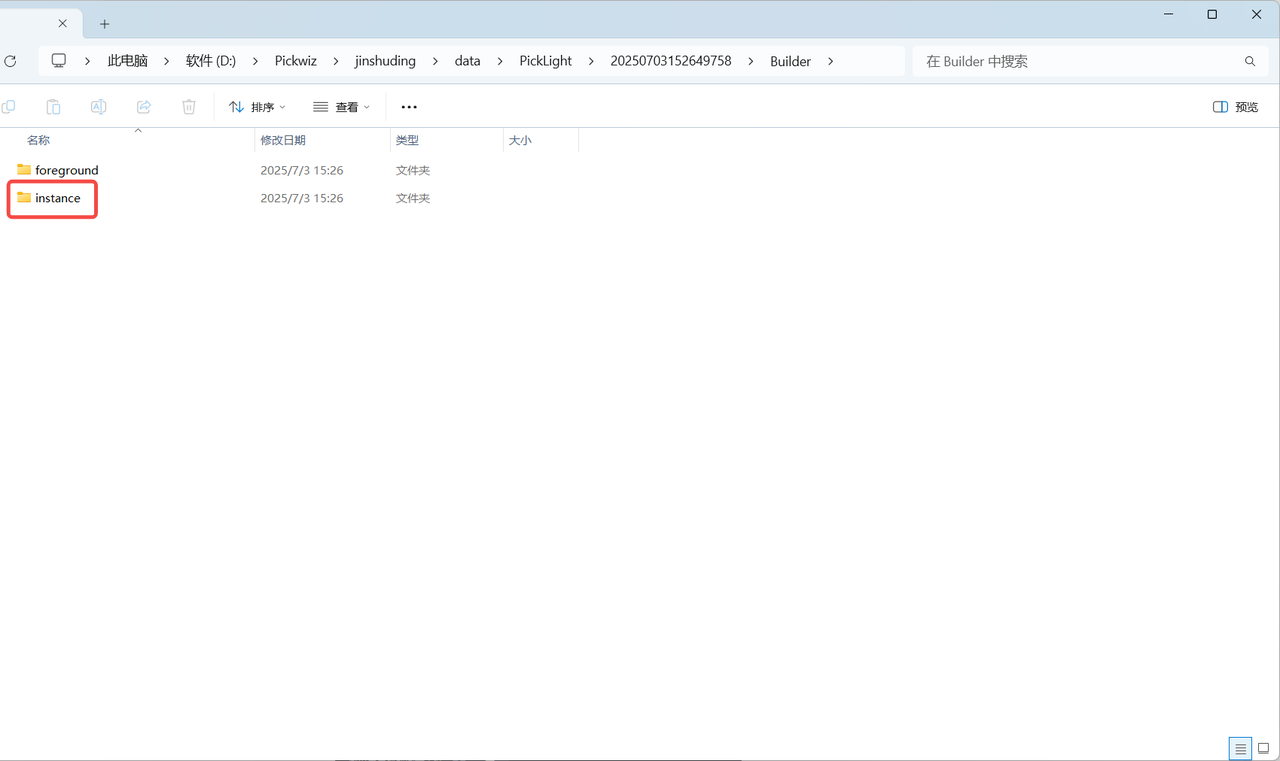
- Customized saving can selectively save the content of the visual calculation process, which is suitable for on-site production when specific data needs to be saved to facilitate subsequent search. As shown in the figure below, check 2D recognition and save the instance folder in the historical data folder.
2. Capture logic settings
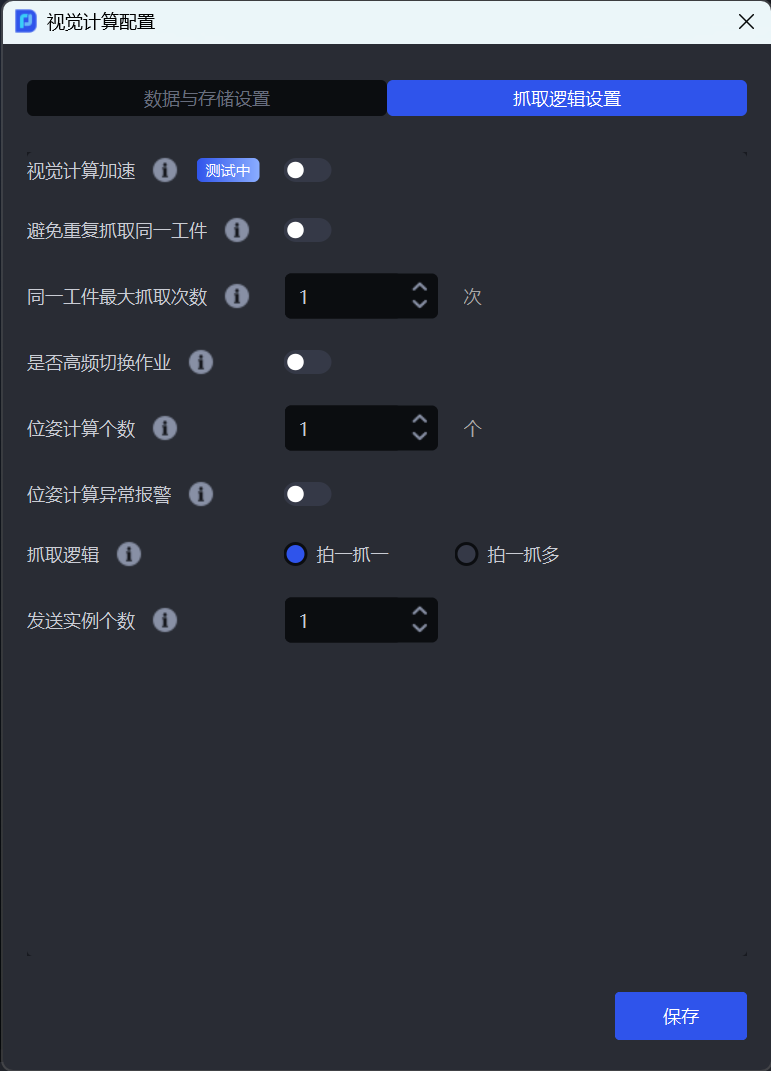
2.1 Visual Computing Acceleration
When turned on, visual calculations take less time and all Target instances in the field of view are identified by default. It is suitable for scenes with many Target instances that require a short cycle time.
Supported in PickWiz 1.8.2:
This function supports single-carton depalletizing; ordered loading and unloading and unordered picking of general Targets; ordered loading and unloading and unordered picking of general circular or cylindrical Targets; ordered loading and unloading of general quadrilateral Targets; and ordered loading and unloading of planar Targets (parallel mode).
This function does not currently support single-sack depalletizing; ordered loading and unloading or unordered picking of planar Targets; loading and unloading of isolated planar Targets; ordered loading and unloading of planar Targets (image matching); or positioning and assembly scenes.
Function option scenes (such as Type Identification/Local Identification/Front-Back Identification), Point Cloud noise filtering, Pallet Detection, and Partition and Pallet Detection are not currently supported. They will be gradually integrated with other Scenes and function option scenes in the future.
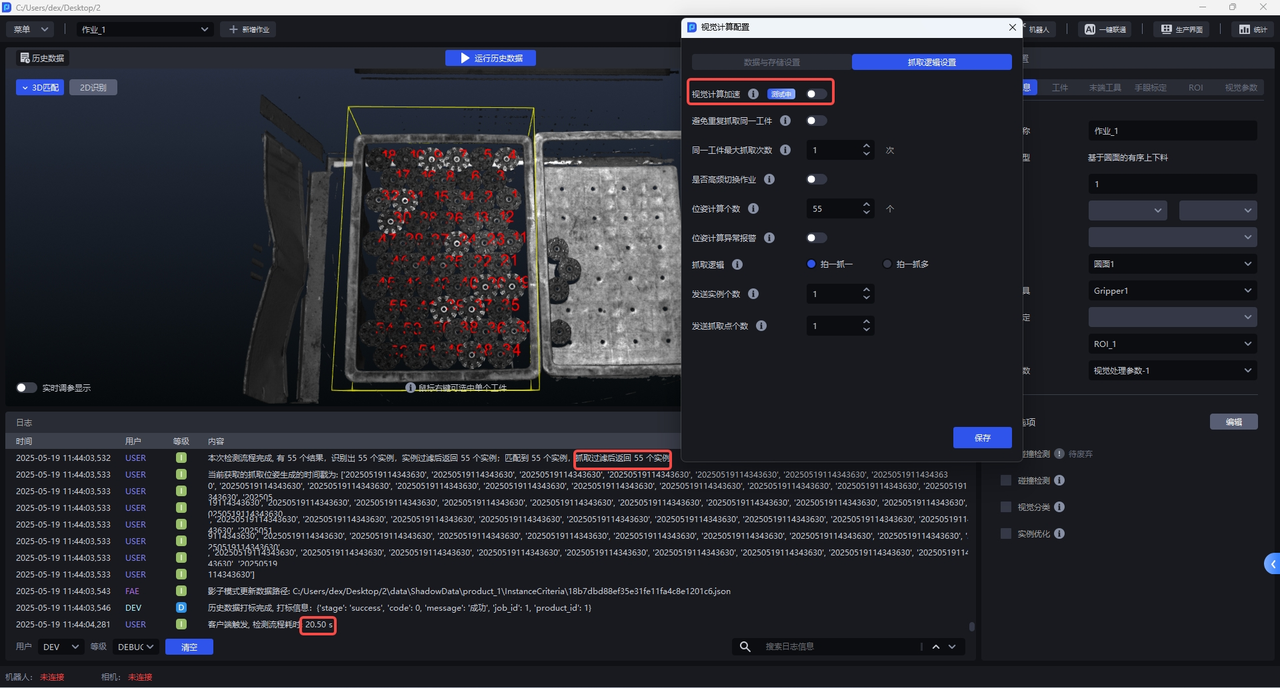
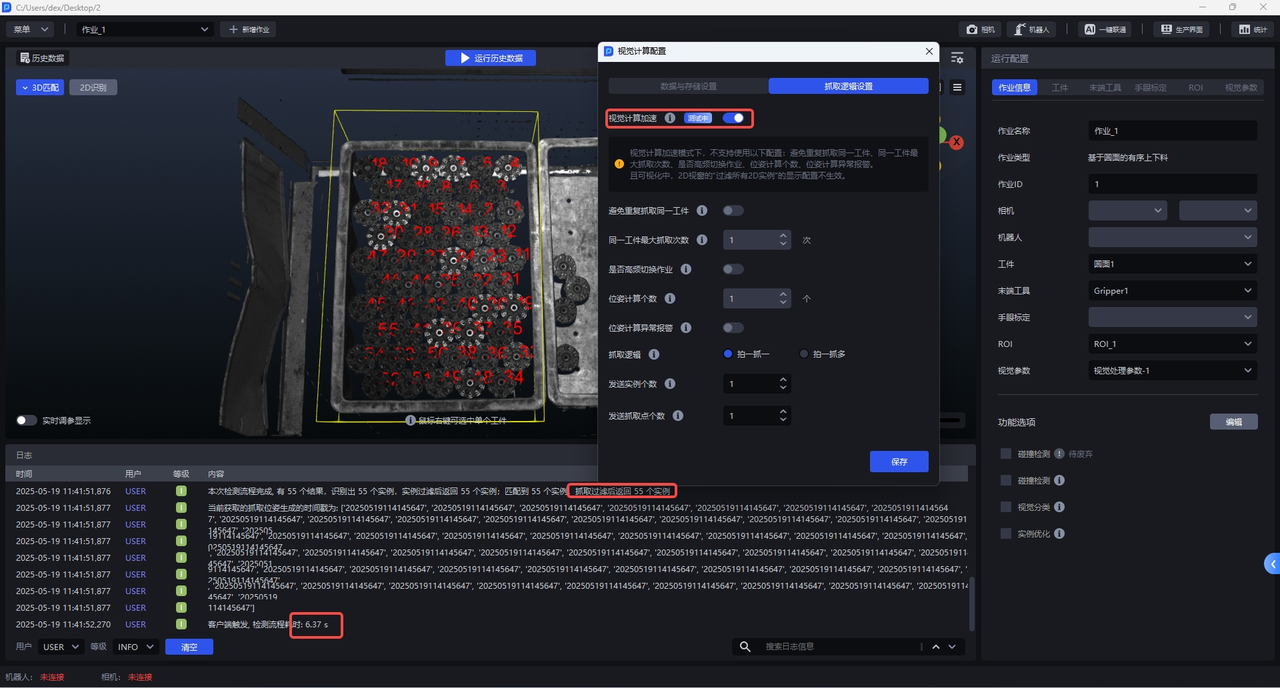
Notice:
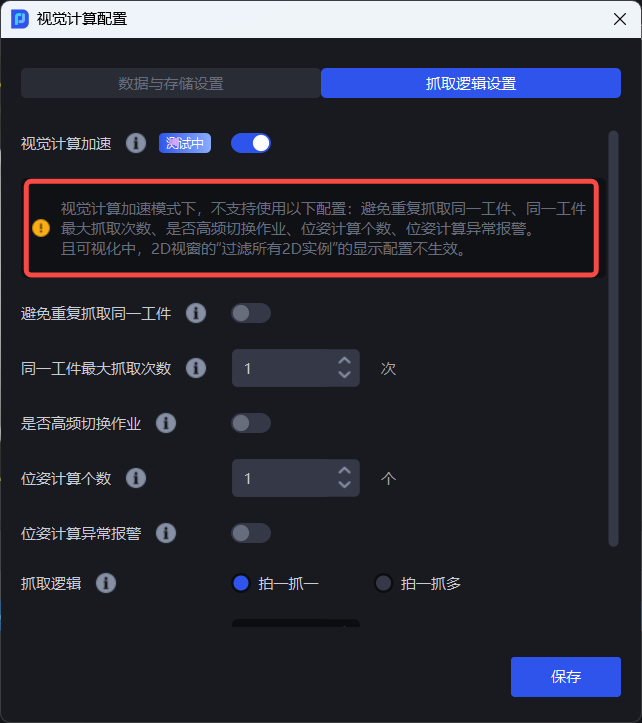
When the "Visual Computing Acceleration" mode is turned on, "Avoid grabbing the same target repeatedly", "Maximum number of grabs for the same target", "Whether to switch tasks frequently", "Number of pose calculations", and "Alarm for abnormal pose calculations" cannot take effect.
2.2 Avoid Repeated Picks of the Same Target
When enabled, if picking the same Target does not succeed within the maximum number of attempts, PickWiz stops trying that Target and moves to the next one.
Notice:
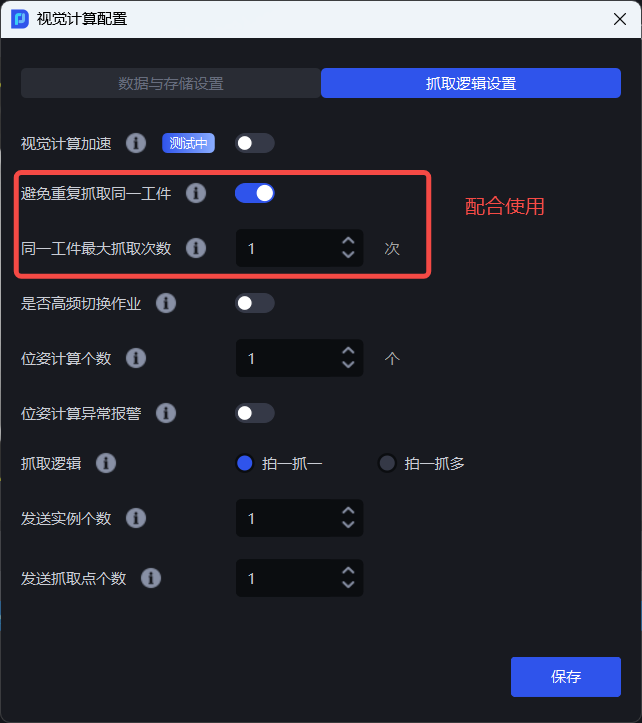
To enable "Avoid Repeated Picks of the Same Target," also enable "Maximum Pick Attempts for the Same Target" and set the maximum number of attempts.
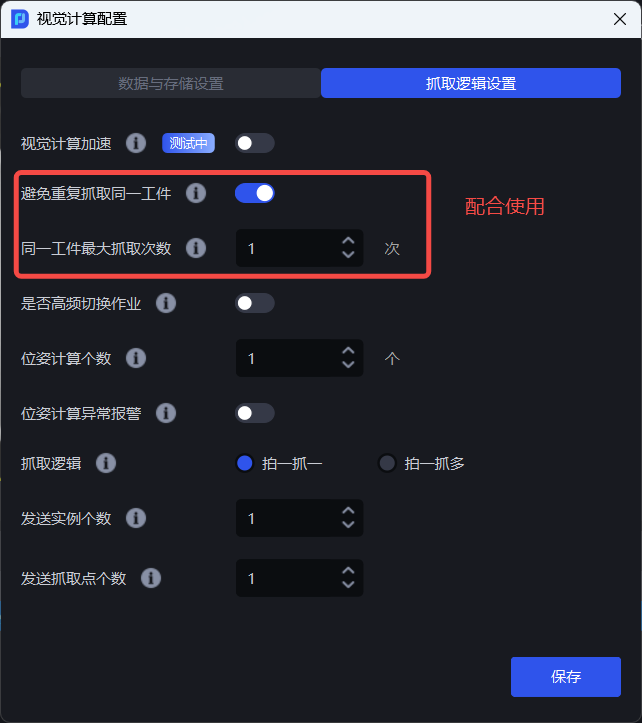
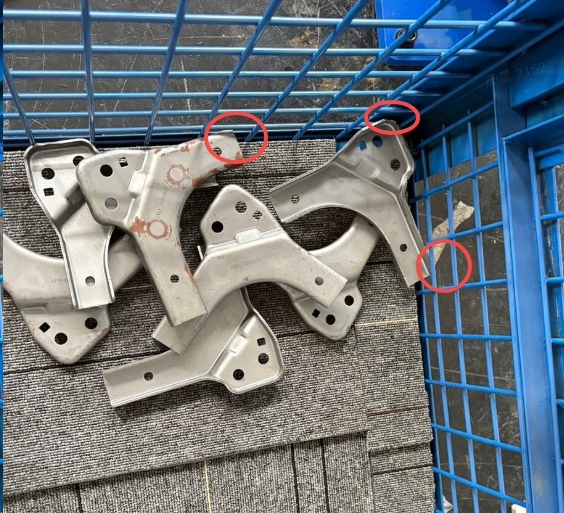
Commonly seen in disordered scenes, some materials are suppressed by other materials and cannot be grasped, or objects such as material frames restrict their grasping. For such targets, it is necessary to avoid repeated grabbing, which is a waste of time.
Example
Notice:
When "Visual Computing Acceleration" mode is turned on, "Avoid repeatedly grabbing the same Target" will not take effect after it is turned on. If you need to avoid repeated grabbing at this time, you can use the "Filter Pick Points that are similar to the last visual result" function in Pick Point filtering (filtering Pick Points that are similar to the last visual result: calculate the change in pose between this and the last visual result, determine whether it is the same Target and filter it).
2.3 Maximum Pick Attempts for the Same Target
Sets the maximum number of pick attempts for the same Target, from 1~5. Use it together with "Avoid Repeated Picks of the Same Target." If picking that Target does not succeed within the maximum number of attempts, PickWiz stops trying it and moves to the next Target.
2.4 Whether to switch tasks at high frequency
When the actual production scene requires frequent task switching, it can be turned on, which can improve the cycle time.
2.5 pose calculation number
Set the maximum number of Target poses that the vision system can calculate.
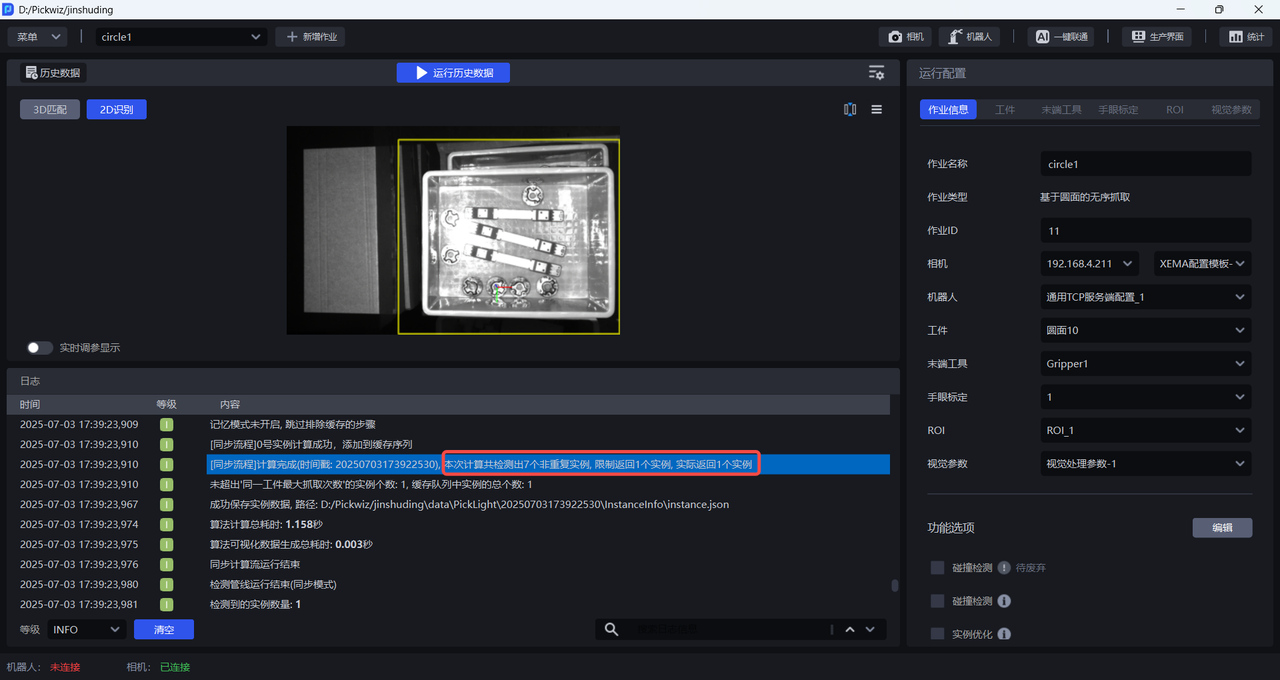
As shown in the figure below, 7 instances were detected. Because the number of pose calculations is set to 1, the visual system will only calculate the pose of 1 instance and generate a Pick Point.
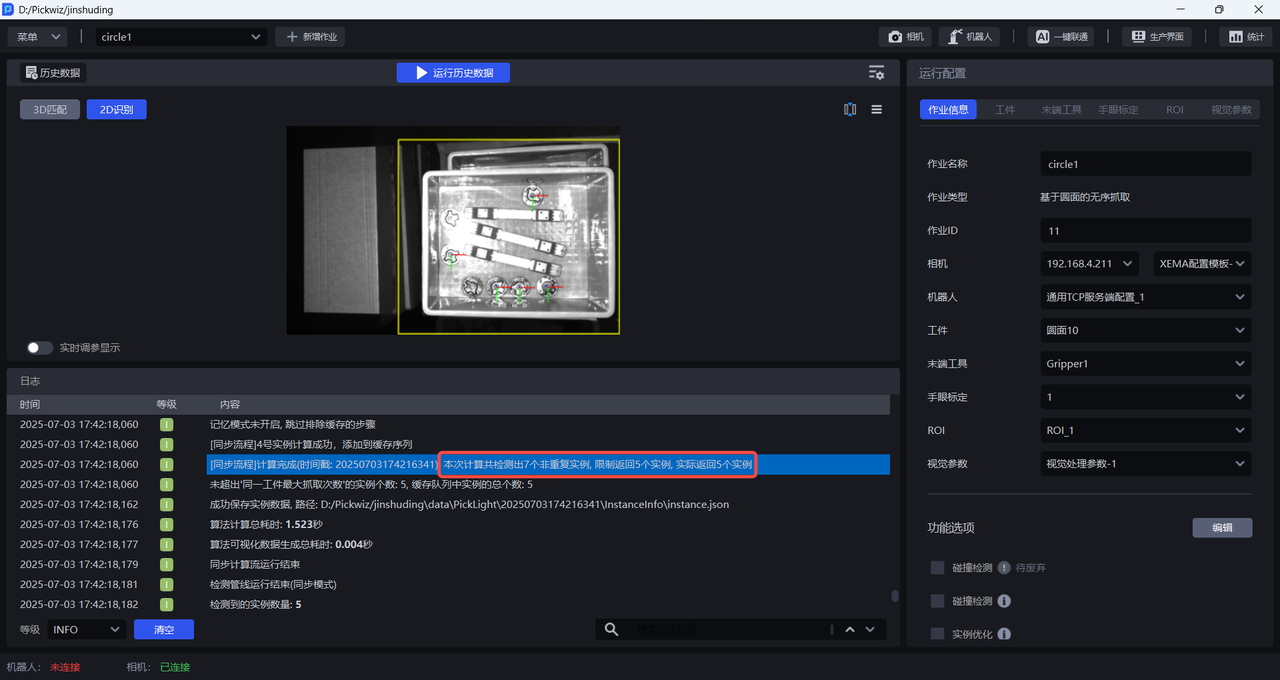
If the number of pose calculations is set to 5, the visual system will calculate the poses of 5 Targets and generate Pick Points.
2.6 pose calculation abnormality alarm
After being turned on, the Target pose is calculated in the order of instance sorting. If the 3D pose estimation calculation fails, an alarm will be issued;
(Default is off) When turned off, if the 3D calculation fails, the current Target will be skipped, the next Target pose will be calculated, and alarms and visual process interruptions will not be performed.
Use this in ordered scenes when missed recognition causes a Target to be skipped in the pick order and an alarm is required.
2.7 Picking Logic
2.7.1 One Capture, One Pick
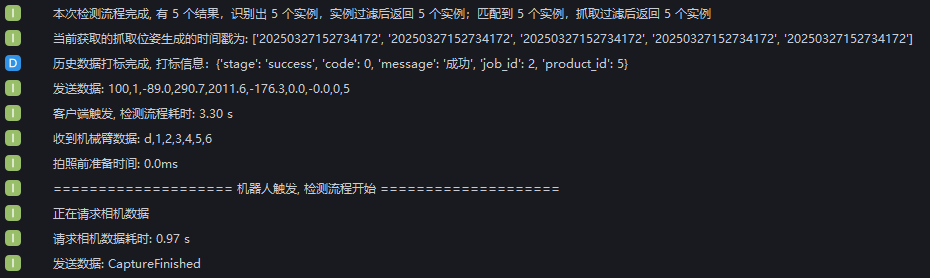
With One Capture, One Pick, PickWiz captures an image and calculates once, sends the result to the robot, and discards any additional results. The robot performs the pick, and the process repeats.
As shown below, when One Capture, Multiple Picks is not selected, PickWiz captures and calculates a new image every time the robot triggers detection.
2.7.2 One Capture, Multiple Picks
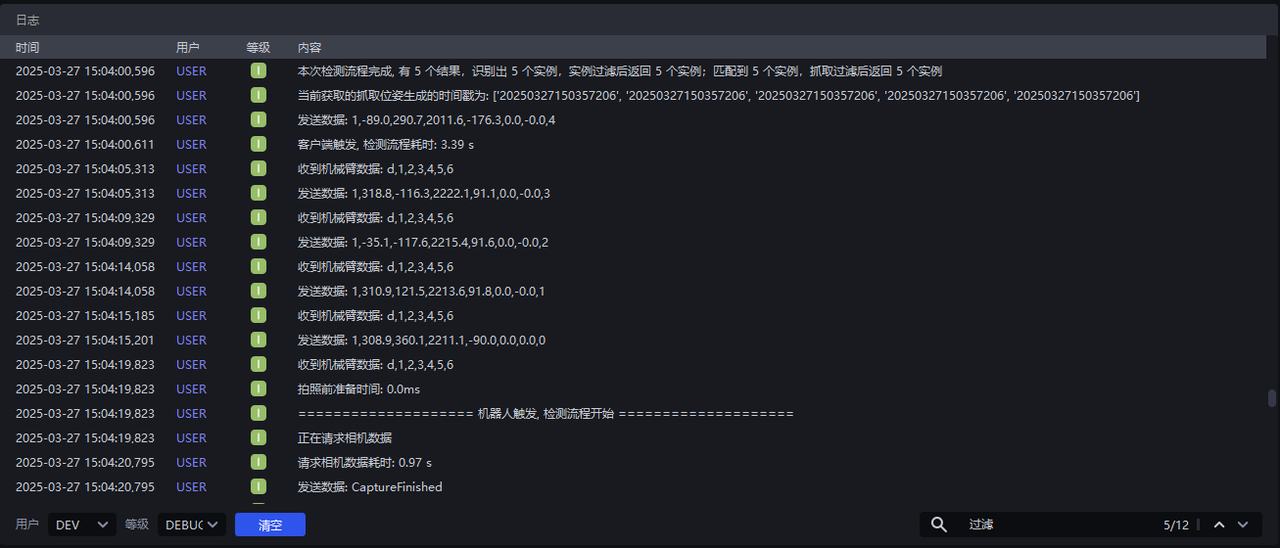
With One Capture, Multiple Picks, PickWiz captures an image and calculates once, sends a result to the robot, and saves the remaining visual results. When the robot sends the next capture-and-calculate command, PickWiz returns a saved result directly if it meets the requirements.
As shown below, when One Capture, Multiple Picks is selected, PickWiz calculates one capture for multiple picks. In the example, it detects 5 instances. PickWiz triggers the first pick; the robot triggers the next 4 picks. For those 4 picks, the robot sends pose information to PickWiz to trigger detection. PickWiz does not capture and calculate again; it returns the saved pick pose directly.
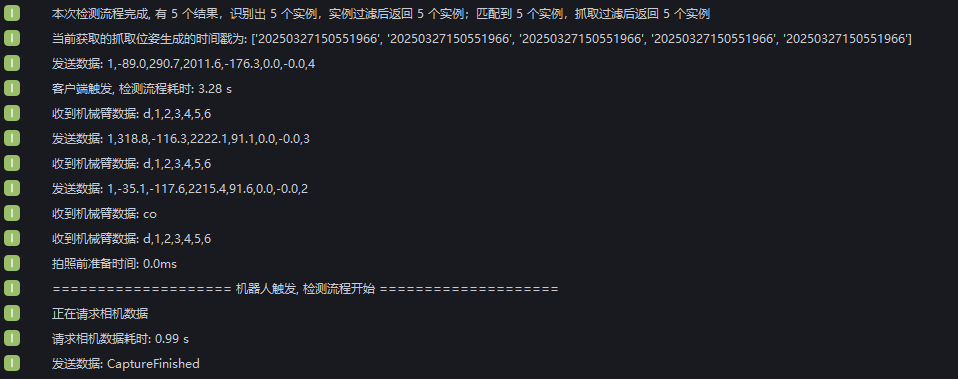
If the robot sends the co command to clear the PickWiz cache after picking the 3rd instance, the saved visual results for the 4th and 5th instances are cleared. When the robot triggers the 4th pick, PickWiz captures and calculates a new image.
2.8 Number of instances sent
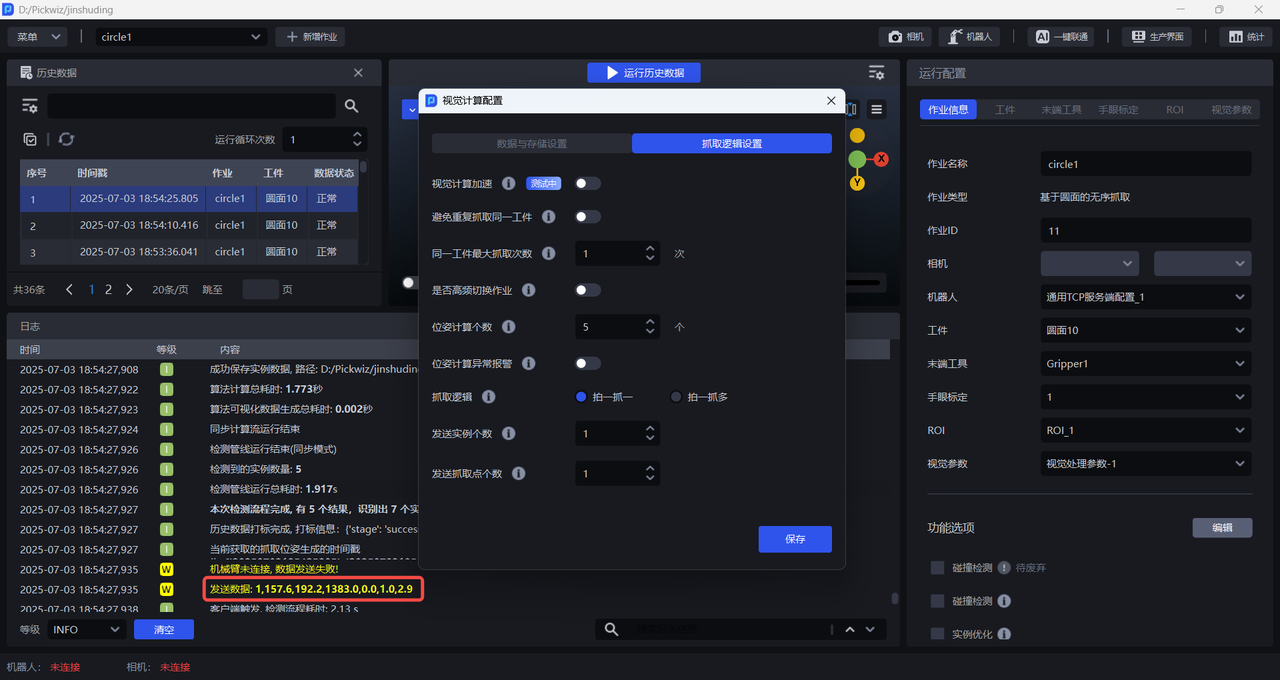
Indicates how many instances of visual results PickWiz sends to Robot each time. The value is ≥-1, and the default is 1. -1 indicates that PickWiz sends the visual results of all instances to Robot each time.
As shown in the figure below, when the number of sent instances is set to 1, PickWiz sends the visual results of one instance to Robot each time.
When the number of sent instances is set to 3, PickWiz sends the visual results of 3 instances to Robot each time, as shown in the figure below.