
Task Operation Guide
In PickWiz, a task is a group of related operations performed by a robot in a specific industrial setting. These operations include depalletizing, picking randomly arranged objects, loading and unloading neatly arranged objects, and positioning and assembly.
A task is a smaller unit of work than a project in PickWiz. It includes configurations for the target, end-effector, eye-hand calibration, ROI (Region of Interest), vision parameters, camera, robot, and more.
1. Create a Task
1.1 Create the First Task
When creating a project, you must select a task scenario. PickWiz provides the first task by default after the project is created. See the Project Operation Guide to create a project.
A task is provided by default when you create a project.
1.2 Create Multiple Tasks
Some industrial settings, such as parts assembly, have multiple material areas. A robot may need to pick several types of materials, move between material areas, or perform different operations such as depalletizing, loading and unloading neatly arranged objects, and picking randomly arranged objects.
To meet these needs, you can create multiple tasks in the same PickWiz project for different operating conditions and configure each task. This allows the robot to perform multiple tasks and improves production efficiency.
In the upper-left corner of the main interface, click + Create Task. The Create Task page opens automatically.
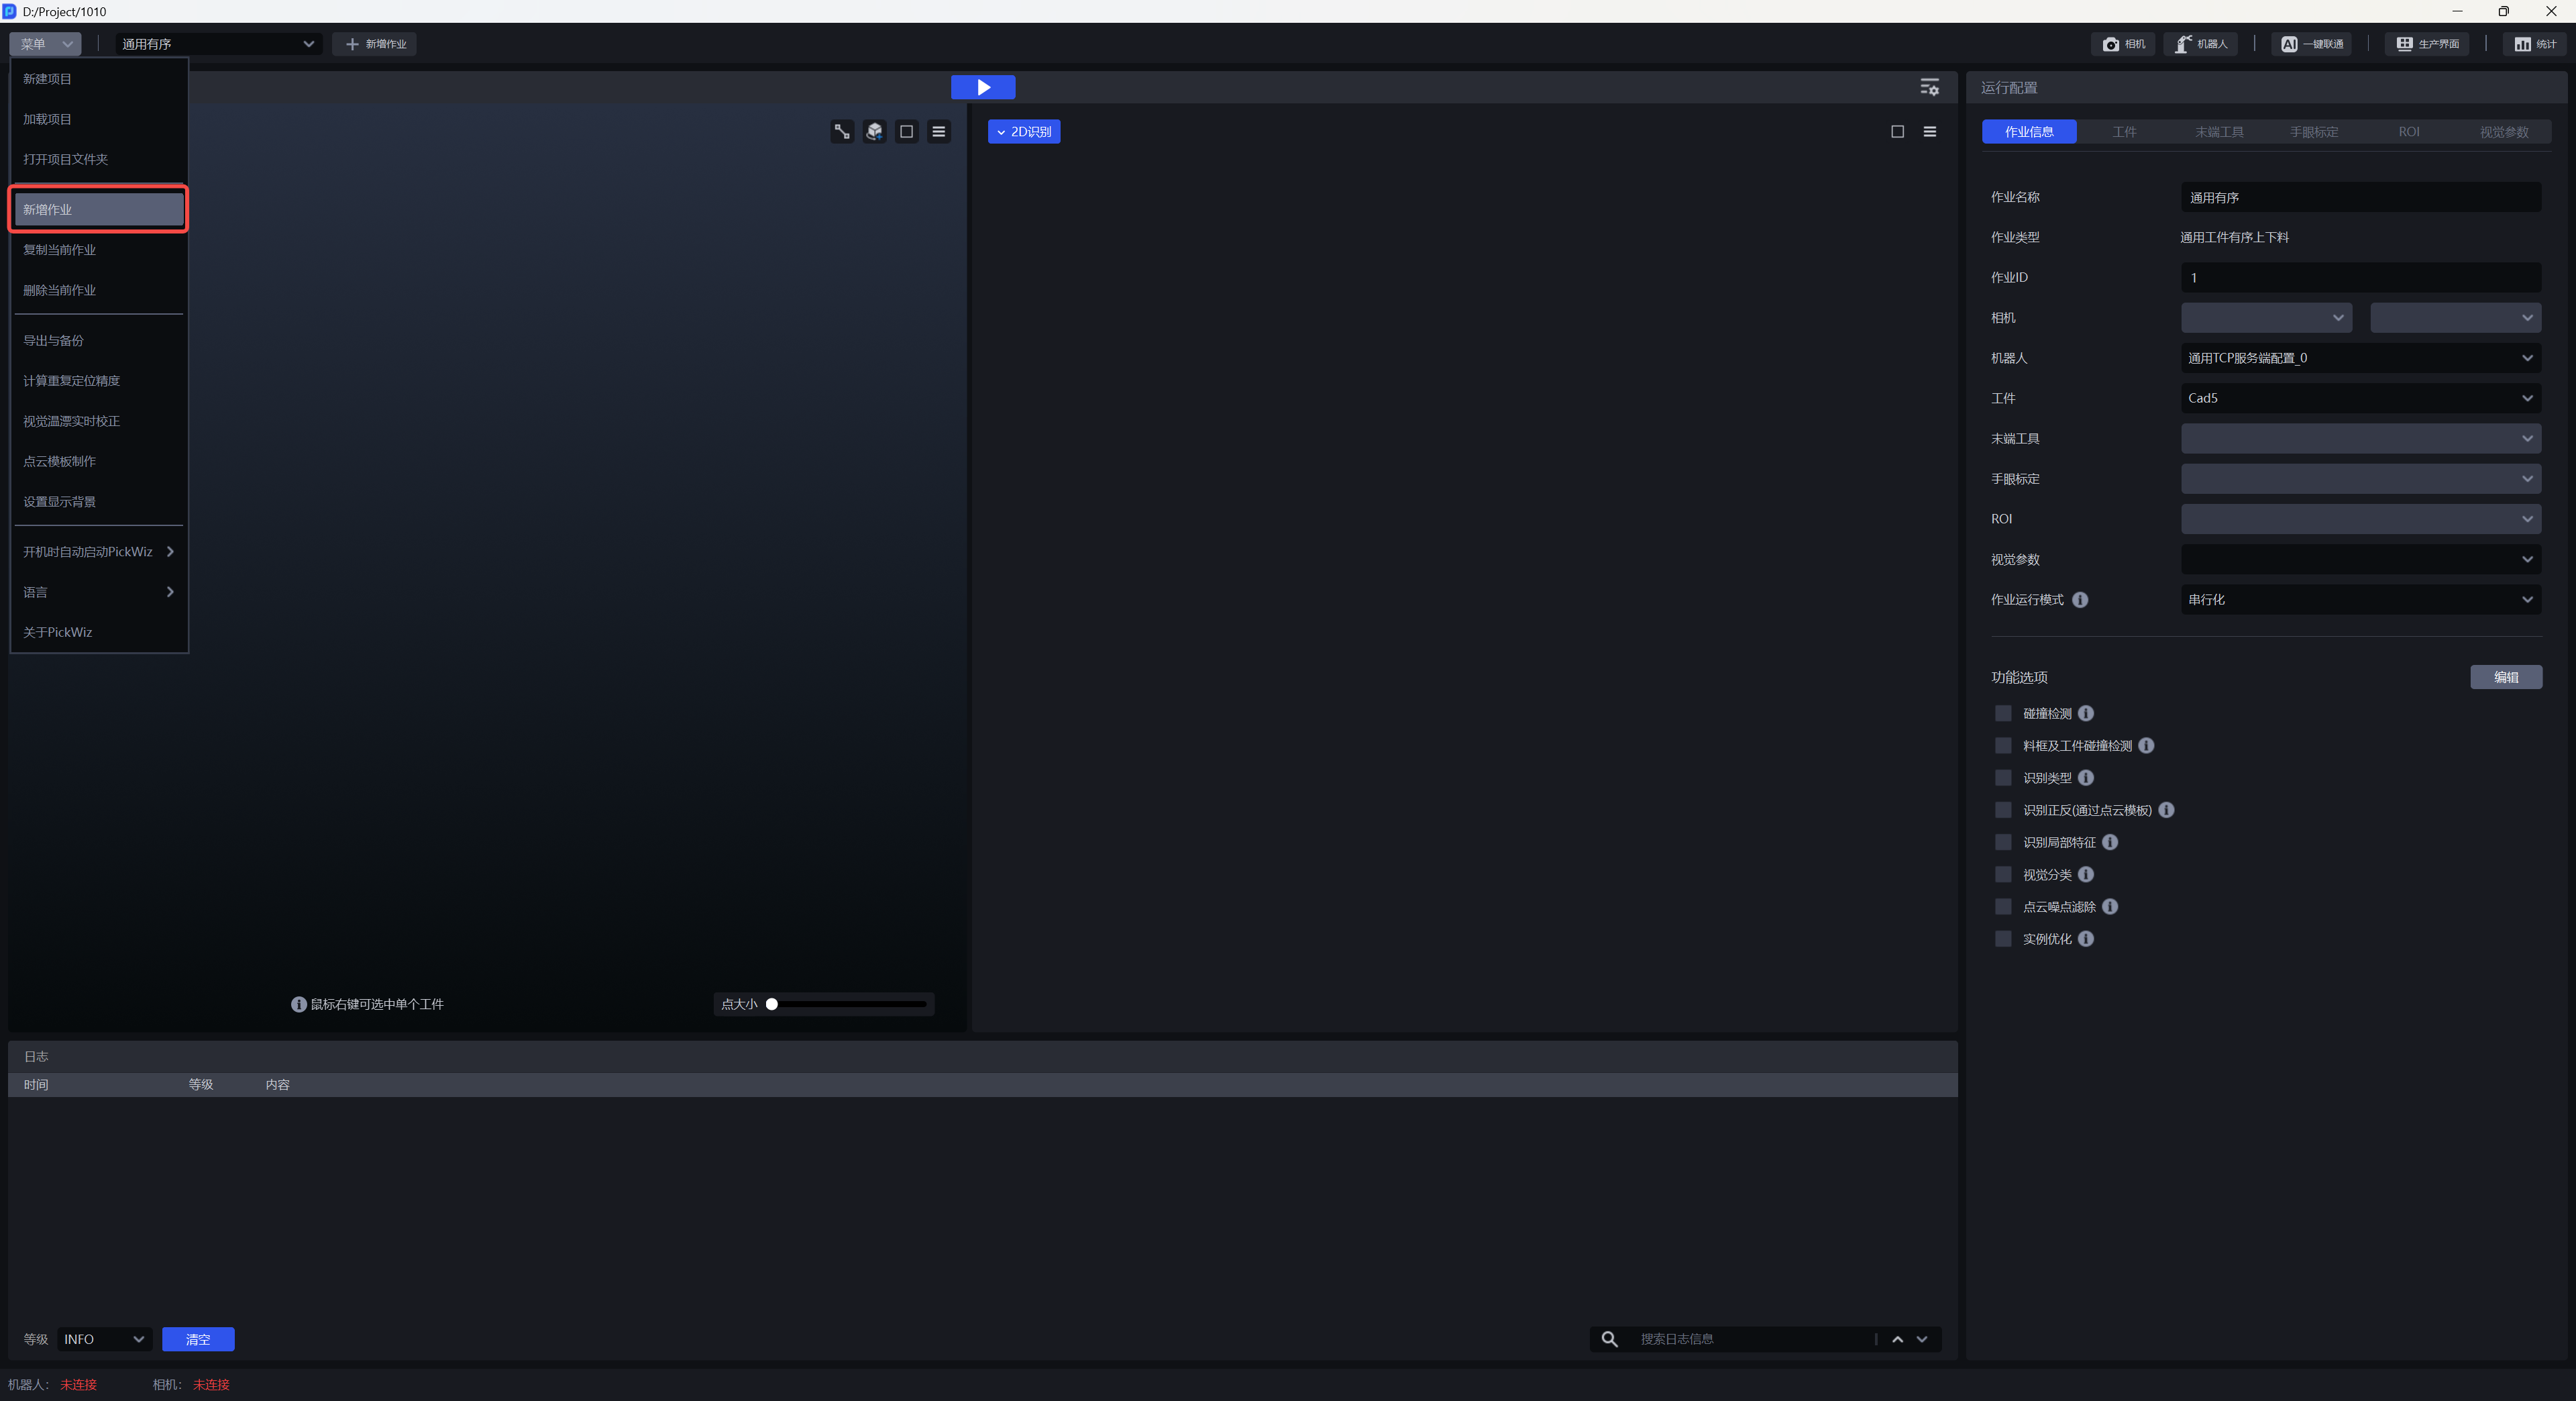
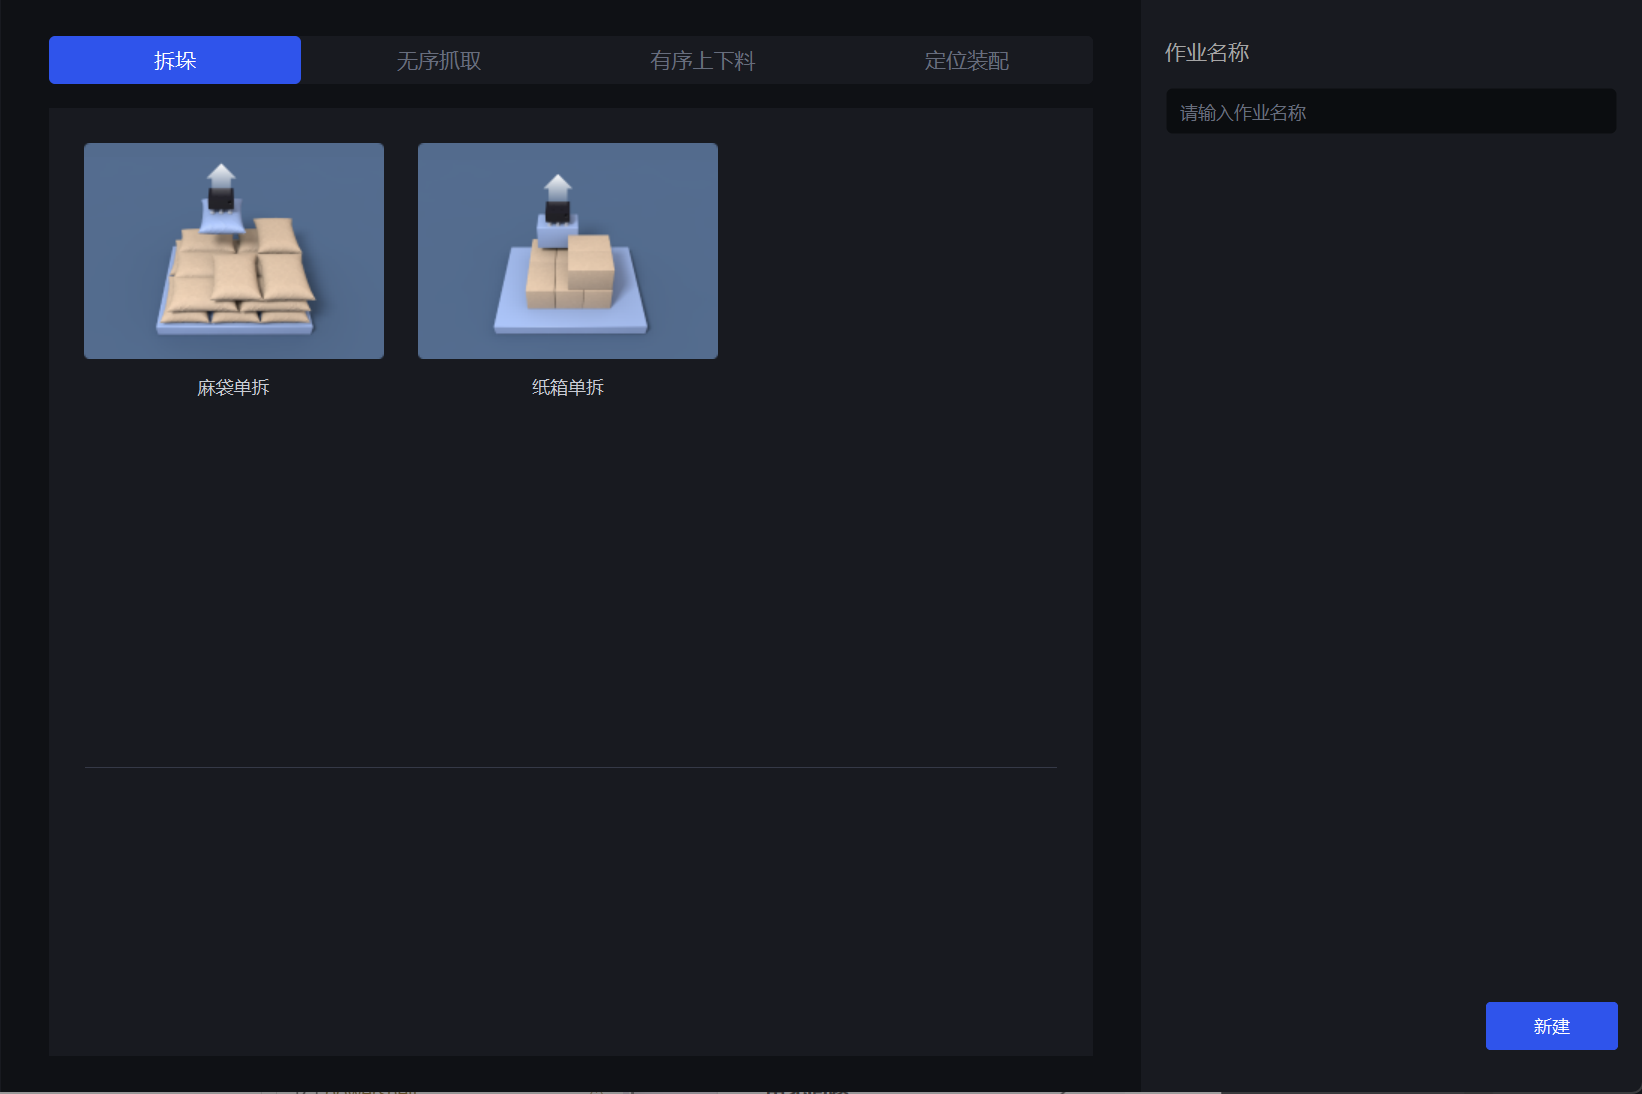
Select the task scenario that meets your needs, enter a "Task Name", and click Create to create the task.
See Introduction to 3D Vision-Guided Solutions to choose a task scenario.
2. Configure a Task
Before running a task, select all configuration items in Task Information.
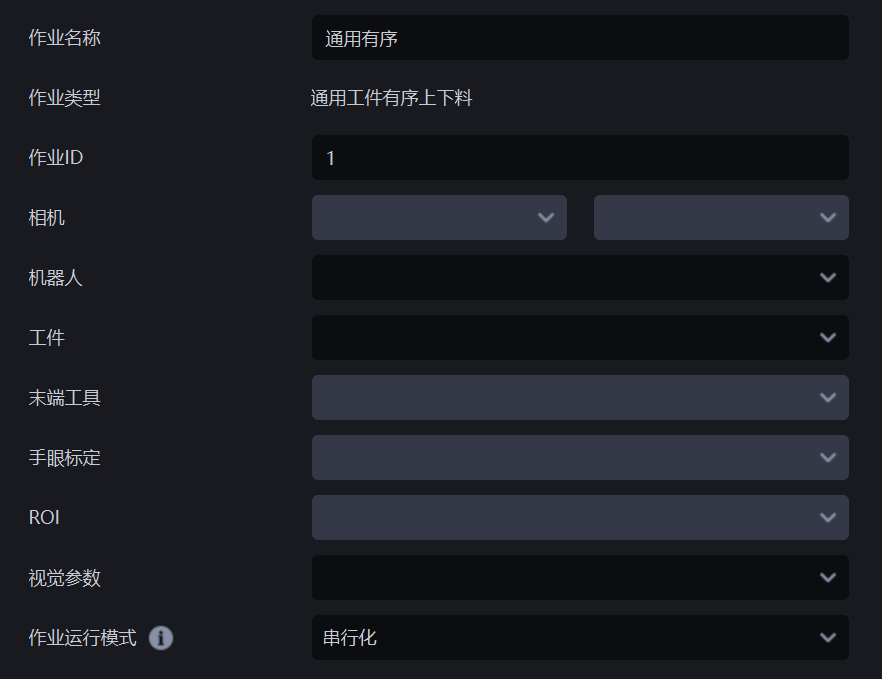
| Configuration Item | Description |
|---|---|
| Task Name | The name of the current task. It can be changed. |
| Task Type | The type of the current task, corresponding to the task scenario selected when creating the task. It cannot be changed. |
| Task ID | Identifies the current task. The robot can use this ID to switch tasks. |
| Task Running Mode | The running mode of the current task: Serial, Parallel (Vision Computation Acceleration), or End-to-End Pose Estimation. The supported modes vary by task type. See Task Running Modes. |
| Camera | The camera and camera parameters used when the current task runs. See the Camera Connection and Parameter Adjustment Guide for connecting a camera and adjusting its imaging. |
| Robot | The robot used when the current task runs. See the Robot Configuration Guide for establishing communication with the robot. |
| Target | The target configuration for the current task. Add a target on the Target page, then assign it in Task Information. See the Target Configuration Guide for adding a target. |
| End-effector | The end-effector configuration used when the current task runs. Add an end-effector on the End-effector page, then assign it in Task Information. See the End-effector Configuration Guide for adding an end-effector. |
| Scene Object | Objects in the current task scenario, including bins and pallets. The Scene Object page appears only after you select Collision Detection, Pallet Detection, or Partition and Pallet Detection under Feature Options. After adding a scene object, assign it in Task Information. For the procedures, see the Pallet Detection User Guide, Collision Detection User Guide, and Partition and Pallet Detection User Guide. |
| Eye-hand Calibration | The eye-hand calibration configuration used when the current task runs. Add it on the Eye-hand Calibration page, then assign it in Task Information. See the Eye-hand Calibration Procedure. |
| ROI | The ROI configuration used when the current task runs. Add it on the ROI page, then assign it in Task Information. See the ROI Configuration Guide. |
| Vision Parameters | The vision parameter configuration used when the current task runs. Configure it on the Vision Parameters page. See the Vision Parameter Adjustment Guide for the procedure. |
After selecting all configuration items, click the  button to run the current task.
3. Delete a Task
(1) Delete any task: Click the task drop-down list to view all tasks. Hover over the task you want to delete to display the 🗑 button. Click 🗑 to delete the task and its configuration.
(2) Delete the current task: Open the menu and click Delete Current Task to delete the current task and its configuration.
4. Copy a Task
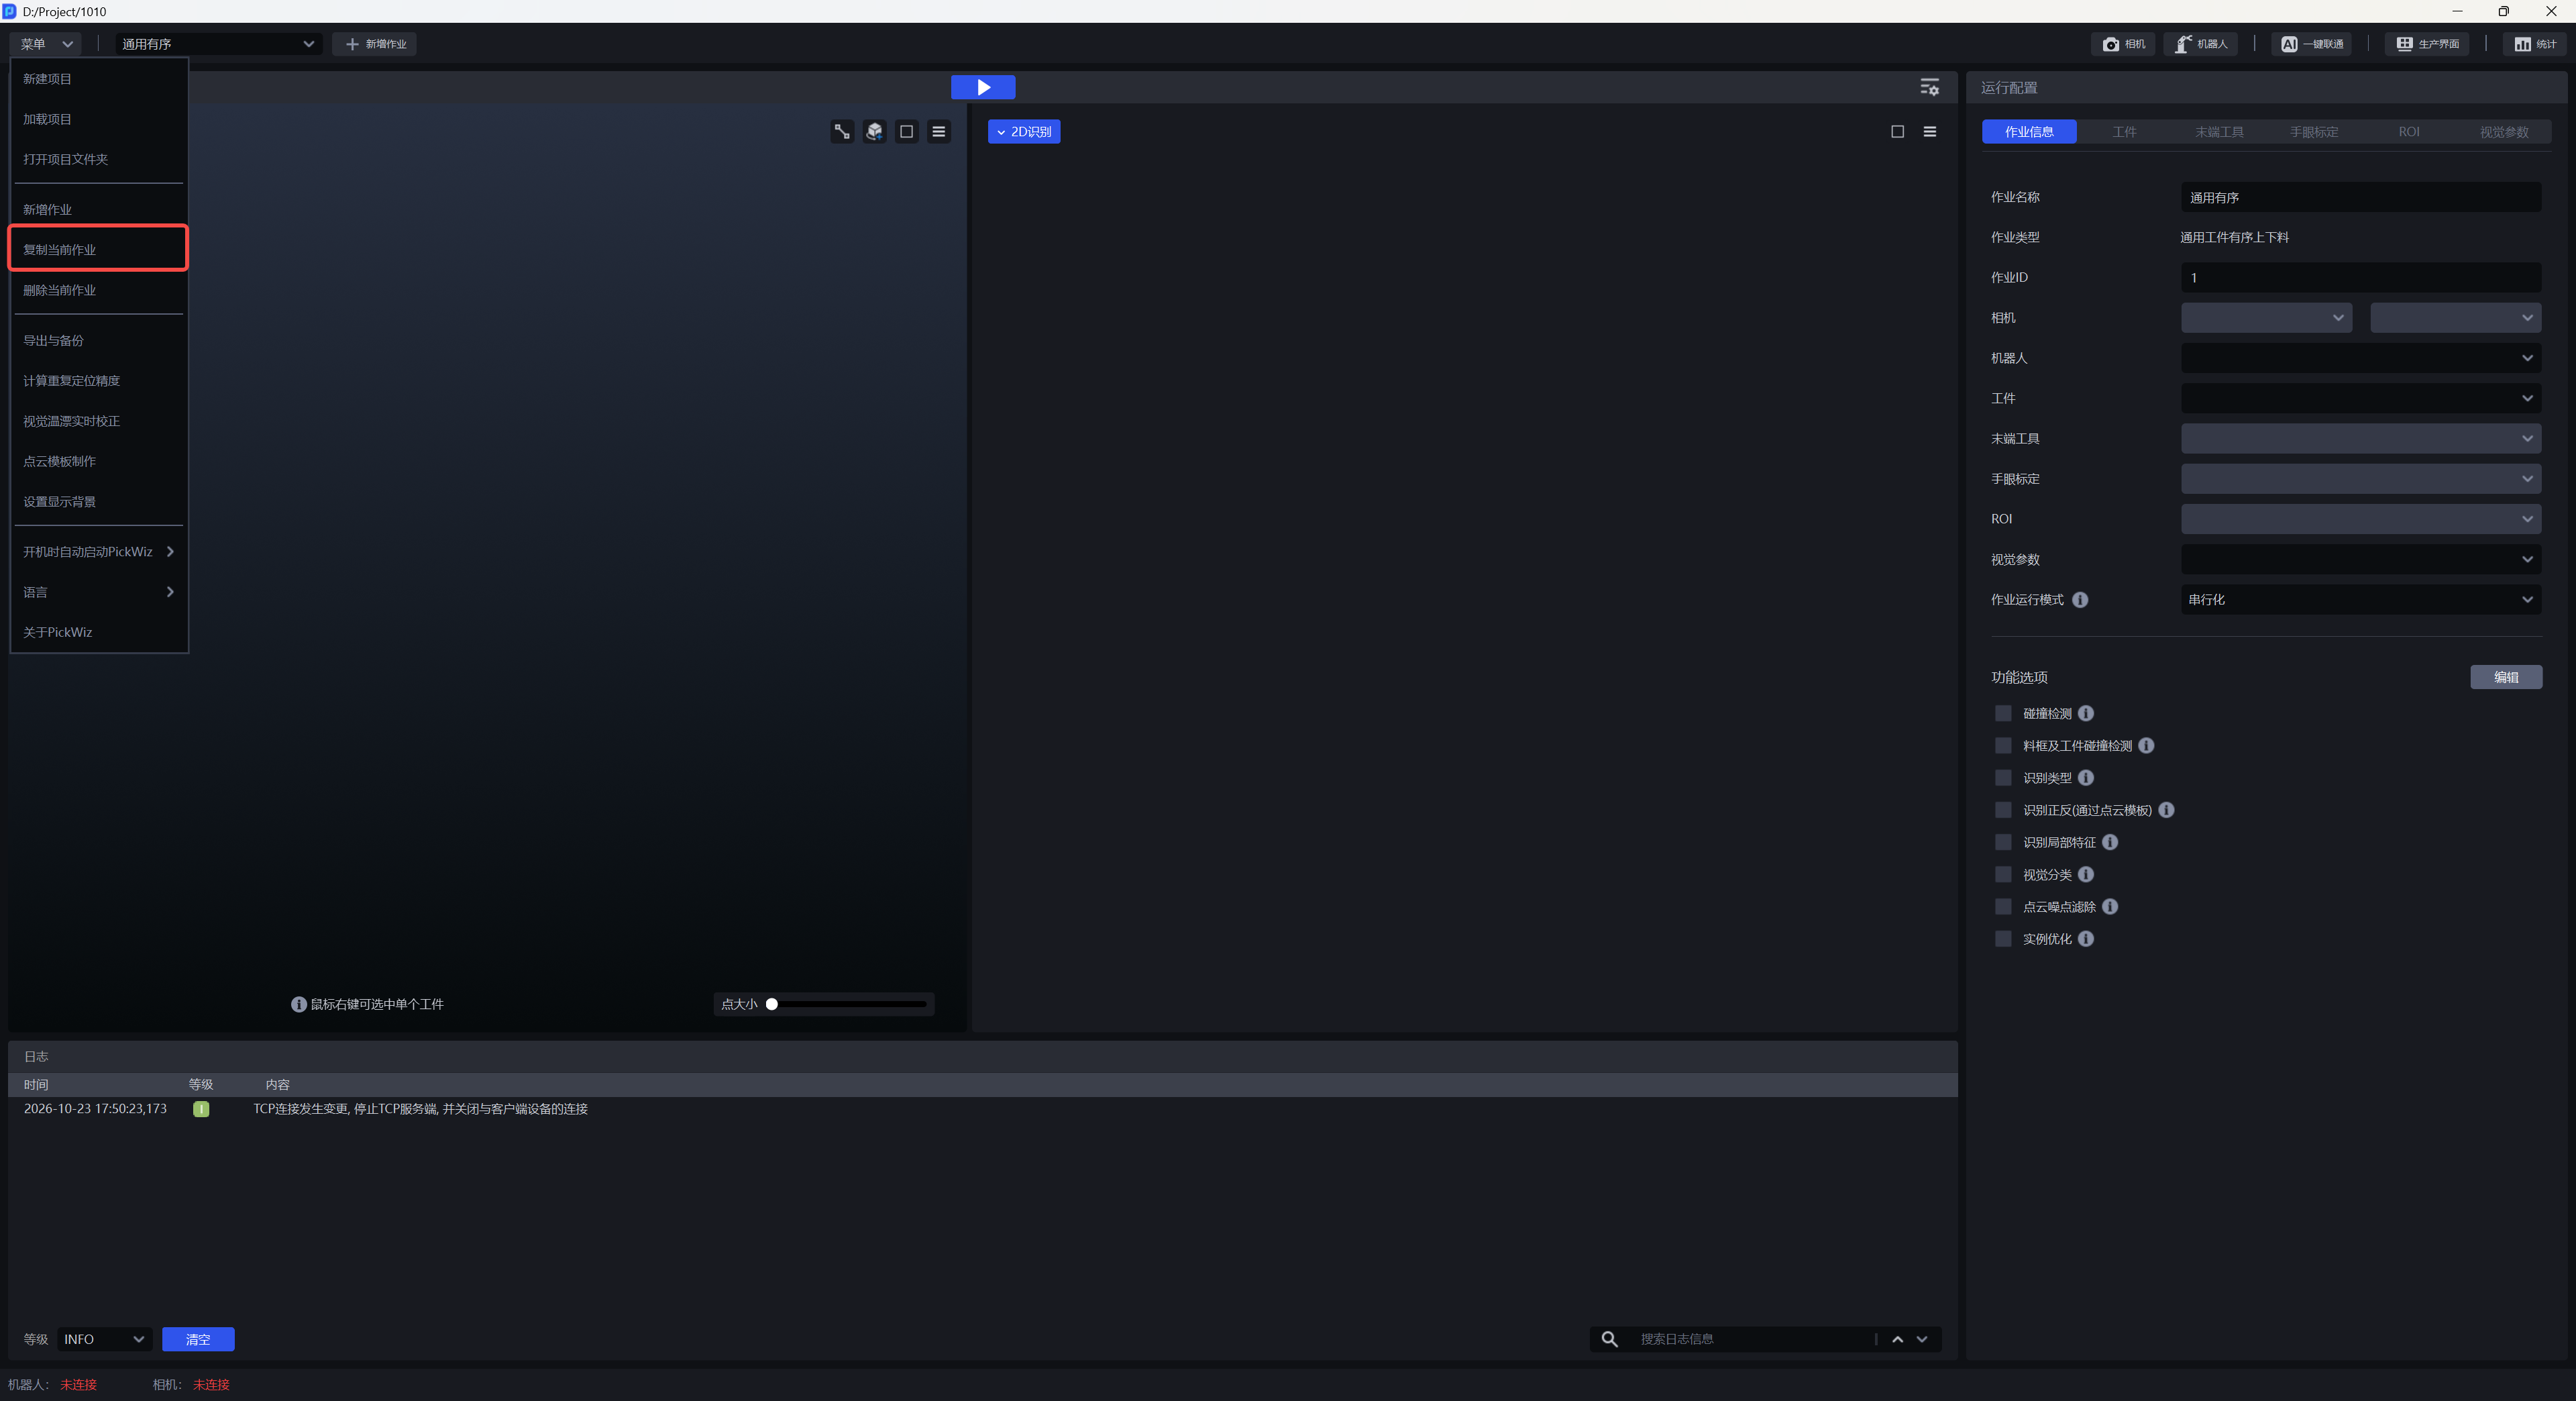
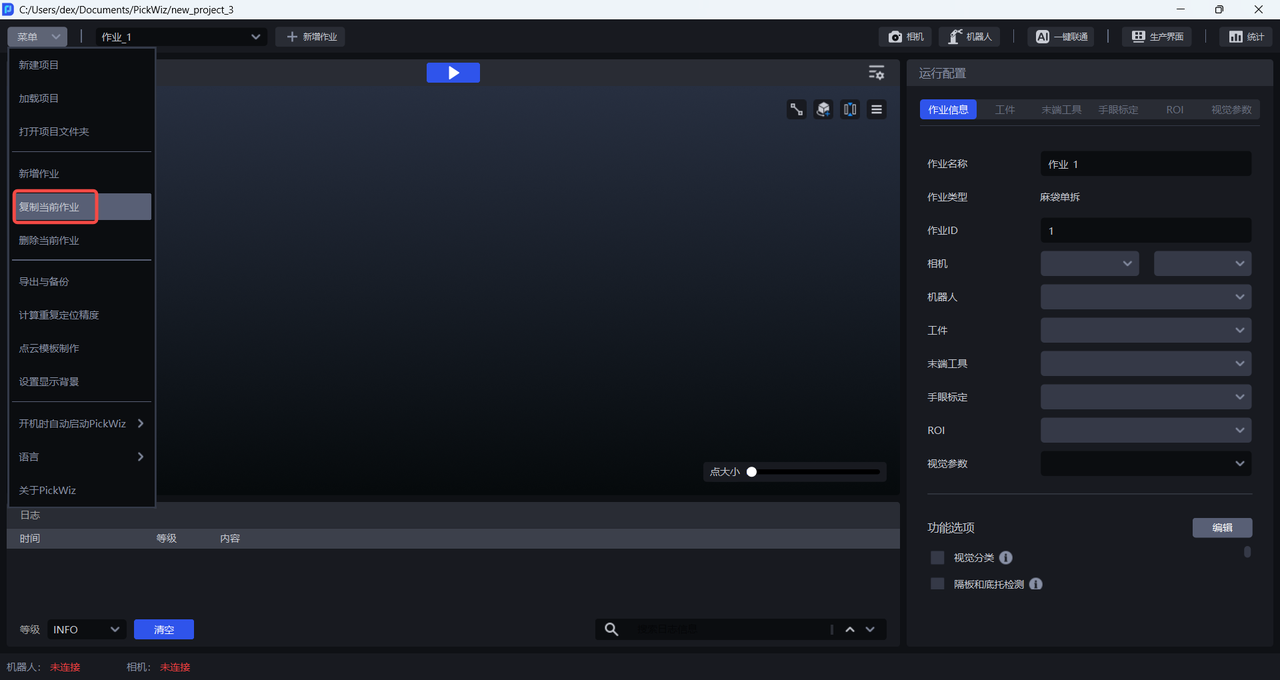
Open the menu and click Copy Current Task to create a copy containing all configurations from the original task.
5. Switch Tasks
You can switch tasks during operation in two ways: from the PickWiz software or from the robot.
5.1 Switch in PickWiz
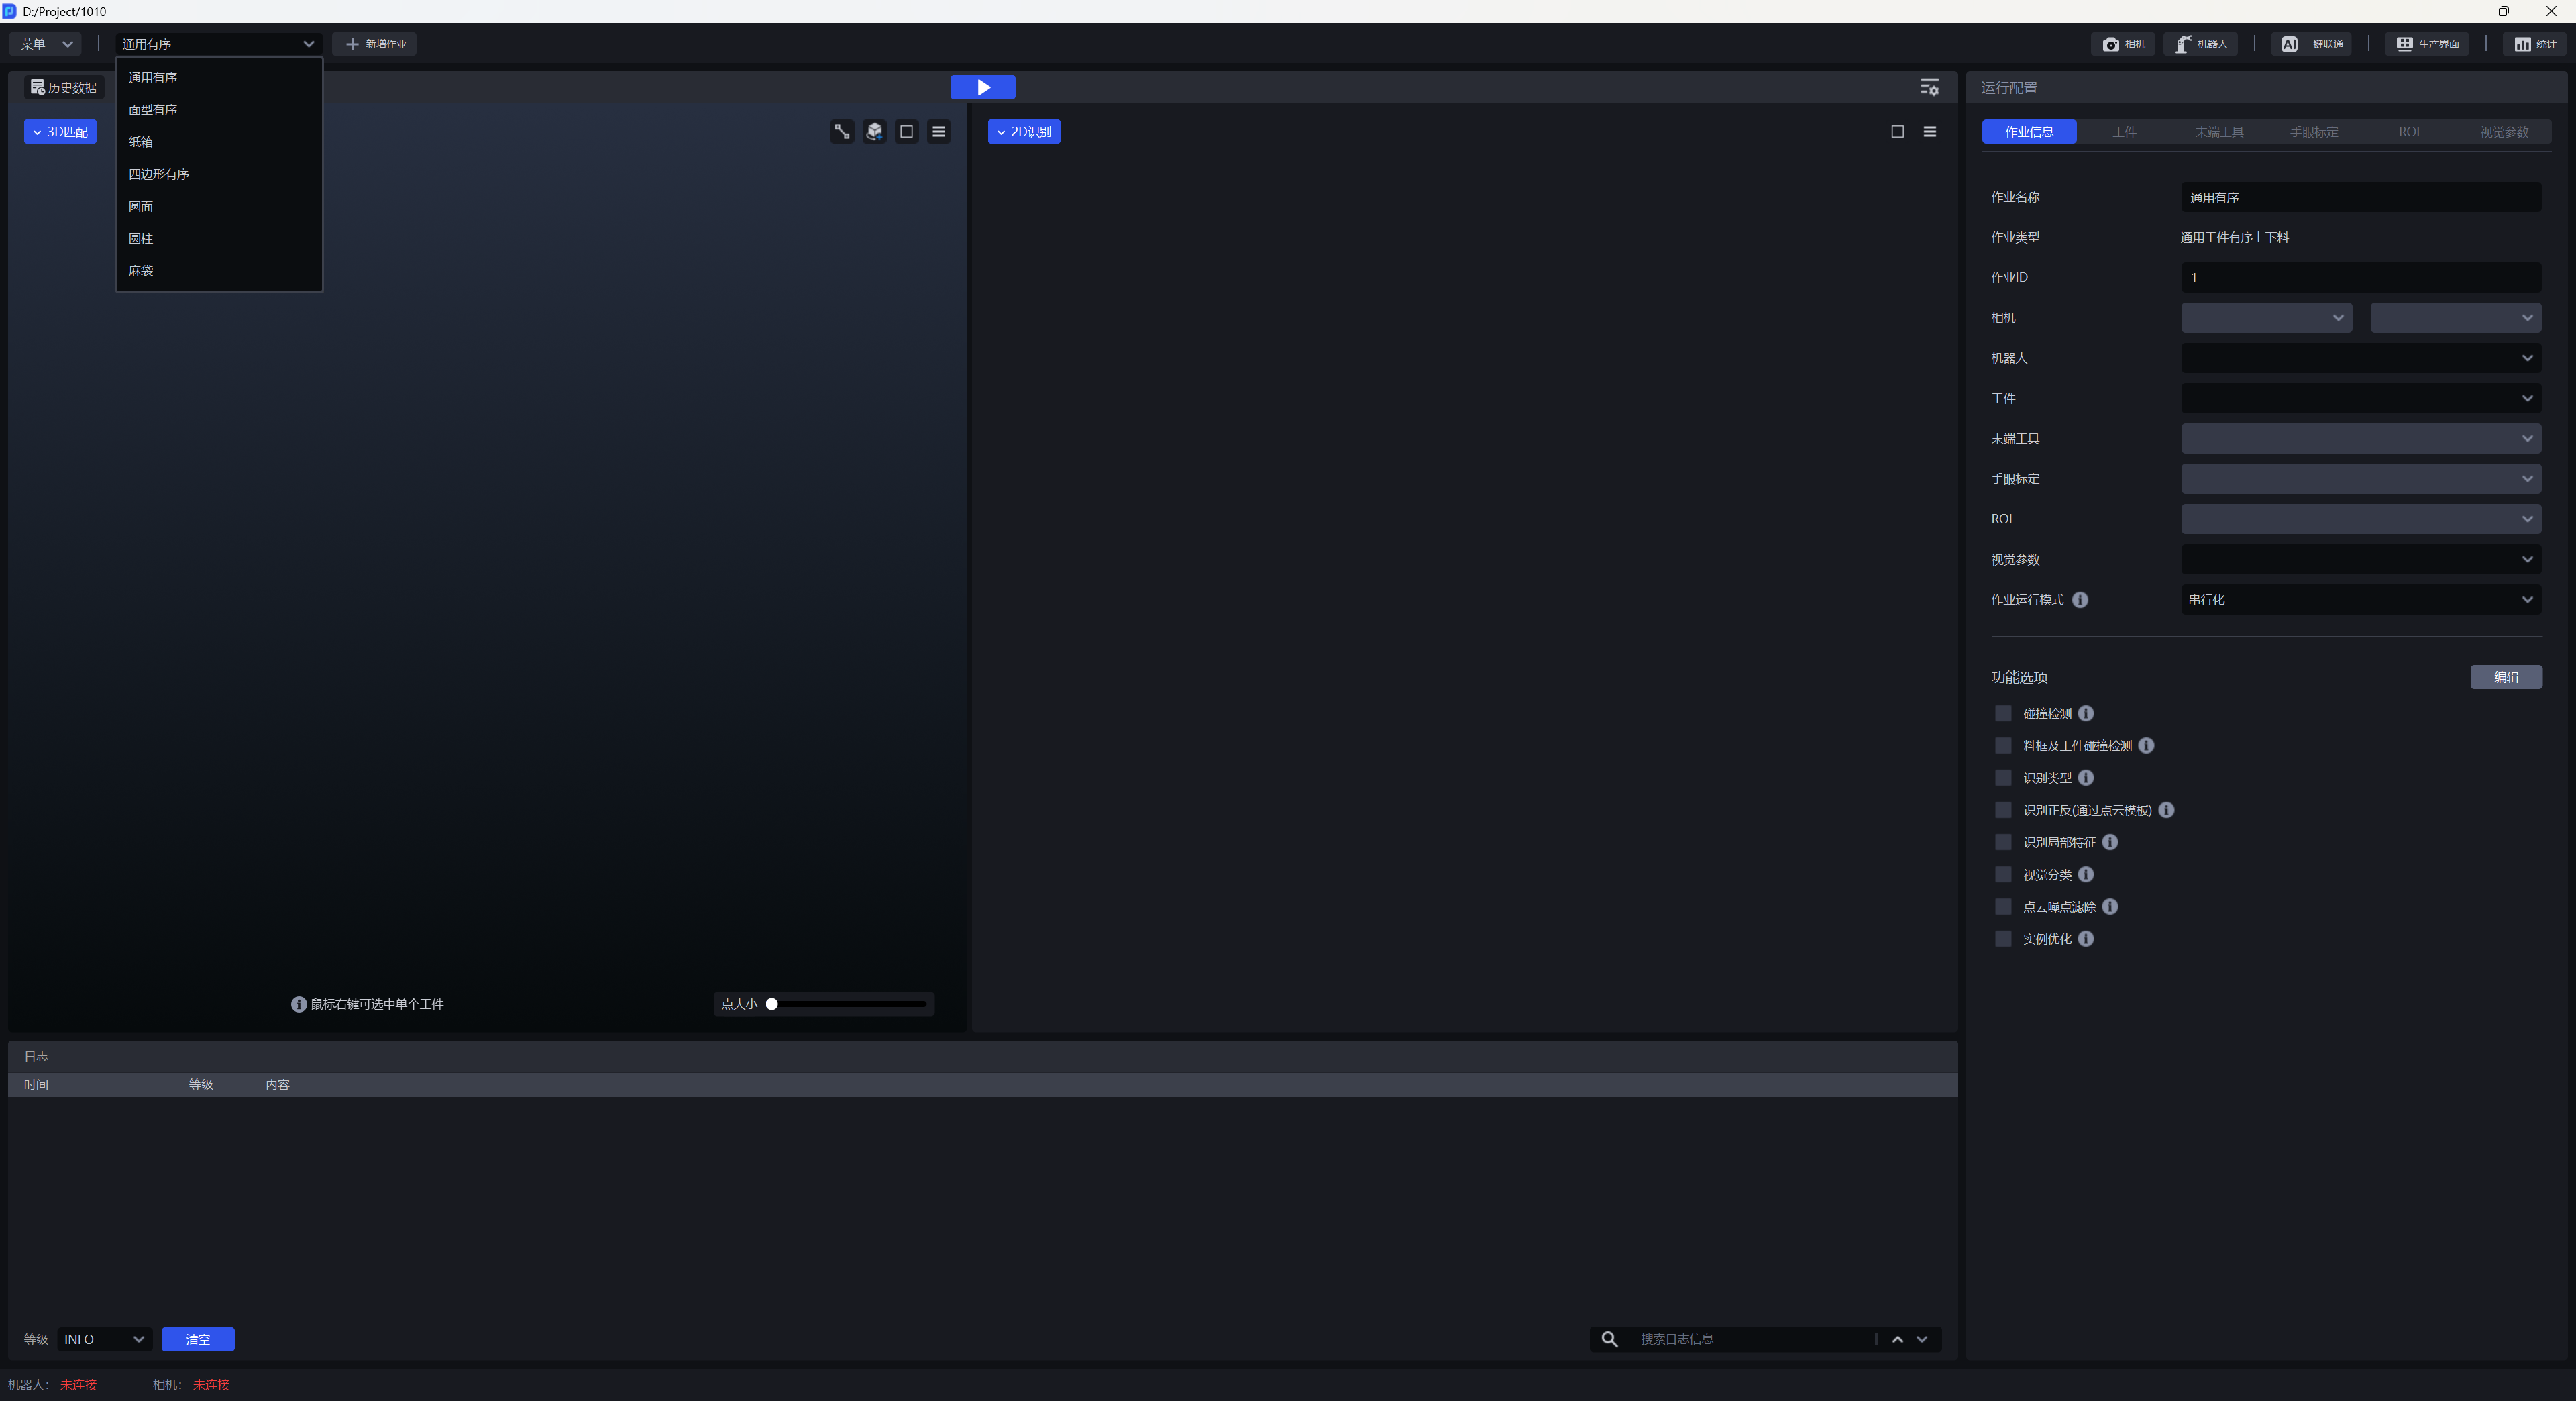
Click the task drop-down list in the upper-left corner of the main interface and select the task you want to run.
5.2 Switch from the Robot
You can import a project file containing the business logic on the robot side so that the robot sends a signal to PickWiz to switch tasks. The robot can communicate with PickWiz using the command content {wid} (Task ID) to complete the switch.
For communication methods and commands between PickWiz and the robot, see the Robot Configuration Guide.
6. Task Running Modes
The task running mode determines how vision computation is performed for the current task. Select it in the "Task Running Mode" field on the Task Information configuration page. This required field allows only one selection, so a task can use only one running mode at a time.
6.1 Three Running Modes
PickWiz provides three task running modes:
- Serial: The default mode. Each stage of vision computation runs in sequence. This mode is suitable for most task scenarios.
- Parallel (Vision Computation Acceleration): Vision computation takes less time, and all target instances in the field of view are detected by default. This mode is suitable for scenarios with many target instances and demanding cycle time requirements. For its scope and limitations, see the Vision Computation Configuration User Guide.
- End-to-End Pose Estimation: Takes an RGB image from either camera view as input and directly generates pose estimates for instance point clouds. This shortens the vision computation pipeline and reduces task runtime. For details, see the SIPE End-to-End Pose Estimation User Guide.
6.2 Select a Running Mode
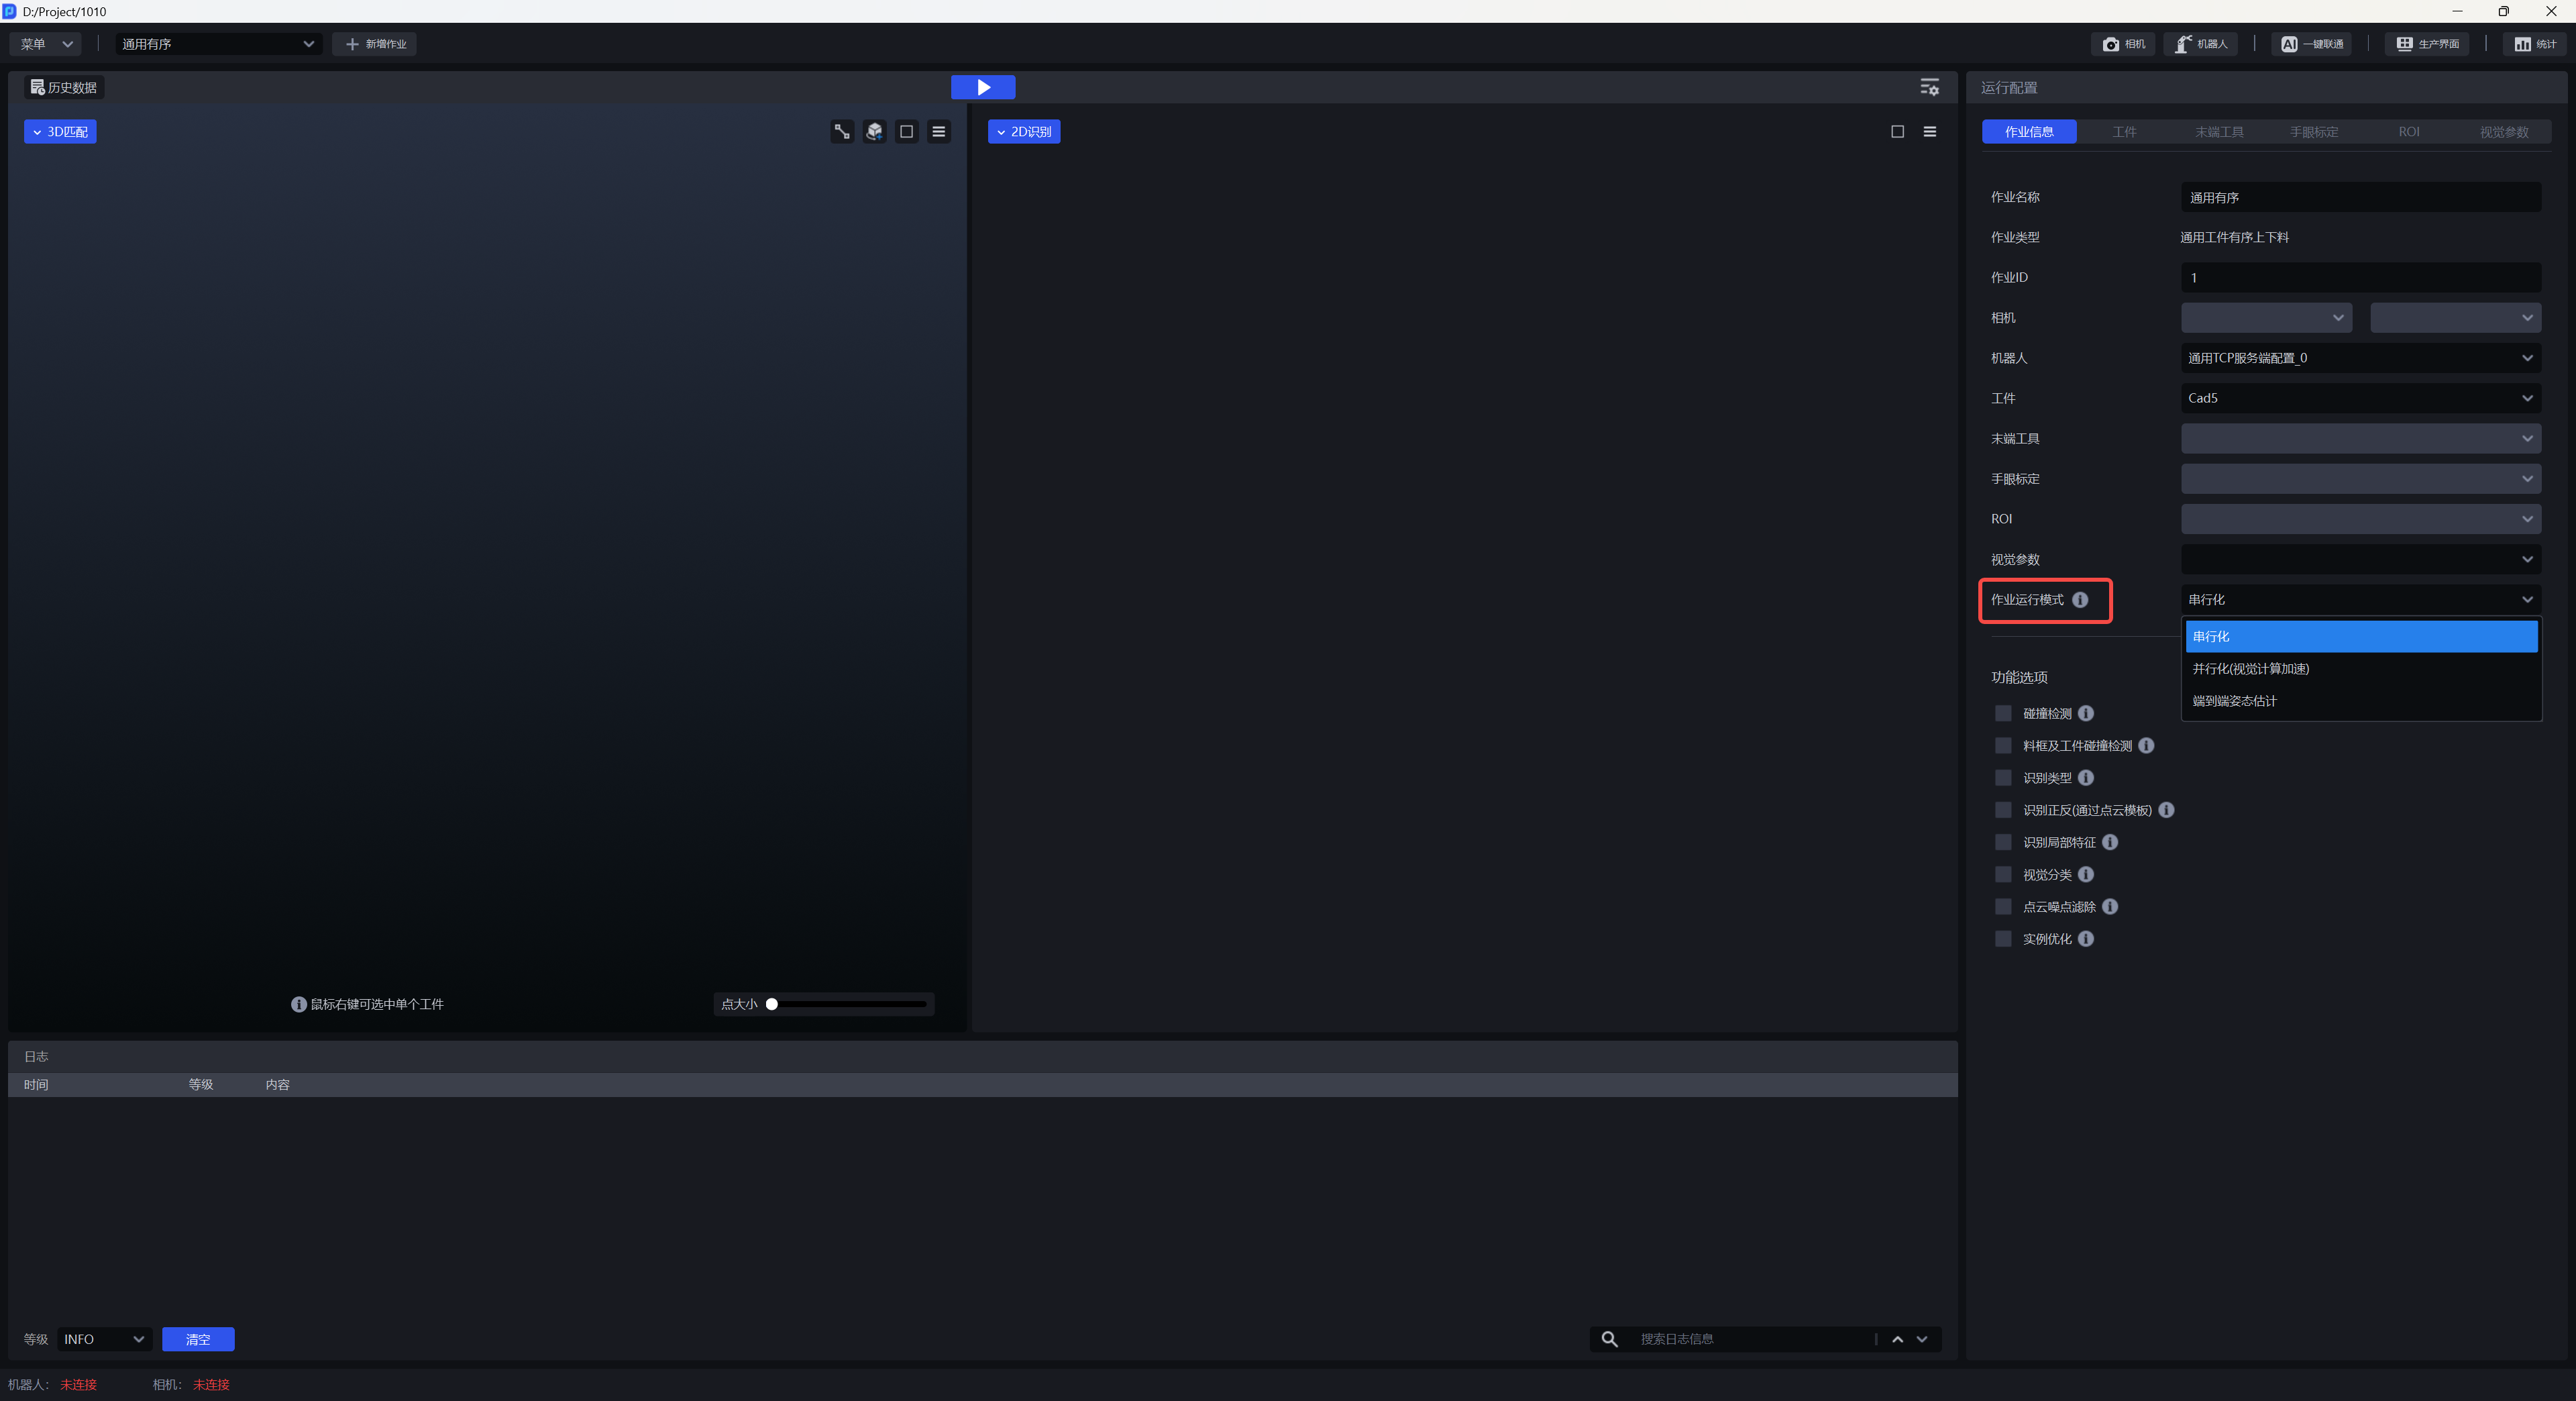
On the Task Information configuration page, expand the "Task Running Mode" drop-down list and select the required mode.
Hover over the icon to the right of the "Task Running Mode" field to display this description: "Set the running mode for the current task. The options are Serial, Parallel (Vision Computation Acceleration), and End-to-End Pose Estimation. Supported running modes vary by task type."
6.3 Task Types and Supported Running Modes
The running modes available depend on the task type:
| Running Mode | Supported Task Types |
|---|---|
| Serial | All task types |
| Parallel (Vision Computation Acceleration) | Available only for task types that support this mode; the option appears in their drop-down lists. For the specific scope, see the Vision Computation Configuration User Guide. |
| End-to-End Pose Estimation | In PickWiz 1.9.0, this mode is supported by Loading and unloading of neatly arranged general type target objects and General Target positioned assembly. |
When you create a task, "Task Running Mode" defaults to Serial. Switch modes manually if you need another mode.
6.4 Switching and Retaining Running Modes
- End-to-End Pose Estimation and Parallel (Vision Computation Acceleration) are mutually exclusive and cannot be selected at the same time. When End-to-End Pose Estimation is turned off, the task returns to the running mode used before it was enabled. If no running mode was set previously, the task returns to Serial.
- When upgrading from an older version to PickWiz 1.9.0, the existing task configuration and running behavior are retained. The running mode does not change automatically.
- When loading an existing project or task from the Menu, "Task Running Mode" displays the mode selected for that task.