Vision Computation Configuration Operation Guide
Vision computation configuration is a customized system configuration for the entire PickWiz vision computation process. Users can customize system behavior according to specific scenario requirements. By configuring “Data and Storage Settings” and “Picking Logic Settings,” PickWiz can achieve the best balance among picking accuracy, takt time, and picking stability, guiding the Robot to perform accurate and efficient picking.
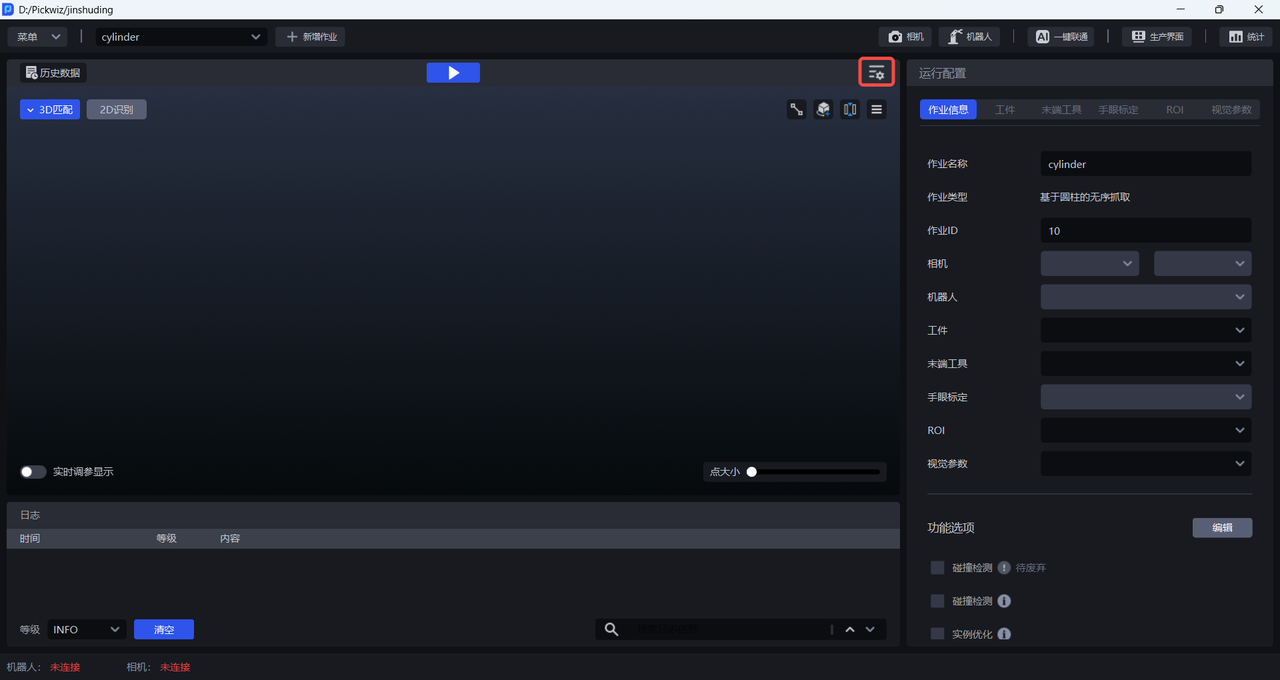
Click on the PickWiz main interface

to enter the Vision Computation Configuration page, as shown below.
1. Data and Storage Settings
1.1 Input Data
During vision computation, Camera data or historical data is input into the Workflow of the corresponding scenario. After 2D recognition, 3D computation, and Pick Point processing, the Workflow outputs Pick Points on the Target Object.
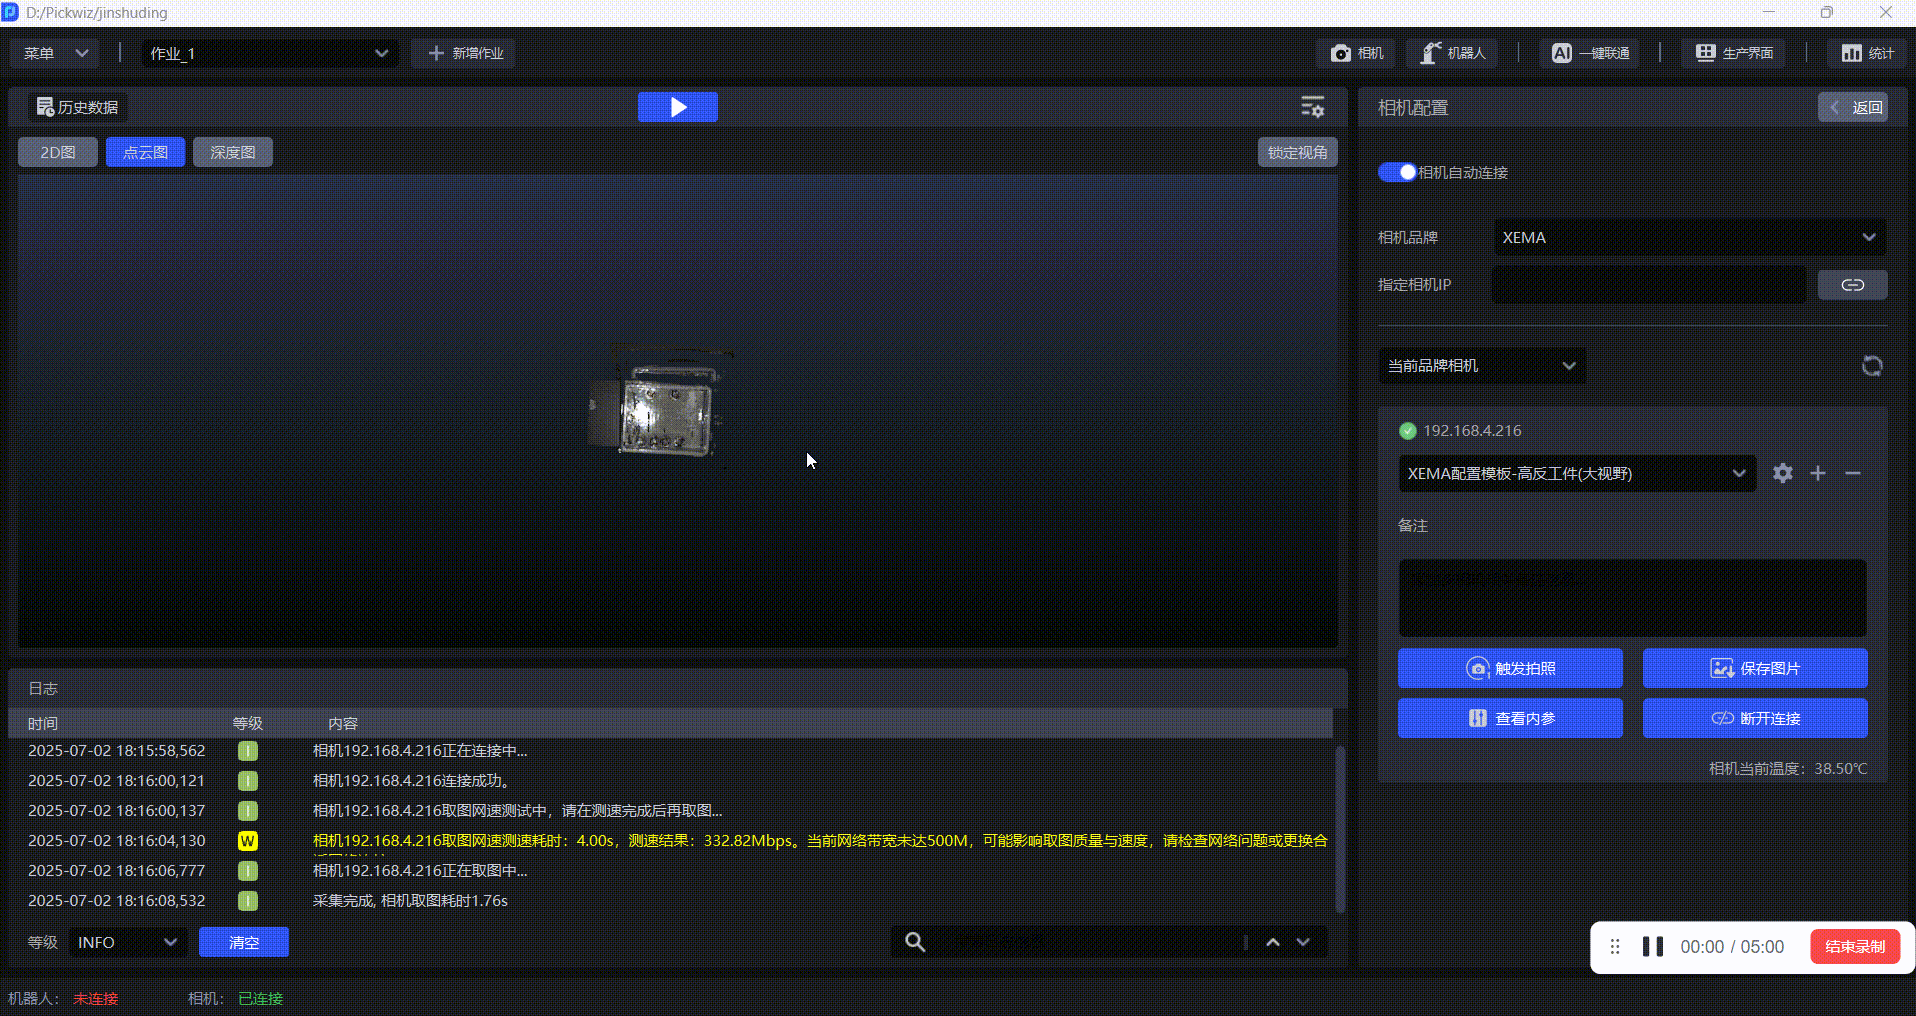
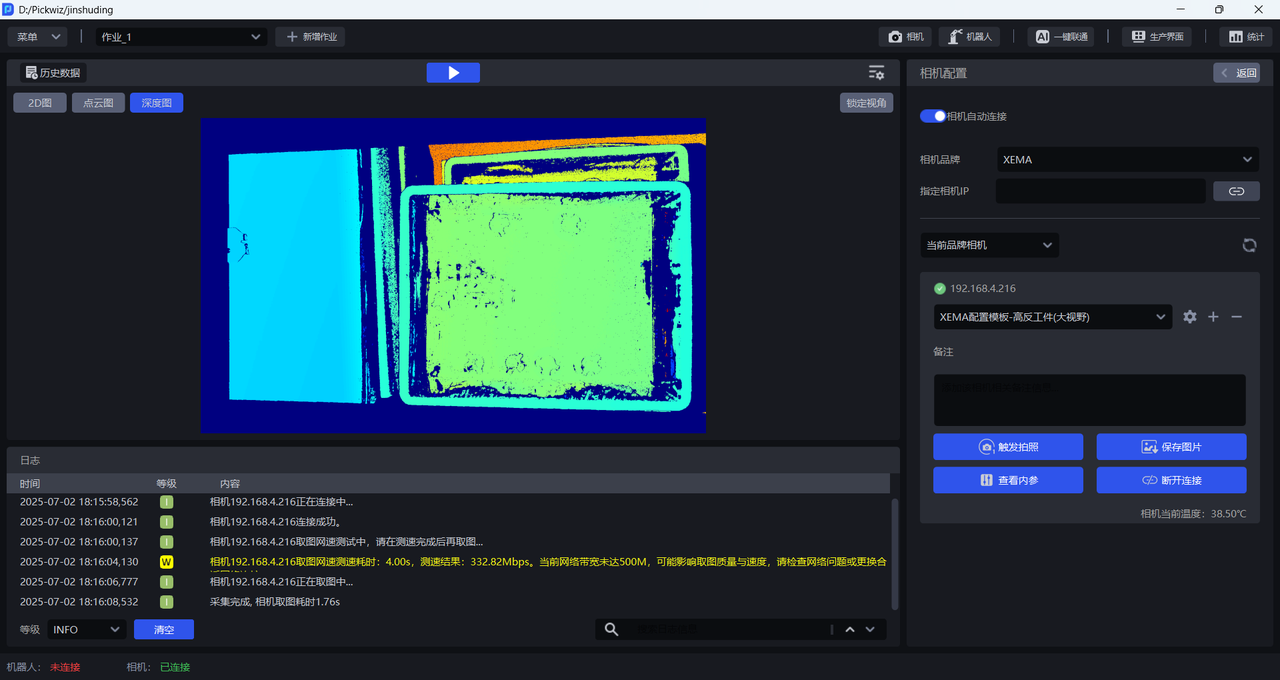
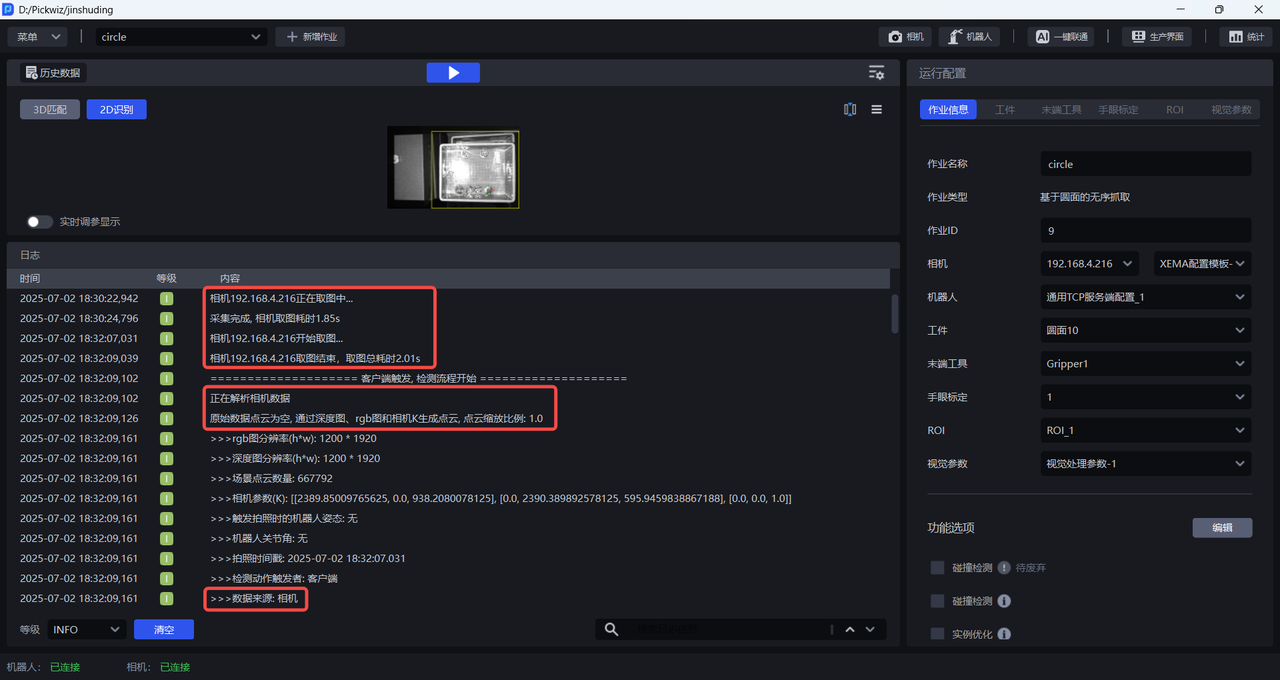
1.1.1 Camera Data
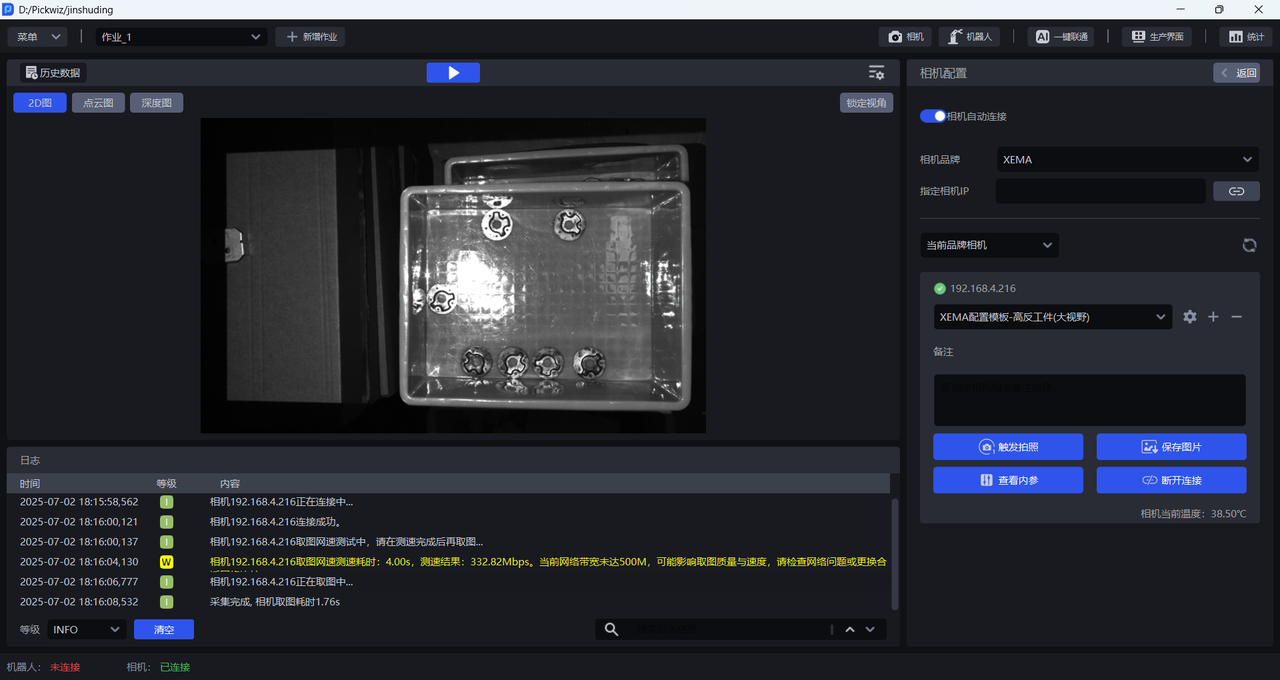
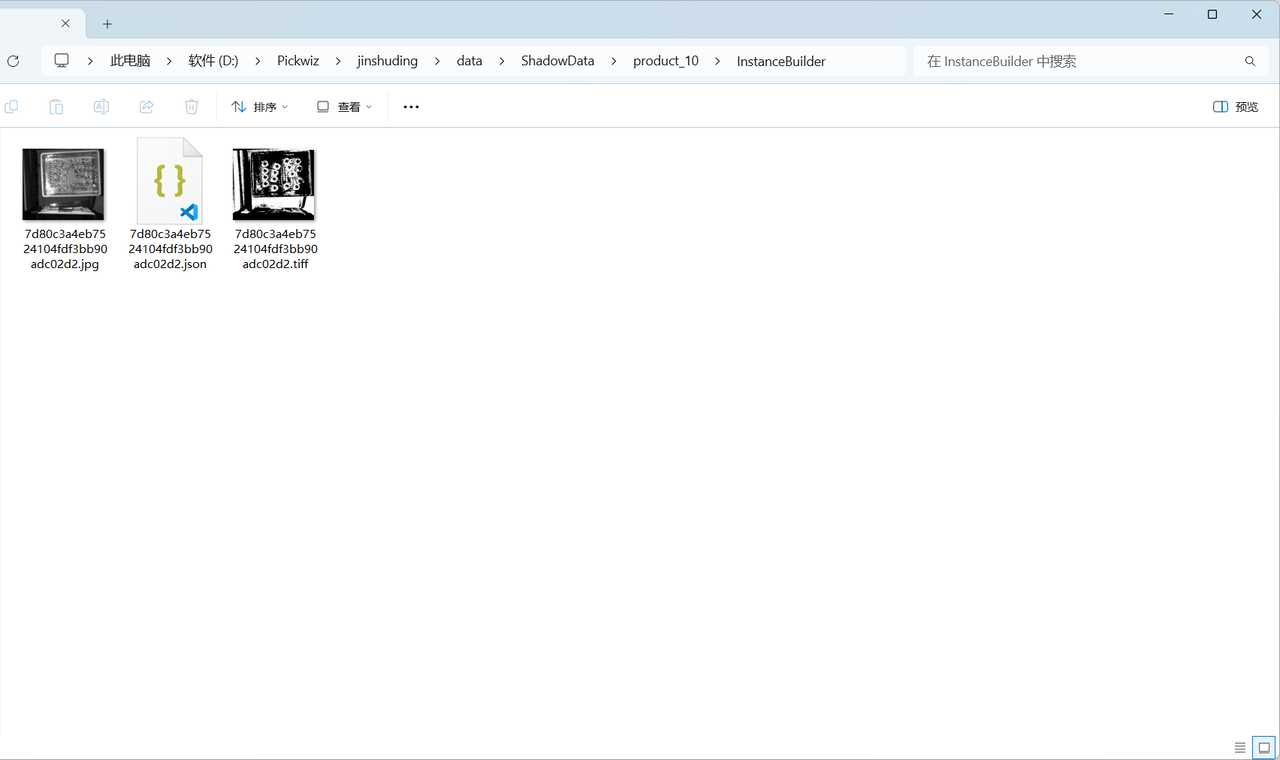
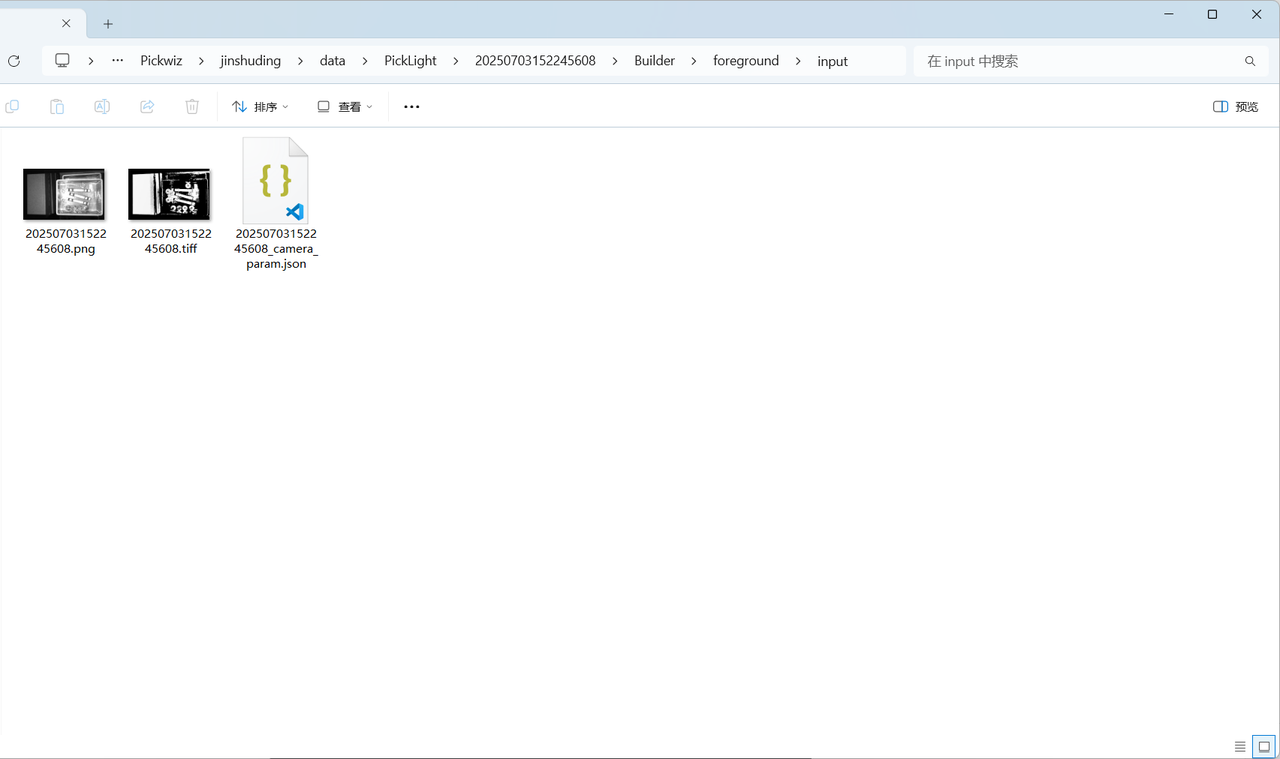
Camera data is real-time scene data collected by the Camera, including 2D images, depth images, and Point Cloud images, as shown below.
The workflow for using Camera data for vision computation is as follows:
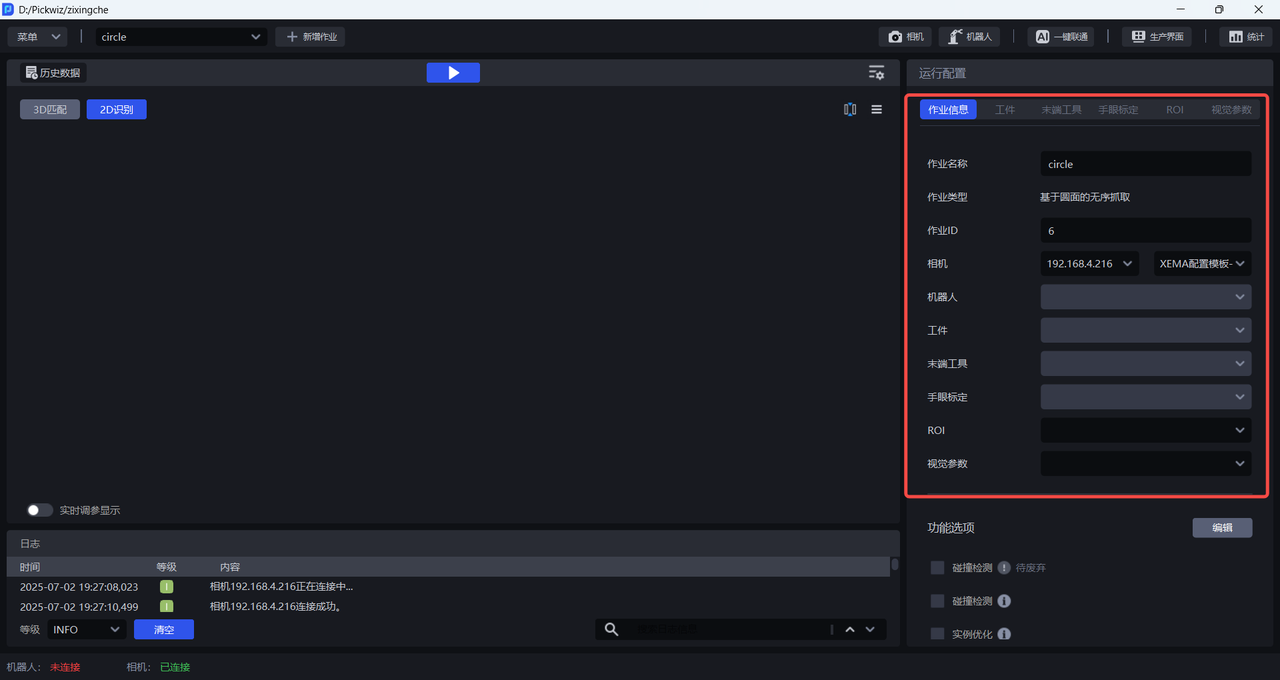
(1)Create a new Project and task, connect the Camera and Robot, and complete the task information configuration. For detailed operations, refer to Project Operation Guide, Task Operation Guide, Camera Connection and Parameter Tuning Guide, and Robot Configuration and Communication Guide.
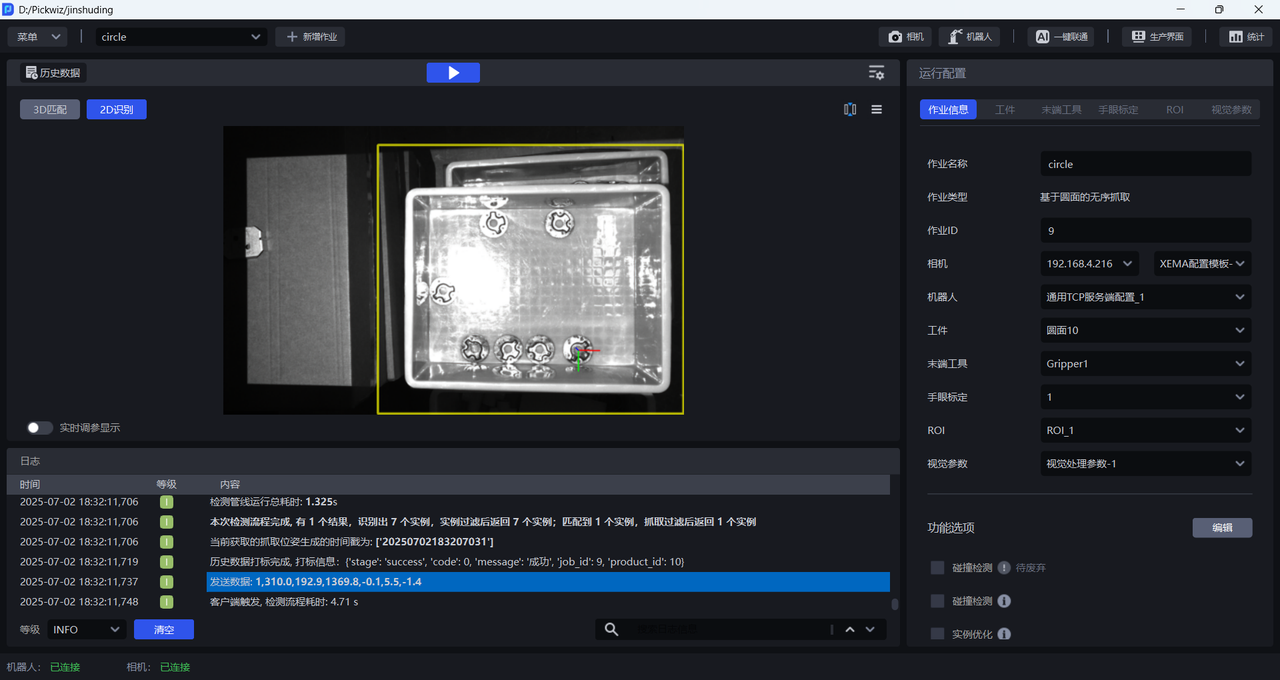
(2)After clicking Run, the Camera data is input into the Workflow for vision computation, and Pick Points are output at the end. The beginning of the log shows that the data source is Camera data, as shown below.
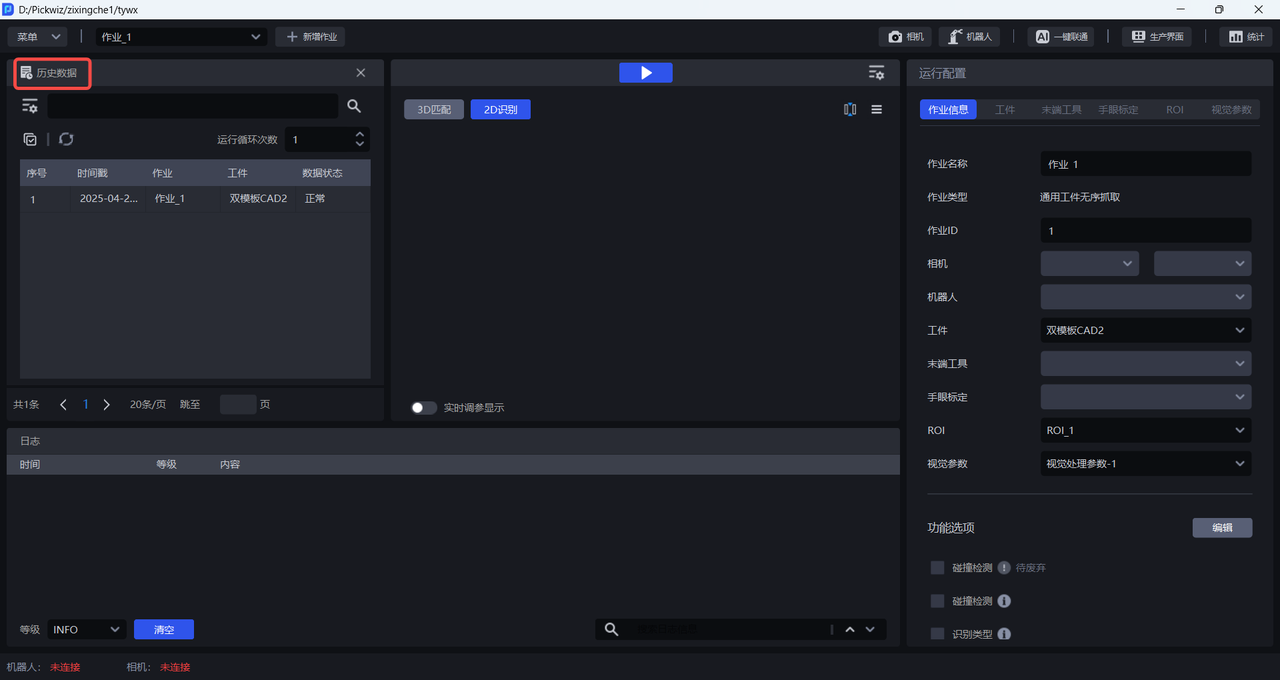
1.1.2 Historical Data
Historical data is the running record of PickWiz over a past period of time. It stores the input data and output results of each process in vision computation and is used to troubleshoot fault causes. As shown below, for detailed instructions, refer to Historical Data User Guide.
The workflow for using historical data for vision computation is as follows:
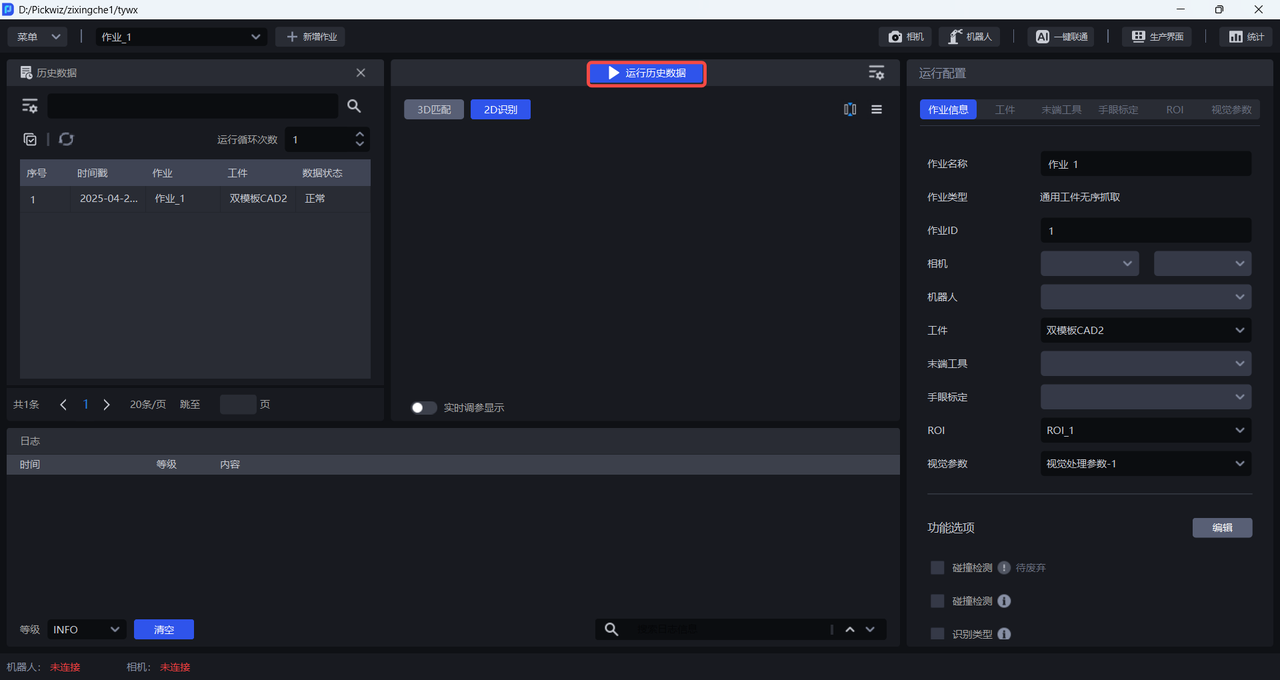
(1)Click Historical Data to open the historical data pop-up window.
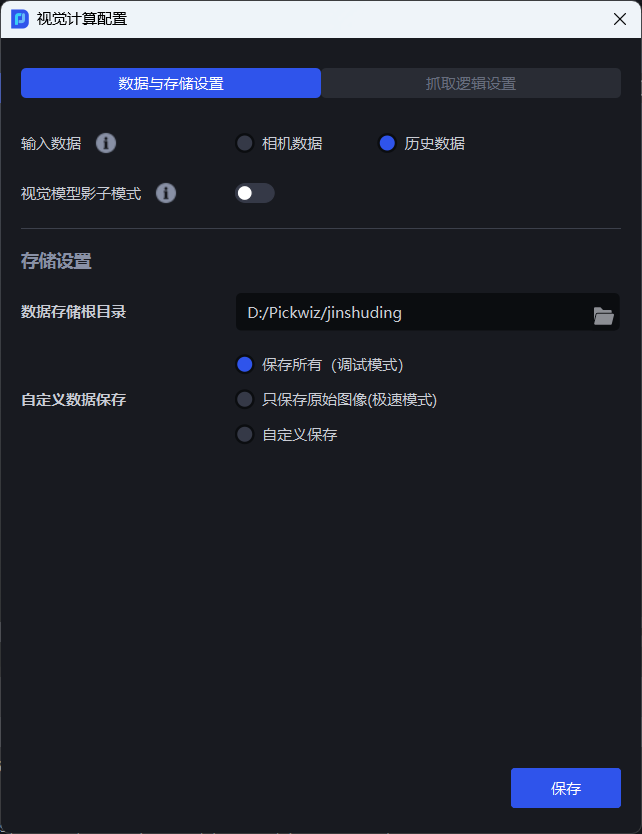
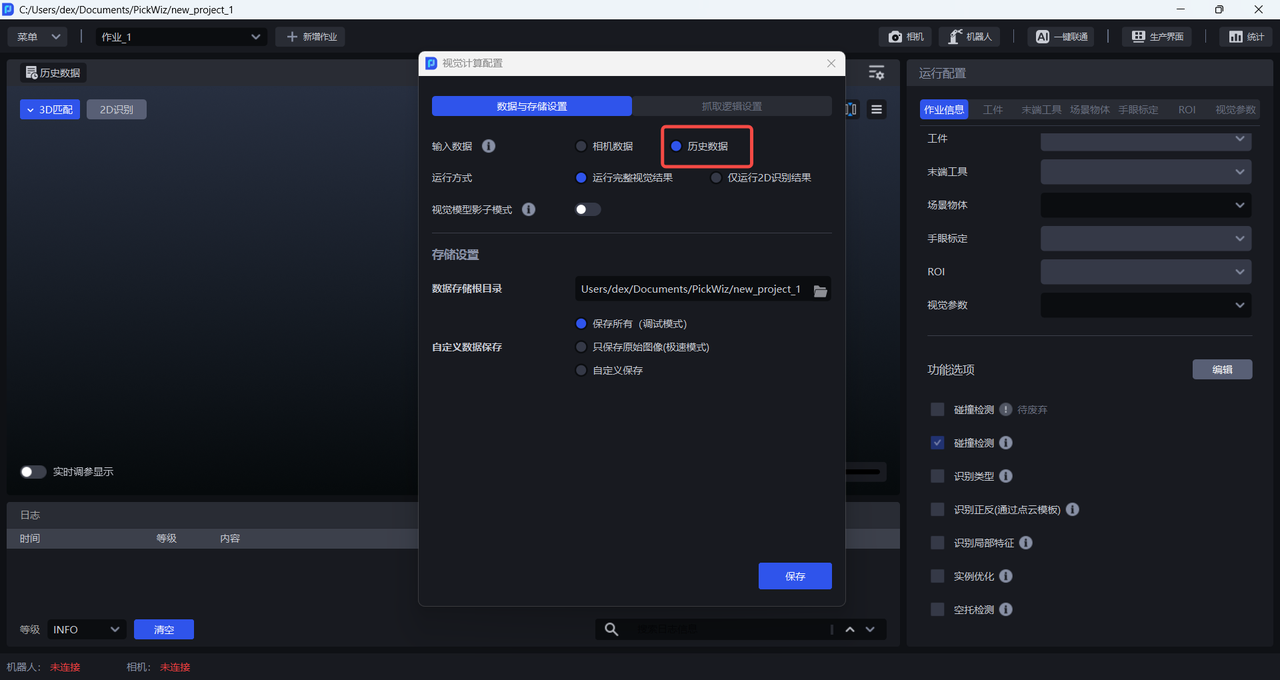
(2)Open the Vision Computation Configuration pop-up window, switch Input Data to Historical Data . For historical data input, you can choose Run Full Vision Result or Run 2D Recognition Result Only .
Selecting Run Full Vision Result saves the complete rerun record of the historical data, as shown below.

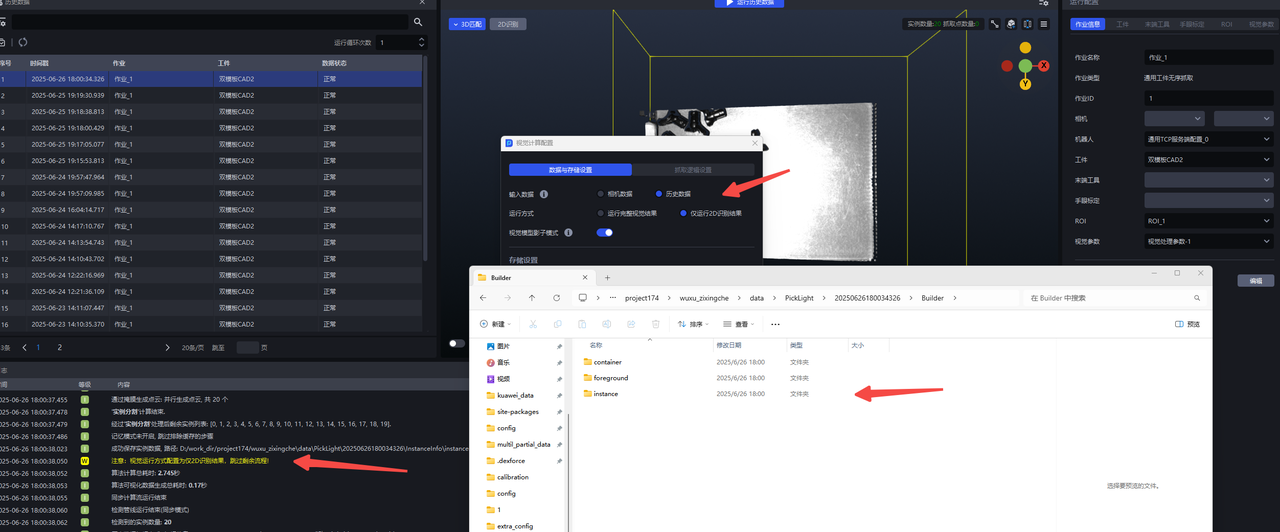
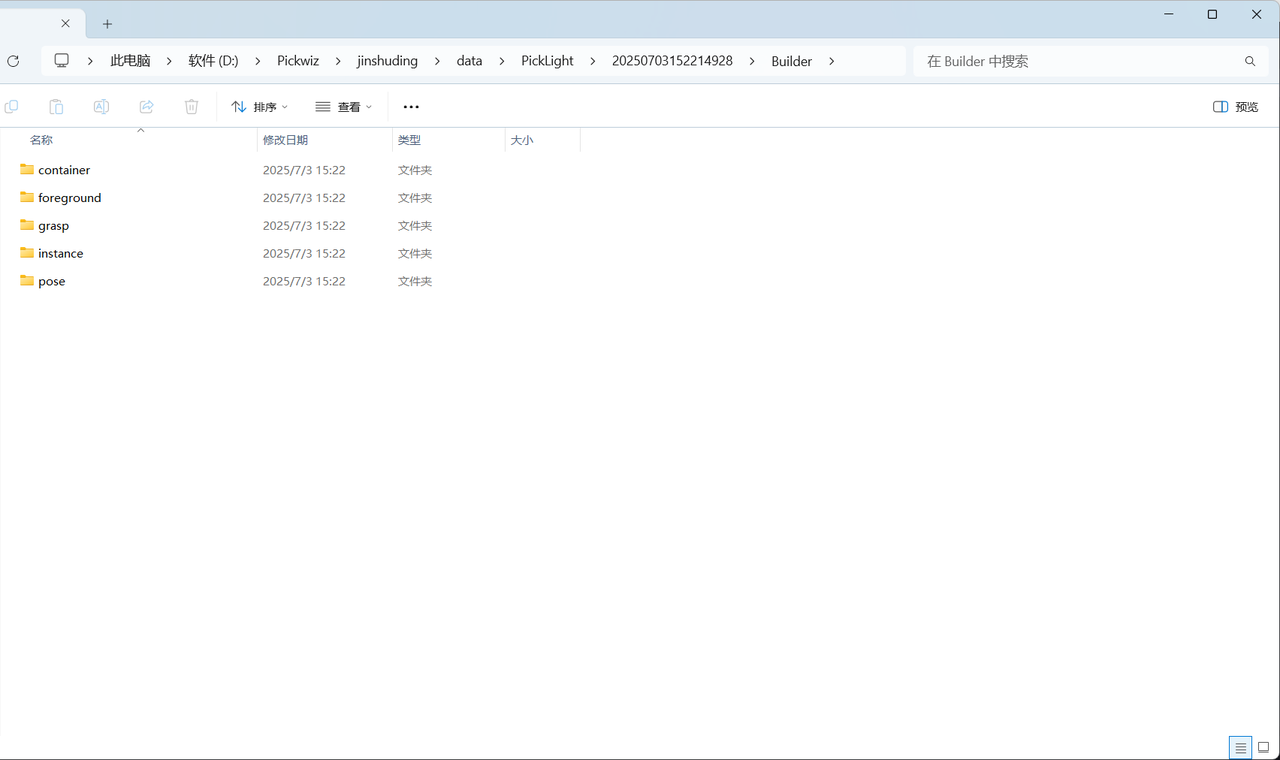
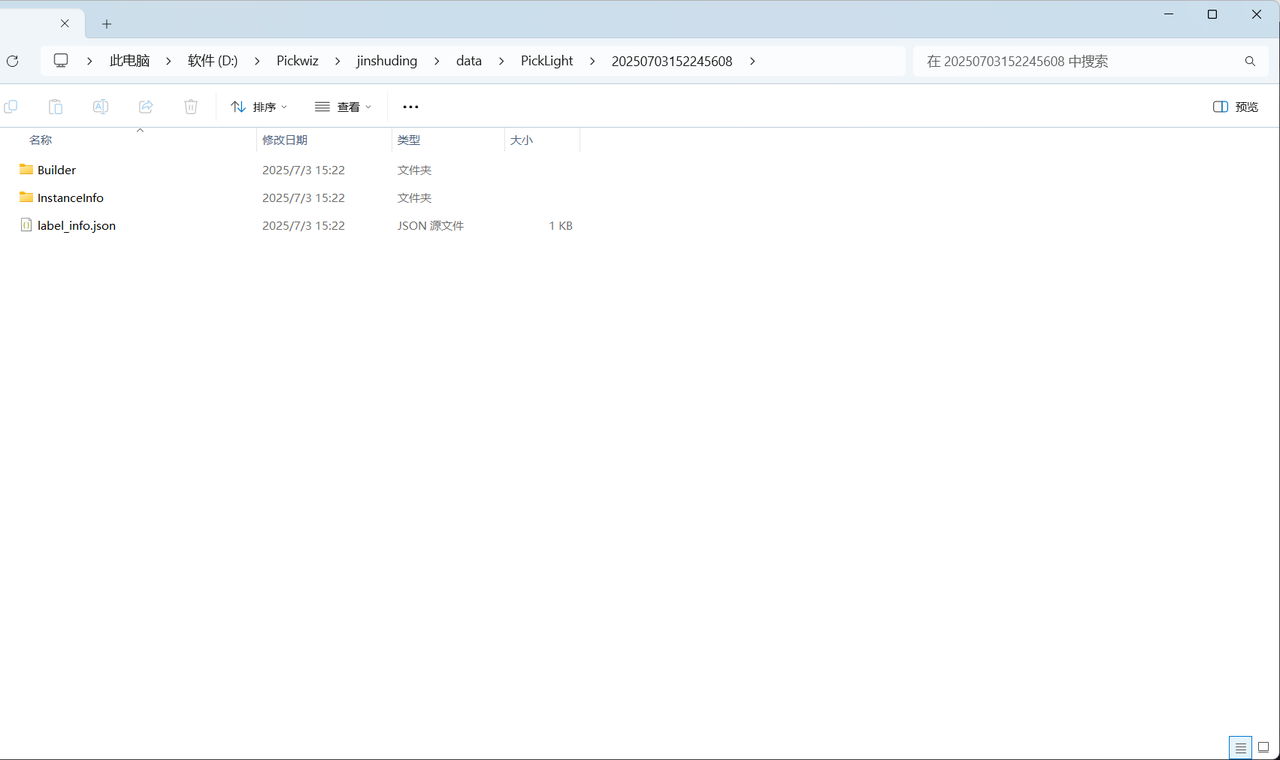
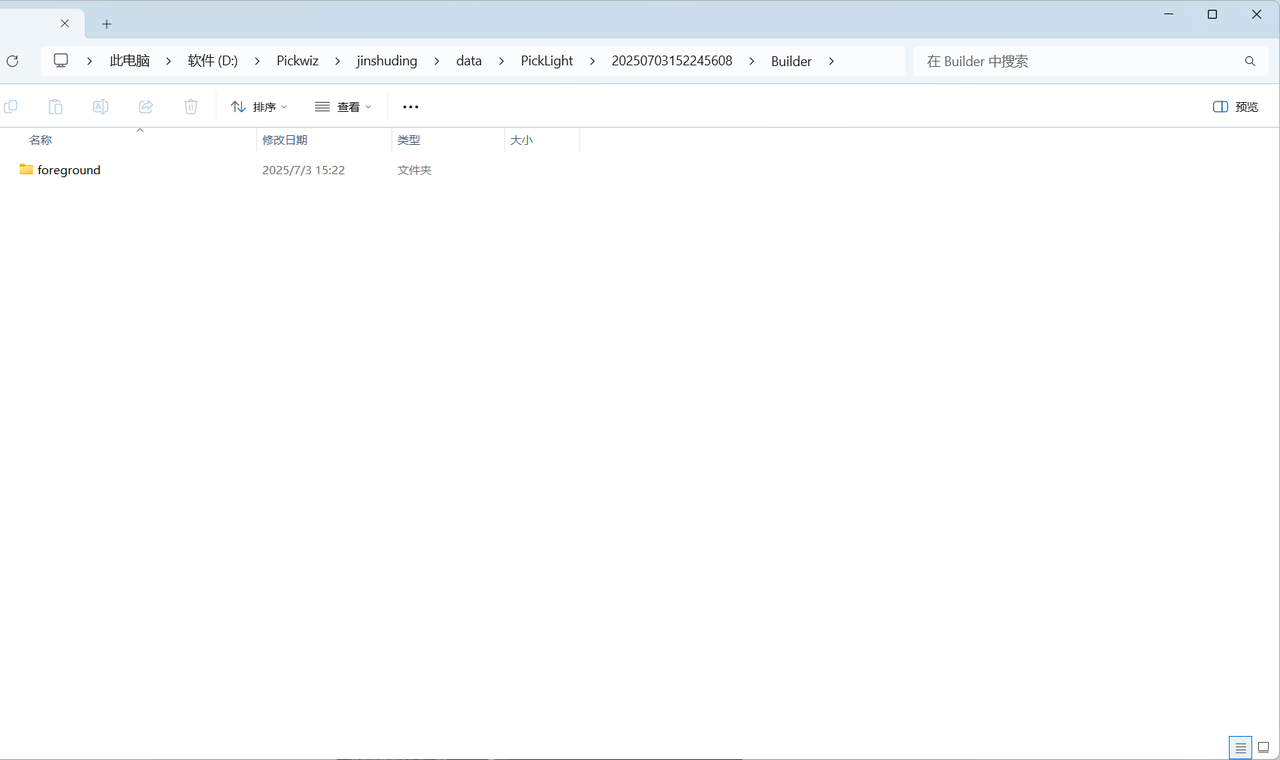
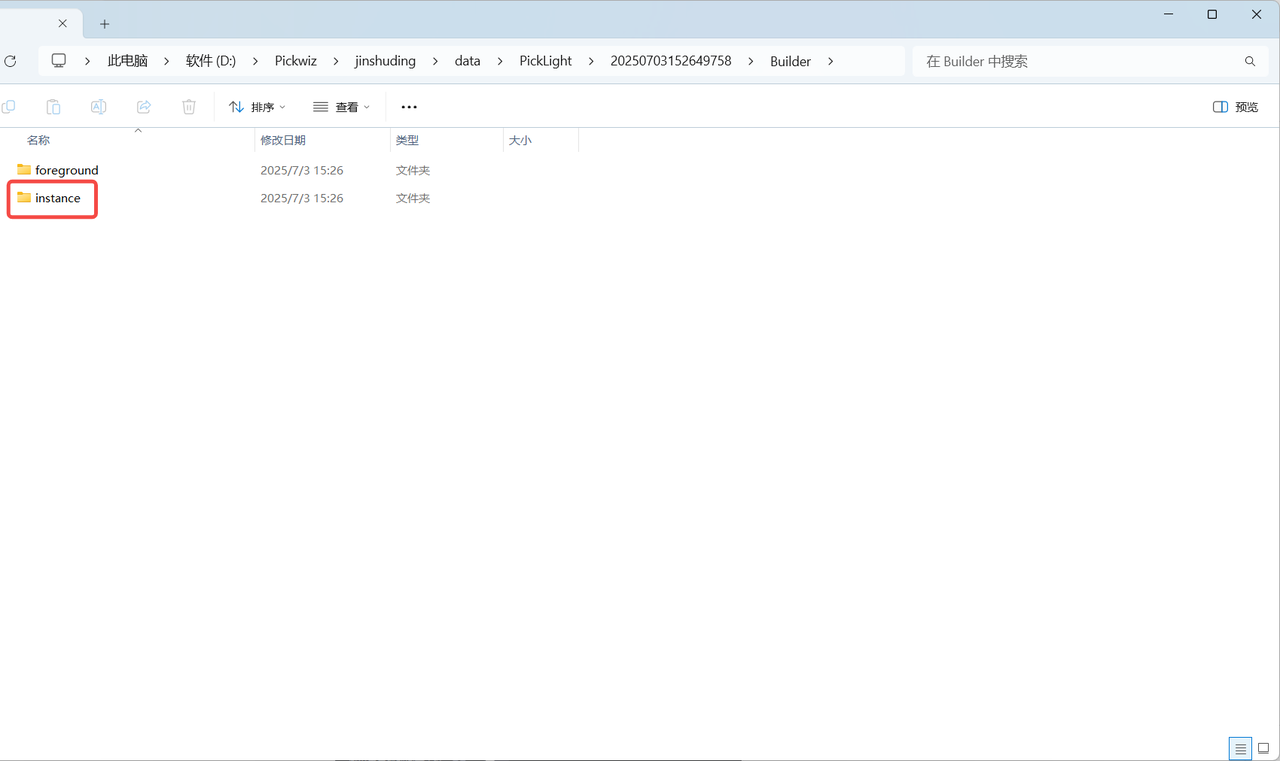
Selecting Run 2D Recognition Result Only saves only the rerun 2D recognition result of the selected historical data item (the Builder folder saves only the foreground node foreground, container detection container, and instance detection instance, but does not save the pose estimation node pose or the Pick Point generation node grasp), as shown below.
(3)After switching, the Run button becomes the Run Historical Data button, as shown below.
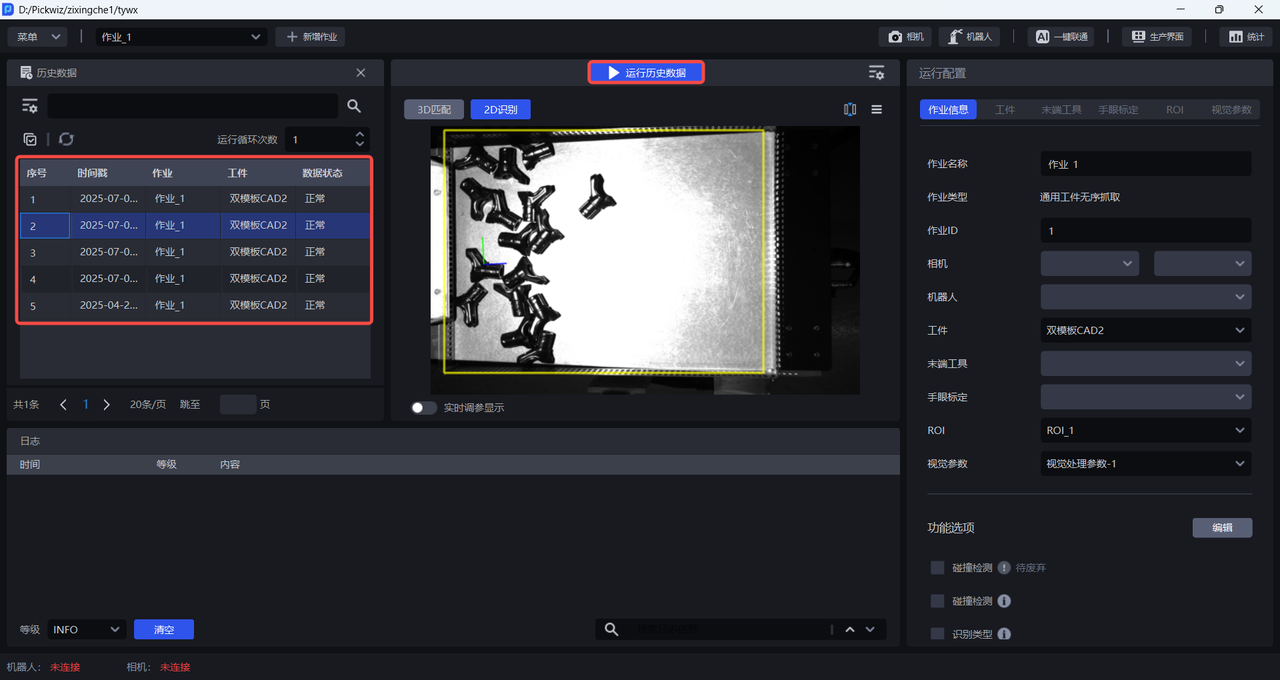
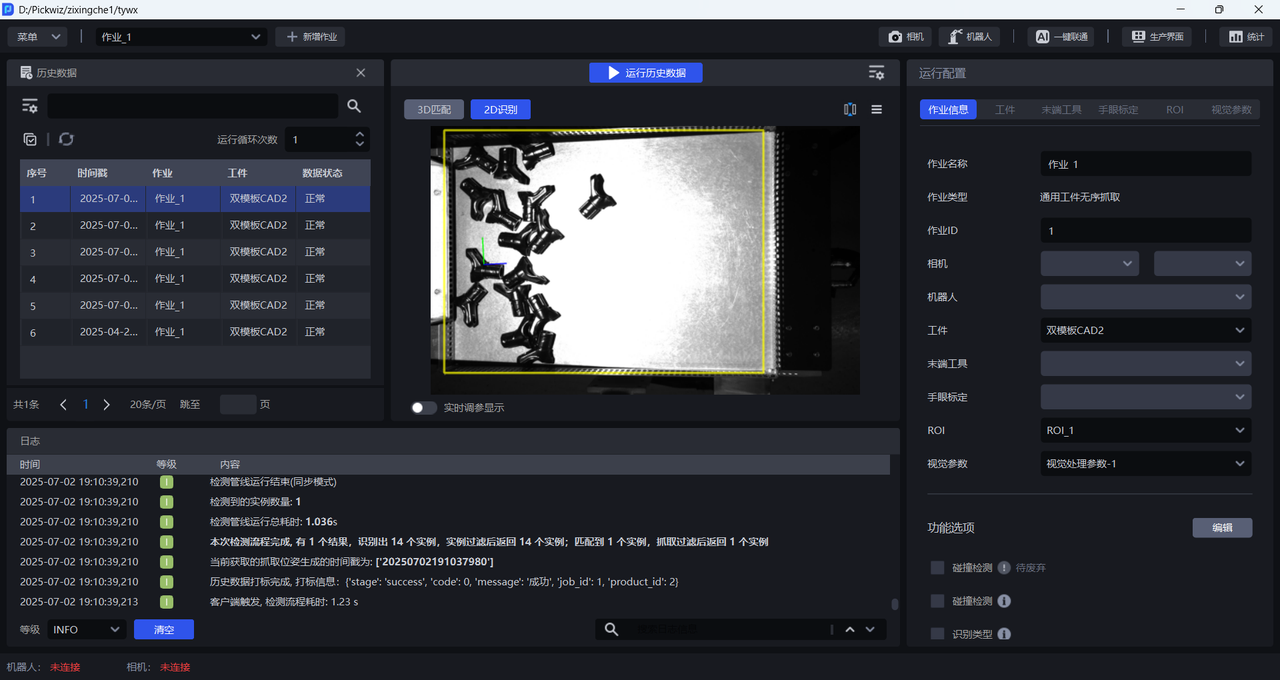
(4)Select one historical data entry, then click the Run Historical Data button to input the historical data into the Workflow for vision computation, and Pick Points are output at the end. The beginning of the Log shows that the data source is historical data, as shown below.
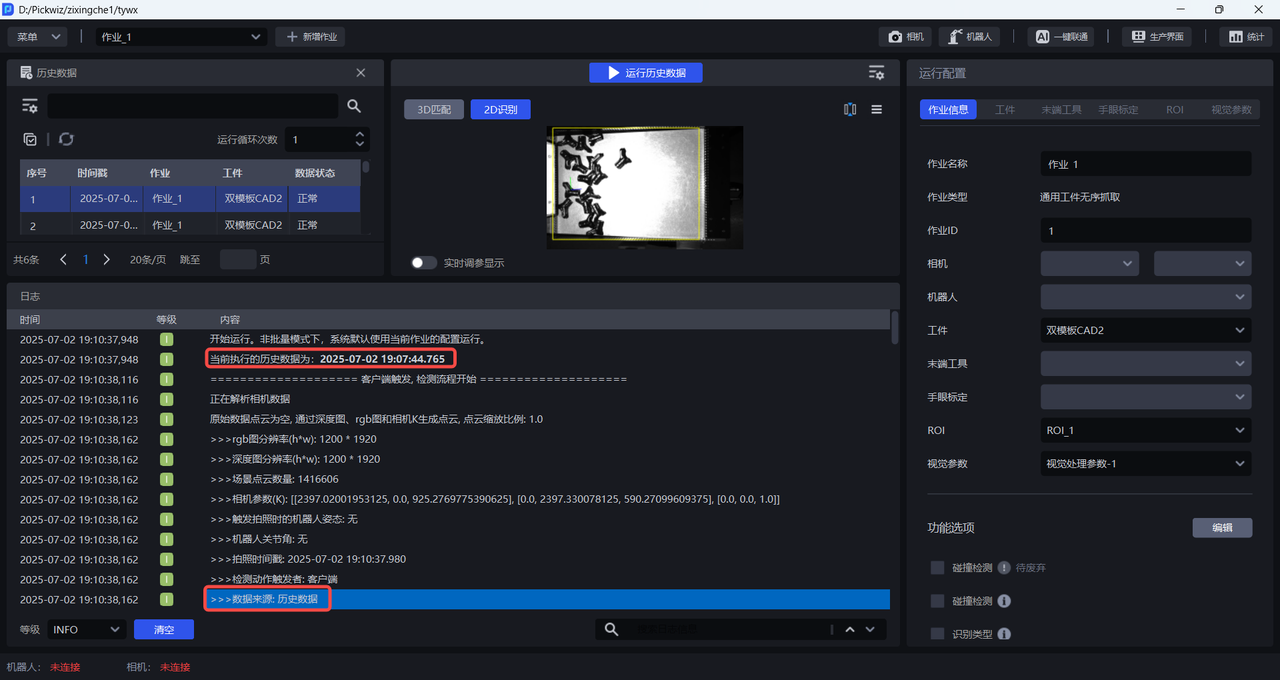
Before using historical data for vision computation, there is no need to connect the Camera and Robot, nor configure task information. The Workflow uses the current task configuration to perform vision computation on the historical data.
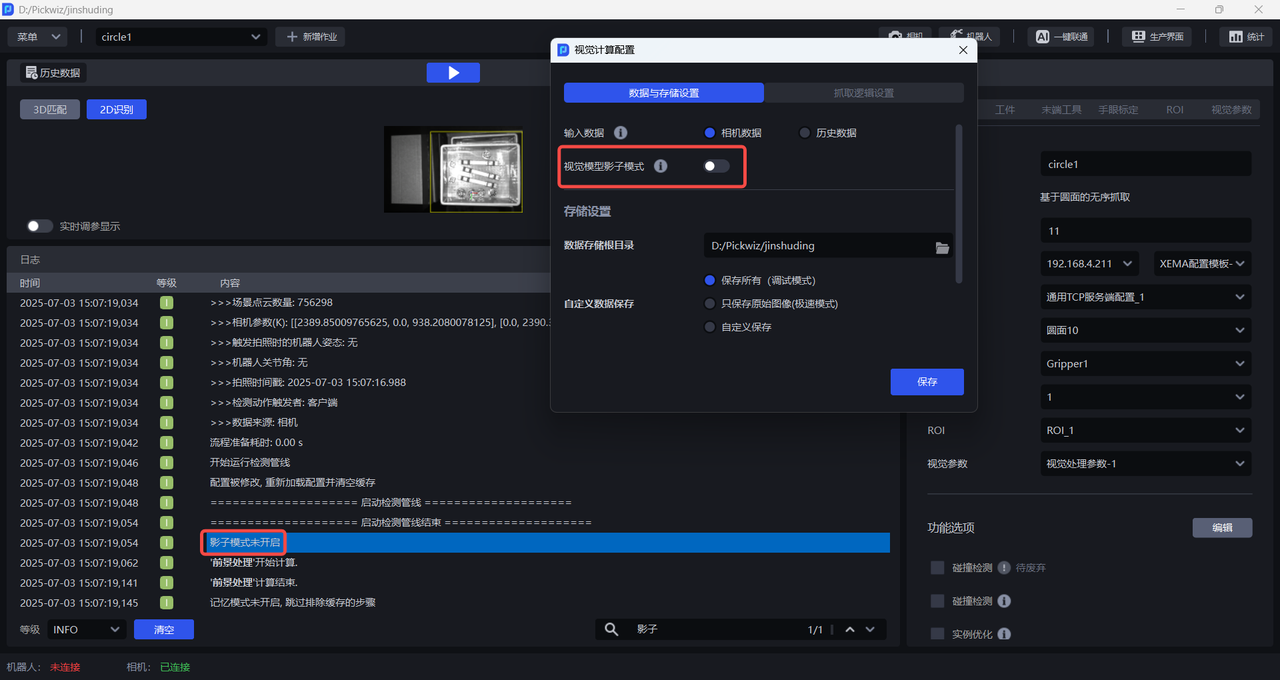
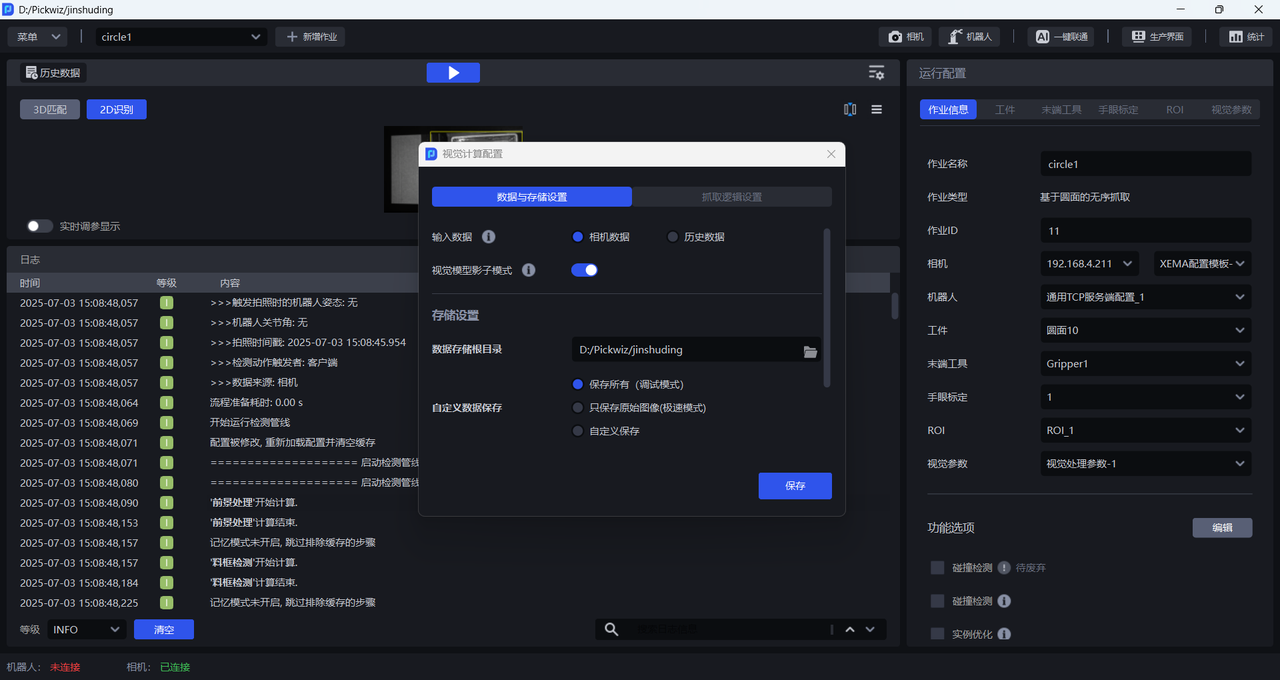
1.2 Vision Model Shadow Mode
After it is enabled, the system saves the task running data. Among them, data triggered by the Robot is used for vision model shadow training under the Target Object module to optimize model recognition performance.
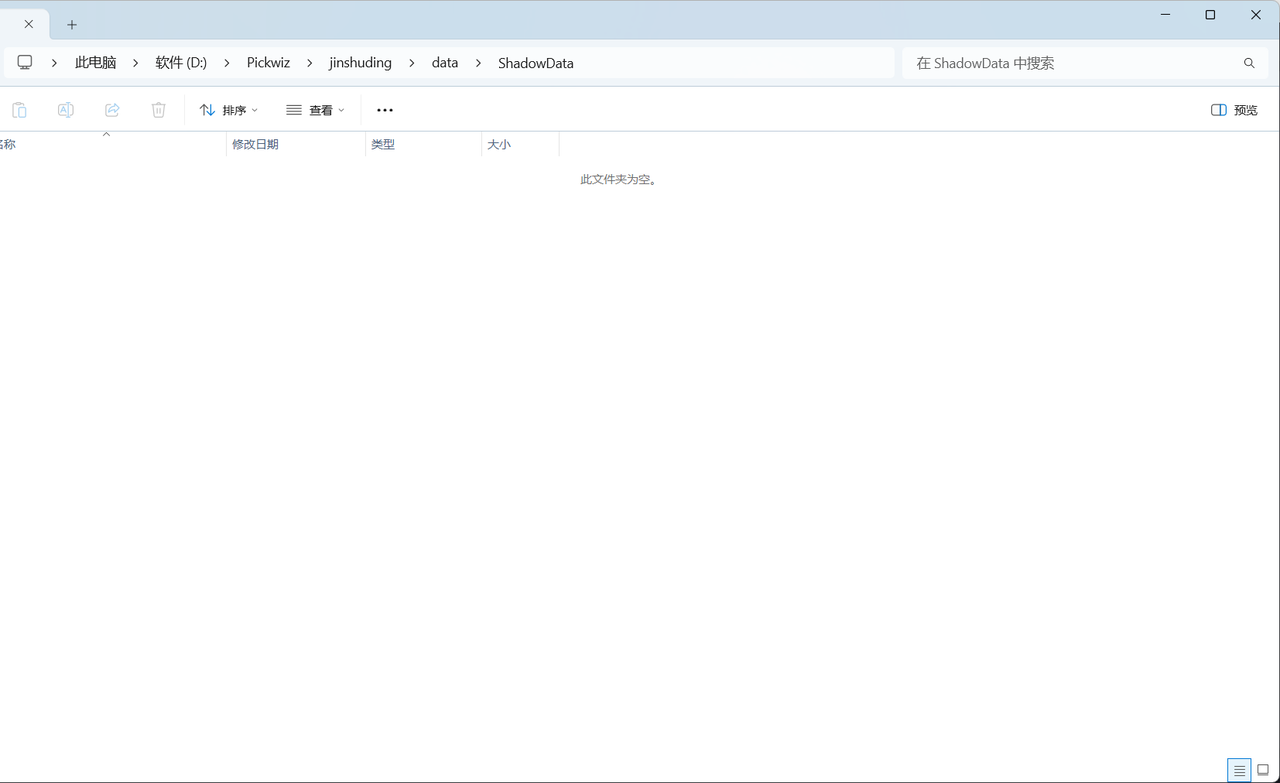
If this option is disabled, task runs do not save Shadow Mode data, as shown below.
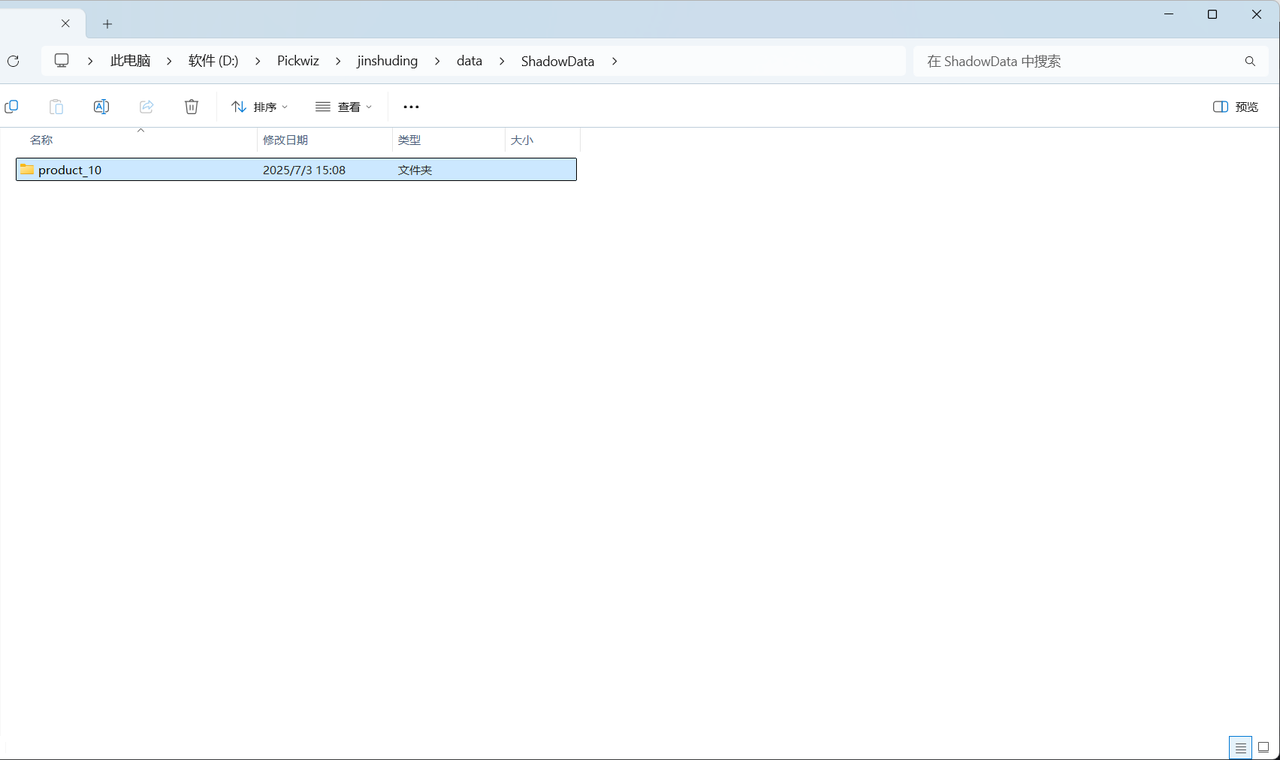
After this option is enabled, running the task saves Shadow Mode data, as shown below.
1.3 Storage Settings
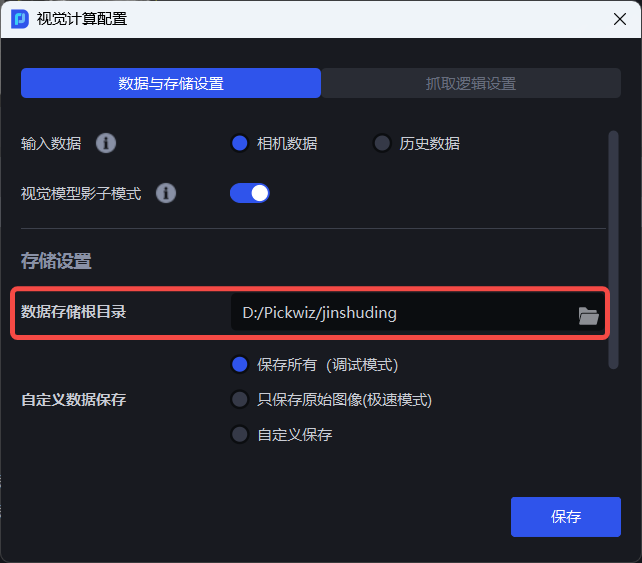
1.3.1 Root Directory for Data Storage
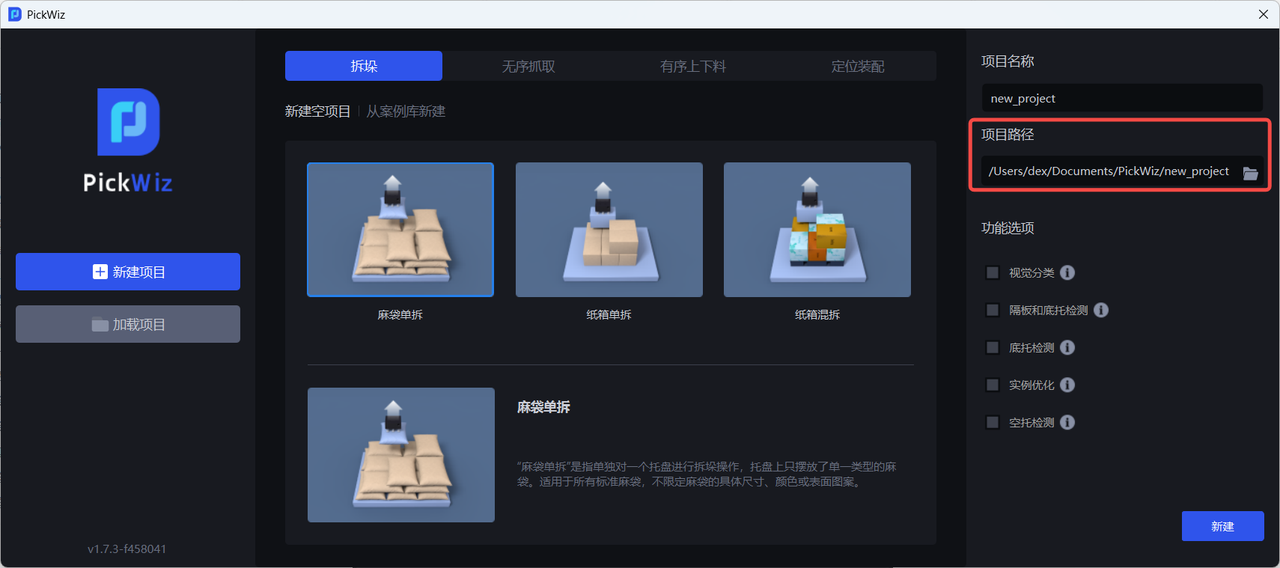
The root directory for data storage is the storage path of the Project, which is the same as the Project path selected when the Project was created and cannot be modified.
1.3.2 Custom Data Saving
Custom data saving means saving content generated during vision computation. You can choose Save All (Debug Mode), Save Raw Images Only (Ultra-Fast Mode), or Custom Save.
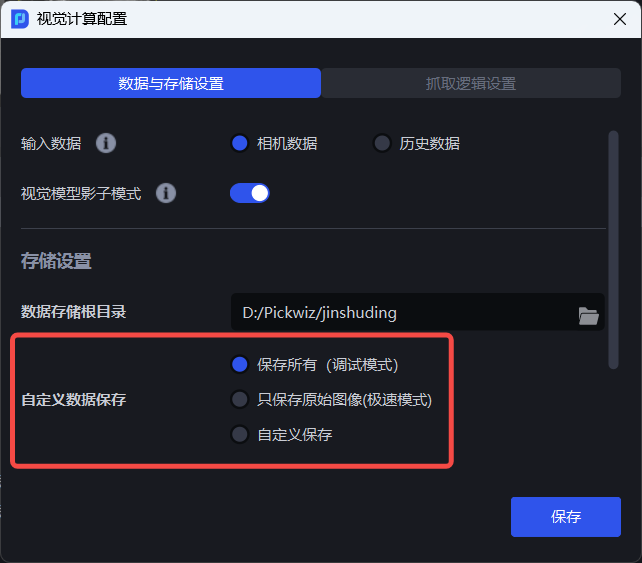
- Save All (Debug Mode), which saves the input data and output results of the entire vision computation process, as shown below.
- Save Raw Images Only (Ultra-Fast Mode), which saves only the raw 2D images and depth images, as shown below.
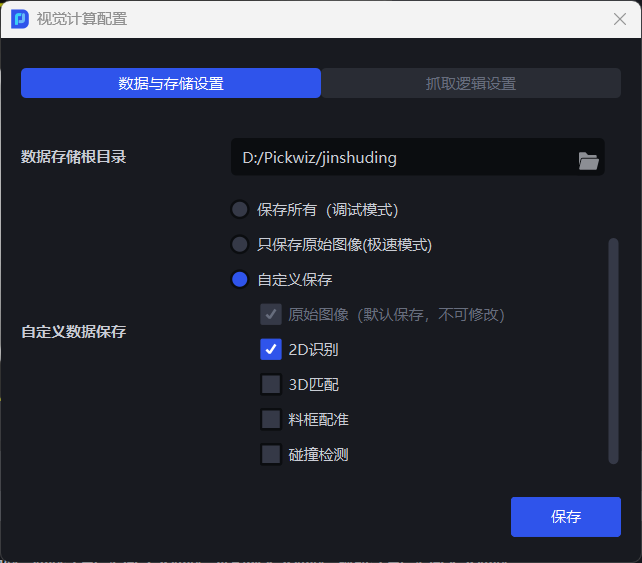
- Custom Save allows you to selectively save content from the vision computation process. It is suitable for on-site production scenarios where specific data needs to be saved for convenient later lookup. As shown below, after selecting 2D Recognition, the instance folder is saved in the historical data folder.
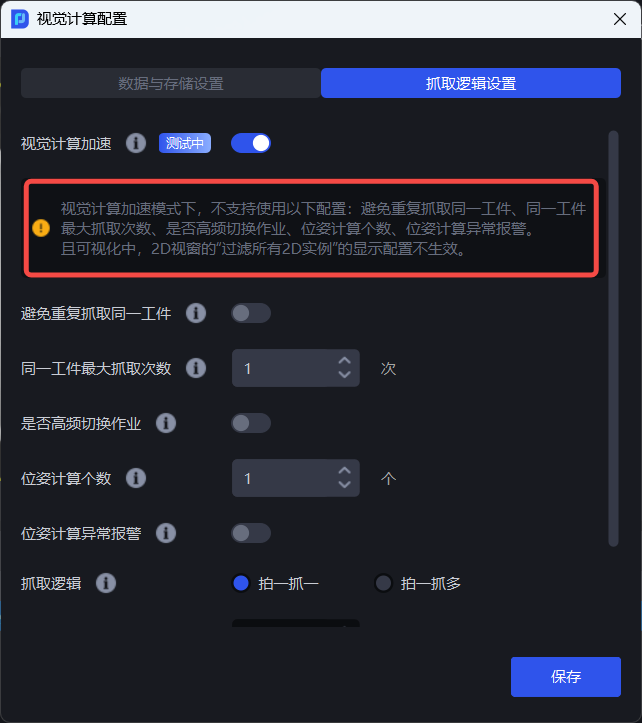
2. Picking Logic Settings
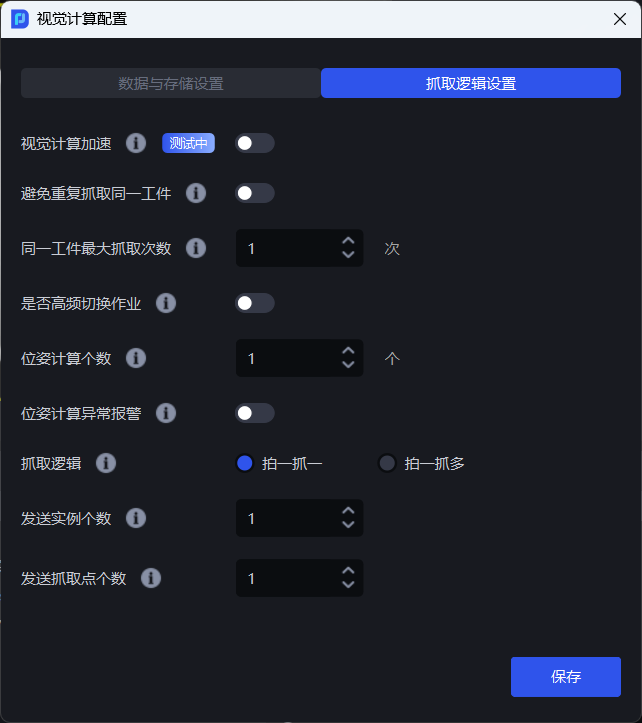
2.1 Vision Computation Acceleration
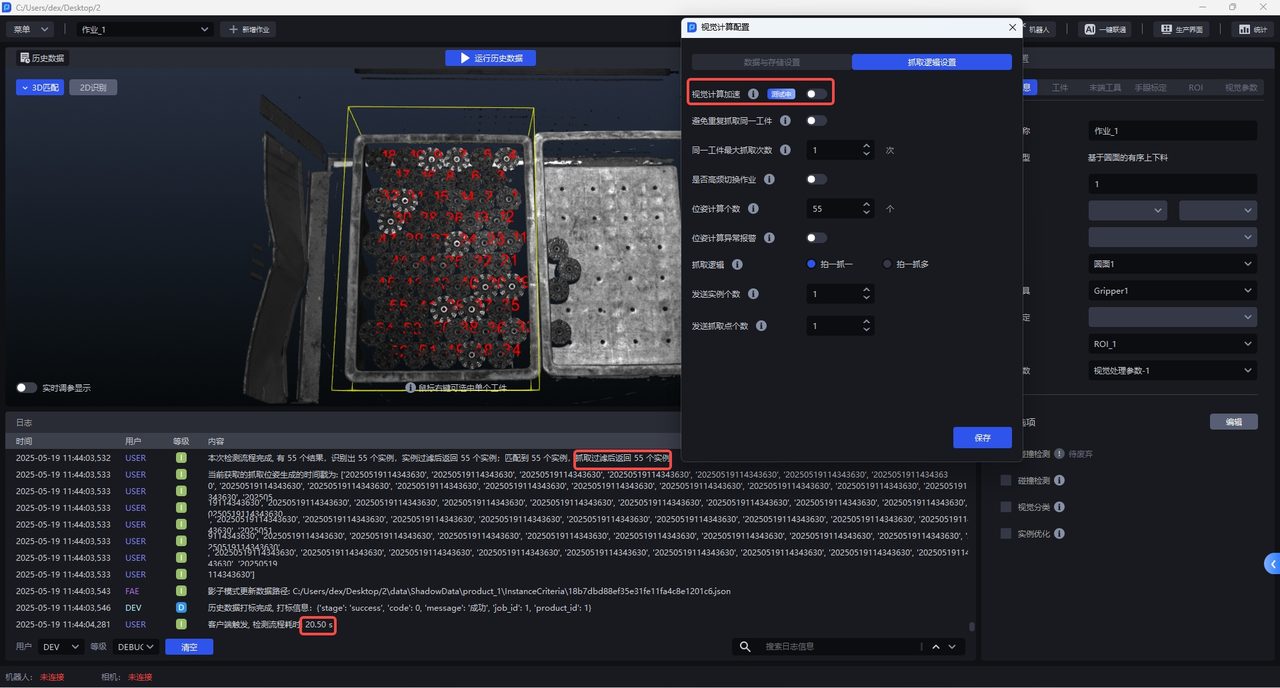
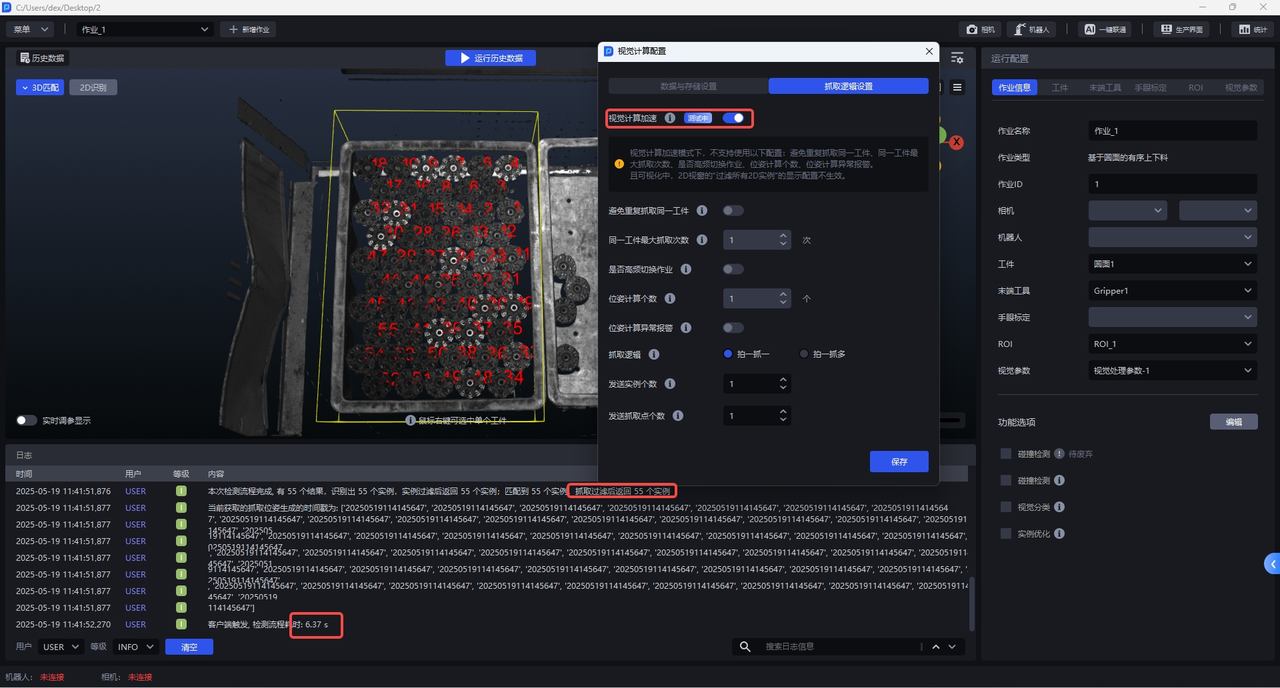
After it is enabled, vision computation takes less time and all Target Object instances within the field of view are recognized by default. It is suitable for scenarios with many Target Object instances where takt time does not meet requirements. As shown below, when vision computation acceleration is disabled, 55 instances are detected and it takes 20.5 s; after vision computation acceleration is enabled, the same 55 instances are detected, and it takes only 6.37 s.
In PickWiz 1.7.5, this feature is available only for scenarios related to depalletizing, General Target Object, General Circular Surface, and General Cylinder, and functional option scenarios (such as recognition type/local features/front and back) are not yet supported. It will gradually be integrated into other scenarios and functional option scenarios in the future.
Note:
When “Vision Computation Acceleration” mode is enabled, “Avoid Repeatedly Picking the Same Target Object,” “Maximum Picking Attempts for the Same Target Object,” “Frequent Task Switching,” “Pose Calculation Count,” and “Pose Calculation Exception Alarm” do not take effect.
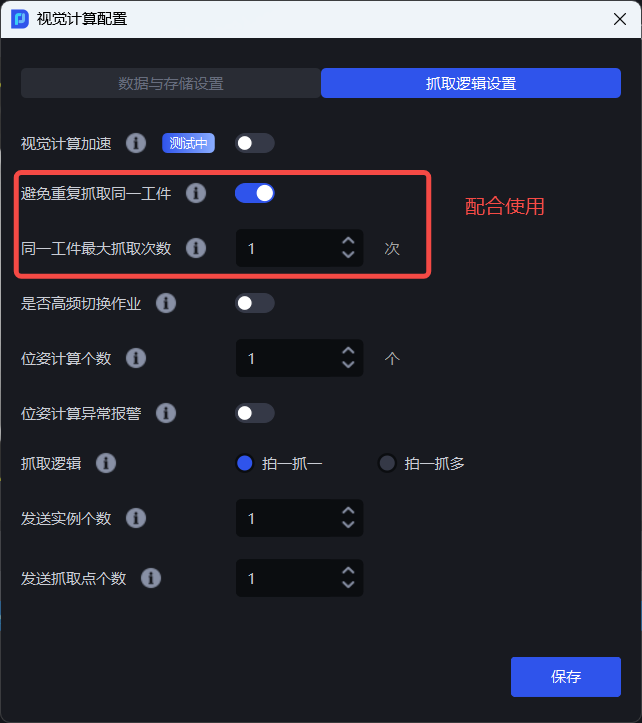
2.2 Avoid Repeatedly Picking the Same Target Object
After it is enabled, if the same Target Object cannot be picked successfully within the maximum number of picking attempts, the system no longer attempts to pick that Target Object and instead skips it to pick the next one.
Note:
If you need to enable “Avoid Repeatedly Picking the Same Target Object,” you should also enable “Maximum Picking Attempts for the Same Target Object” and set the maximum number of picking attempts for the same Target Object.
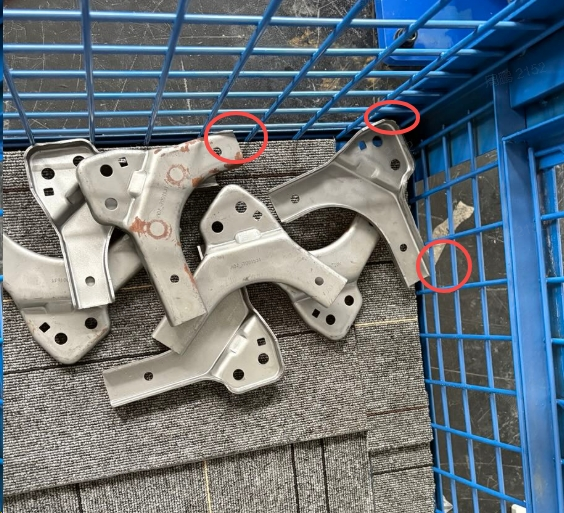
This is common in unordered scenarios, where some materials are pressed down by other materials and cannot be picked, or are restricted by containers and similar objects. For such Target Objects, repeated picking should be avoided to prevent wasting time.
Example
Note:
When “Vision Computation Acceleration” mode is enabled, “Avoid Repeatedly Picking the Same Target Object” does not take effect even if enabled. In this case, if you need to avoid repeated picking, you can use the function “Filter Pick Points Similar to the Previous Vision Result” in Pick Point filtering instead (Filter Pick Points Similar to the Previous Vision Result: calculates the pose variation between the current and previous vision results to determine whether it is the same Target Object and filters it out).
2.3 Maximum Picking Attempts for the Same Target Object
Indicates the maximum number of times the same Target Object can be picked. The value range is 1~5. It is used together with “Avoid Repeatedly Picking the Same Target Object.” If the same Target Object cannot be picked successfully within the maximum number of attempts, PickWiz no longer attempts to pick that Target Object and instead skips it to pick the next one.

2.4 Frequent Task Switching
Enable this option when tasks need to be switched frequently in actual production scenarios. It can improve takt time.
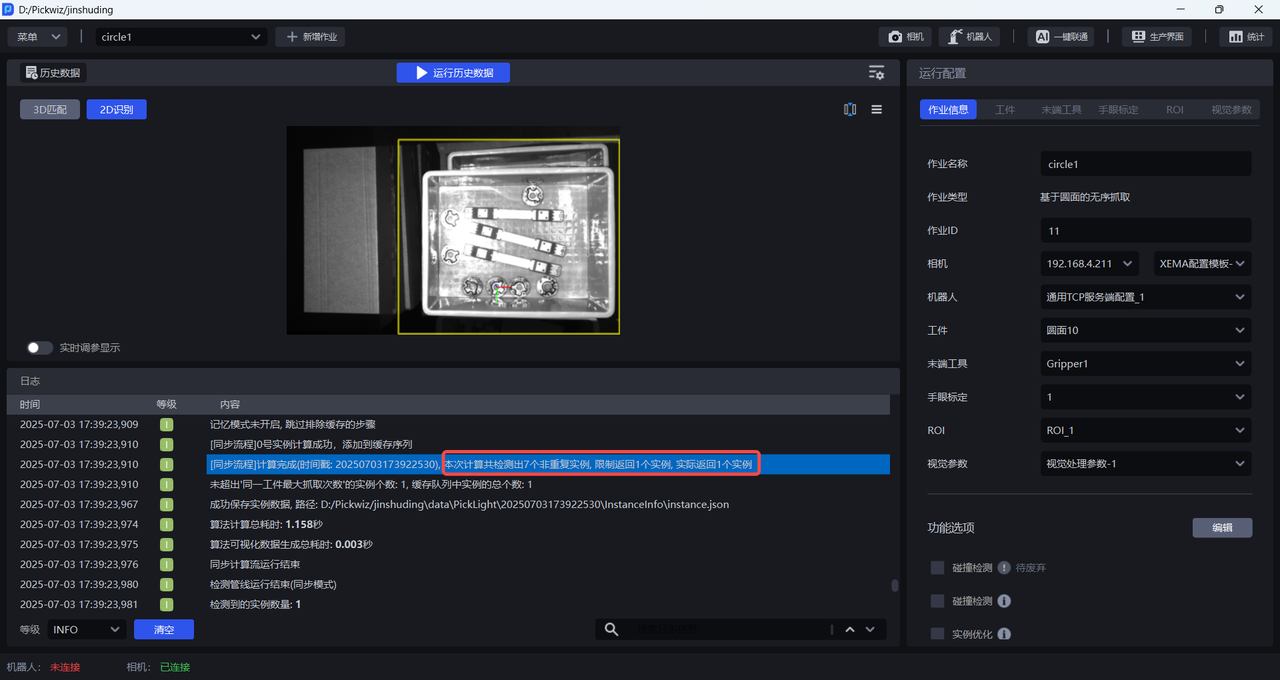
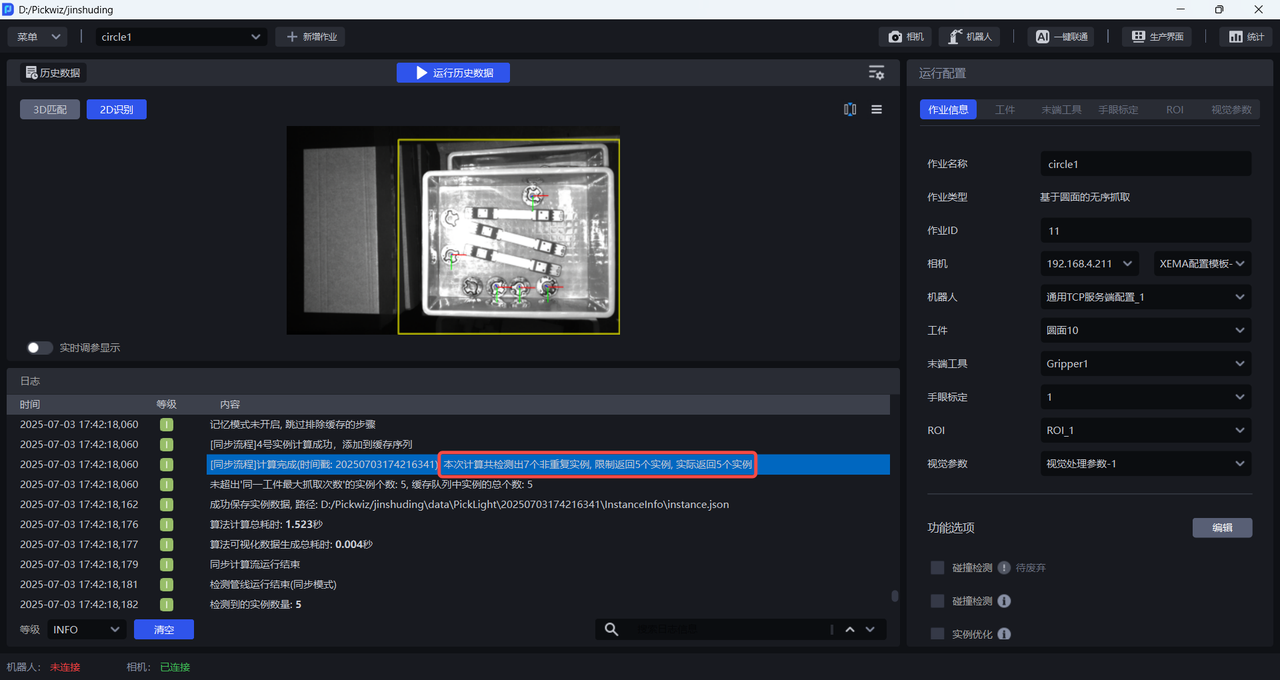
2.5 Pose Calculation Count
Set the maximum number of Target Object poses calculated by the vision system.
As shown below, 7 instances are detected. Because the Pose Calculation Count is set to 1, the vision system calculates the pose of only 1 instance and generates its Pick Point.
If the Pose Calculation Count is set to 5, the vision system calculates the poses of 5 Target Objects and generates Pick Points.
2.6 Pose Calculation Exception Alarm
After it is enabled, Target Object poses are calculated one by one in instance sorting order. If 3D pose estimation fails, an alarm is raised;
When disabled (disabled by default), if 3D computation fails, the current Target Object is skipped and the pose of the next Target Object is calculated, without raising an alarm or interrupting the vision process.
This is suitable for ordered scenarios where an alarm is required if missed recognition causes materials to be skipped during sorted picking.
2.7 Picking Logic
2.7.1 One Shot One Pick
One Shot One Pick means the vision system captures one image and computes once. After computation, the result is sent to the Robot and the extra results are discarded. The Robot executes the related picking action, and then the process repeats.
As shown below, when One Shot Multiple Picks is not selected, each time the Robot triggers the detection workflow, PickWiz performs image capture and computation again.
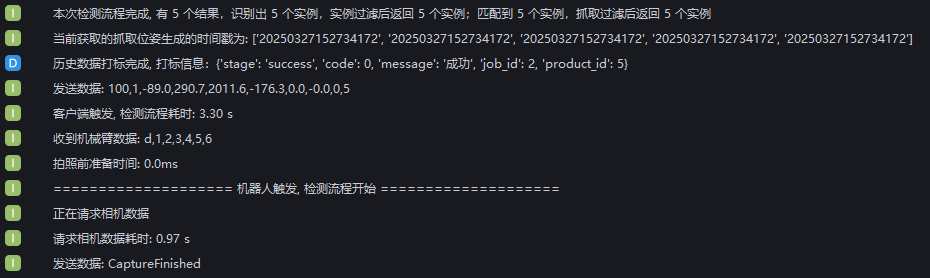
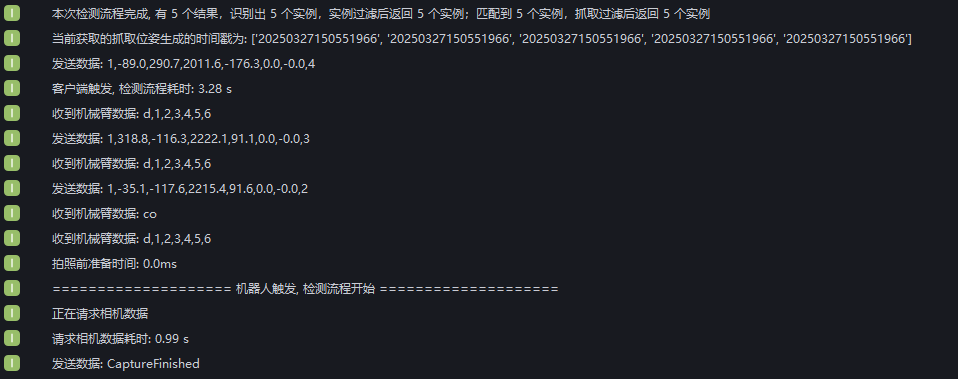
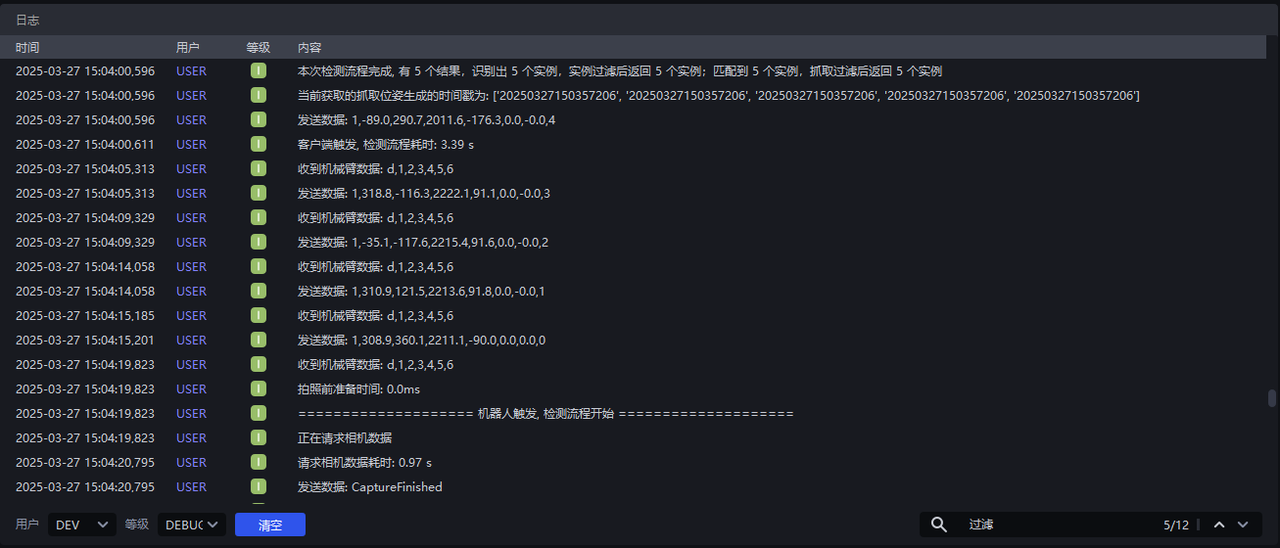
2.7.2 One Shot Multiple Picks
One Shot Multiple Picks means the vision system captures one image and computes once. After computation, the result is sent to the Robot, and the extra vision results are saved. The next time the Robot sends an image-capture computation command, if the saved vision results meet the requirements, the results are returned directly to the Robot.
As shown below, when One Shot Multiple Picks is selected, PickWiz can achieve multiple picks after one image capture and computation. As shown below, 5 instances are detected. The first pick is triggered by PickWiz, and the remaining 4 picks are triggered by the Robot. During the remaining 4 picks, the Robot sends pose information to PickWiz to trigger the detection workflow. PickWiz does not perform image capture and computation again, but directly returns the Picking Pose.
If after picking the 3rd instance, the Robot inputs the co command to clear the PickWiz cache, the cached vision results of the 4th and 5th instances are cleared. When the Robot triggers the 4th pick, PickWiz performs image capture and computation again.