Software Interface
1. Welcome Page
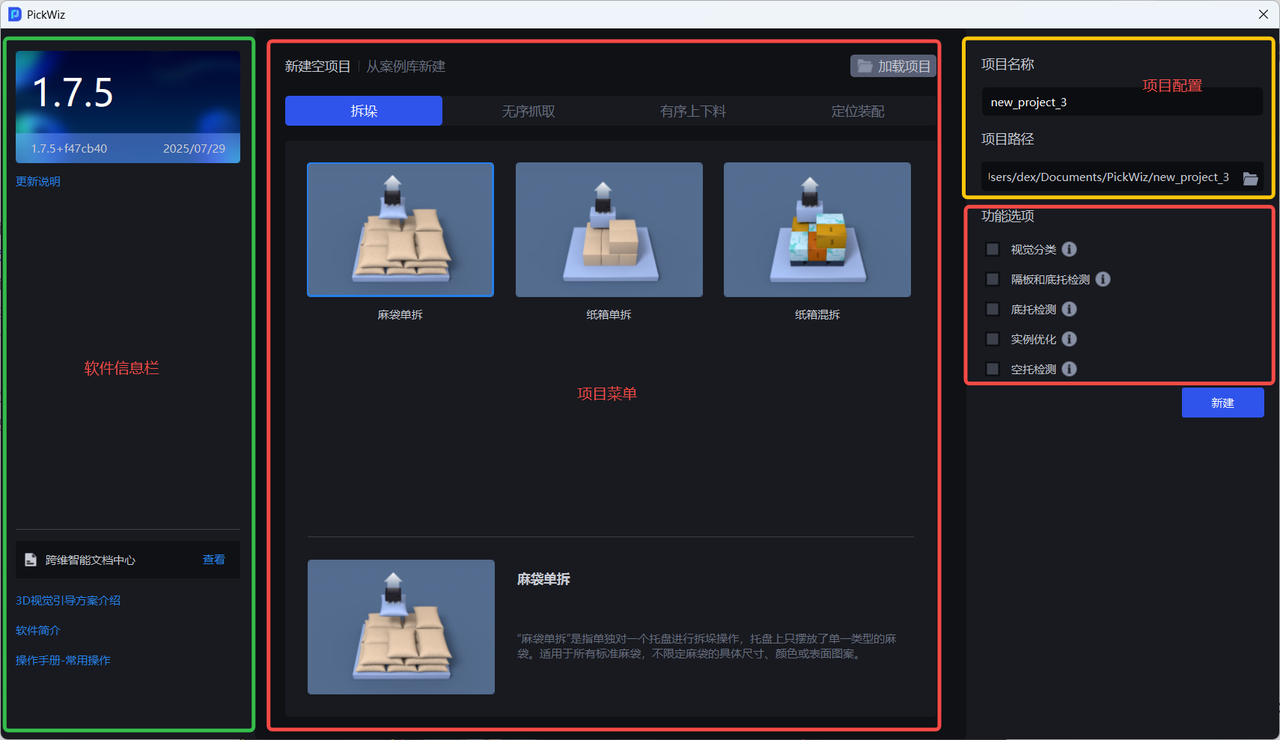
After installing PickWiz, the first time you open PickWiz, you will enter the Welcome Page.
| Interface | Description |
|---|---|
| Software Information Bar | The upper left displays version information, and the lower left displays document links such as the Dexforce Documentation Center, solution introductions, software overview, and operation manuals. |
| Project Menu | Displays all available task Scenes, task types, and feature options. |
| Project Configuration | Enter the project name and project path when creating a new project. The default project name is “new project” + the project sequence number, and the default project path is C: |
The Welcome Page allows users to create a new Scene project, load a project from the disk, or load a project from the case library.
| Function | Description |
|---|---|
| Create Empty Project | Create a new Scene project. When you select a task Scene in Create Empty Project, a new project name is generated automatically, and the project path defaults to C:. |
| Create from Case Library | Project cases for different Target Objects in multiple different Scenes. You can download a project file containing historical data and vision solutions from the case library. |
| Load Project | Load an existing project from the disk. |
2. Main Interface
After creating a new project, you will enter the Main Interface.
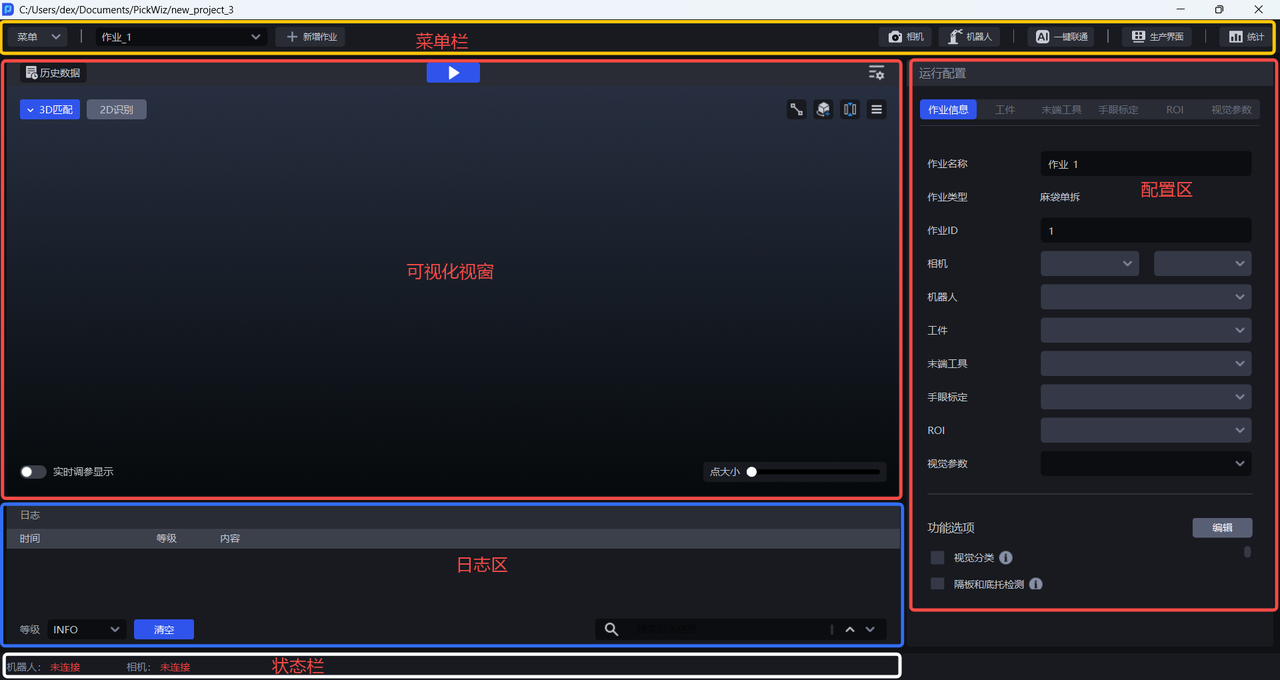
| Module | Description |
|---|---|
| Menu Bar | Provides basic functions related to projects and tasks, including Menu, Camera, Robot, One-click Connectivity, Production Interface, and Statistics. |
| Visualization Window | The visualized result area displays 3D vision operation results in real time and includes functions such as Run, vision calculation configuration, and historical data. |
| Log Area | The log area is used to display log information in real time. You can view operation-related data information for easier debugging, and it includes functions such as clear and filter. |
| Status Bar | The status area is used to check in real time whether the Camera and Robot have been connected successfully. |
| Configuration Area | The task-related configuration area includes task information, Target Object, Tool, eye-hand calibration, Scene Object, ROI, and visual parameters. |
2.1 Menu Bar
The Menu Bar contains the basic functions related to project and task management, and includes functions such as Menu, Camera, Robot, One-click Connectivity, Statistics, and historical data.

- Menu
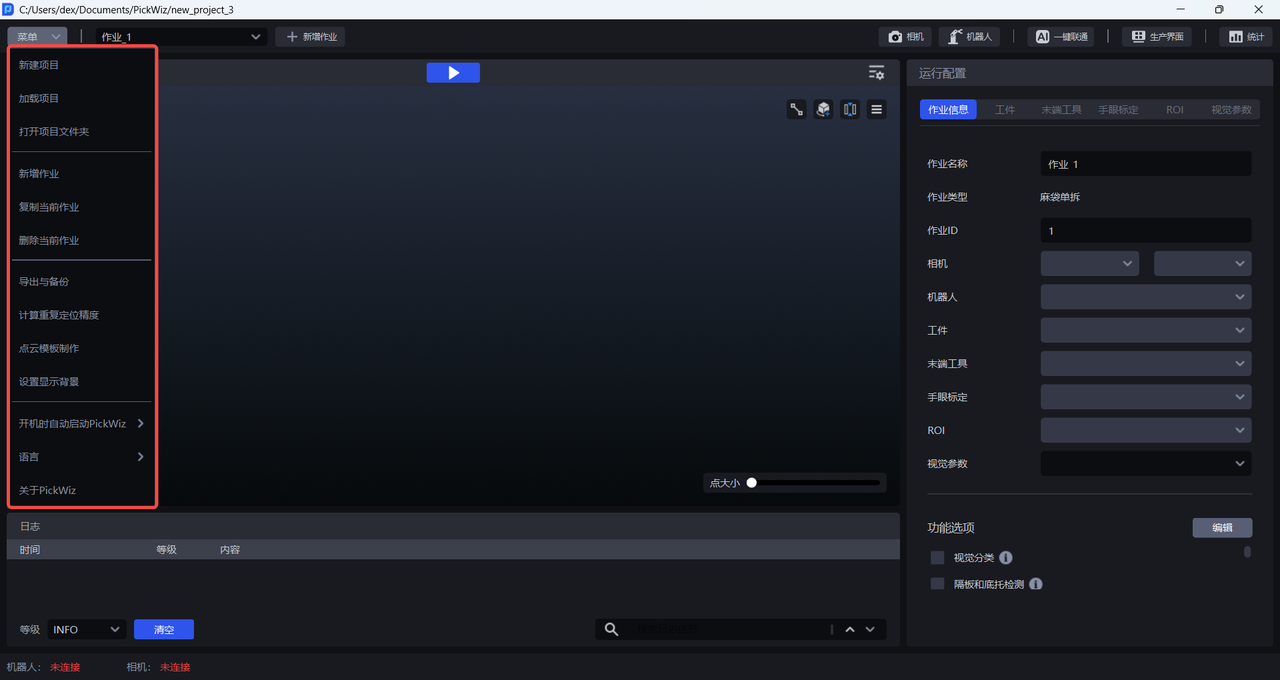
| Function | Description |
|---|---|
| Create Project | Go to the Welcome Page, where you can create an empty project, create a project from the case library, or load an existing project from the disk. |
| Load Project | Load an existing project file from the disk. |
| Open Project Folder | Open the storage path of the current project. |
| Add Task | Add a new task Scene. You need to select a Scene and set the task name on the Add Task page. |
| Copy Current Task | Copy the currently selected task. |
| Delete Current Task | Delete the currently selected task. |
| Export and Backup | Supports customized export of task configurations, historical data, and shadow mode data, and supports automatic backup of project configurations. |
| Calculate Repeat Positioning Accuracy | Calculates the consistency error of results when the vision recognition system recognizes the position of the same object multiple times. It can be used to troubleshoot the stability of vision system recognition. Influencing factors include Camera accuracy and vision recognition accuracy. |
| Point Cloud Template Creation | Includes four functions: standardized mesh files, Point Cloud template creation, key point creation, and Point Cloud alignment mesh. It supports two Point Cloud template creation methods: generating templates from meshes and generating templates from Camera images. |
| Set Display Background | You can set the Background color of the 3D Matching visualization window to make it easier to observe the Scene Point Cloud of the Target Object. |
| Automatically Start PickWiz on Startup | After it is enabled, PickWiz starts automatically when the computer starts. |
| Language | Switch the software language. Chinese and English are currently supported. After switching the language, a restart is required to activate the setting. |
| About PickWiz | View the product version information, including the PickWiz version number, release date, dongle validity period, and PickLight / RLIA / GLIA version numbers. |
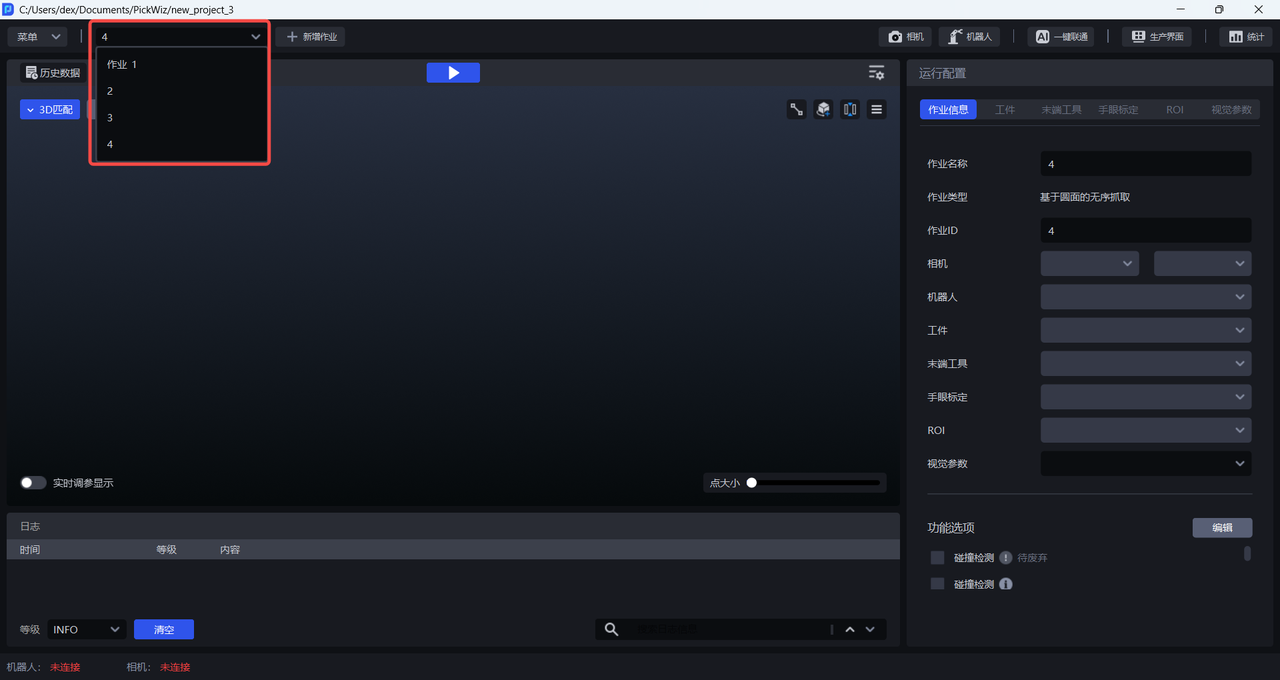
- Task
Click to switch tasks.
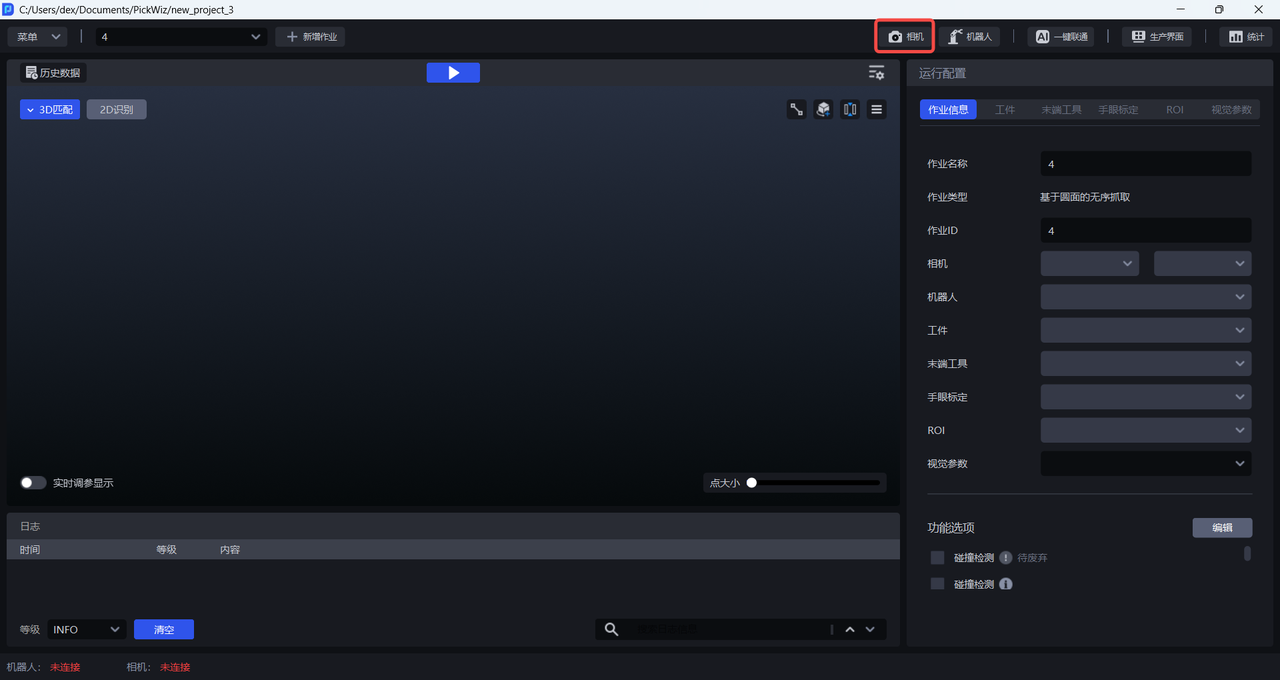
- Camera
Click to enter the Camera interface to connect the Camera and adjust parameters to ensure imaging quality.
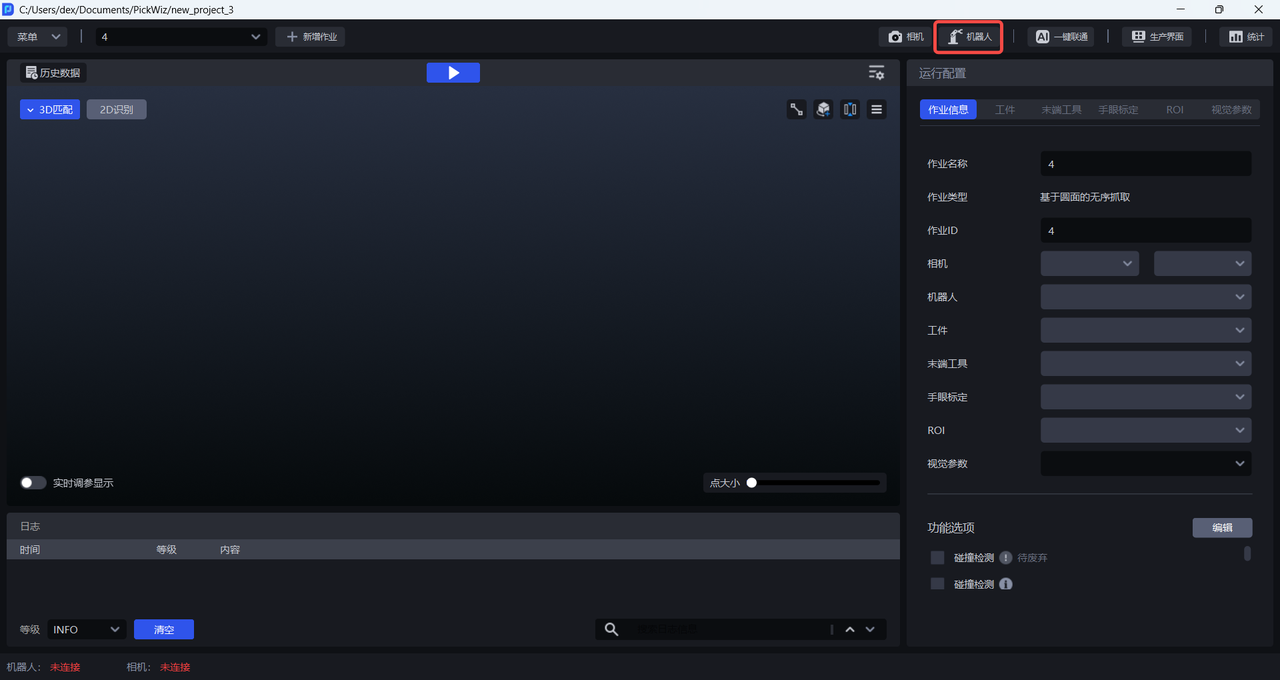
- Robot
Click to enter the Robot configuration interface to perform Robot configuration and communication operations.
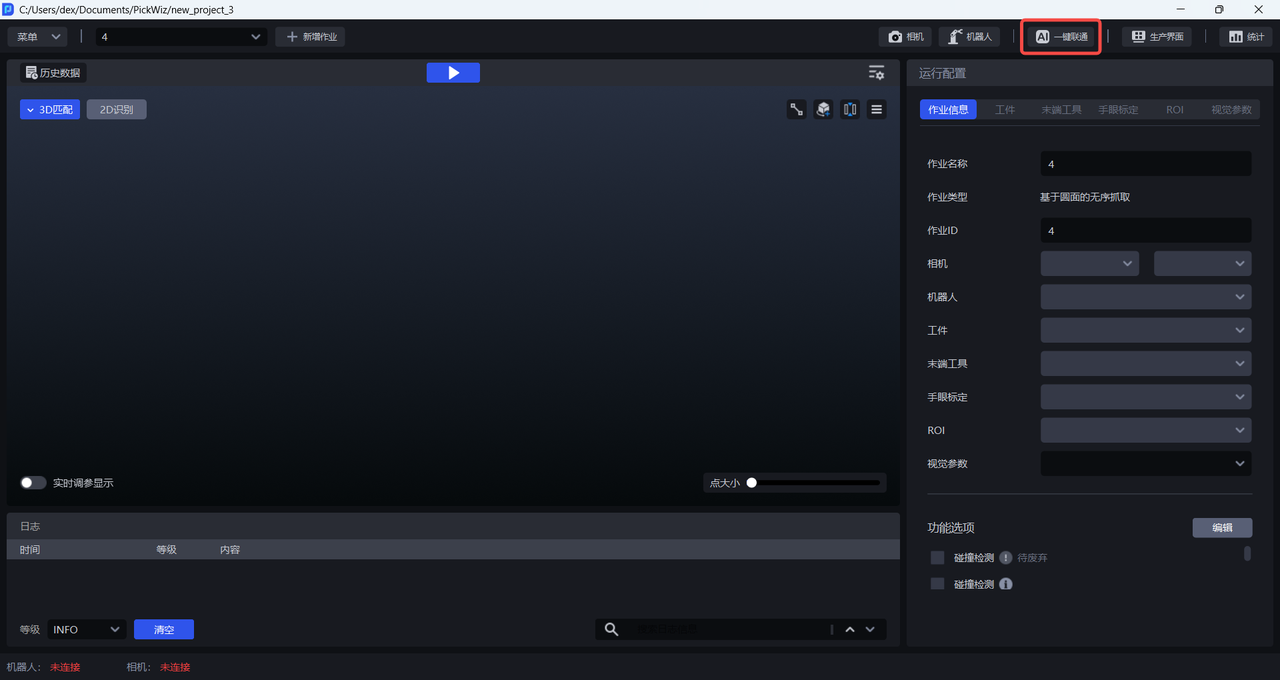
- One-click Connectivity
Click to enter the One-click Connectivity interface, which automatically calls the Dexverse backend API to create a new training task for model training.
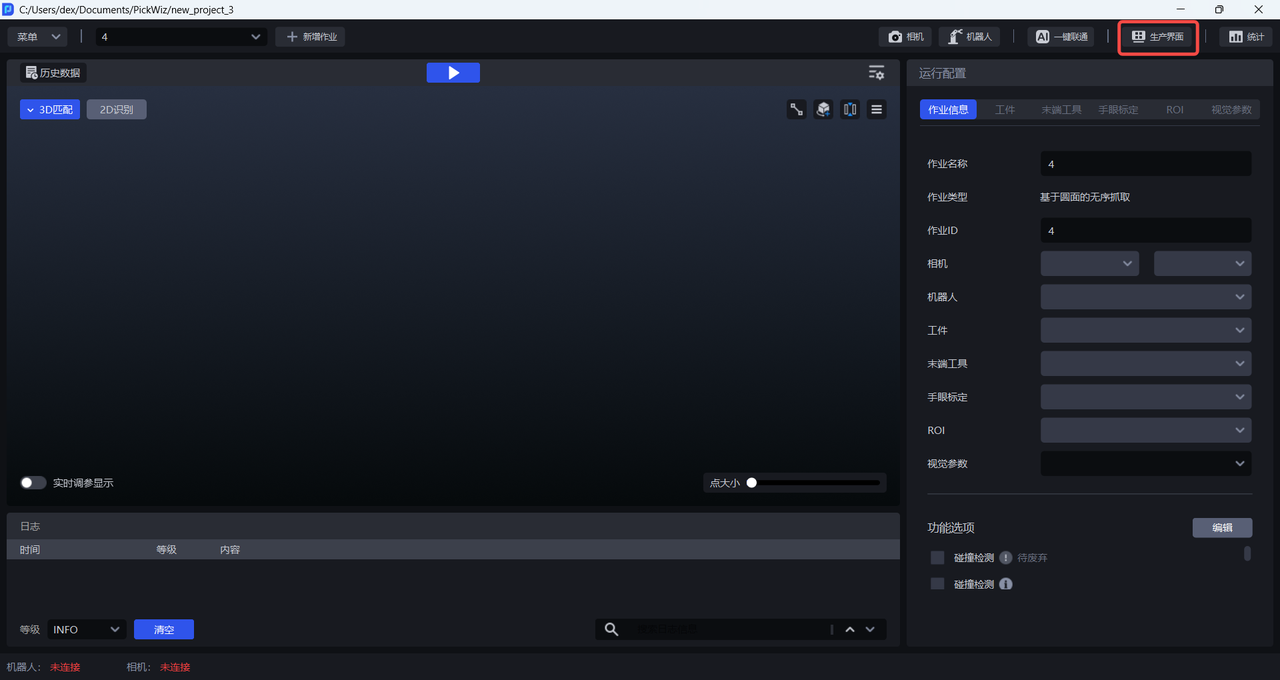
- Production Interface
Click to enter the Production Interface, which includes real-time display of key information such as equipment operating status, production progress, and equipment faults.

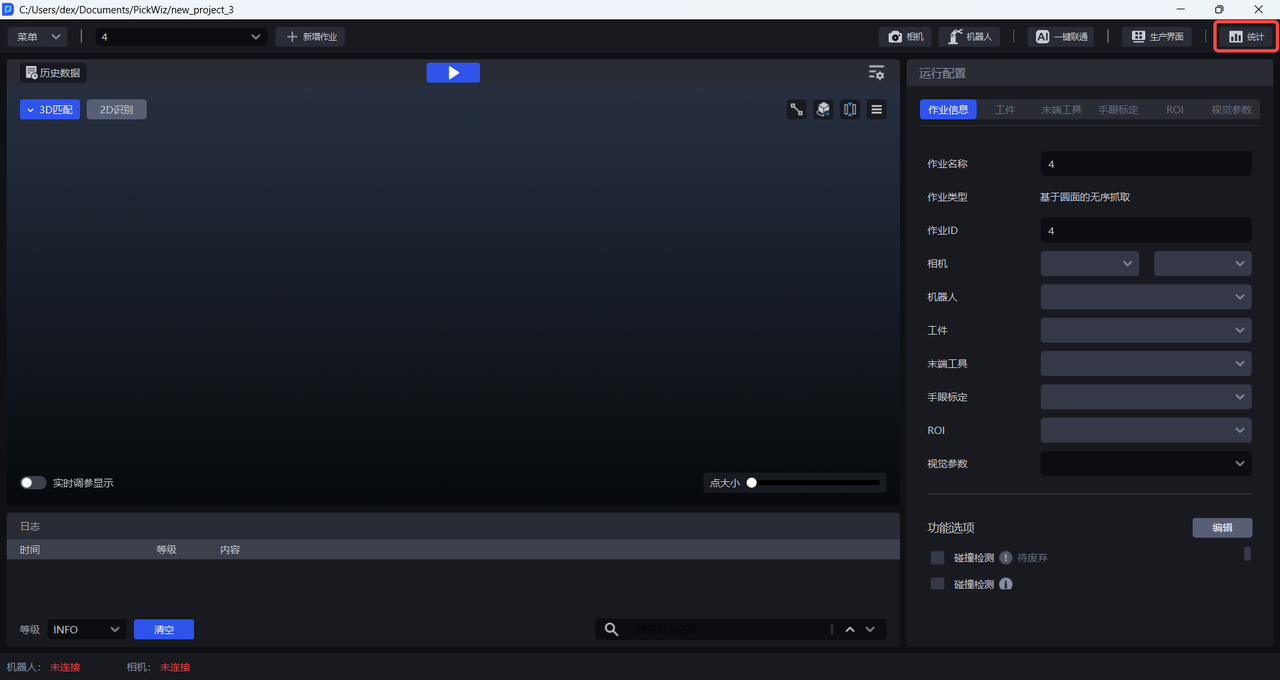
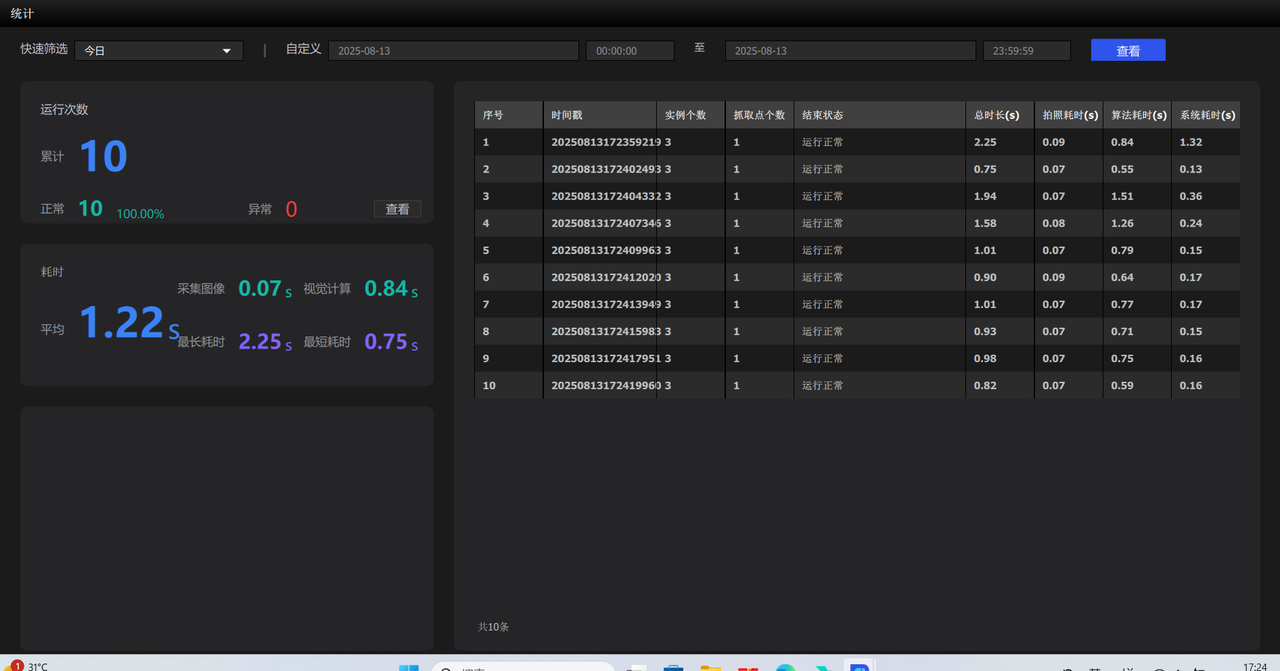
- Statistics
The Statistics interface mainly includes functions such as date filtering and data display.
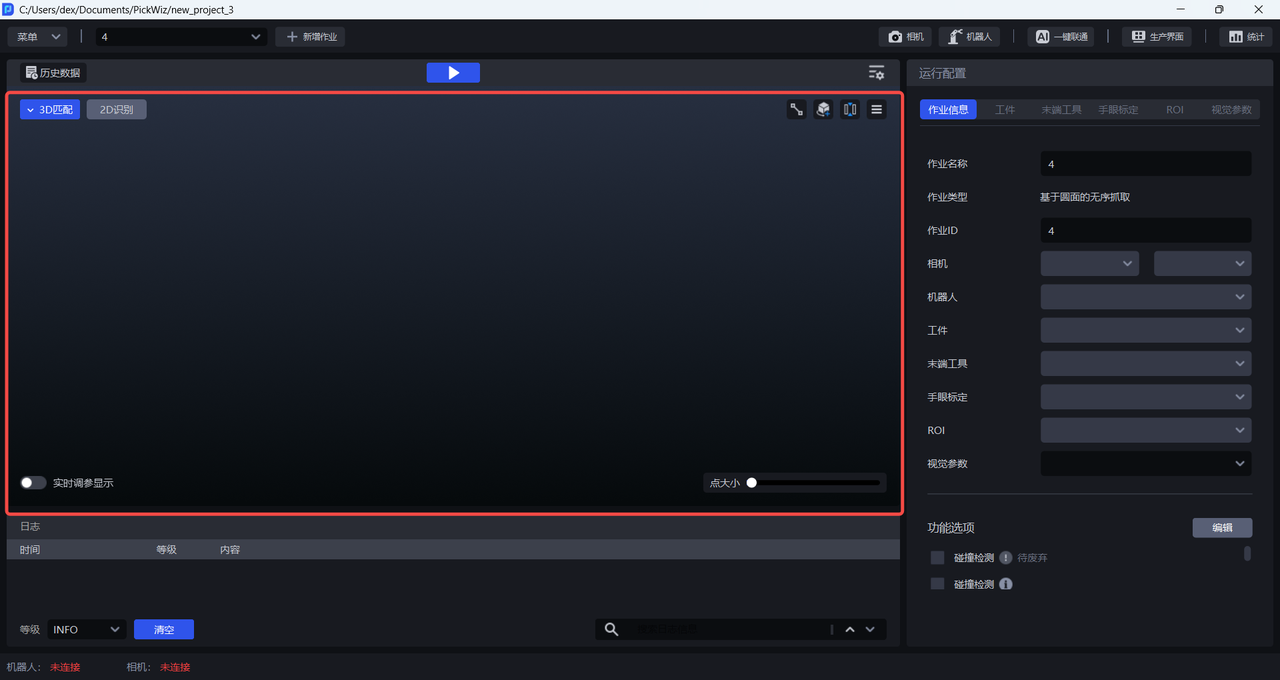
2.2 Visualization Window
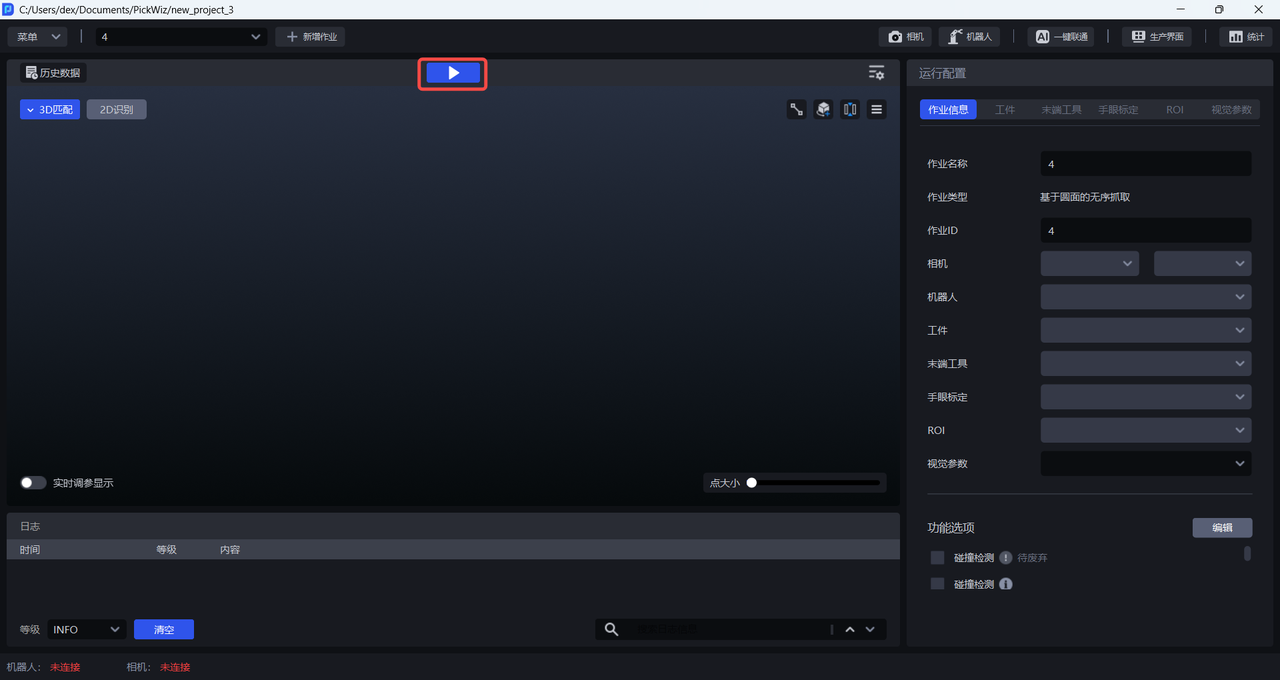
- Click the "Run" Button in the middle of the run bar to perform a complete vision inspection.
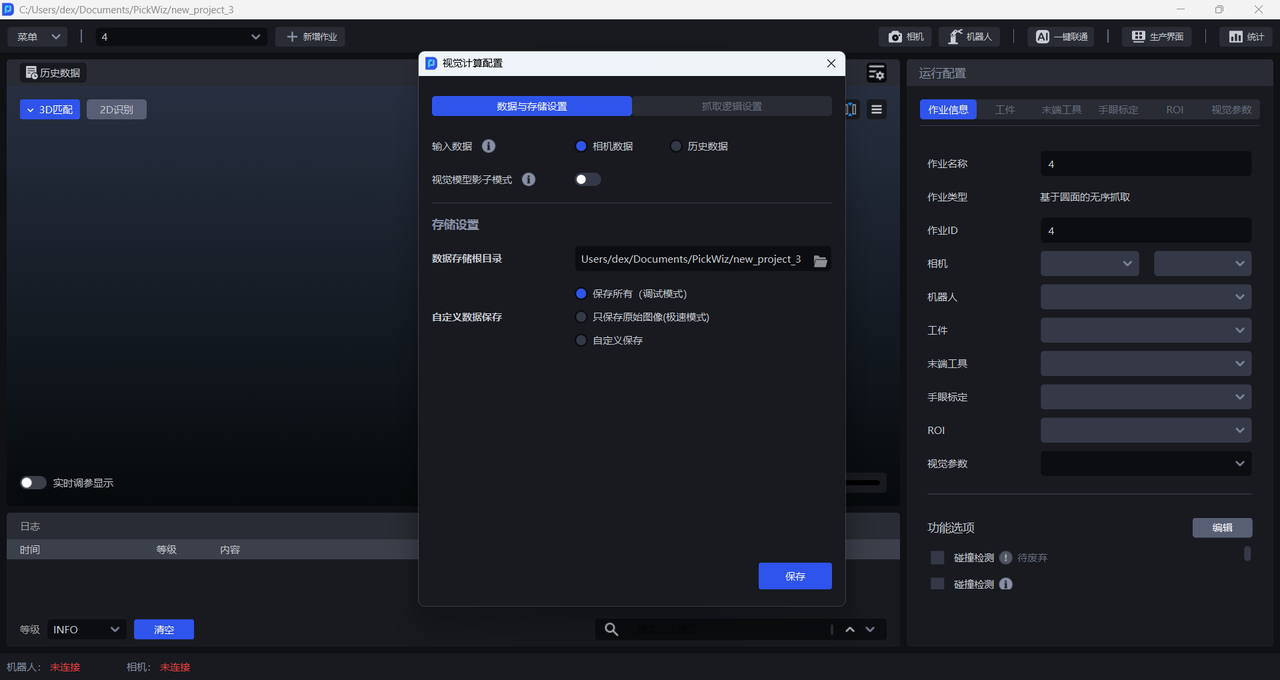
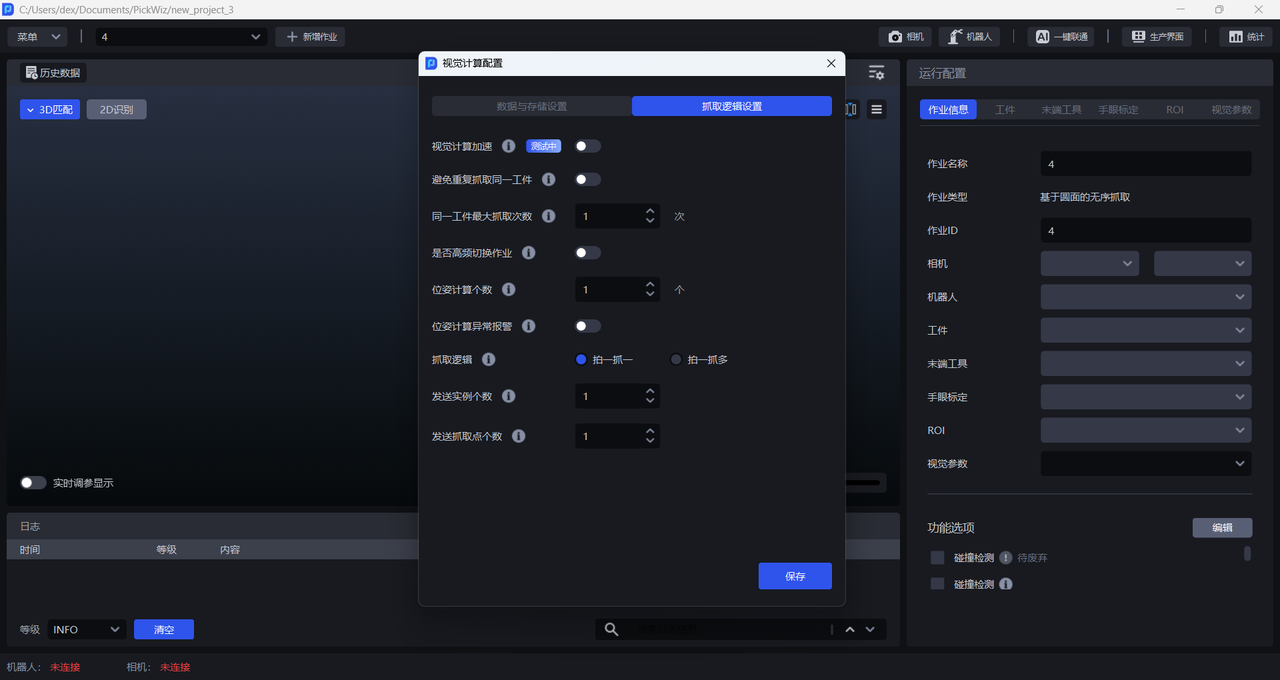
- The configurations used by the vision algorithm during calculation are divided into "Data and Storage Configuration" and "Picking Logic Settings", which can be customized according to the needs of the Scene project.
- Visualization area: displays 2D recognition results and 3D Matching Pick Point results in real time.
2.3 Log Area
Includes time, level, and content, classifies log records by level, and includes functions such as clear and filter.

2.4 Status Bar
Displays the connection status of the Robot and Camera.

2.5 Configuration Area
The Configuration Area mainly contains configuration items related to task operation, mainly including Target Object, Tool, eye-hand calibration, Scene Object, ROI, visual parameters, etc.
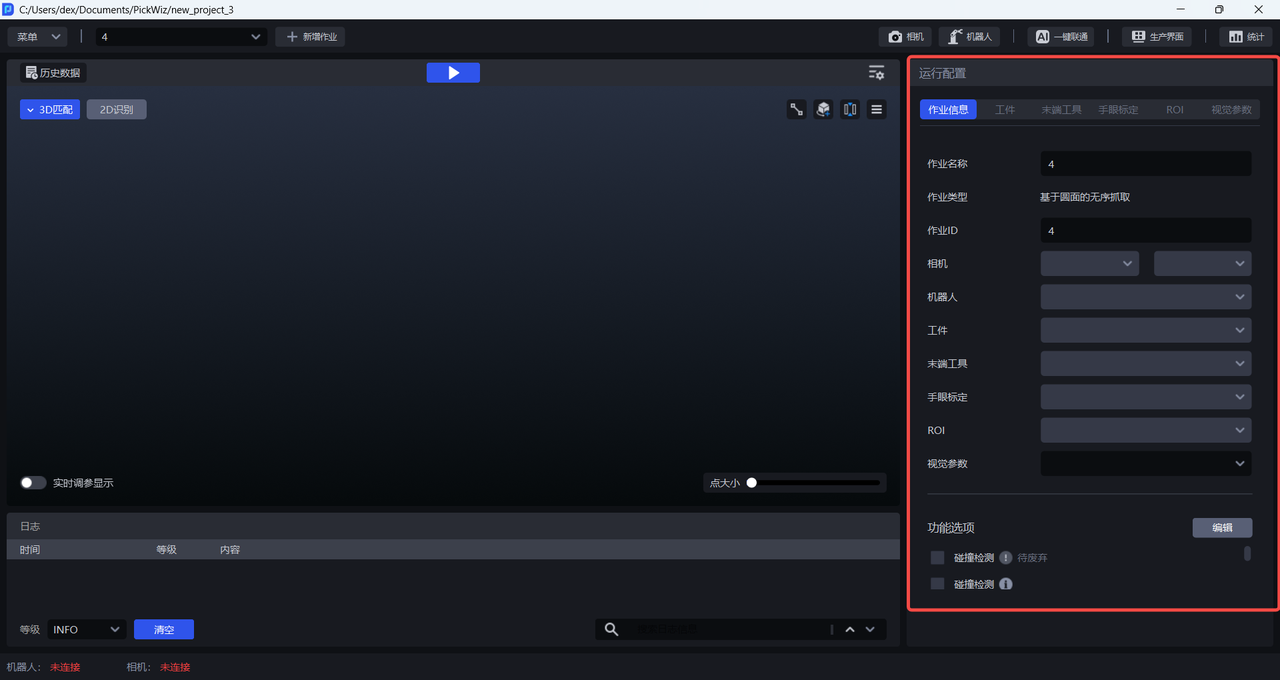
| Configuration Item | Description |
|---|---|
| Task Information | Related configurations of the current task, including task name, task type, task ID, Camera, Robot, Target Object, Tool, Scene Object, eye-hand calibration, ROI, visual parameters, and feature options. |
| Target Object | The Target Object configuration of the current task. |
| Tool | The Tool configuration of the current task. |
| Scene Object | Various objects in the actual Scene of the current task, including material frames and bottom trays. |
| eye-hand calibration | The eye-hand calibration configuration of the current task. |
| ROI | The ROI configuration of the current task. |
| Visual Parameters | The visual parameter configuration used when the current task runs. |
| Feature Options | Optional functions corresponding to working conditions such as "Collision Detection", "Recognition Type", "Recognize Local Features", and "Bottom Tray Detection". |