Case Library User Guide
Project is the core working unit in PickWiz. A Project can be created in two ways: creating a new scenario Project, or loading a Project from the Case Library. The Case Library contains specific solutions provided by PickWiz for common typical application scenarios, including the basic configuration data for each scenario, allowing faster commissioning and configuration. The steps for creating a Project from the Case Library are as follows:

1. Load a Project from the Case Library
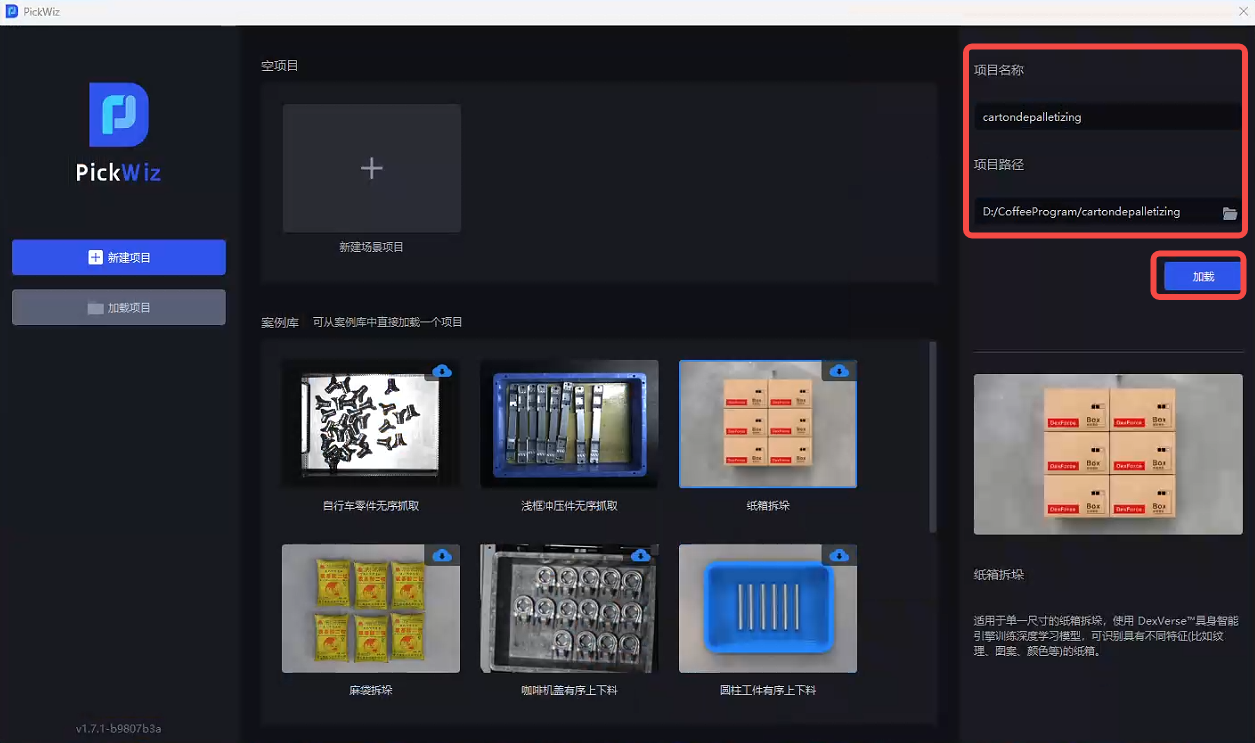
After opening PickWiz for the first time, you will automatically enter the welcome page, where you can select the Project for the required scenario from the Case Library, as shown below. If there is no case in the Case Library that matches the scenario requirements, click "New Scenario Project" at the top and refer to Project Operation Guide to create a new scenario Project.

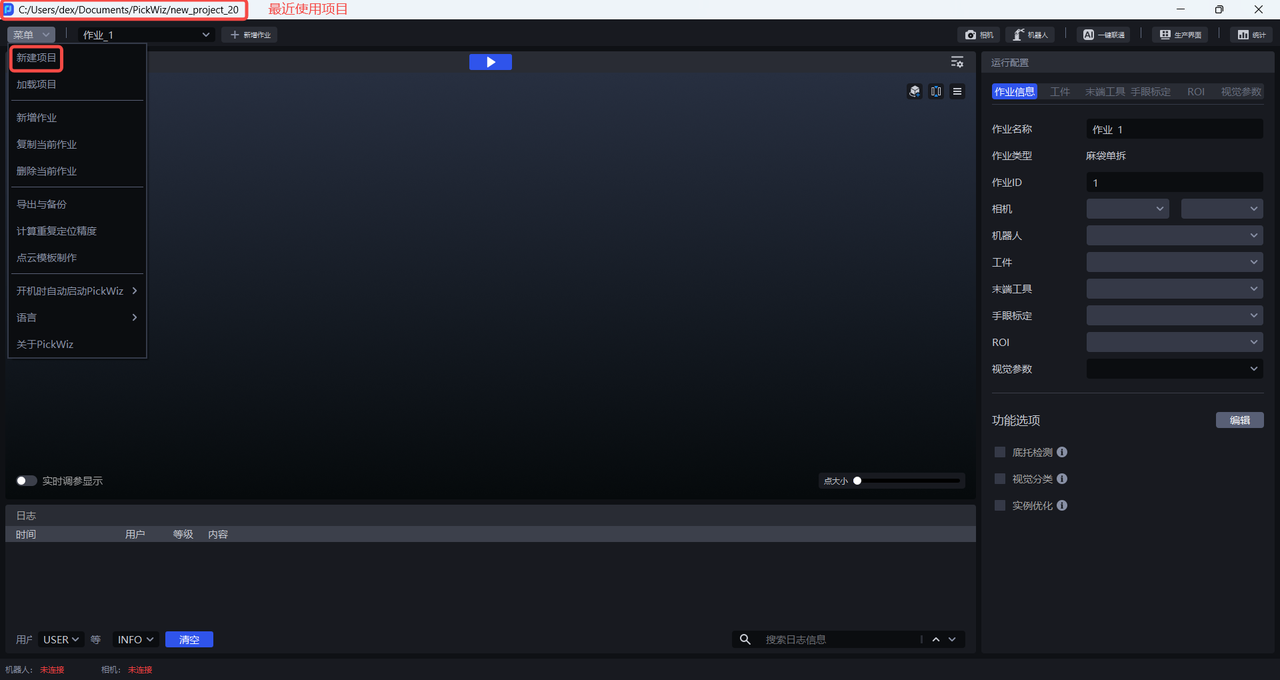
If you have already entered the software main page, click Menu in the upper-left corner and select New Project.
The software will open the new Project page, where you can select the Project for the required scenario from the Case Library. If there is no case in the Case Library that matches the scenario requirements, click "New Scenario Project" at the top and refer to Project Operation Guide to create a new scenario Project.
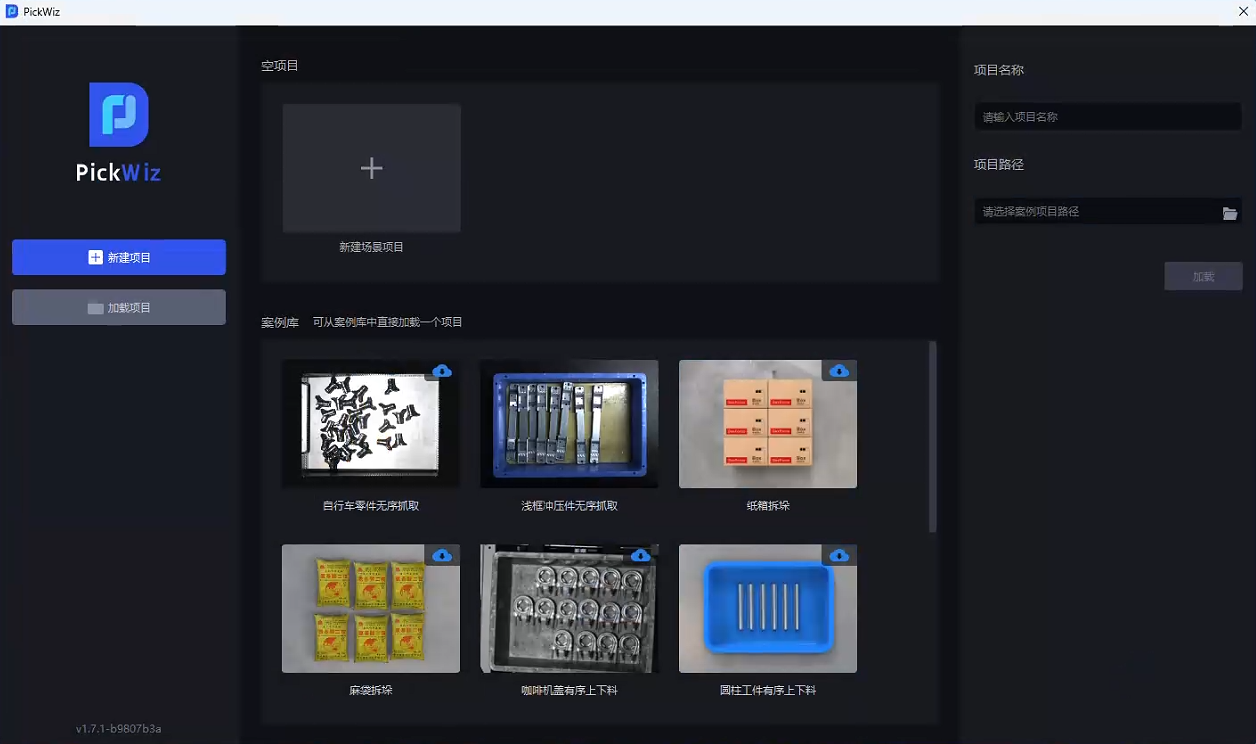
After selecting the required case in the Case Library for the scenario, if this is your first time using the case, you need to download it. After the download is complete, a prompt pop-up window will appear automatically. Click OK.
Note
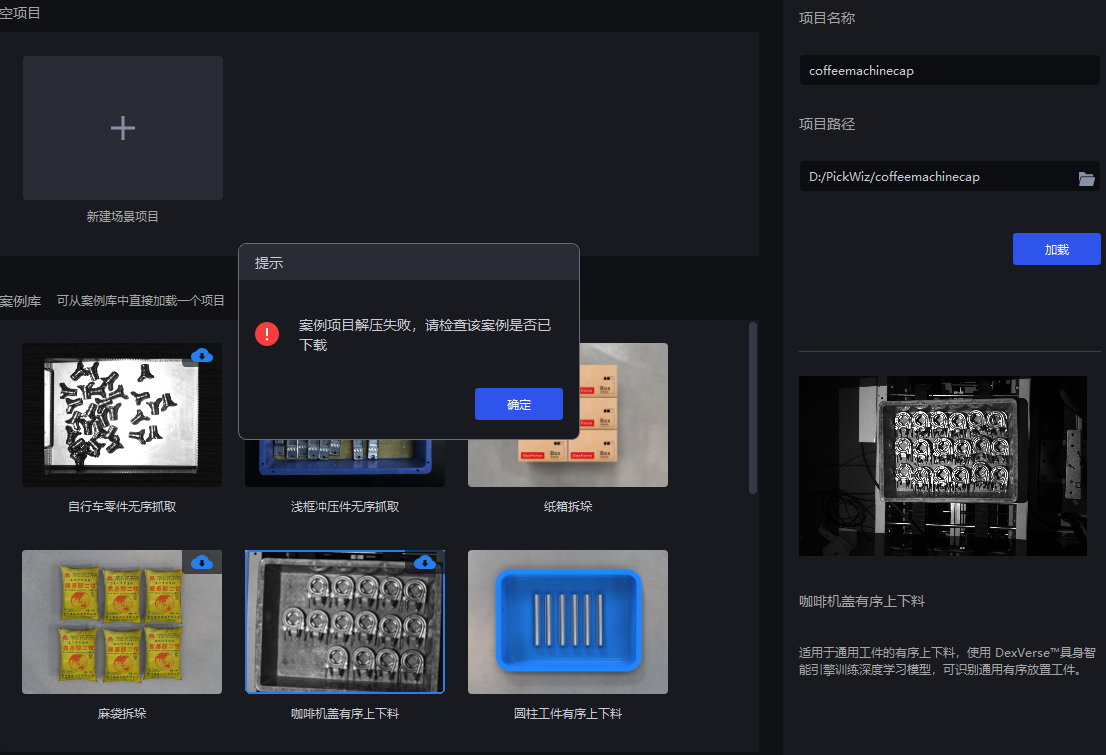
If this is your first time using the selected case, connect to the Internet and click the blue icon in the upper-right corner of the case to download it.
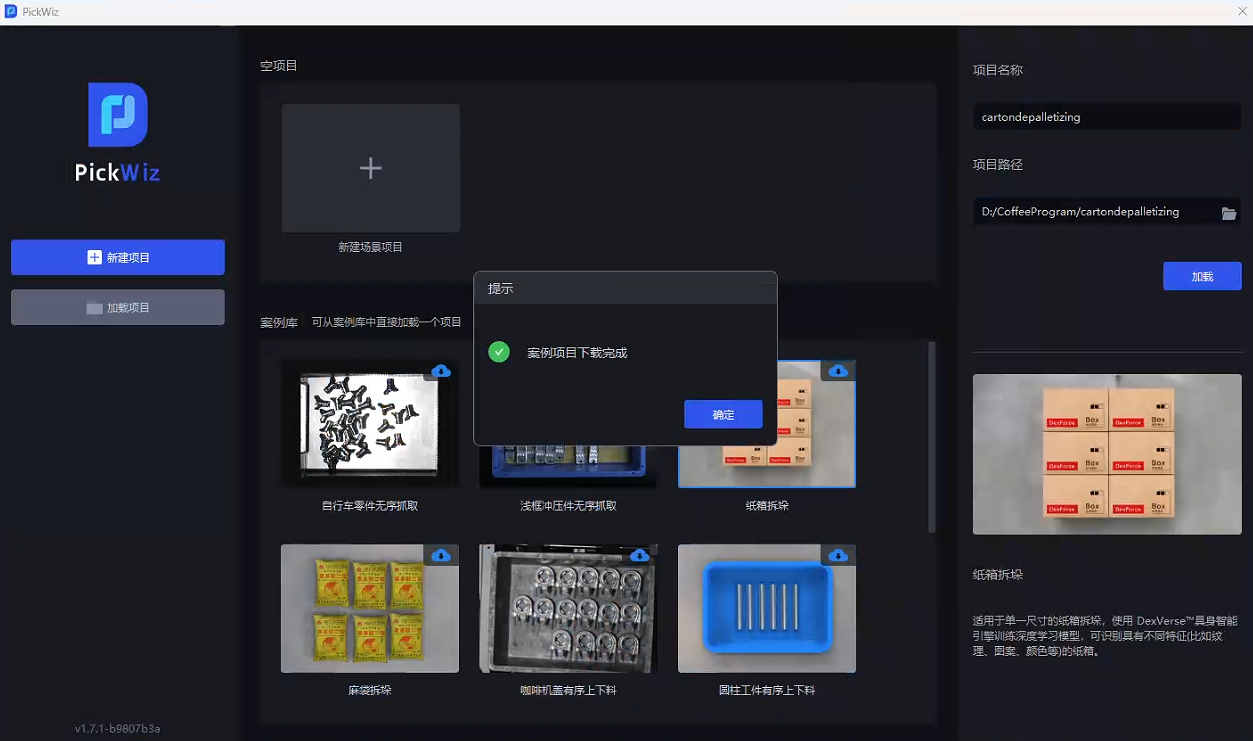
Enter the Project name on the right and select the Project storage path, then click Load to create the solution in the Project storage path.
Note
The Project name supports only uppercase and lowercase English letters and special characters.
2. Project Configuration
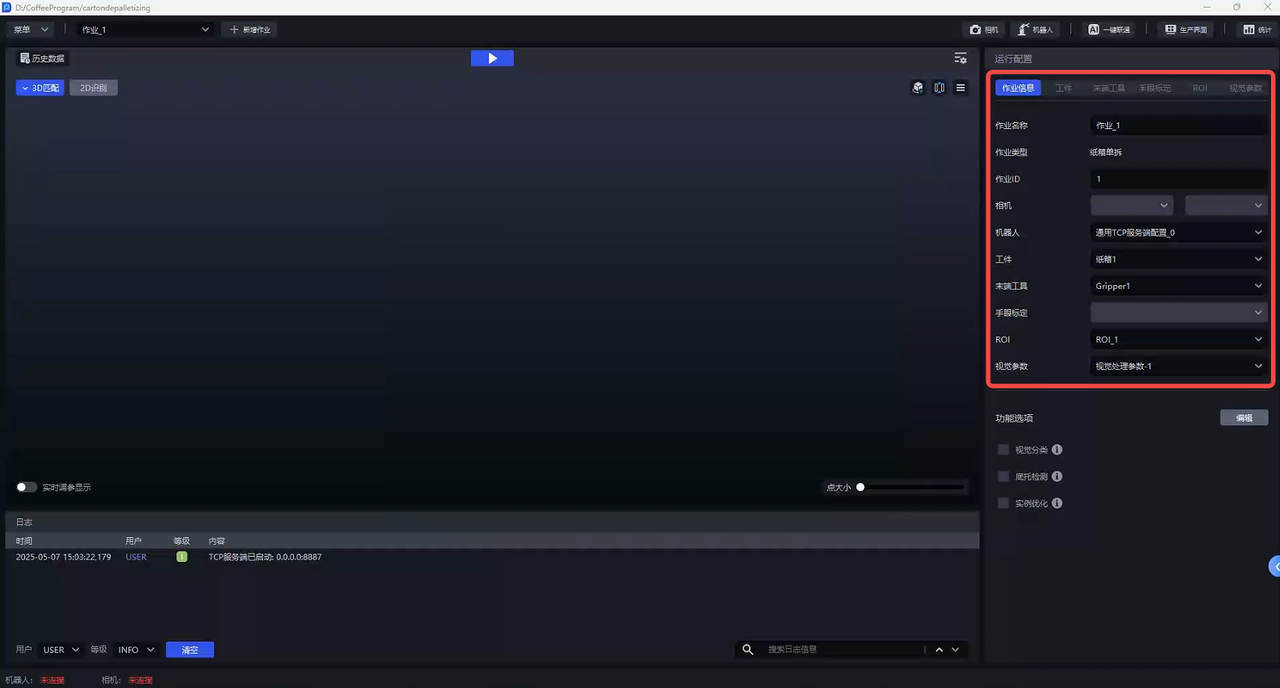
After creating a Project from the Case Library, the Project contains the basic configuration data for tasks and task scenarios. Based on this data, you can configure and commission vision-related parameters. For actual picking, additional configurations such as Camera, Robot, and eye-hand calibration need to be added.
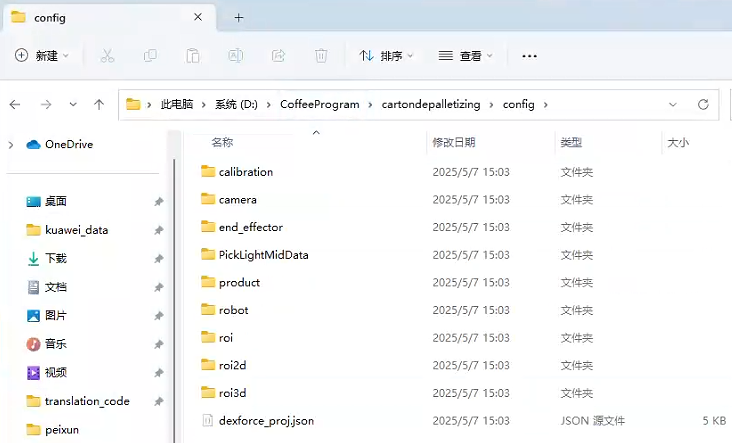
Open the corresponding Project configuration folder config according to the Project storage path set when creating the Project (click here to view) to view the configuration data of the Case Library Project, as shown below.
Note
Modifying the Project configuration folder is not recommended. Otherwise, PickWiz may report errors and fail to operate properly.
| No. | Folder Name | Configuration Name | Description |
|---|---|---|---|
| 1 | calibration | eye-hand calibration | Stores the eye-hand calibration (new version) configuration used when the current task is running |
| 2 | camera | Camera | Stores the Camera and Camera parameters used when the current task is running |
| 3 | end_effector | Tool | Stores the Tool configuration used when the current task is running |
| 4 | PickLightMidData | Visualization configuration | Stores the configuration corresponding to the visualization window |
| 5 | product | Workpiece | Stores the workpiece configuration of the current task |
| 6 | robot | Robot | Stores the Robot used when the current task is running |
| 7 | roi | ROI | Stores the ROI configuration used when the current task is running |
| 8 | roi2d | ROI 2D | Stores the ROI 2D configuration used when the current task is running |
| 9 | roi3d | ROI 3D | Stores the ROI 3D configuration used when the current task is running |
| 10 | scene_object | Scene Object | Stores various objects in the actual scenario of the current task, including bins, pallets, etc. |
| 11 | strategy | Vision Parameters | Stores the vision parameter configuration used when the current task is running |
| 12 | dexforce_proj.json | Root configuration file | The root configuration file of the Project. All configuration items corresponding to all tasks in the Project are specified in this file |
The Project configuration data can be cross-checked with the task information.
| Label | Description |
|---|---|
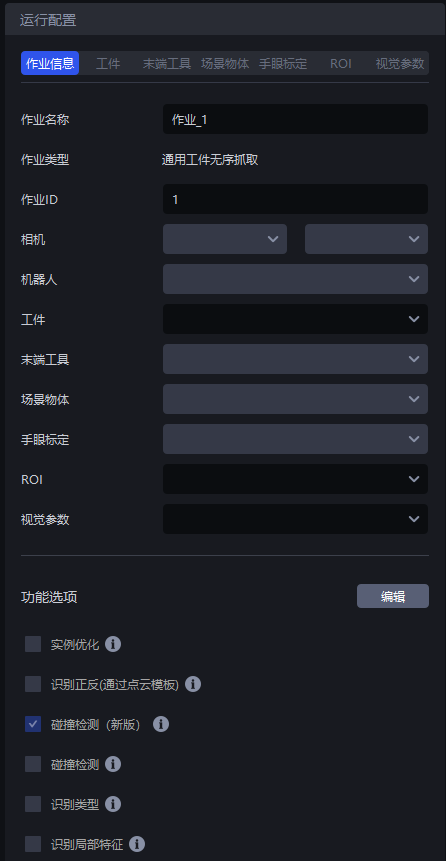
| Task Name | The name of the current task and can be modified |
| Task Type | The type of the current task, that is, the task scenario. It corresponds to the task scenario selected when creating a new Project or creating a new task and cannot be modified |
| Task ID | Identifies the current task. The Robot can switch tasks through this ID |
| Camera | The Camera & Camera parameters used when the current task is running. For connecting the Camera & setting Camera parameters, refer to Camera Connection and Parameter Adjustment Guide |
| Robot | The Robot used when the current task is running. For establishing communication with the Robot, refer to Robot Configuration and Communication Operation Guide |
| Workpiece | The workpiece configuration of the current task. After adding it on the Workpiece page, configure it in the task information |
| Tool | The Tool configuration used when the current task is running. After adding it on the Tool page, configure it in the task information |
| Scene Object | Various objects in the actual scenario of the current task, including bins, pallets, etc. After adding them on the Scene Object page, configure them in the task information |
| eye-hand calibration | The eye-hand calibration configuration used when the current task is running. After adding it on the eye-hand calibration page, configure it in the task information |
| ROI | The ROI configuration used when the current task is running. After adding it on the ROI page, configure it in the task information |
| Vision Parameters | The vision parameter configuration used when the current task is running. Configure it on the Vision Parameters page |
| Functional Options | Click "Edit" to select working-condition attributes such as "Collision Detection", "Recognition Type", "Local Feature Recognition", and "Pallet Detection". After selecting working-condition attributes related to the Project, PickWiz will match the functional configuration suitable for those conditions, that is, it will add the selected condition-related configurations to workpieces, vision parameters, and other related configurations. |