Installation Guide
1. Machine Configuration Requirements
| Operating System | Windows 11 Professional |
|---|---|
| CPU | Intel i7-8700 or above |
| Memory | 16G or above |
| GPU | NVIDIA RTX 3050 or above (driver version 525 or above) |
| Hard Drive | 128 GB SSD or above (free space on the C drive) |
2. Installation Package Download
2.1 Download Methods
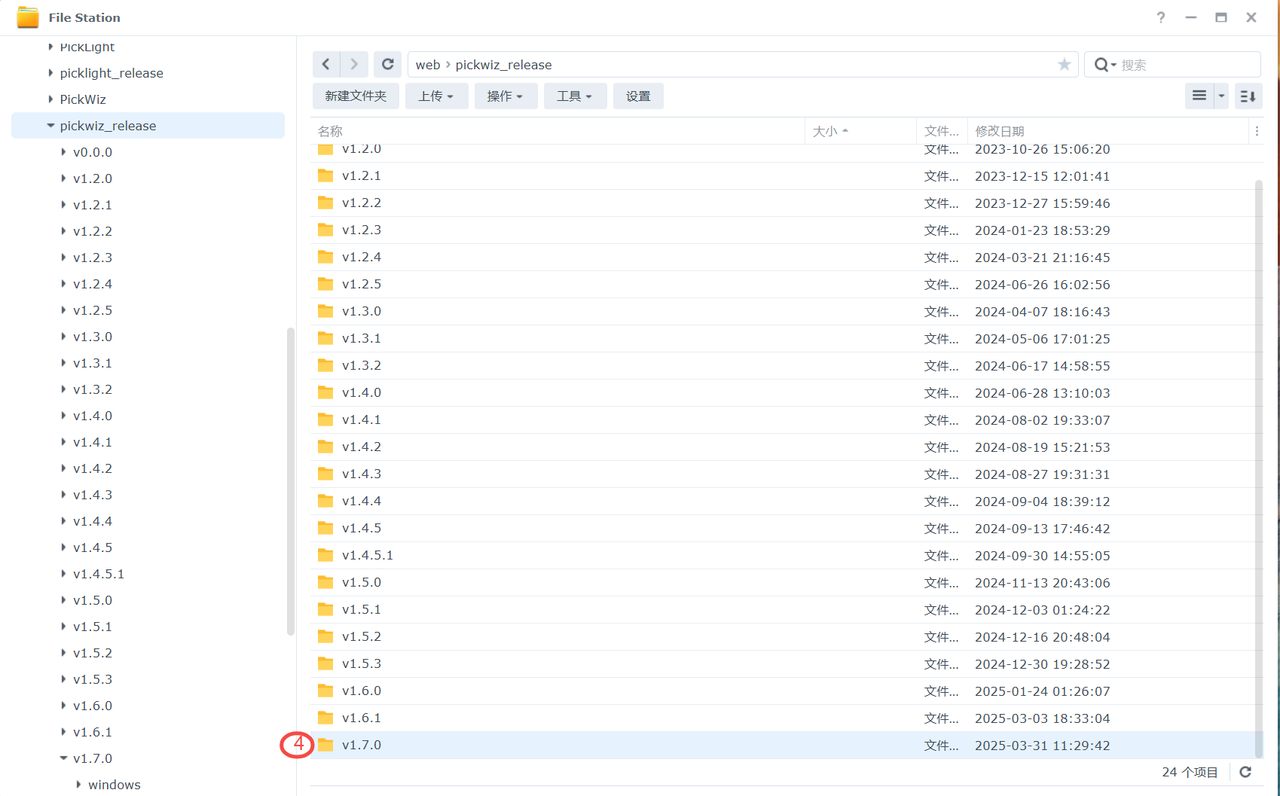
After logging in to NAS, navigate to the PickWiz installation package storage directory:
Find the required software version in the pickwiz_release folder.
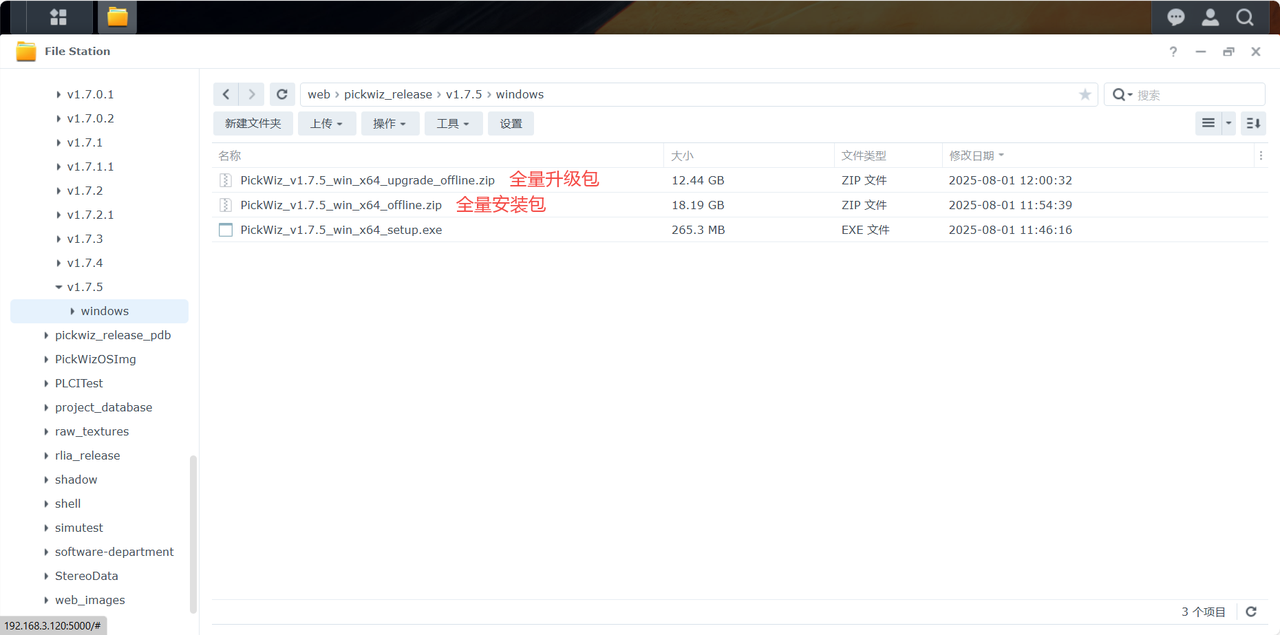
After opening the windows directory, you can see the following file list:

2.2 Description of Installation Package Types
Full Installation Package & Full Upgrade Package
The full installation package is named
PickWiz_v{X.Y.Z}_win_x64_offline.zip, which contains the PickWiz application, the basic Deep Learning environment, and general models, as shown below.The full upgrade package is named
PickWiz_v{X.Y.Z}_win_x64_upgrade_offline.zip, which contains the PickWiz application and general models, with the basic environment-related resources removed. If the basic environment has already been prepared using the full offline package, you can use the offline upgrade package for later upgrades (smaller size).
The full installation package and full upgrade package support fully offline installation.
3. Install the Software
3.1 Installation on a New Machine
The full installation package and full upgrade package support fully offline installation.
Checks required before installation:
When installing and updating PickWiz using the full installation package, Anaconda does not need to be installed;
If Anaconda is already installed but is located in a folder that requires administrator permissions (such as the Windows folder on the C drive,
Program Files,Program Files (x86),ProgramData, etc.), or if the environment variables are configured incorrectly, uninstall the installed Anaconda first and delete the corresponding environment variables. Also ensure that Anaconda is not installed in the PickWiz installation directory (for example,C:\Users\dex);If 360 antivirus software is installed before installation, close it first; otherwise, it may block the installer.
(1) Extract the full installation package
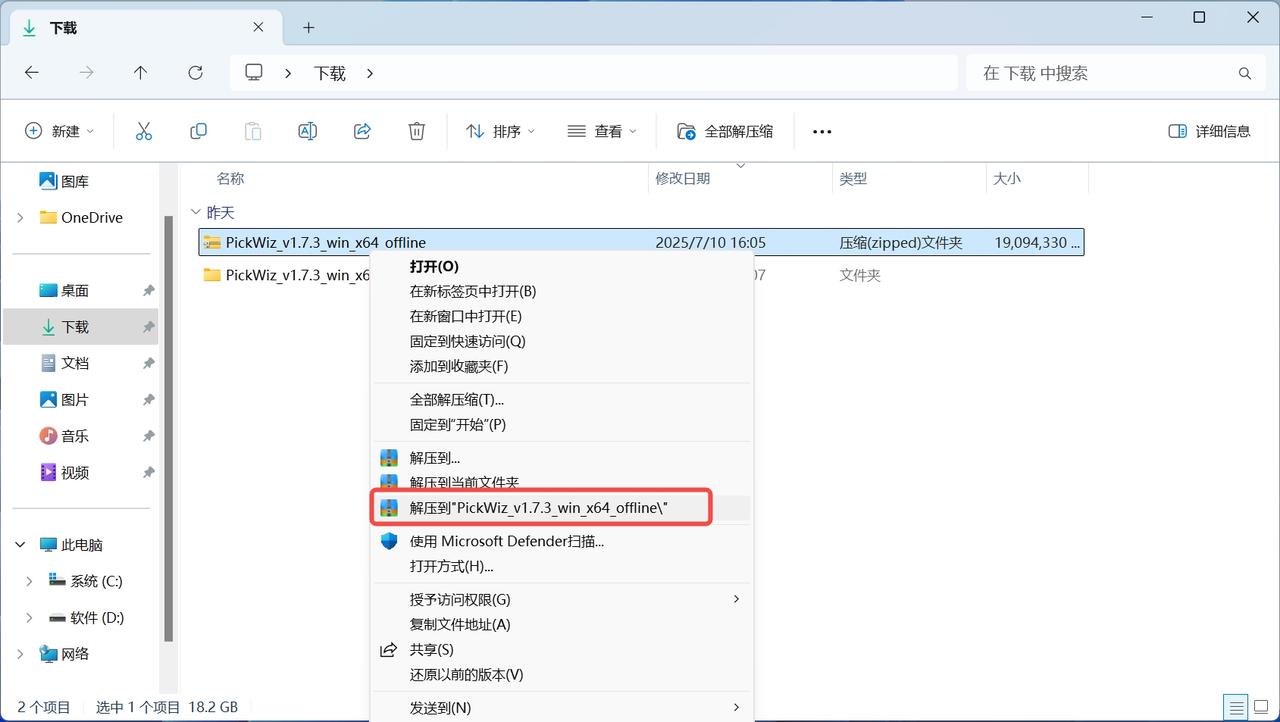
(2) Install PickWiz
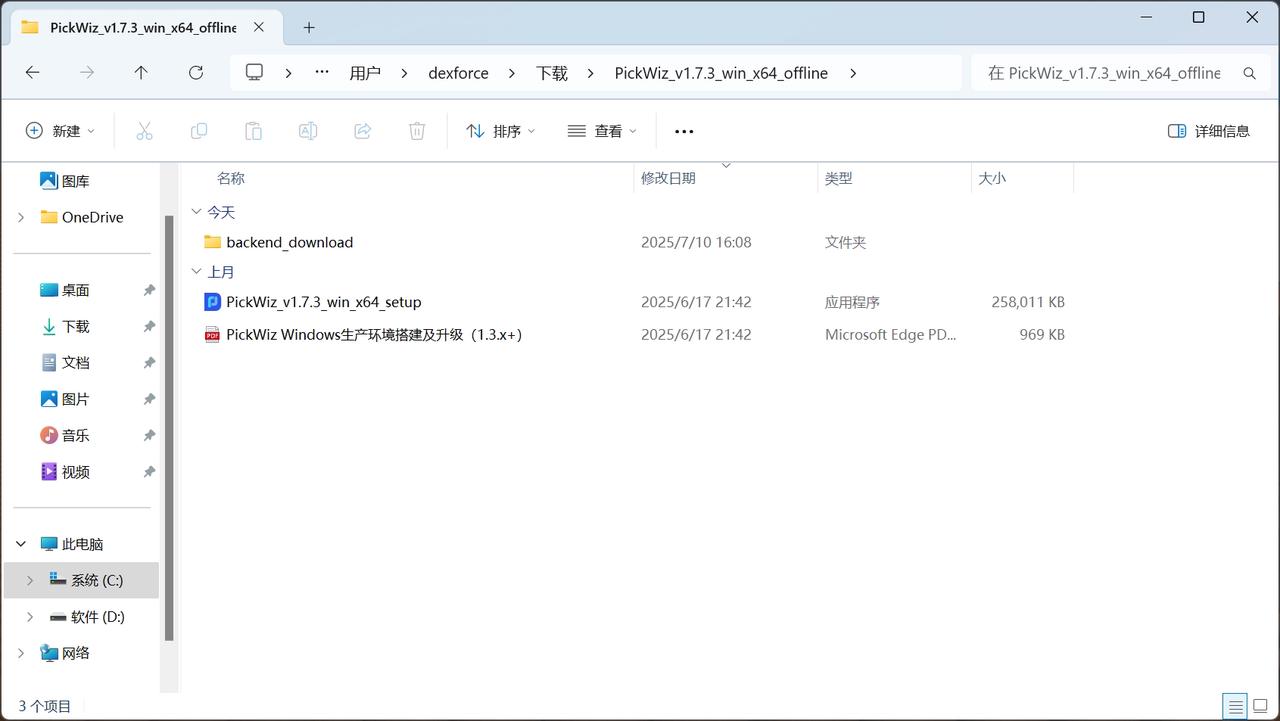
- Open the extracted files and double-click the
exeapplication file, as shown below;
Select the installation directory
It is recommended to install it in the default directory. It cannot be installed on another hard drive.
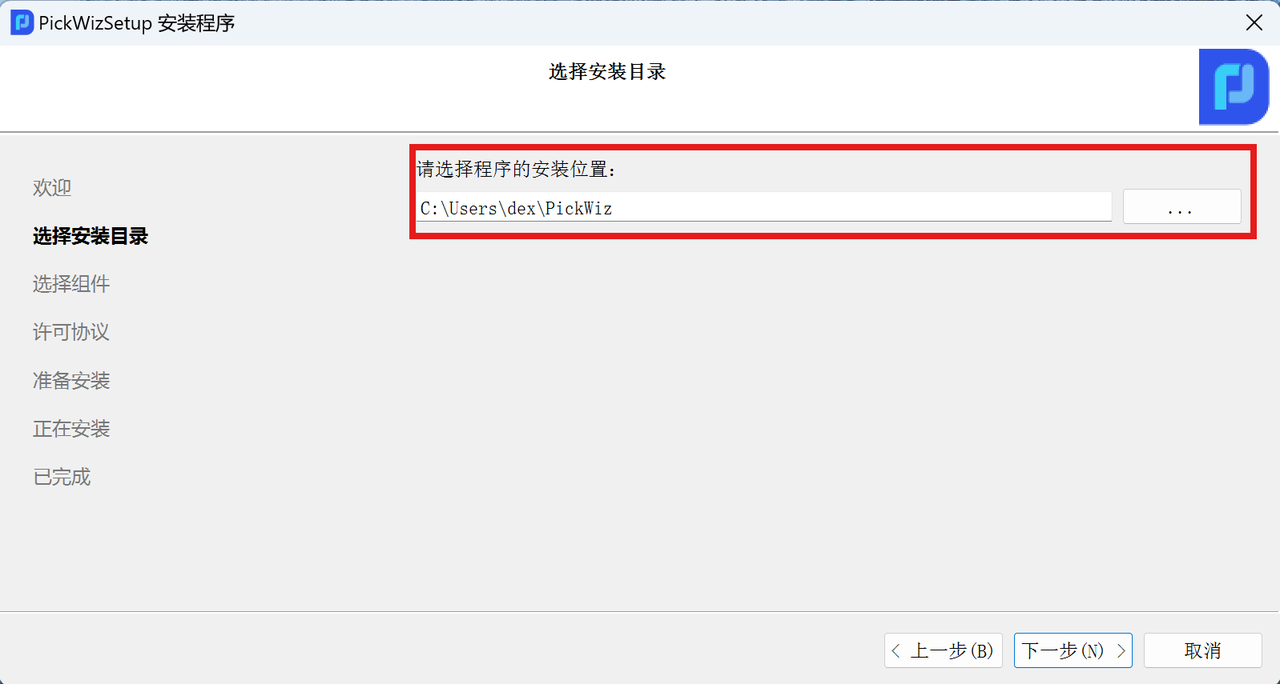
Follow the prompts until you reach "Select Components"
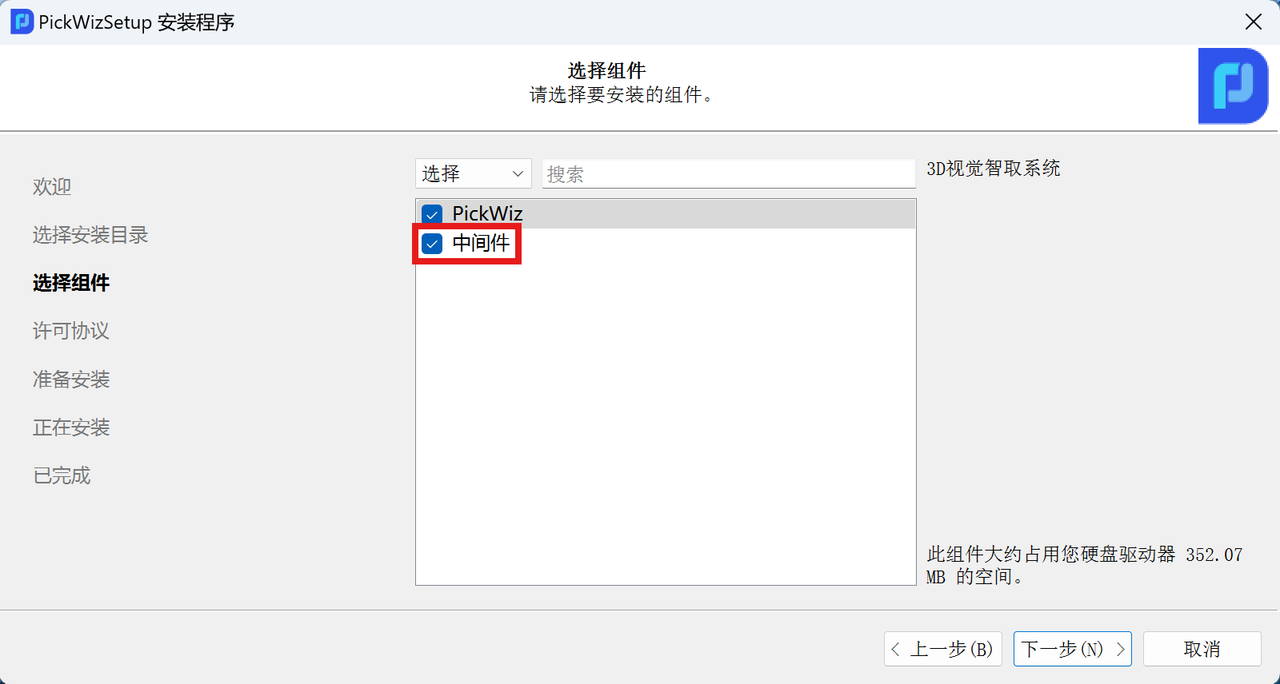
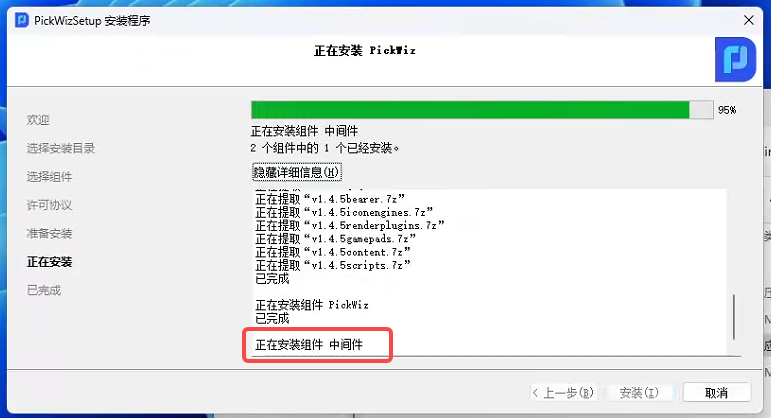
When the installation progress reaches 95%, a prompt saying "Installing component middleware" will appear.
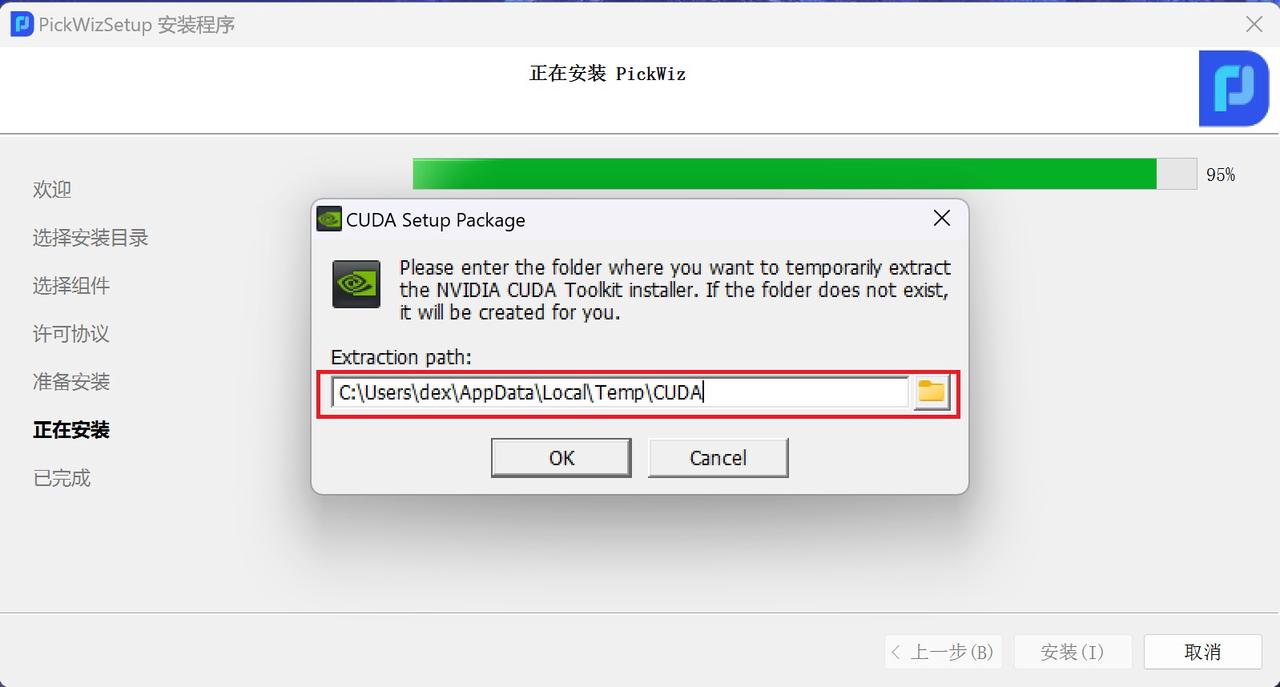
When installing PickWiz for the first time on a new machine, the CUDA installation window will pop up. The image below shows the temporary CUDA extraction directory. It is recommended to use the default folder. This folder will be deleted automatically after installation is complete.
For "Installation Options", it is recommended to choose "Compact".
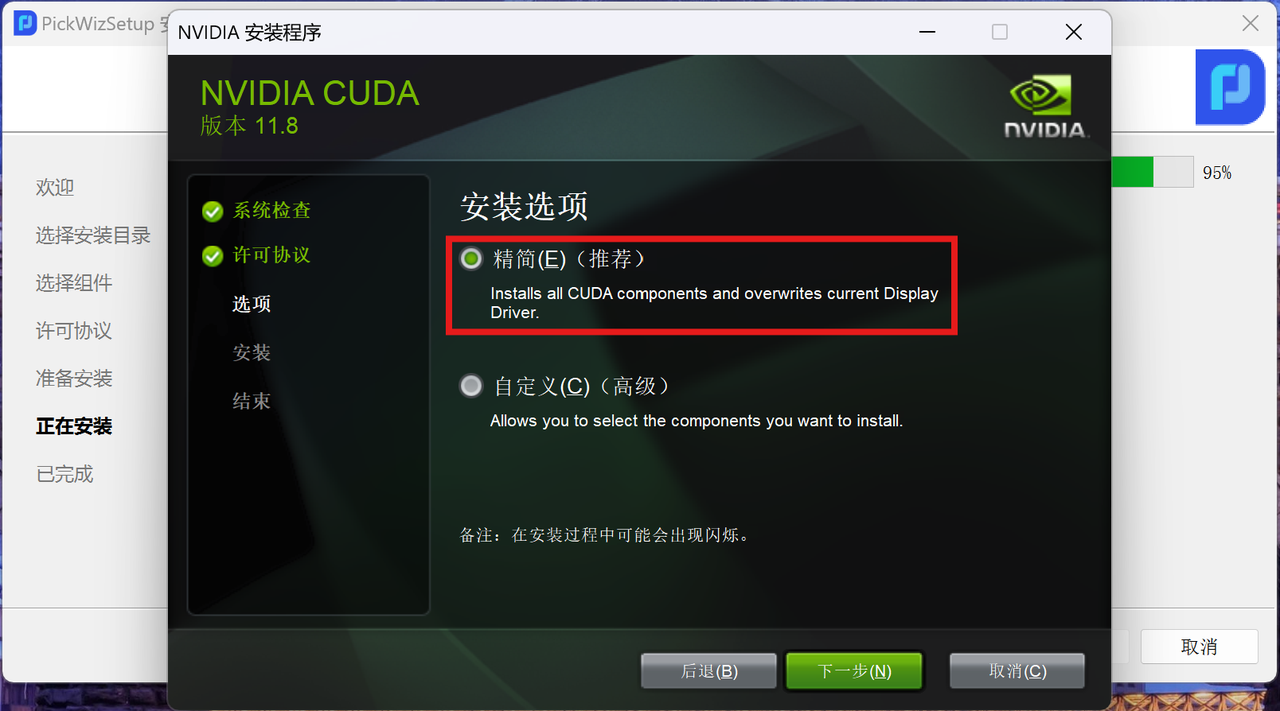
CUDA installation completed
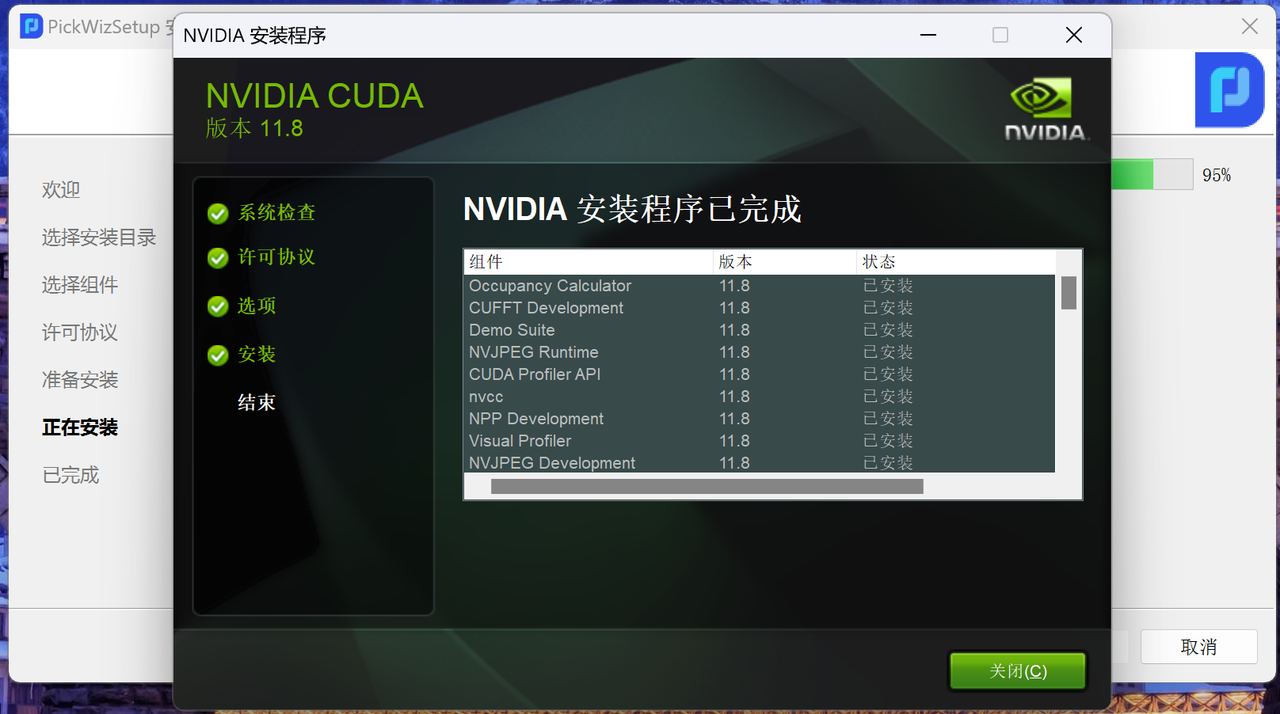
PickWiz installation continues. The first installation takes about 30 minutes. Please wait patiently. After installation is complete, the following prompt will appear:
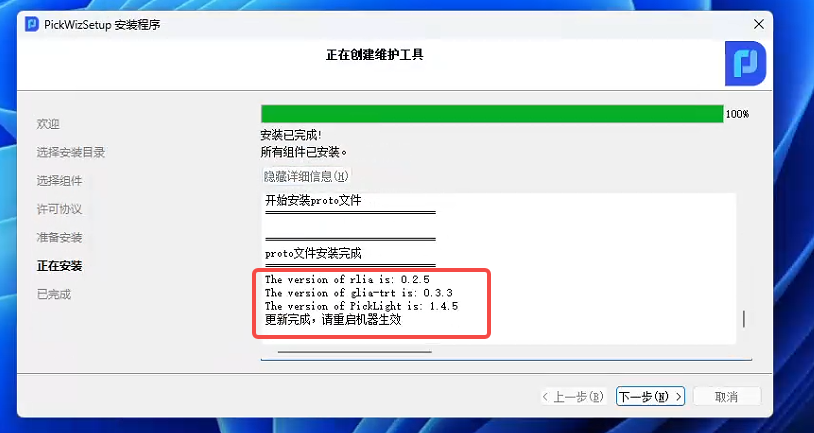
Click "Next" to complete the installation.
After installing PickWiz for the first time, restart the computer before running PickWiz
3.2 Upgrade
To upgrade using the full upgrade package, refer to 3.1 Install Using the Full Installation Package
3.3 Install whl Packages Separately
For installing whl packages such as PickLight, GLIA, and RLIA.
- Download the
whlpackage from NAS. For the NAS address, refer to 2.1 Download Methods
Navigate to the directory of the required whl package and download it.
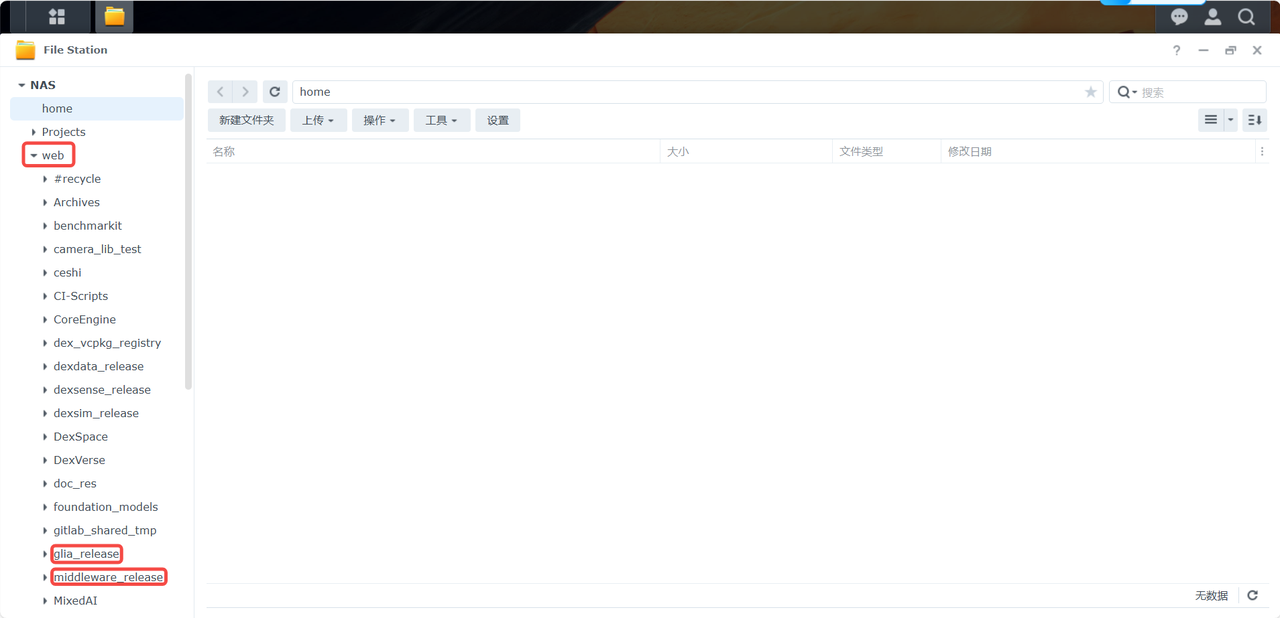
- After downloading, open the Anaconda Prompt terminal.
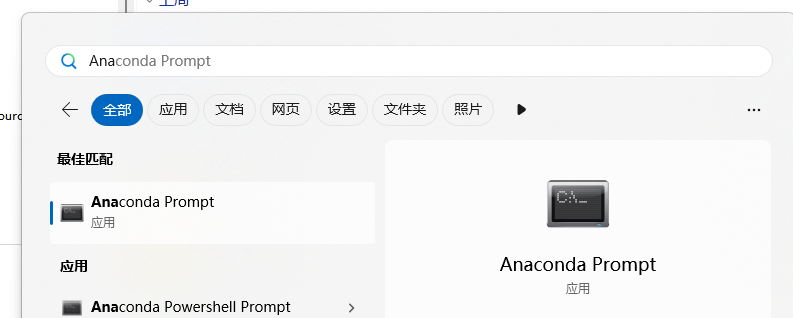
- In the opened Anaconda Prompt terminal, enter the
conda activate pickwiz_py39command to activate the backend environment.

- Enter the command to the directory where the downloaded
whlpackage is saved. Usually, after downloading, thewhlpackage is saved in theC:\Users\Administrator\Downloadsdirectory, so enterDownloadsin the Anaconda Prompt terminal to reach the directory where thewhlpackage is stored.
.jpg)
- In the directory where the
whlpackage is stored, run the installation commandpip install xxx.whl, wherexxx.whlindicates the package name.

If you install a
whlpackage of the same version, run thepip uninstall xxx.whlcommand to uninstall it first, and then run the installation commandpip install xxx.whl; otherwise, thewhlpackage installation may fail.
4. Uninstall the Software
(1) Uninstall using the uninstaller
Open the PickWiz installation directory. For the installation directory, refer to the "Select the installation directory" step in 3.1 Installation on a New Machine
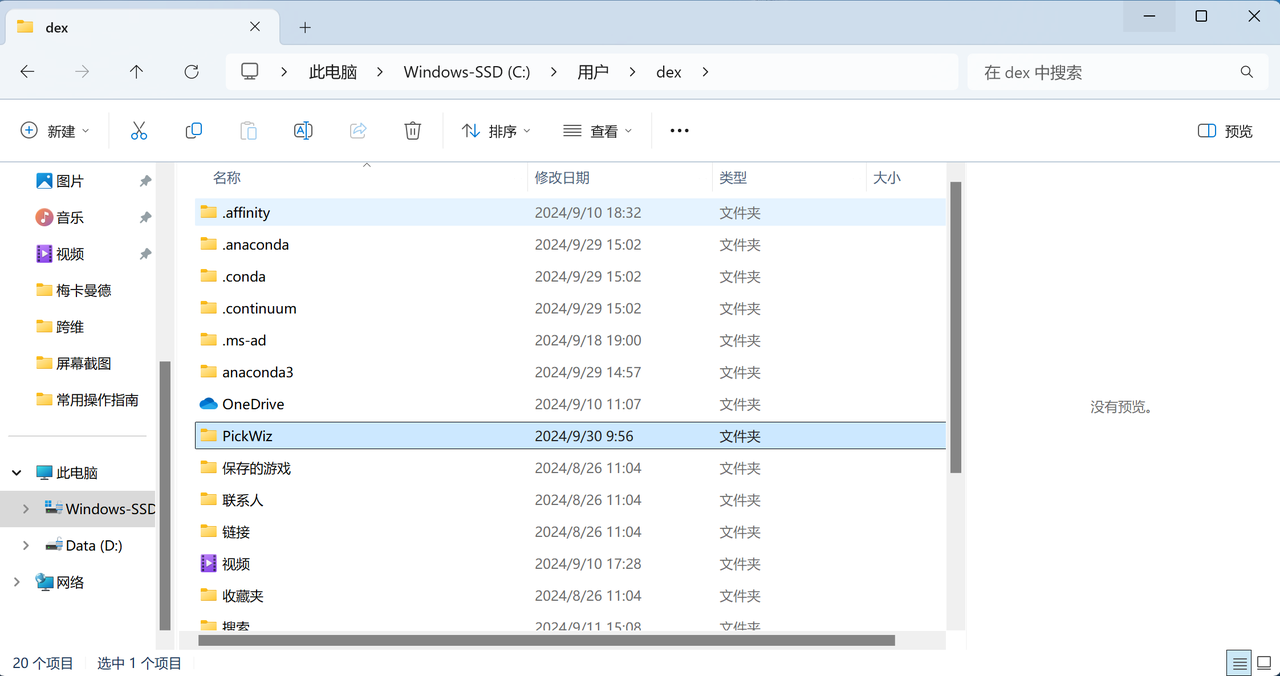
Find the application named
MaintenanceTool.exe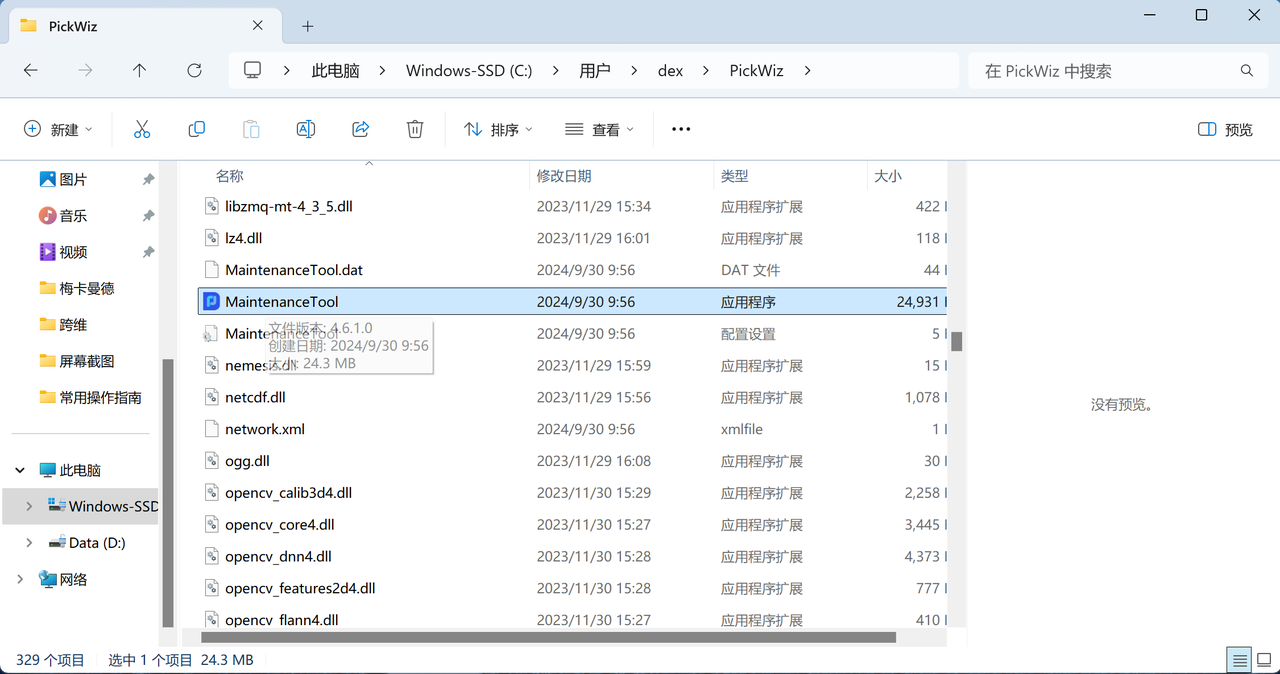
Double-click the
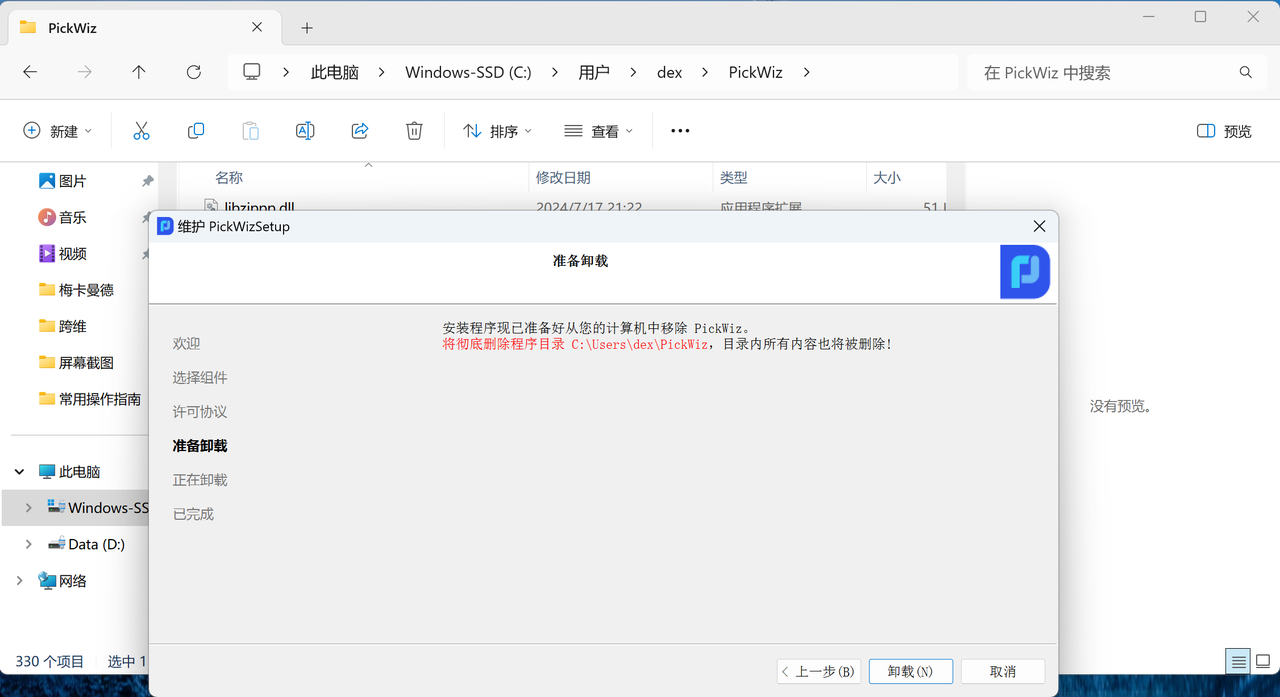
MaintenanceToolapplication to enter the "Maintain PickWizSetup" window, and select "Remove all components"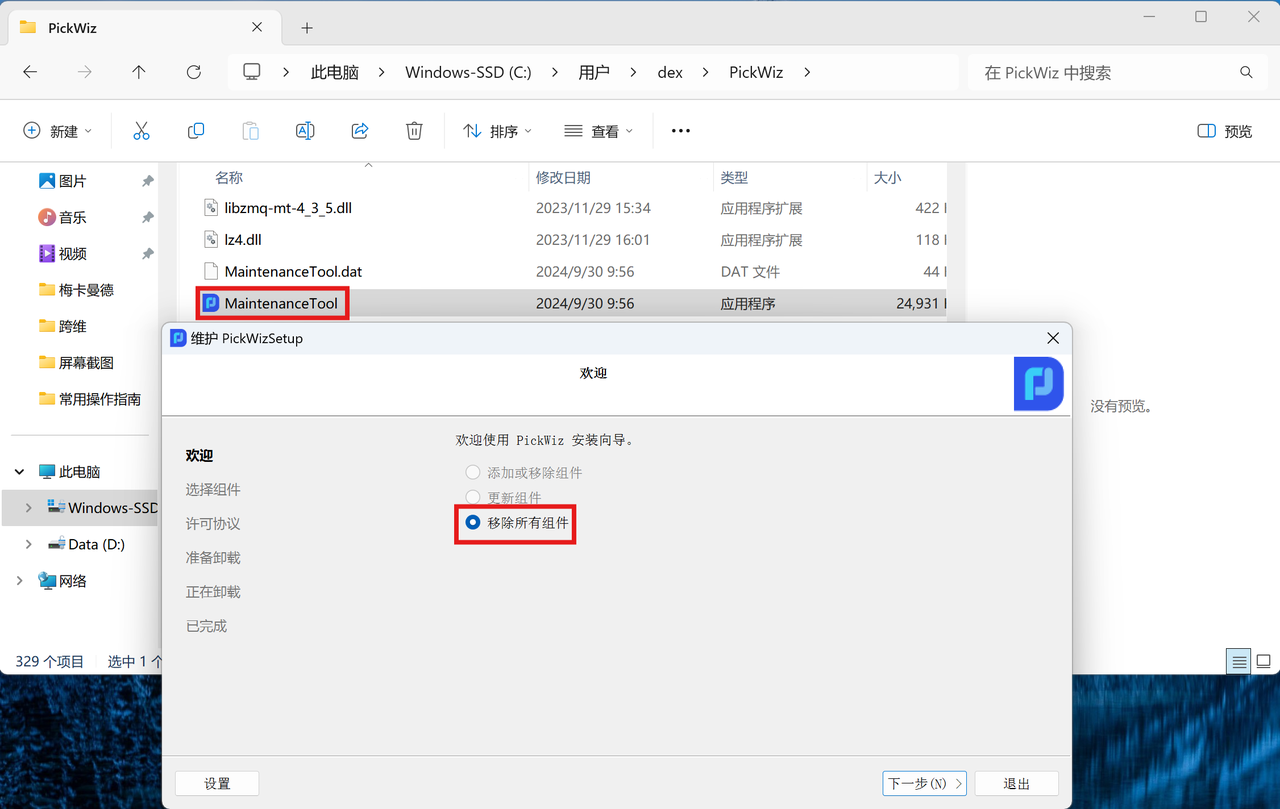
Click "Uninstall" to complete PickWiz uninstallation.
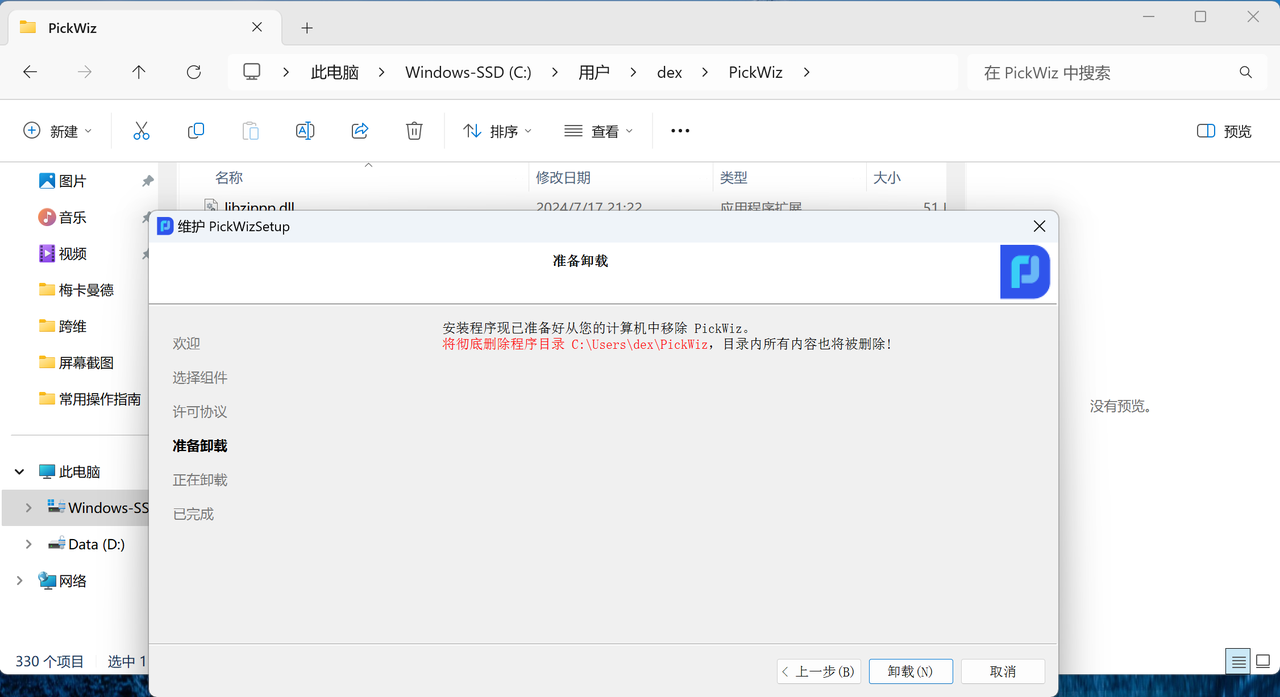
(2) Uninstall using Control Panel
Open "Control Panel" from the Start menu, and click "Uninstall a program"
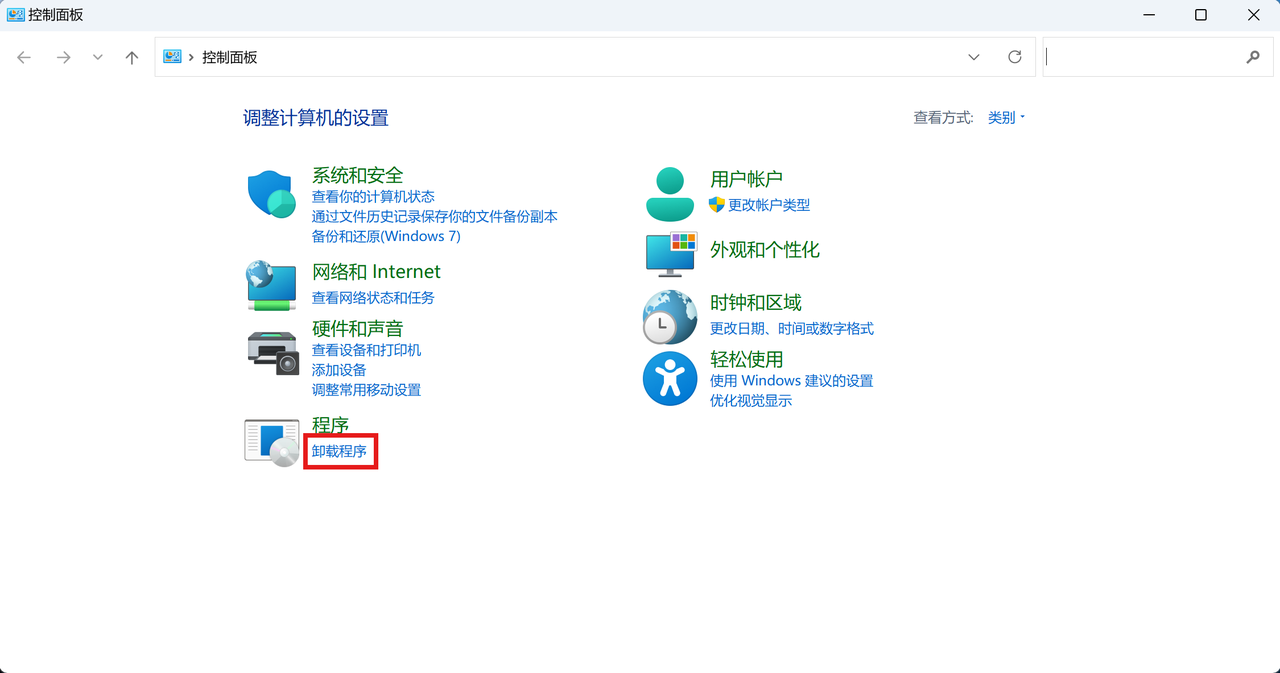
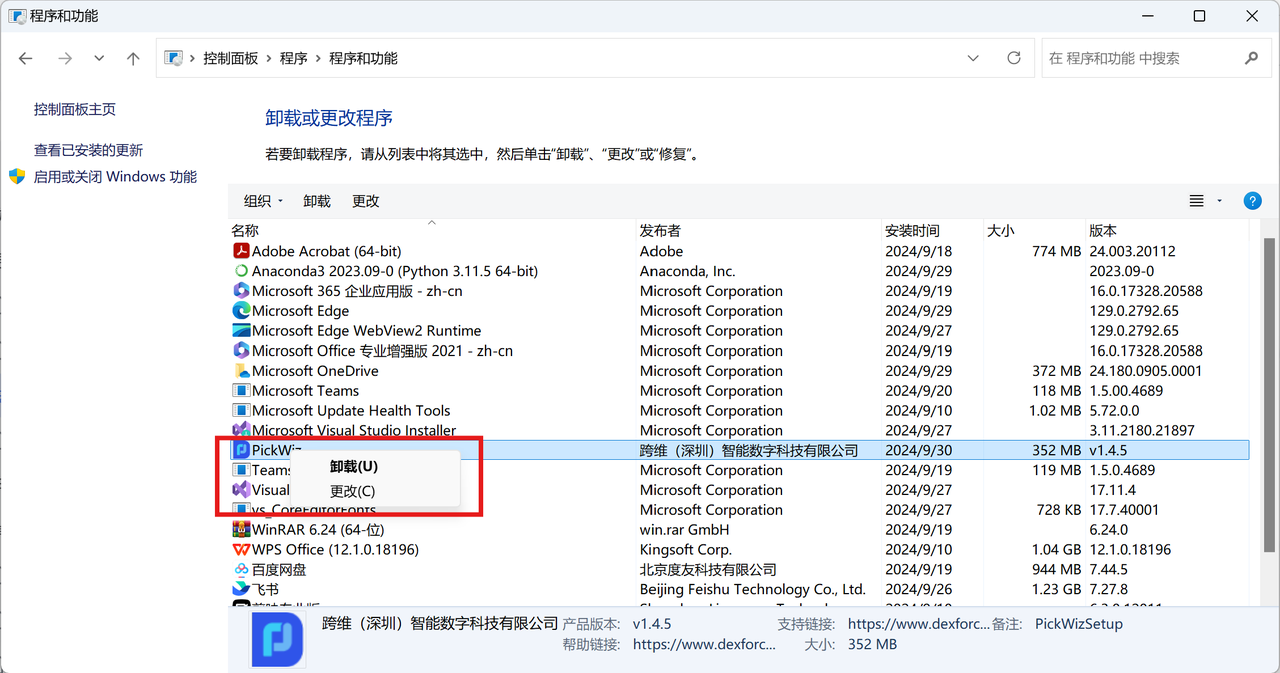
Find the PickWiz program, right-click it, and click "Uninstall"
Enter the "Maintain PickWizSetup" window, and select "Remove all components"
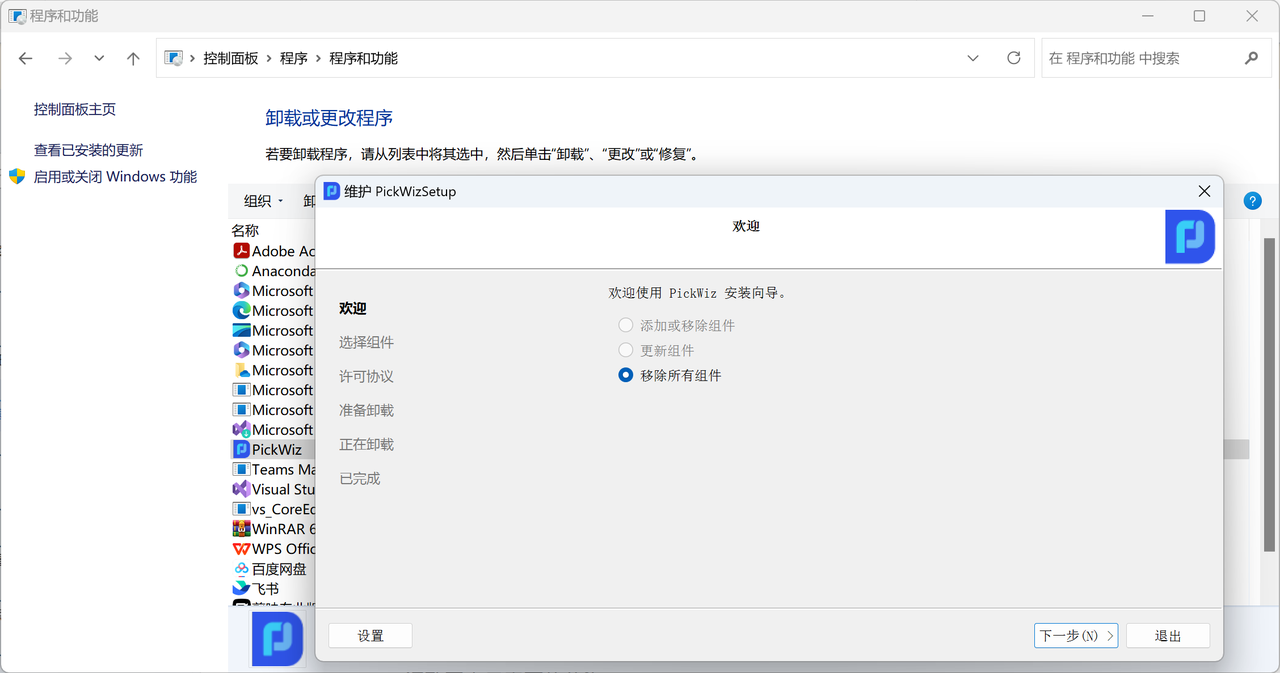
Click "Uninstall" to complete PickWiz uninstallation.
5. Software License Agreement
Open the PickWiz installation directory and enter the folder named Licenses to view the PickWiz software license agreement.
6. Common Installation Issues
| Problem Category | Problem Description | Possible Cause | Solution |
|---|---|---|---|
| Operating System | Error when launching PickWiz: Open3D.dll not found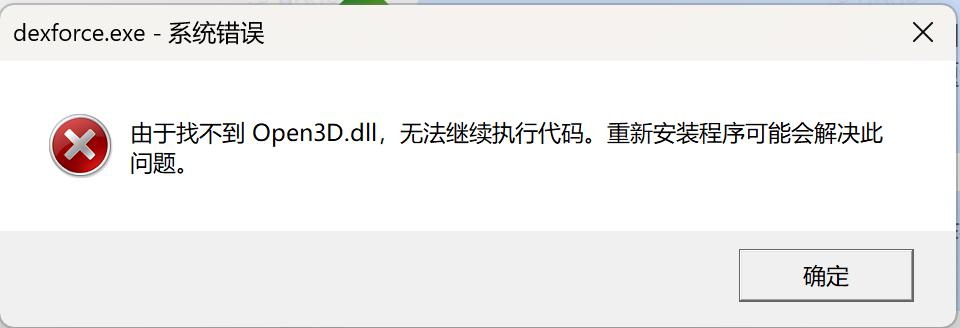 | The device operating system does not meet the system configuration requirements | Upgrade the system to Windows 11 Professional Edition |
| GPU | Error when launching PickWiz: RLIA.dll and Open3D.dll not found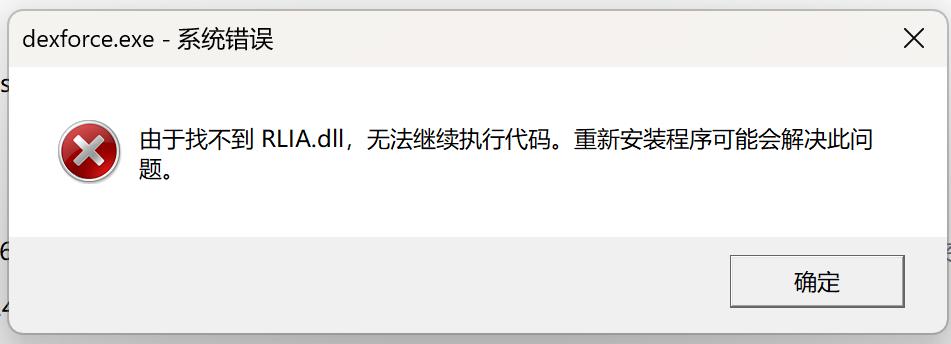 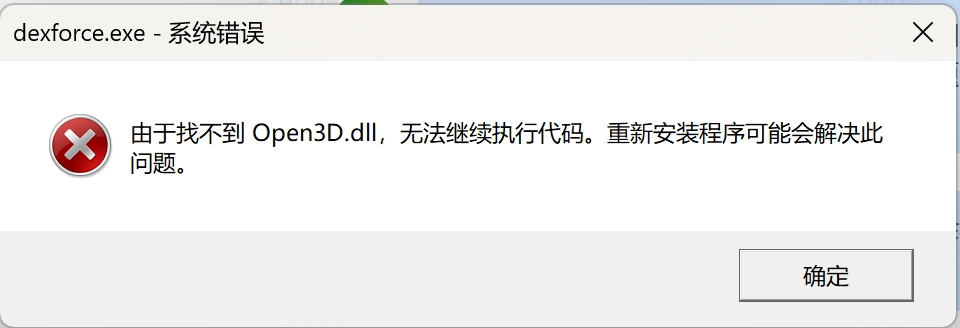 | The graphics card does not meet the hardware configuration requirements | GPU requirement: NVIDIA GTX 1660 or higher (Driver version 525 or above) |
Installation error: "No available graphics card detected, installation cannot continue."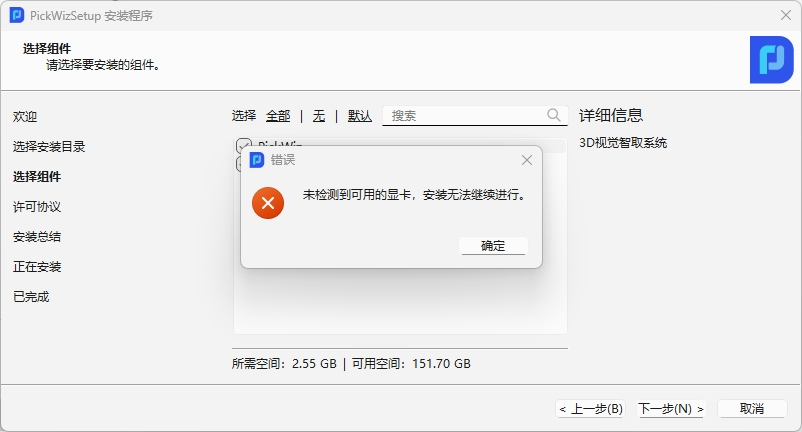 | Graphics card missing or abnormal | 1. Restart the computer; 2. Update driver: Go to Device Manager → Display Adapters, right-click NVIDIA graphics card and update driver;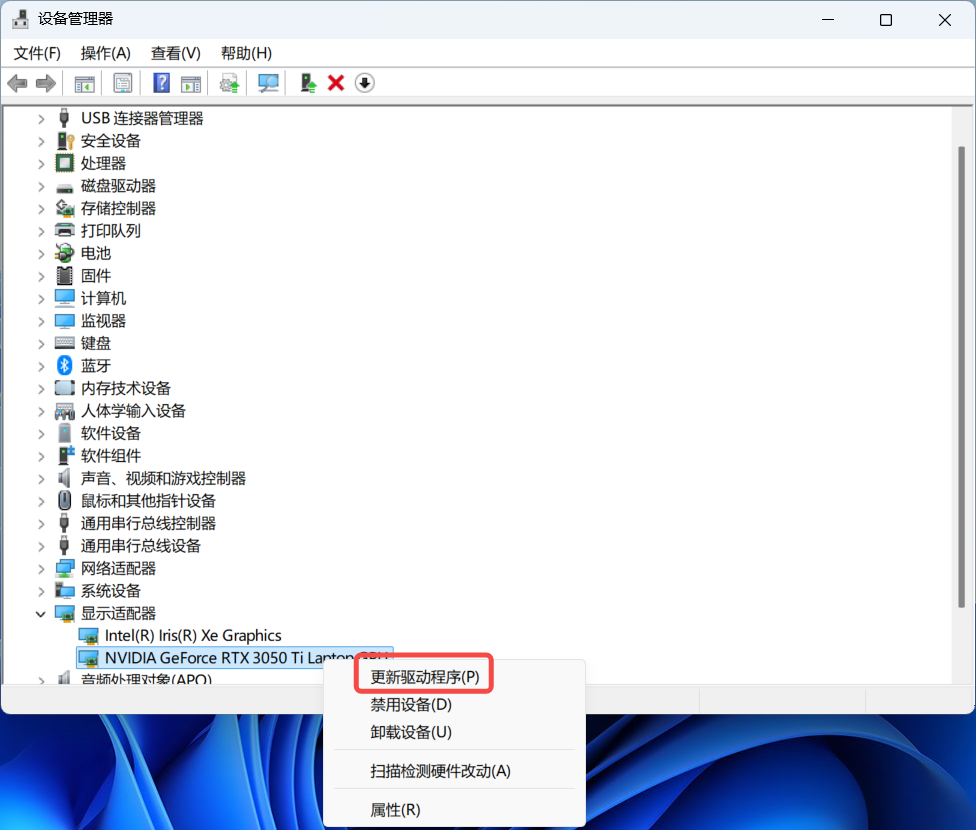 3. Open the case to check if the graphics card is properly seated, reinsert it if loose. 3. Open the case to check if the graphics card is properly seated, reinsert it if loose. | |
Running PickWiz error: "No available graphics card detected. Please restart the PC, update the driver, or check if the graphics card is properly installed."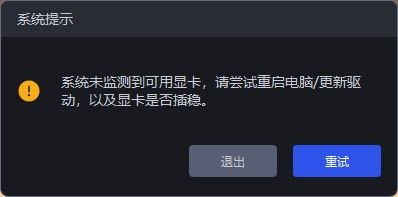 | Graphics card missing or abnormal | 1. Restart the computer; 2. Update driver: Go to Device Manager → Display Adapters, right-click NVIDIA graphics card and update driver;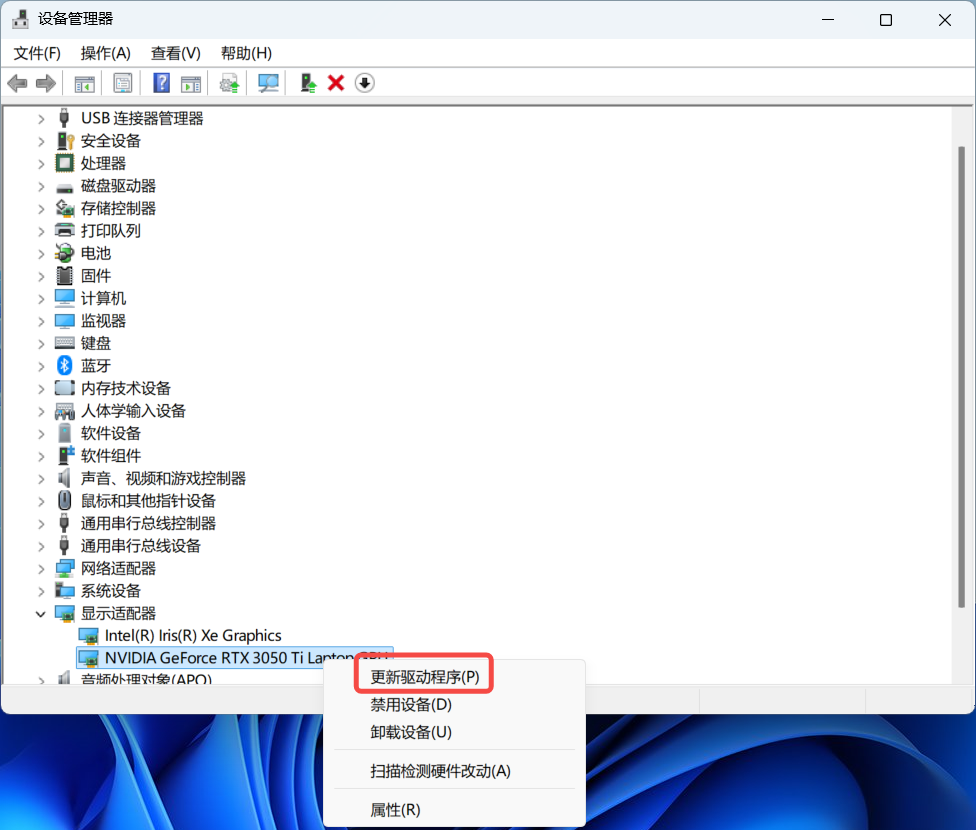 3. Open the case to check if the graphics card is properly seated, reinsert it if loose. 3. Open the case to check if the graphics card is properly seated, reinsert it if loose. | |
| Hard Disk | Installation error: no space left | Insufficient free space on C drive | Reinstall the system, ensure C drive free space is above 128GB before reinstallation. Note: Do not install on D drive or other disks |
| Restart | Error when launching PickWiz: RLIA.dll, Open3D.dll, vtklmagingCore-9.2.dll, pcl_kdtree.dll not found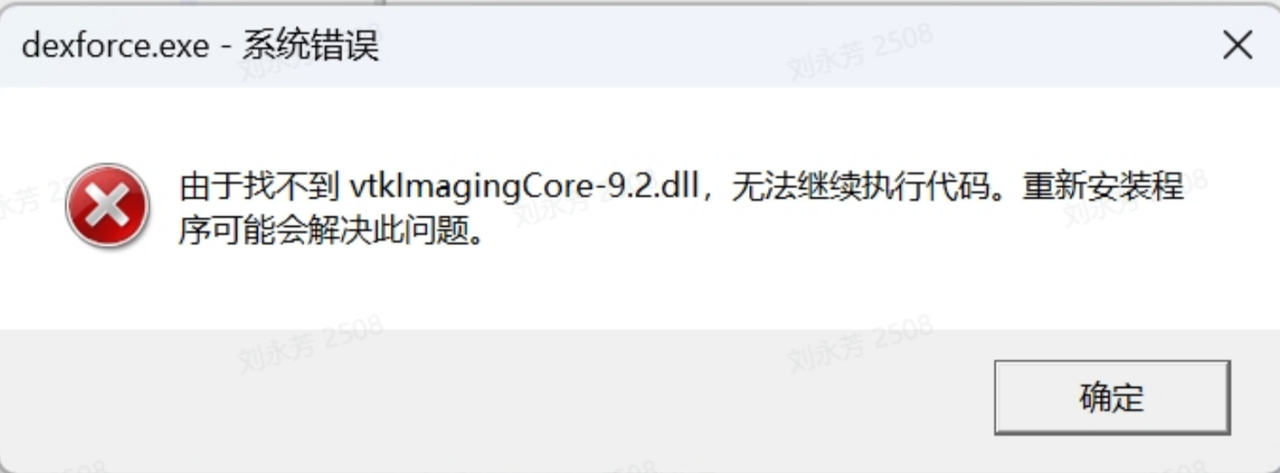 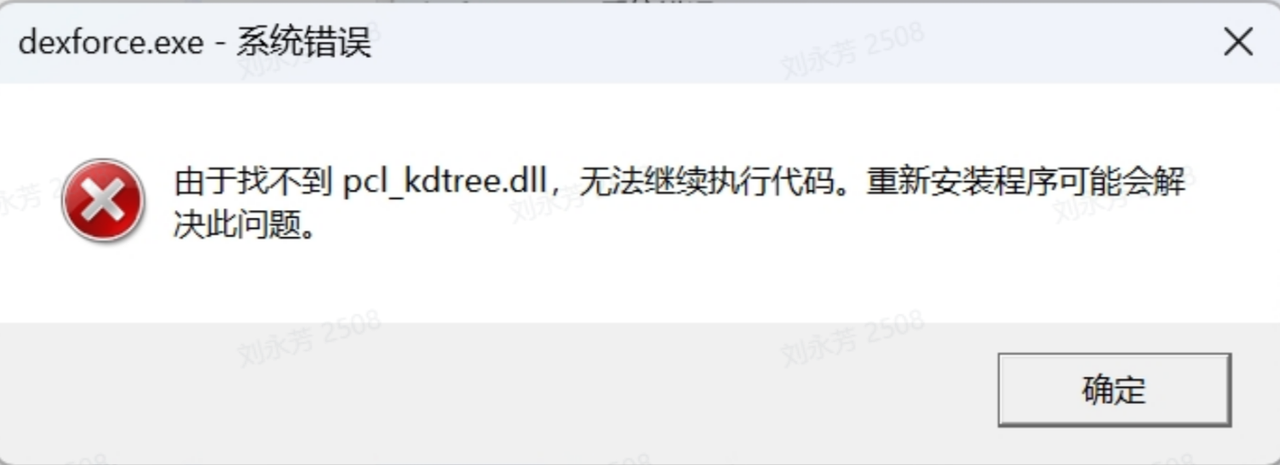 | A device restart is required to validate environment variables after initial installation | Restart the device. Note: The first launch after restart may load slowly, please wait patiently |
| Middleware Installation Error (middleware is a git directory, please remove git directory) | 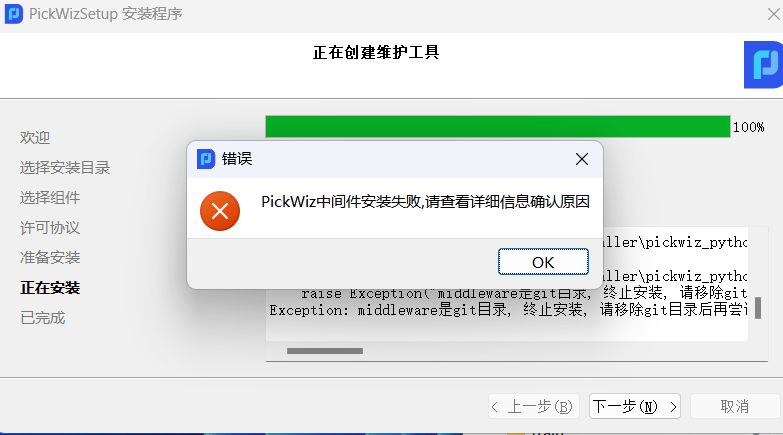 | Middleware and PickLight folders need to be completely deleted | Open Anaconda Prompt and run conda activate pickwiz_py39; execute pip show middleware to locate the site-packages directory; manually delete the middleware, PickLight and their info folders under site-packages, or run pip uninstall middleware and pip uninstall PickLight in Anaconda Prompt to remove them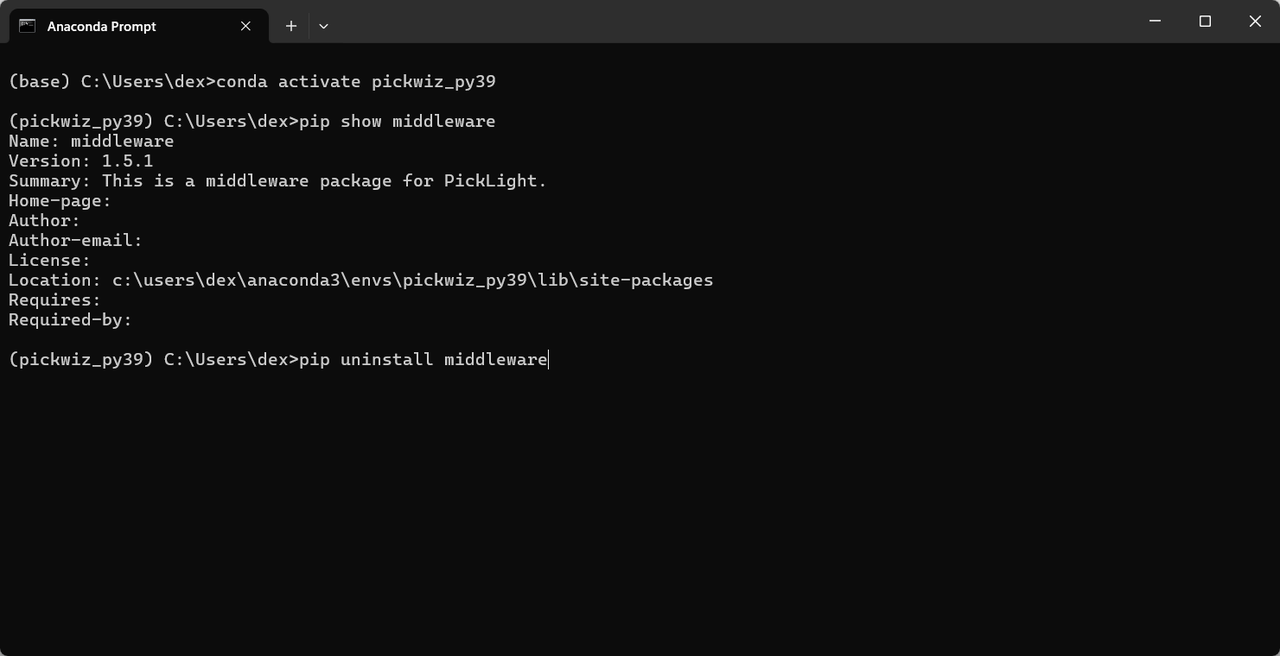 |
| Full Installation Package Missing Compressed Files | Upgrade from PickWiz 1.5 to 1.7.3 prompts installation failure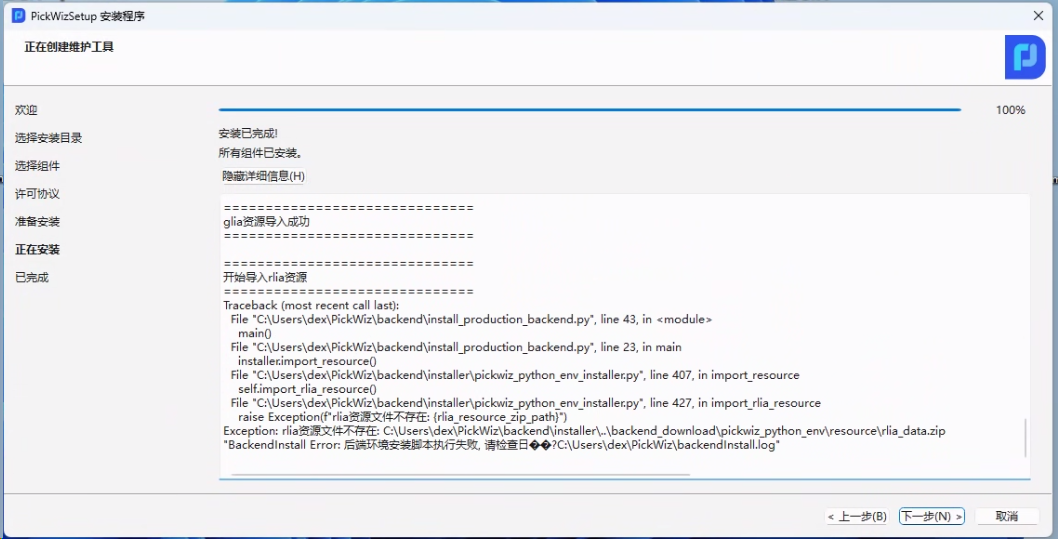 | Two compressed files are missing from the downloaded full installation package. A normal complete package should contain 4 compressed files in the directory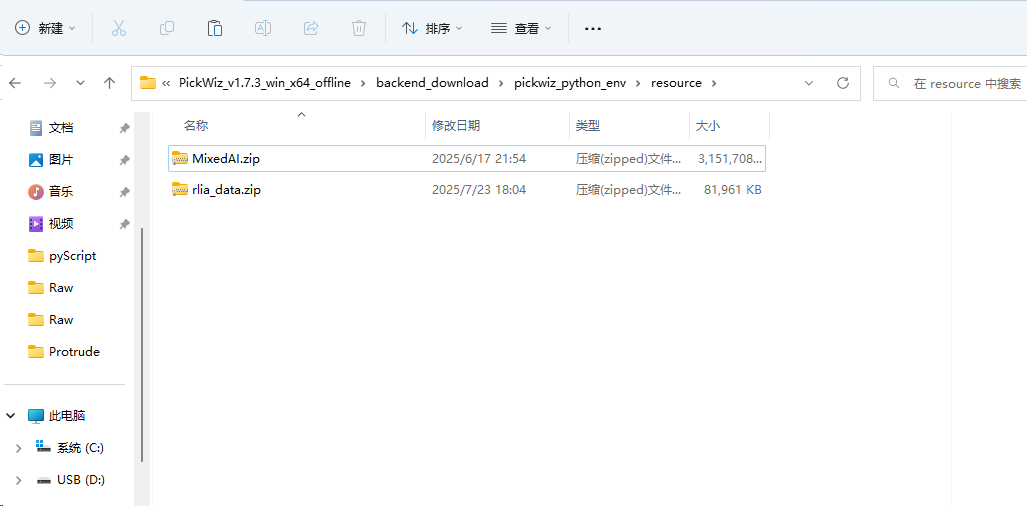 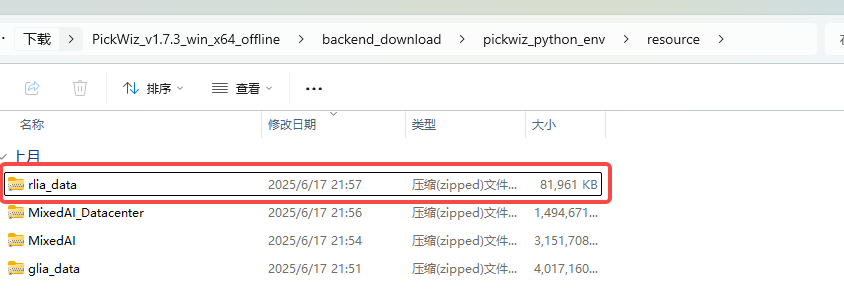 | Re-download the full installation package |
| System Security Interception | Startup error after installation 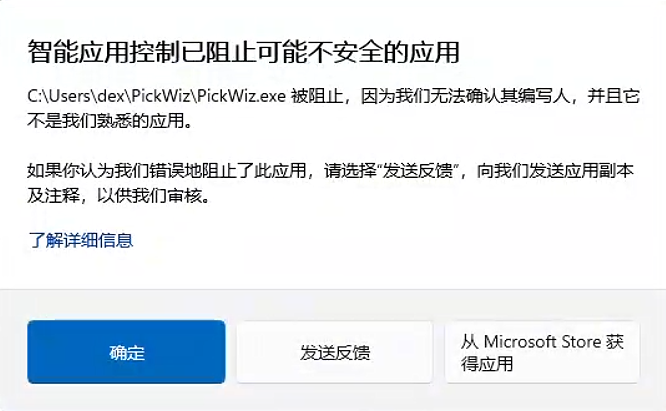 or error code: 0xc0e9002 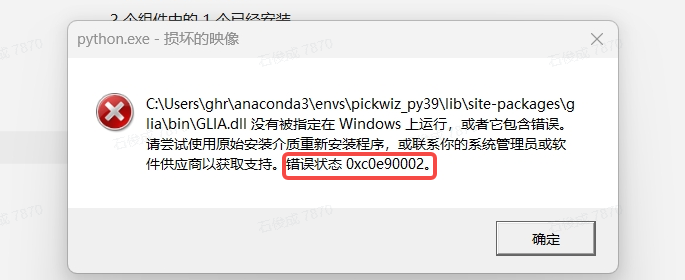 | Windows Smart App Control blocked the software launch | 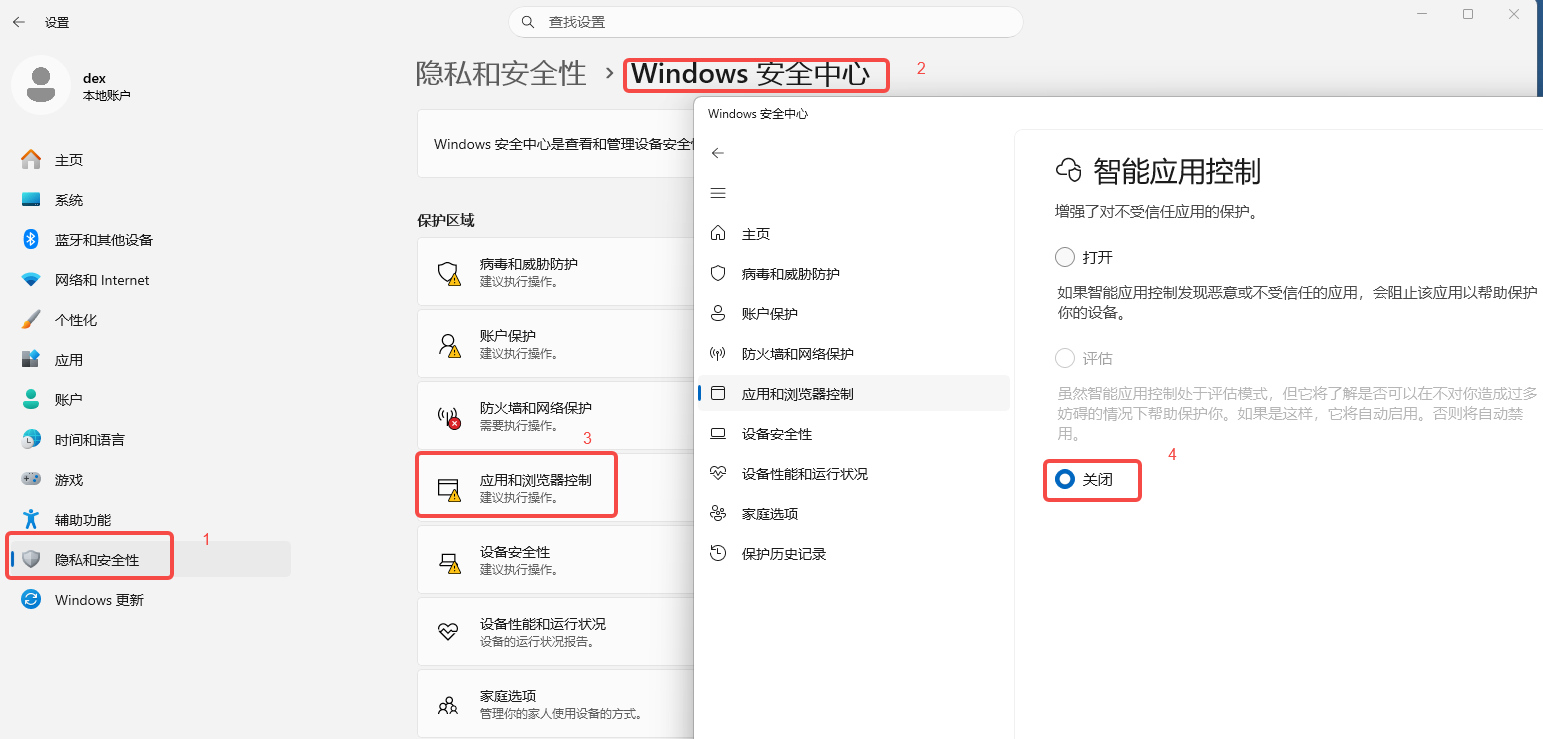 Turn off Smart App Control following the above method Turn off Smart App Control following the above method |
| PC Environment | 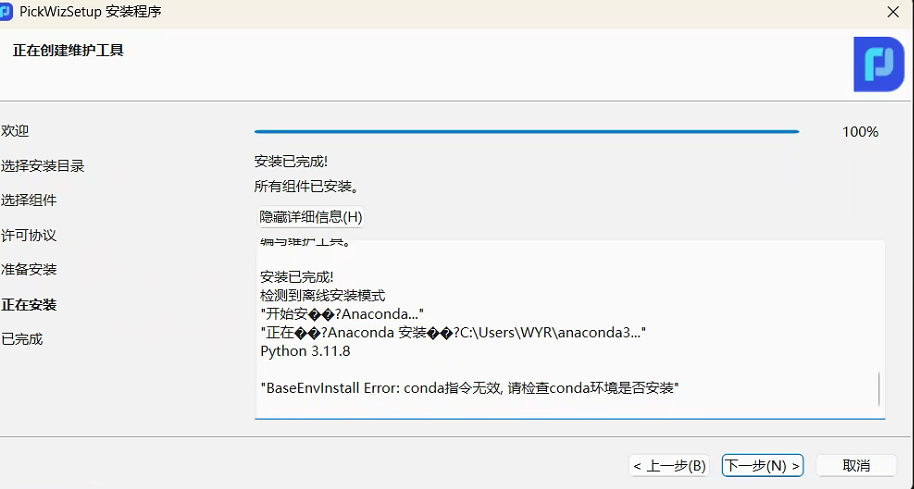 | Unclean environment in the installation directory; residual virtual environments cause config path index errors and incomplete Conda installation | Clean up residual virtual environments in the default installation folder. For special cases, keep the installation path clean before installation |
If you have any other problems, please contact Dexforce technical support for assistance.